Passwordless with FIDO
Overview
FIDO (Fast Identity Online) is an open standard that enables users to log into applications without passwords. Instead of passwords, FIDO authentication uses biometrics (Touch ID/Face ID, Windows Hello) or hardware security keys to validate user identities.
Two types of FIDO authenticators can be used: Security Keys, and Platform Authenticators.
Security Keys
Also referred to as roaming authenticators, security keys are hardware devices that can perform FIDO authentication through USB, near-field communication (NFC), or Bluetooth. When prompted, users connect their security key and typically provide a proof-of-presence action, such as tapping their device or entering a PIN.
Platform Authenticators
A platform authenticator is built into a user's device, with the device acting as the FIDO authenticator. Authentication is performed using the device's built-in biometrics, typically through face recognition or a fingerprint scan. Examples of platform authenticators include Apple Touch ID / Face ID and Windows Hello.
Configure FIDO Authentication in AdminX
Enable or Disable FIDO Authentication
Administrators can choose whether or not to allow FIDO authentication and specify which FIDO authenticators may be used on the tenant.
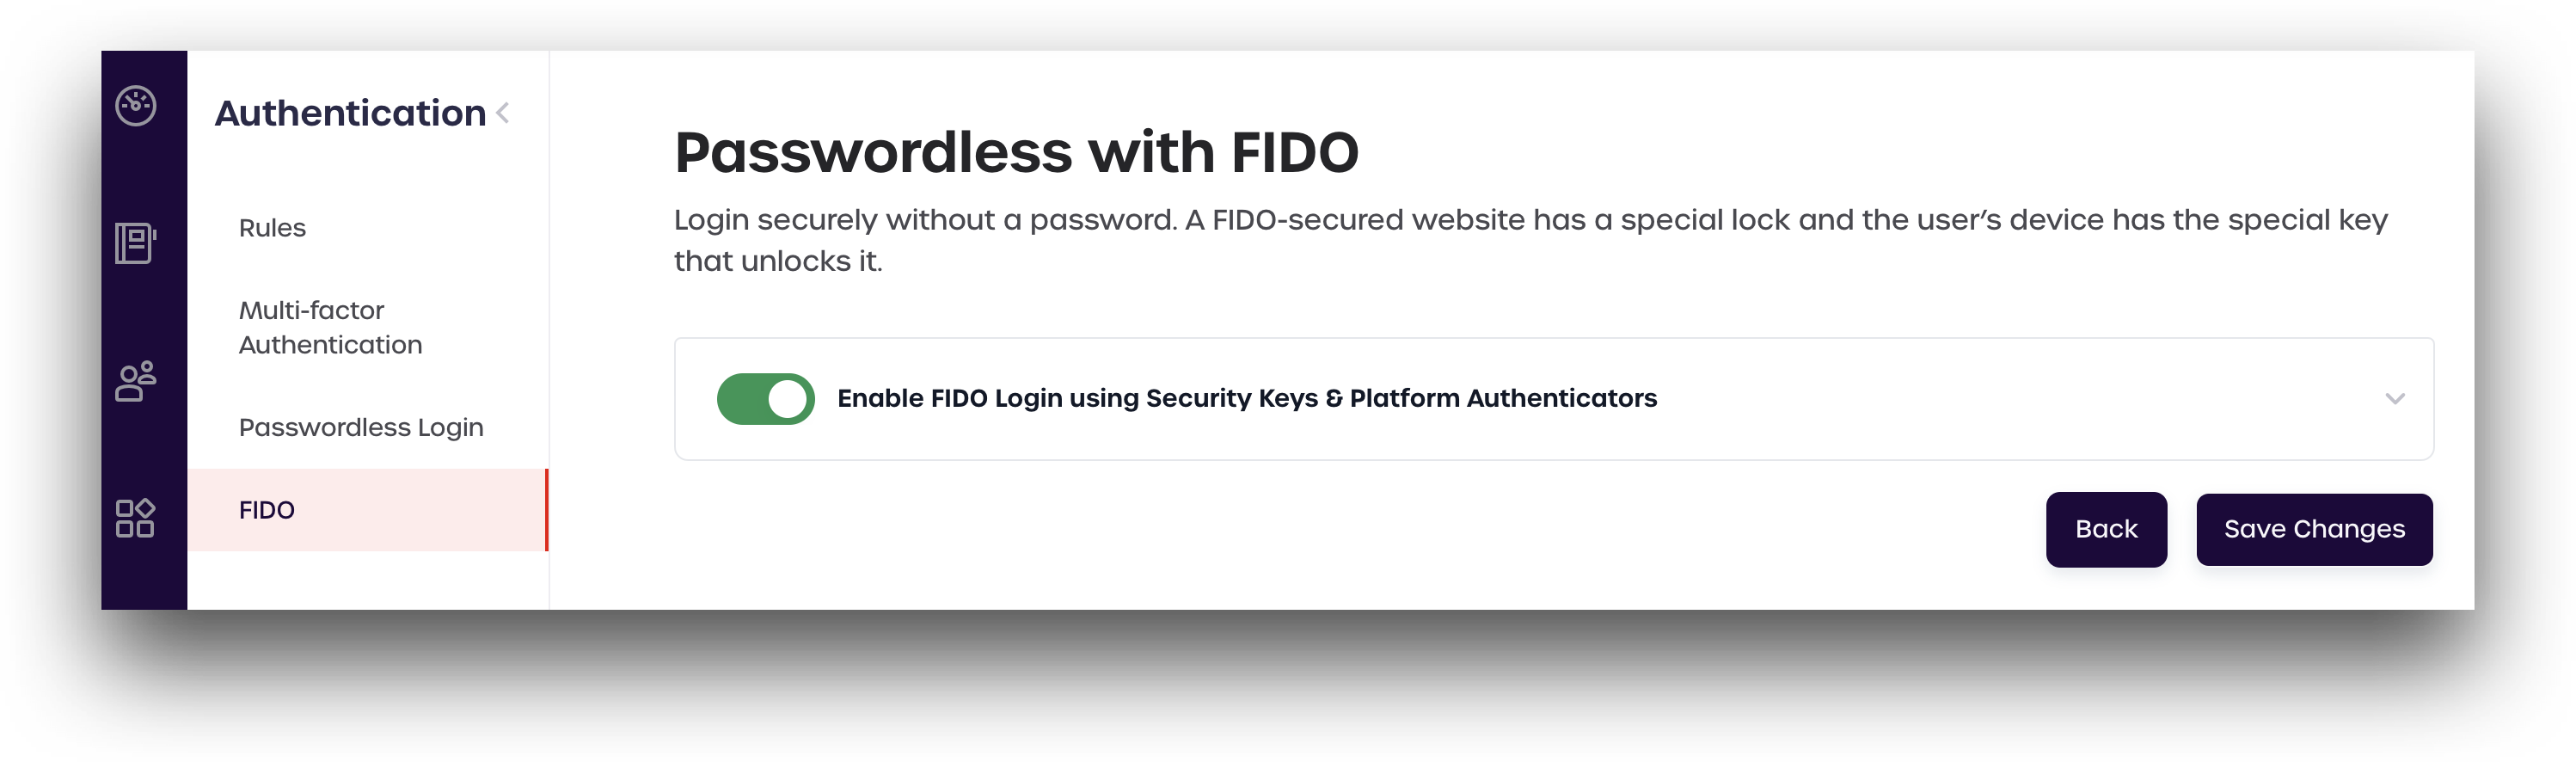
Navigate to the AdminX control plane and log in as a tenant or community administrator.
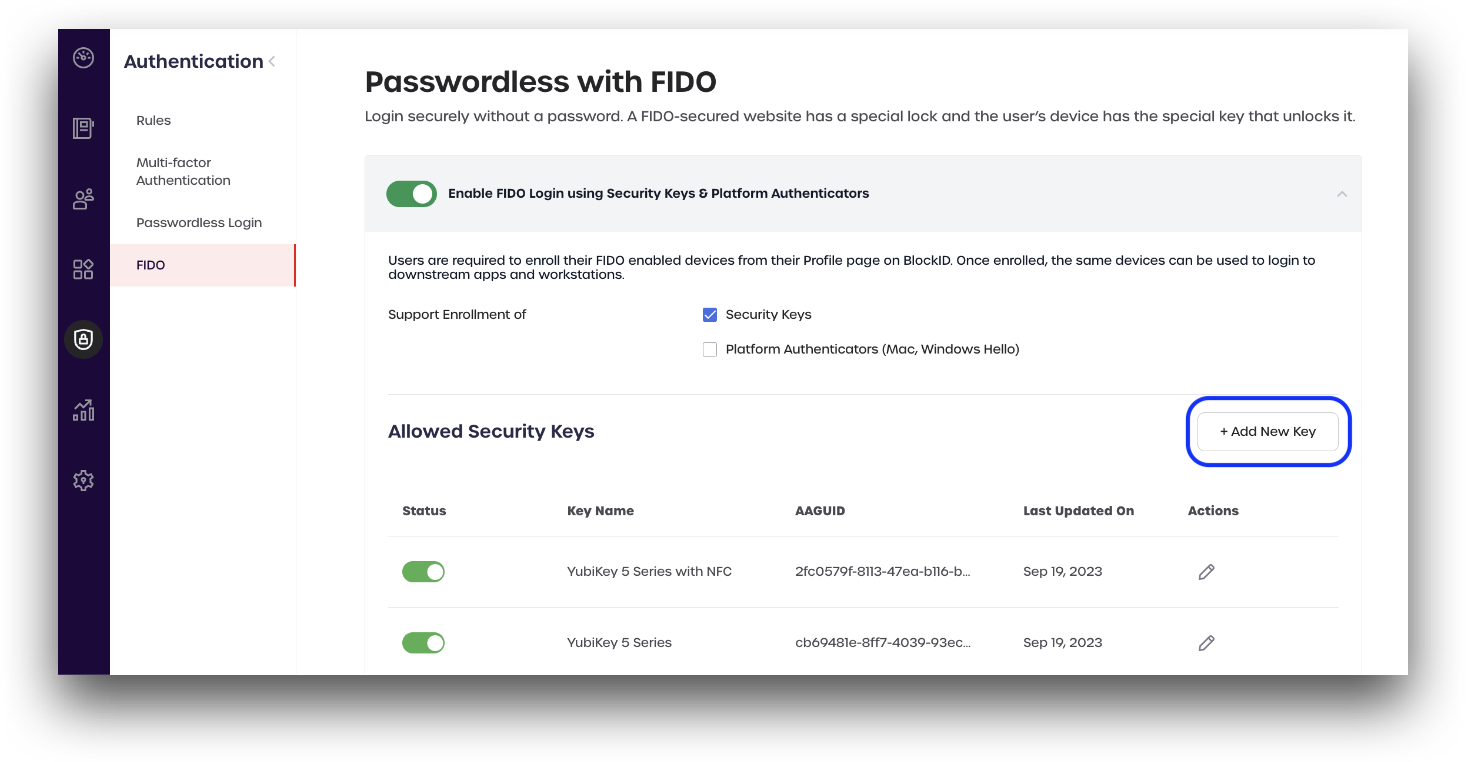
Click on the Authentication icon on the left-hand menu bar, and then FIDO.
Toggle the Enable FIDO Login Using Security Keys and Platform Authenticators switch to turn FIDO login on or off.
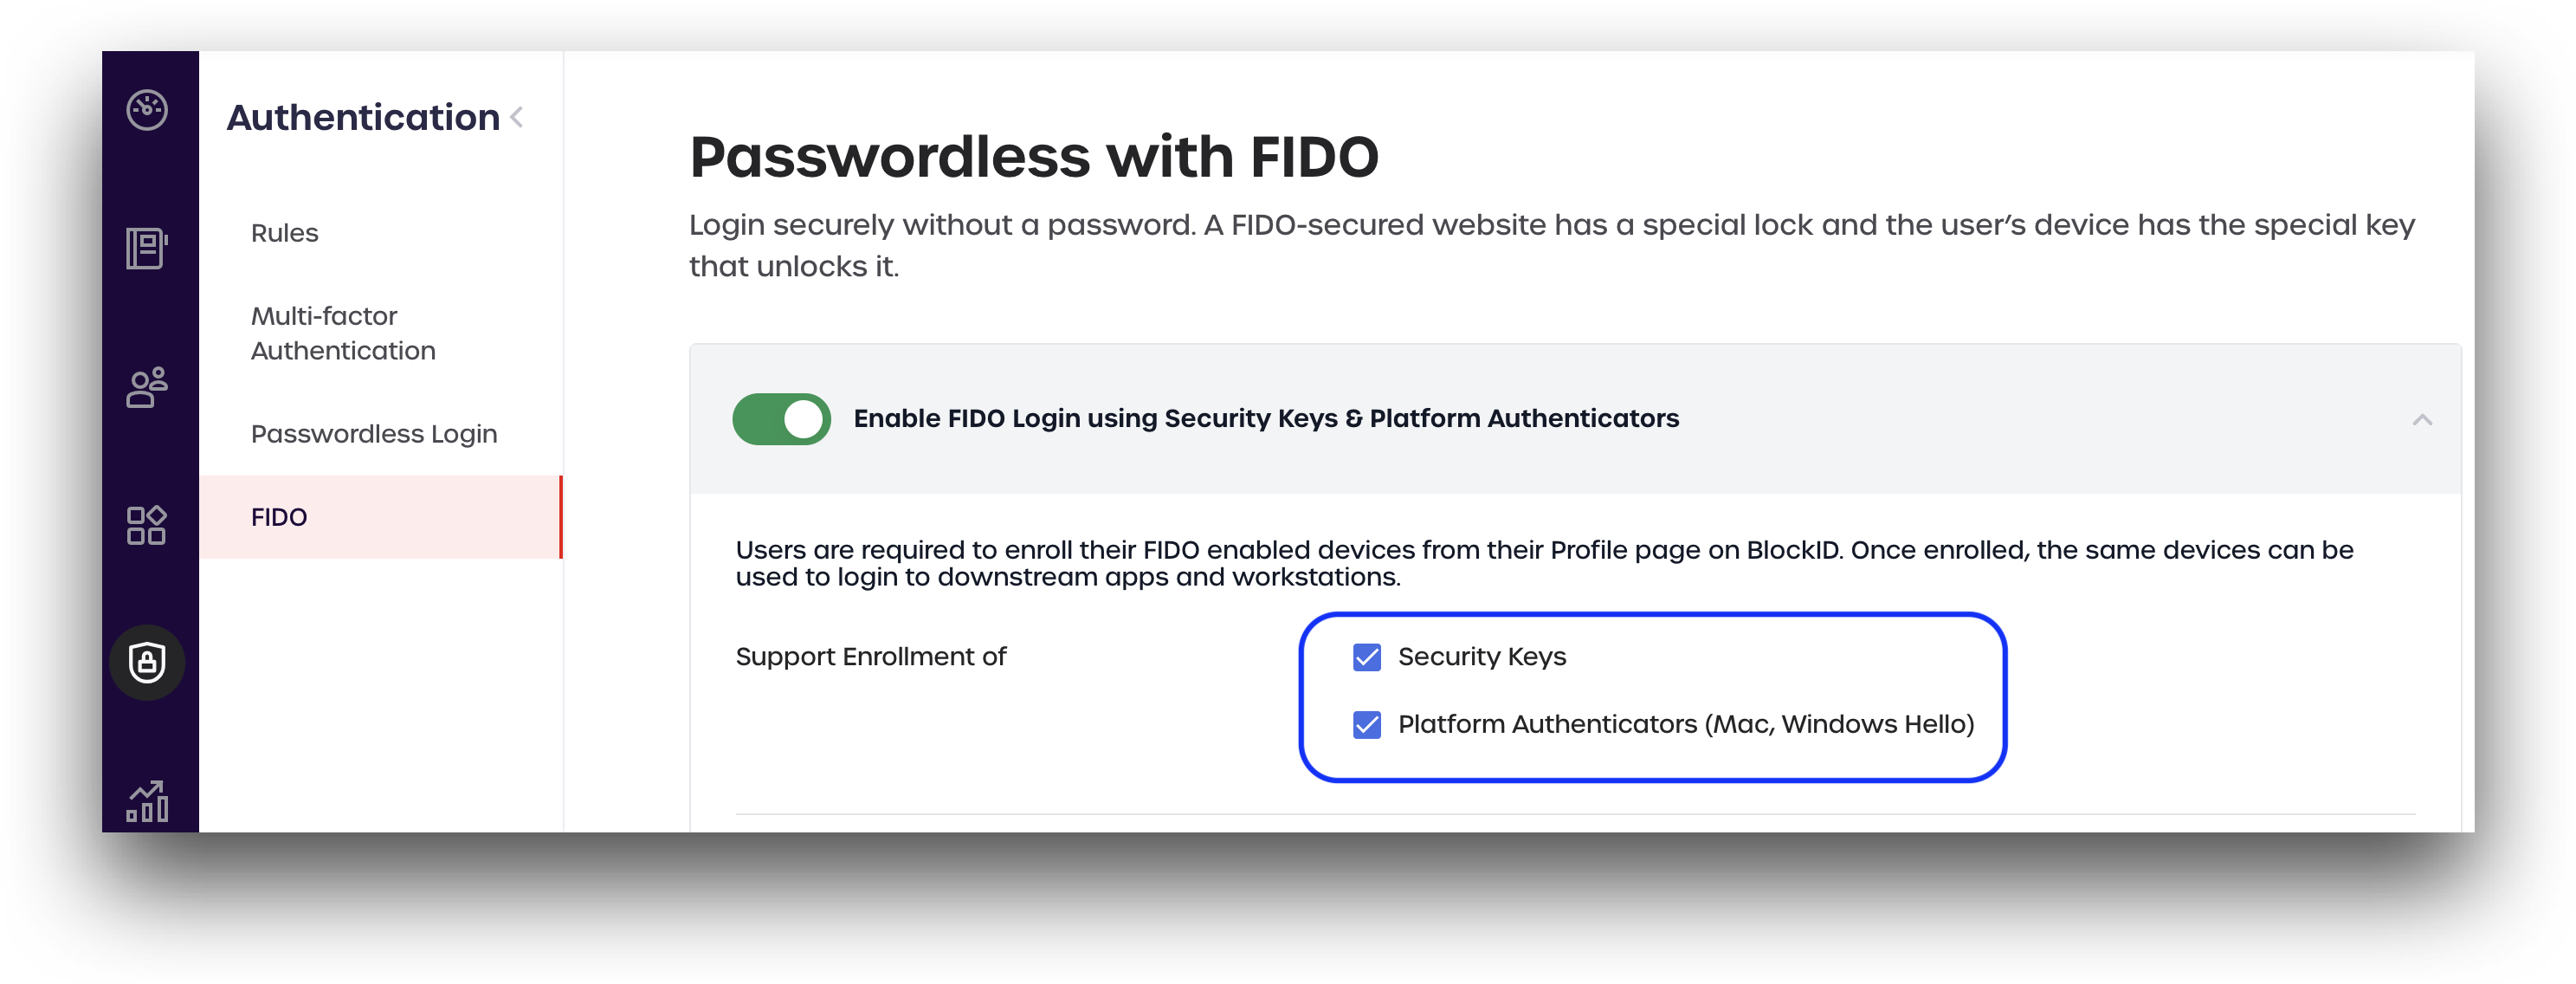
When FIDO authentication is enabled, users must enroll their FIDO-enabled devices from the My Profile page in AdminX. Administrators can also limit their tenants to a specific type of FIDO authentication if desired.
- Click the arrow to the side of the switch to expand the menu

- Mark the boxes of the authentication methods you wish to allow on your tenant. Unmark a box to turn off that method.
Allowed Security Keys
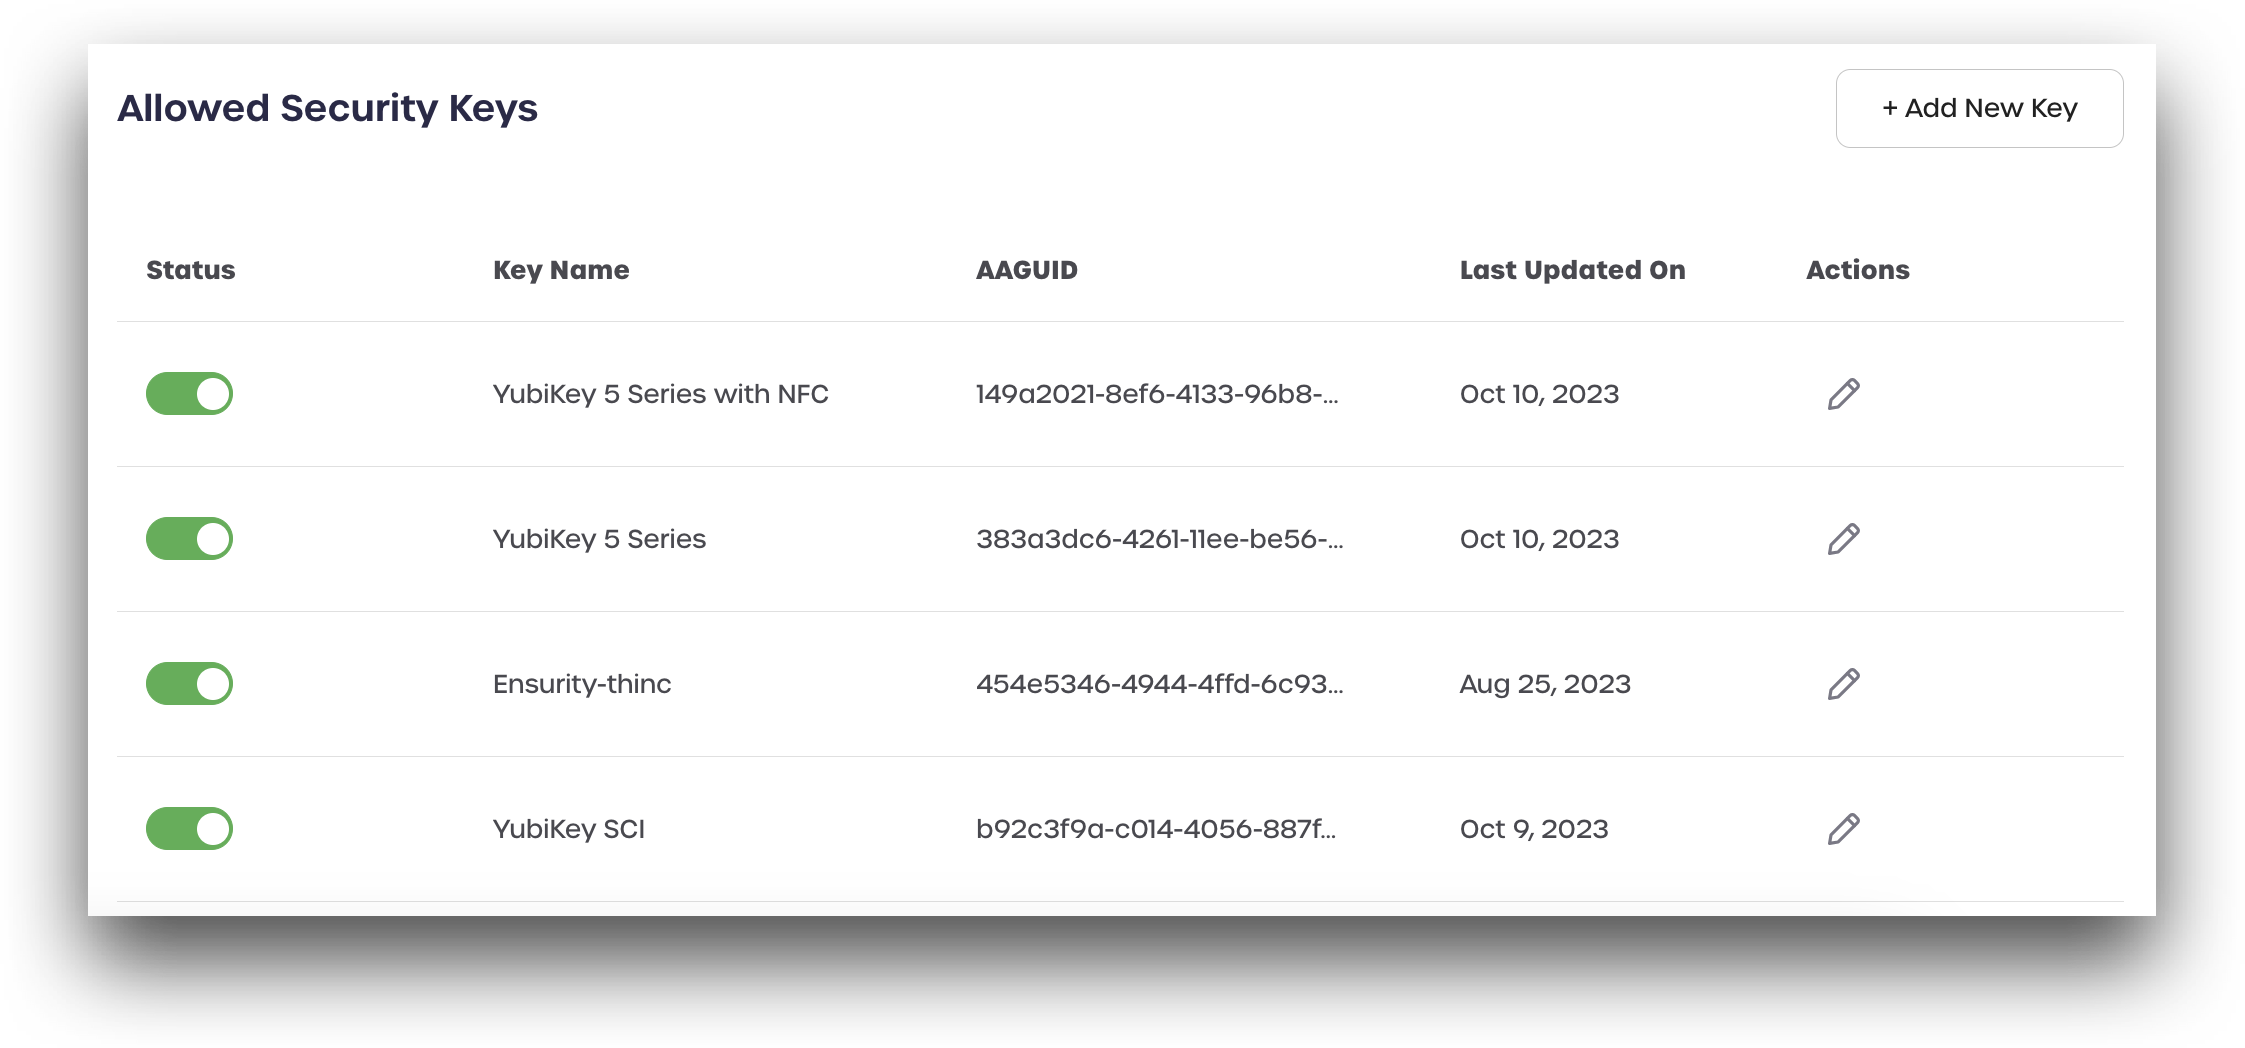
Every tenant is prepopulated with a collection of the most commonly used security keys already enabled, as shown in the image below.
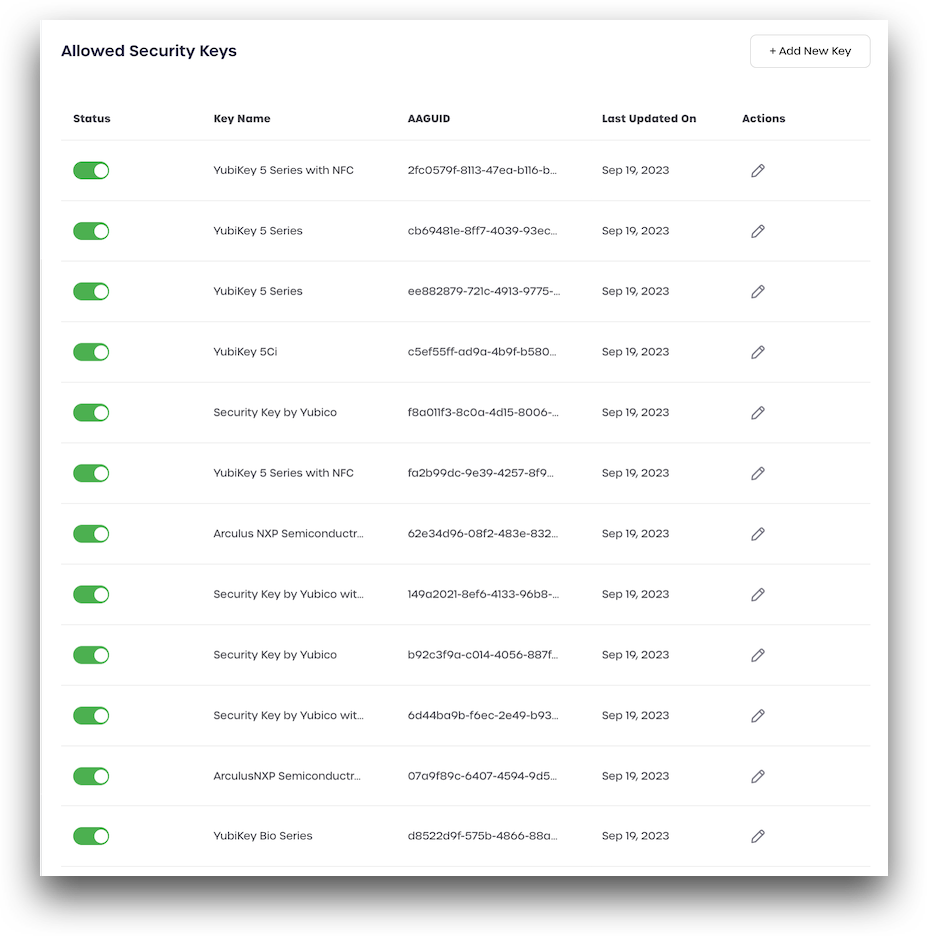
Administrators can turn any of the listed security keys on or off and add new ones as needed. The FIDO metadata of each key can also be replaced or updated as required.
Disable or Enable a Specific Security Key Model
- To disable a specific security key model, scroll to the key you wish to disable and toggle the switch.

- Confirm you wish to turn off the security key by clicking Save.
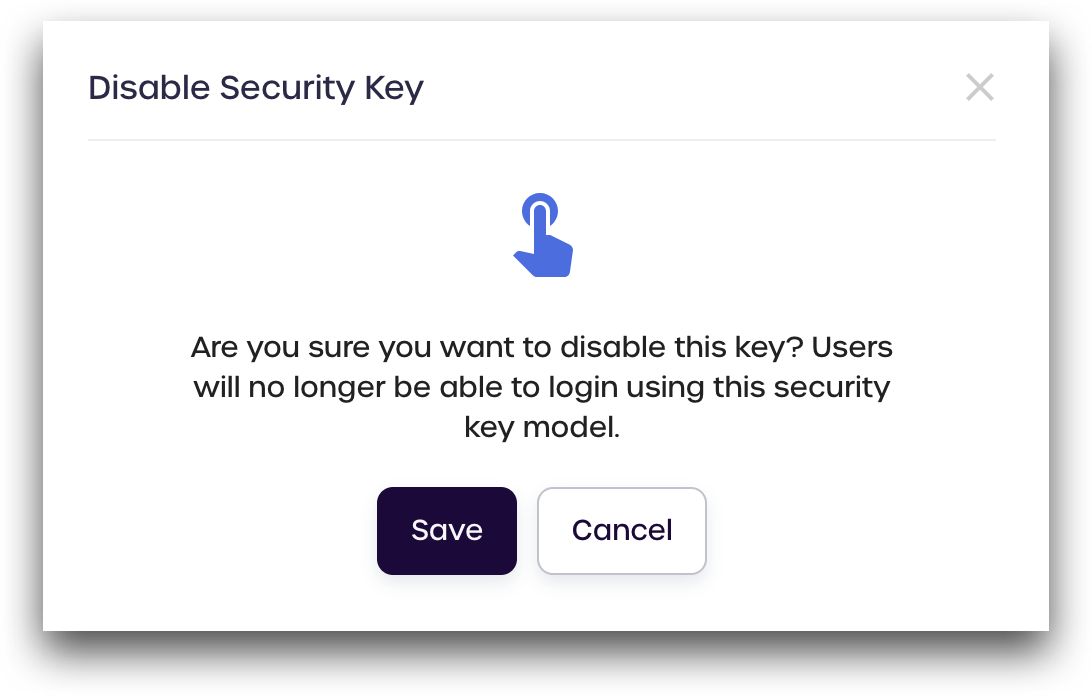
- Your disabled security key will now show its switch in the off position.

Once disabled, users will no longer be able to authenticate using this security key model.
- To re-enable a security key, toggle the switch back to the on position.

Add a New Security Key Model
Administrators can add an allowed security key model to their tenant if their desired model is not listed.
To add a new security key, you will need a FIDO metadata file in JSON format for that model. Manufacturers sometimes provide this information on their developer portal. Please get in touch with your manufacturer directly for more details on how to obtain their FIDO metadata.
- Click Add New Key.
Enter the details for the key you are adding:
- Key name: Assign a name.
- FIDO key metadata: Click Upload and select your metadata file in
JSONformat. - Enable key: Toggle the switch off to disable the key after adding. Leave the switch on to enable.
Click Complete to save and add your new security key

Edit an Existing Security Key
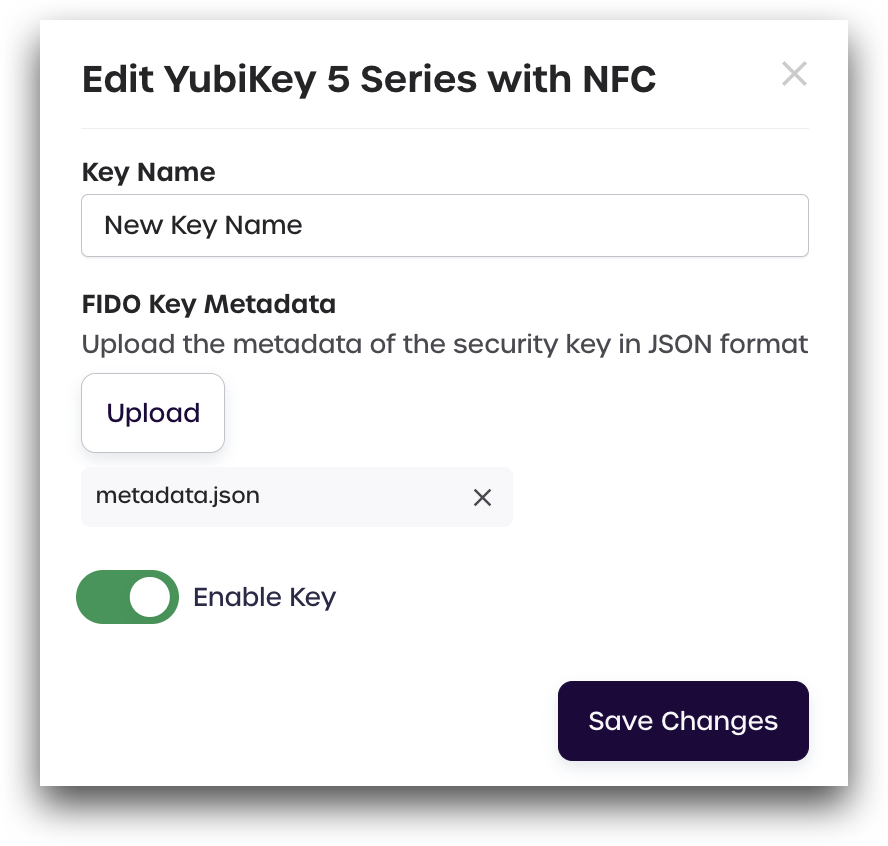
Administrators can also edit an existing security key to change its name or to replace the FIDO metadata.
- Locate the key you wish to edit. Click the pencil icon.
Edit key details as needed:
- Key name: Change the name for this model key.
- FIDO Key metadata: Upload a different metadata file in
JSONformat. - Enable key: Toggle the switch off to disable the key after editing. Leave the switch on to enable.
Click Save Changes
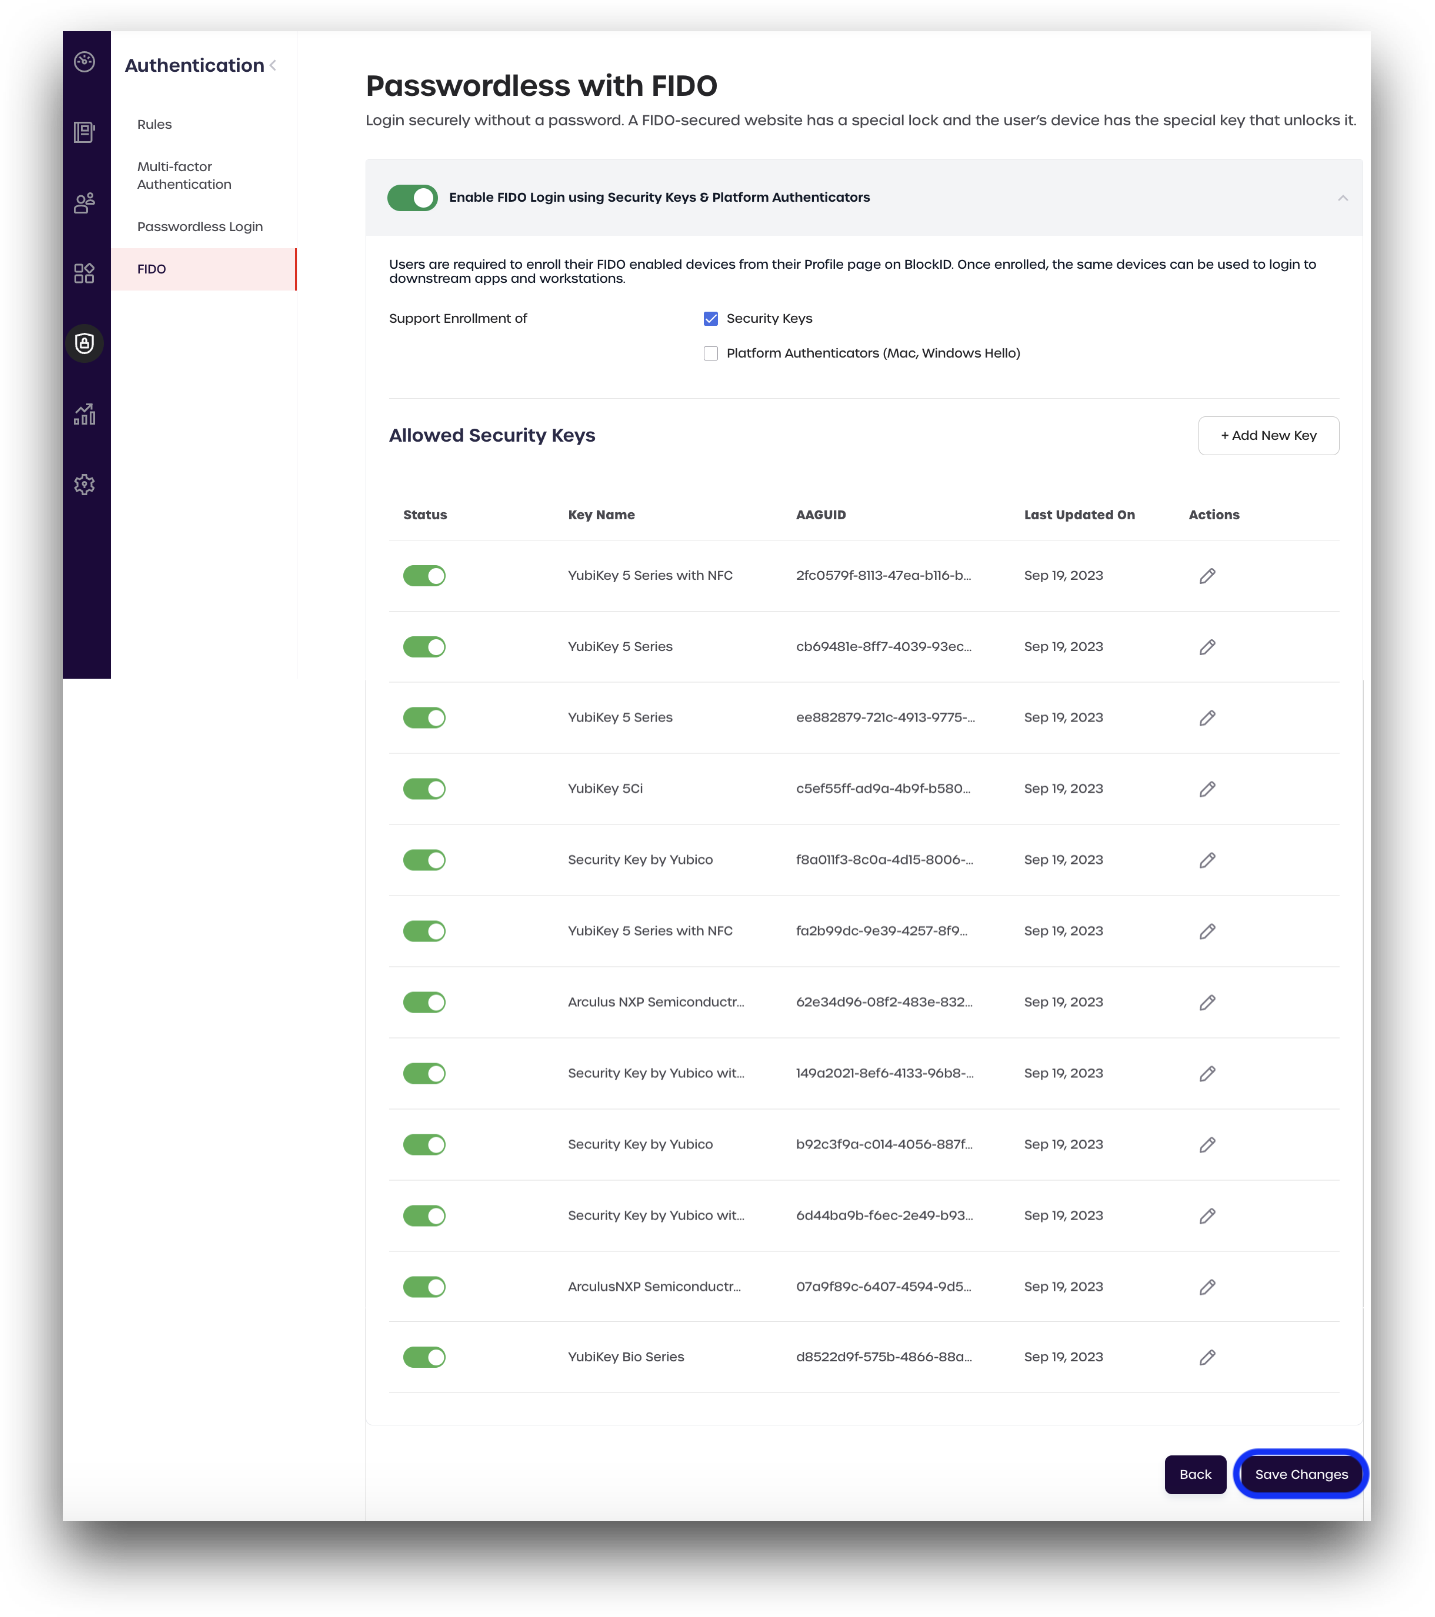
Save Changes
Once you have finished making any desired changes to the Passwordless with FIDO page, click Save Changes at the bottom of the page.
Next Steps
Please see Supported FIDO Devices For information on how to add a FIDO device to your User Account