Passwordless Login
Community/helpdesk administrators can use the Passwordless Login page within the AdminX interface to efficiently manage authentication factors and device configurations ensuring a smooth onboarding experience.
Administrators can perform the following tasks within this page:
- Enabling QR Code Display on the Login Screen
- Configuring LiveId/Biometrics for Passwordless Login
- Managing Number of Devices for Passwordless Login
- Enabling Number Challenge
Enabling QR Code Display on the Login Screen
Use this section to manage the QR Code display.
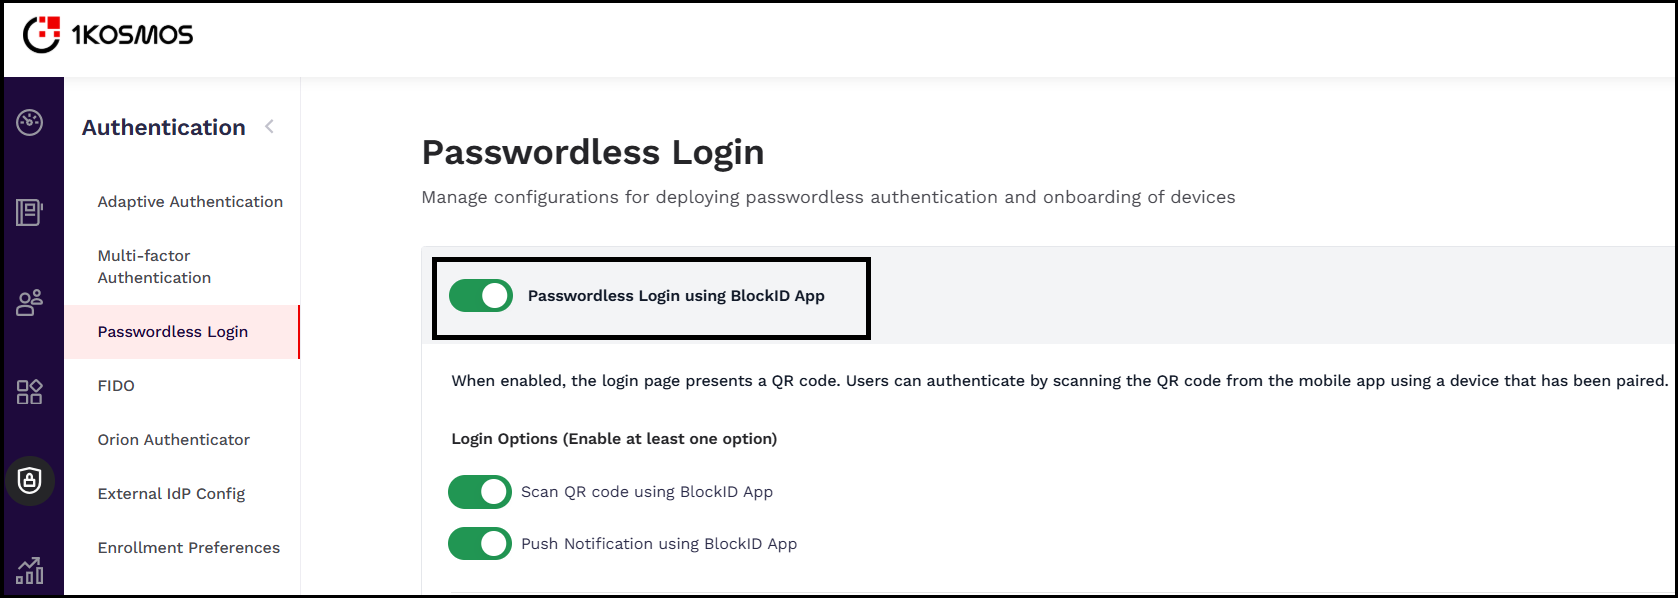
When the Passwordless Login Using BlockID App slider is enabled, the QR code is displayed on the login screen, where users can authenticate by scanning the QR code from the BlockID Mobile App using a device that has been linked, or by requesting a push notification on the linked device.
To display the QR Code on the login page, follow these steps:
-
Log in to a tenant as a community/helpdesk administrator.
-
Navigate to Authentication > Passwordless Login.
-
Enable the Passwordless Login Using BlockID App slider.
-
Enable atleast one of the login mechanisms for the user to login. The following options are available:
- Scan QR code using BlockID App
- Push Notification using BlockID App
-
Click Save.
Scanning QR Code Using BlockID App
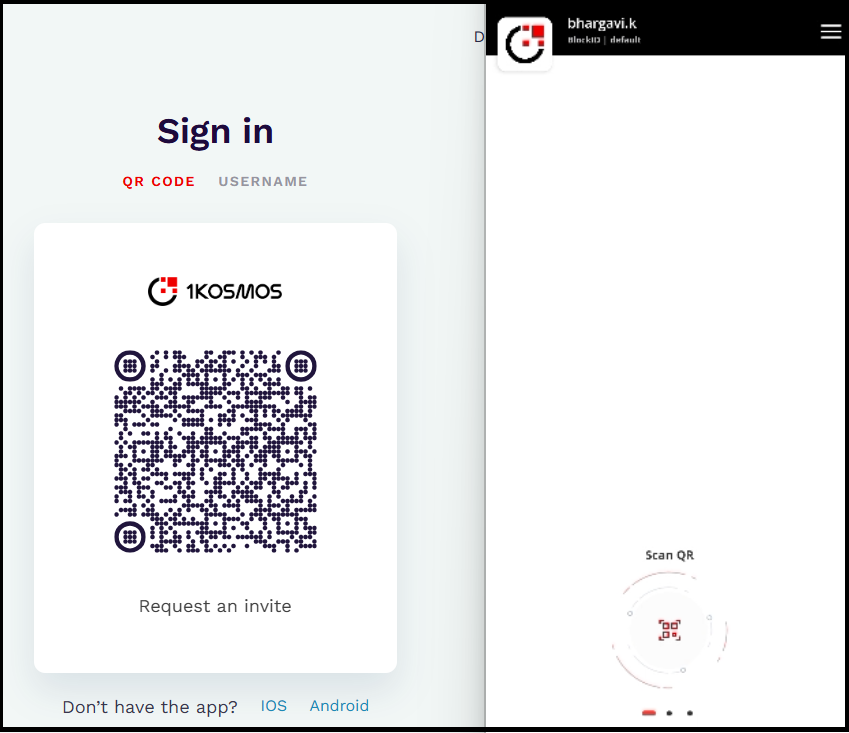
After enabling the QR code display on the AdminX interface, users are presented with a QR Code.
To log in to a tenant using QR code, follow these steps:
-
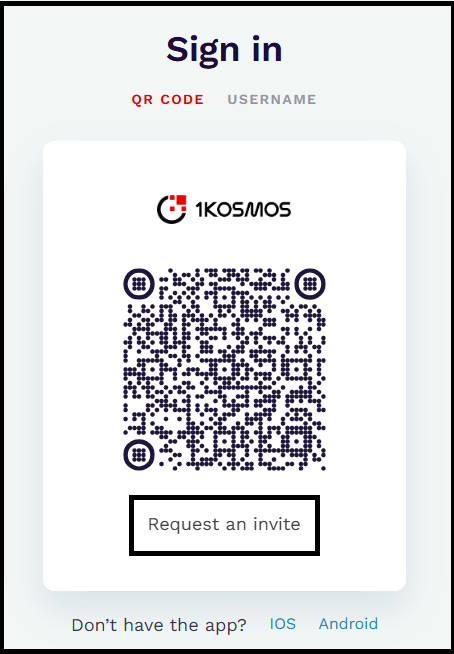
Open a tenant URL and view the QR code on the Sign in page.
-
Open your BlockID app and tap Scan QR.
-
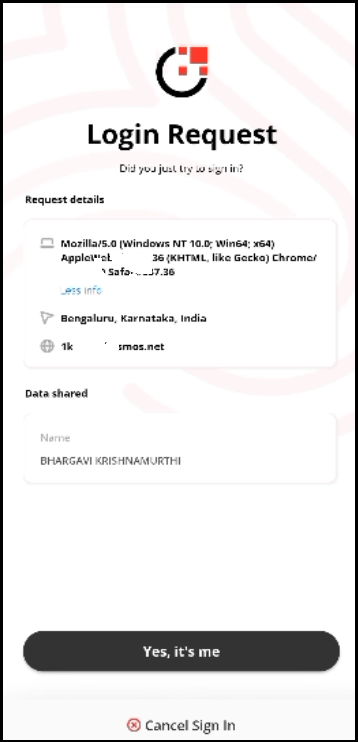
Approve the request.
For more information on QR code, see Logging in to a Tenant Using QR Codes for more details on logging in using QR codes.
Push Notification using BlockID App
You can use the push notification feature as one of your multi-factor authentication mechanisms to authenticate your sign in request.
To bolster security and protect users from MFA bombing attacks, 1Kosmos has enhanced the behaviour of push notification with the introduction of a new Enable number challenge on all push notification requests setting in the AdminX interface. This feature adds an extra layer of verification during push notification authentication.
By enabling this setting, users would be receiving a number challenge during the push notification authentication.
Enabling Number Challenge
To enable the number challenge for push notification, follow these steps:
-
Navigate to the Adminx interface.
-
In the Authentication > Passwordless Login > Push Attack mitigation section, turn the Enable number challenge on all push notification requests slider ON.

How does the Number Challenge Work?
After enabling the Enable number challenge on all push notification requests setting, when the user initiates the push notification request on the login screen, they will receive the corresponding authentication request on their enrolled mobile device. Upon opening the request, the screen displays three randomly generated numbers, and the UI displays the correct challenge value number. When the user taps the number on their mobile screen that matches the challenge value displayed on the UI, they are successfully authenticated and logged into the tenant.
The table below summarizes how the behavior of push notifications changes when the setting is either enabled or disabled.
| Behaviour | When the Enable number challenge on all push notification requests setting is not enabled | When the Enable number challenge on all push notification requests setting is enabled |
|---|---|---|
| Interface on UI | Number challenge screen does not appear on the User Interface  | Number challenge screen appears on the User Interface 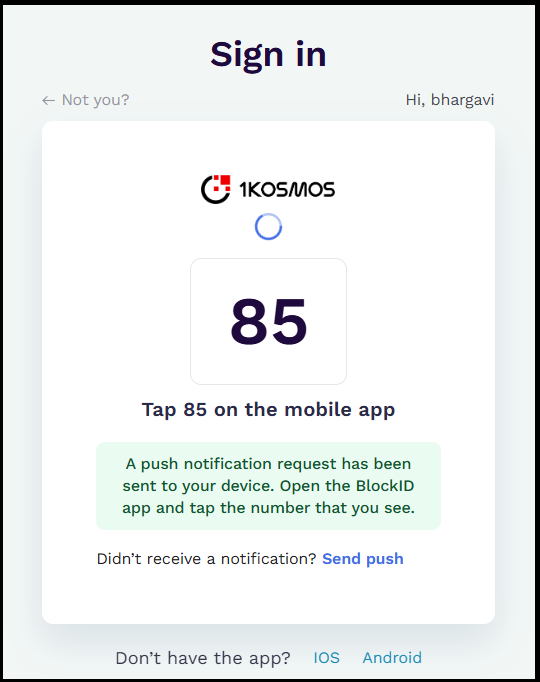 |
| Interface on mobile | Consent screen appears 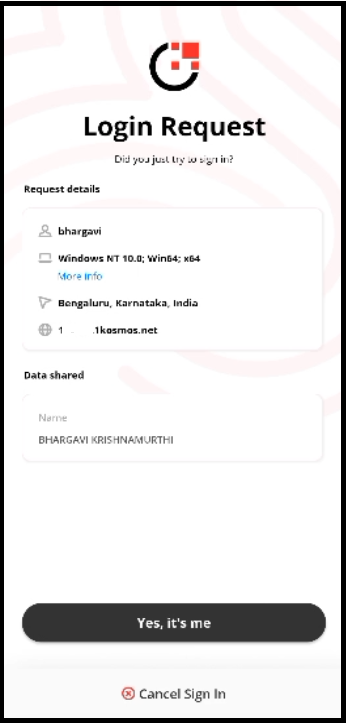 | Number challenge screen appears. 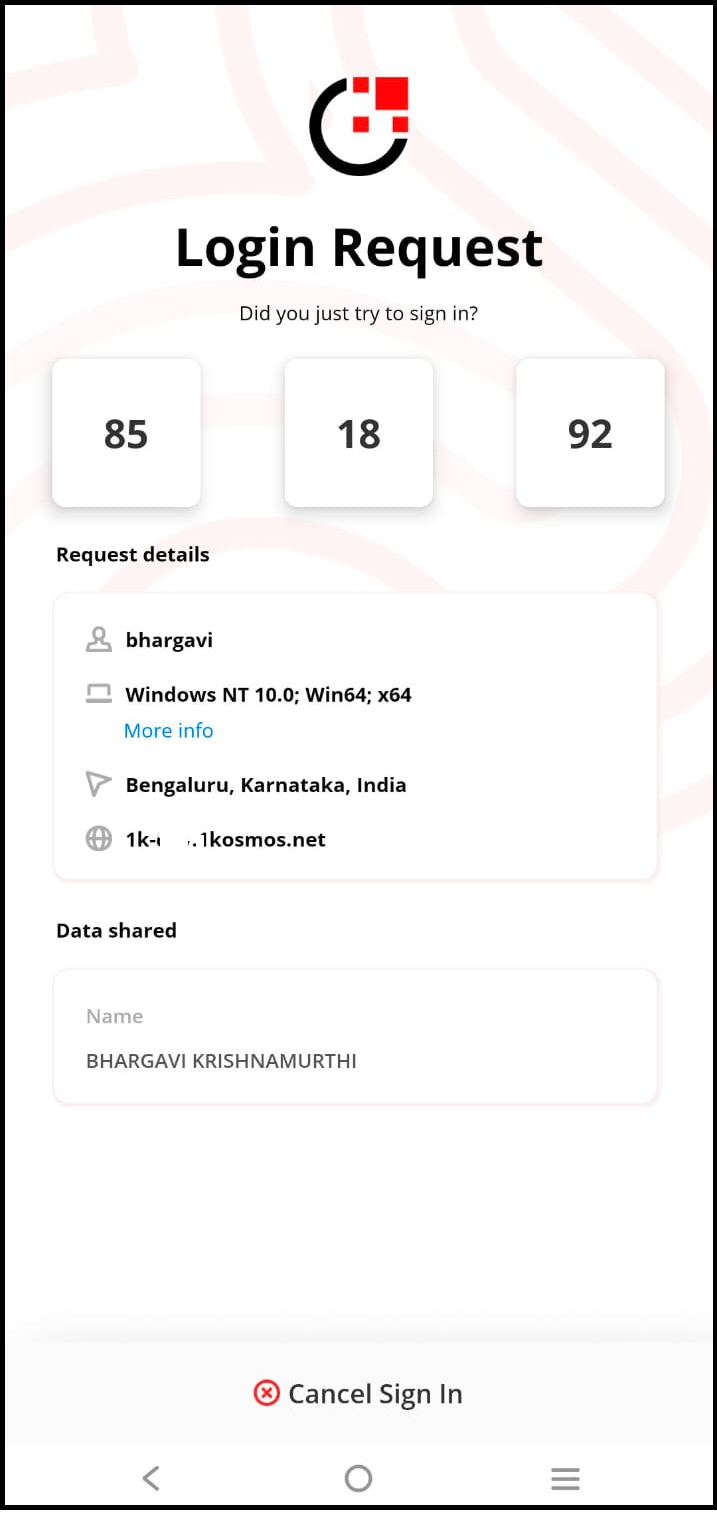 |
| User Action | - To approve the request, tap Yes, it's me. - If the user taps Cancel Sign In, their login request becomes cancelled. | - To approve the request, tap the appropriate challenge value on the mobile screen. - If the user taps Cancel Sign In, their login request becomes cancelled. |
For more information on push notification, see Login with Push Authentication.
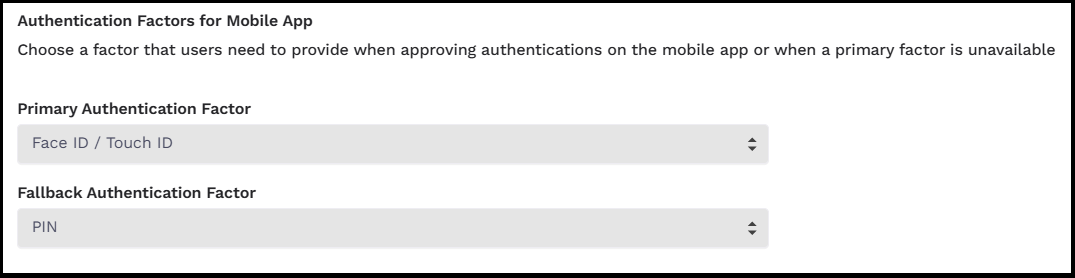
Authentication Factors for Mobile App
The primary and secondary authentication factors apply to both passwordless login methods: BlockID Mobile App and Push Notification Login
This section also allows administrators to configure the primary and fallback authentication factors for their login experience. Users are asked to approve the login request after scanning the QR code or accepting a push notification. Approving the request will trigger the primary authentication method, followed by the fallback authentication method, if the primary method fails or is not supported by the device.
-
Primary Authentication Factor: The multi-factor authentication methods are to be completed by users after scanning their QR code or accepting a push notification on their mobile device.
-
Fallback Authentication Factor: The fallback authentication factors are the same methods as the primary factors but will only be used if the primary factors fail or are not supported by the user's device.
Primary and Secondary Authentication Factors
Configuring LiveId/Biometrics for Passwordless Login
This is the default MFA method, where users authenticate their login using their enrolled biometrics, such as a fingerprint or Face ID. For more information on how to setup touch id/face id, see Setting up Touch ID/Face ID section in the BlockID Mobile Application User Guide.
PIN
Users authenticate their login by entering an 8-digit PIN. This PIN method should be used in situations where biometric scanners or cameras are not permitted by company policy, or on older devices that lack these features.
Managing Number of Devices for Passwordless Login
In this section, administrators can define preferences for how users can onboard their mobile devices and FIDO authenticators. Administrators can set whether users can self-onboard devices from the Request an Invite or the My Profile page in AdminX.
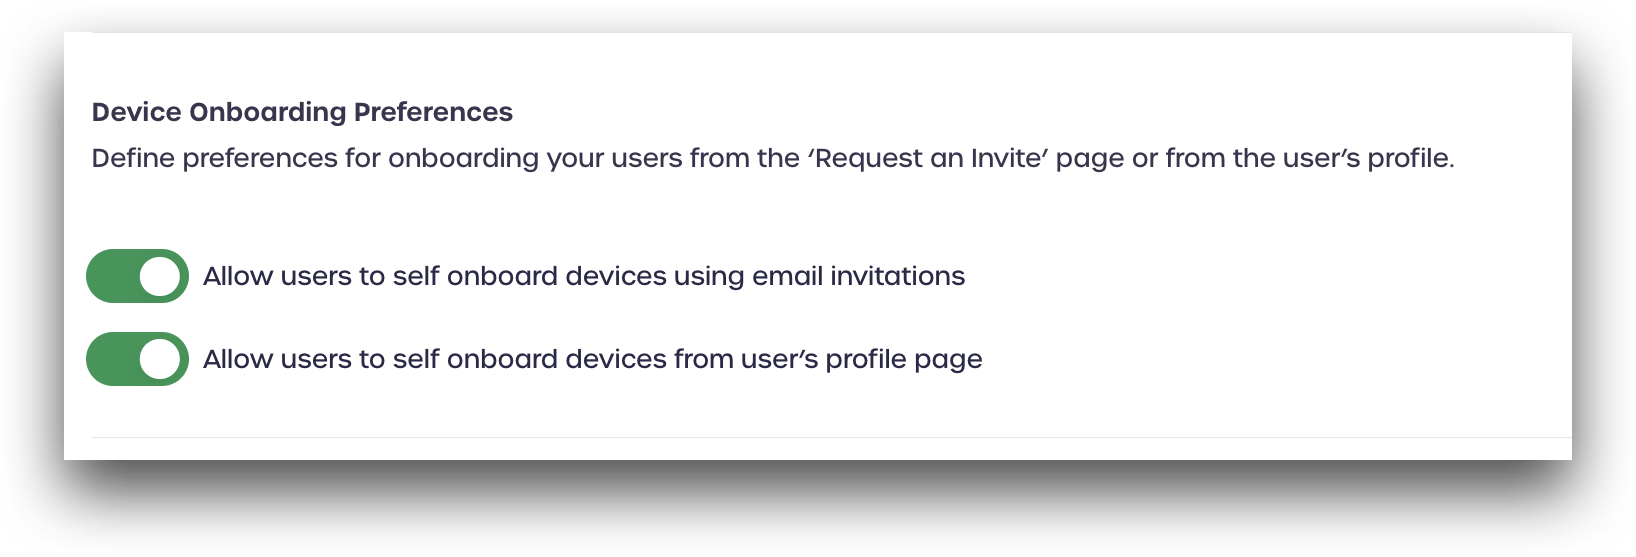
Enabling Users to Self-Onboard Devices using Email Invitations
When the Allow users to self onboard devices using email invitations option is enabled, users can onboard a device using the Request an Invite link from the AdminX sign-in page when enabled. Users will receive an invite link to their registered email address. Users are instructed to open the included link on their mobile device to complete the device onboarding process.
To onboard a device, follow these steps:
-
Open a tenant URL.
-
In the Sign in page, click Request an invite.
-
Enter the email id to which you want to receive the invite and click Send invite.
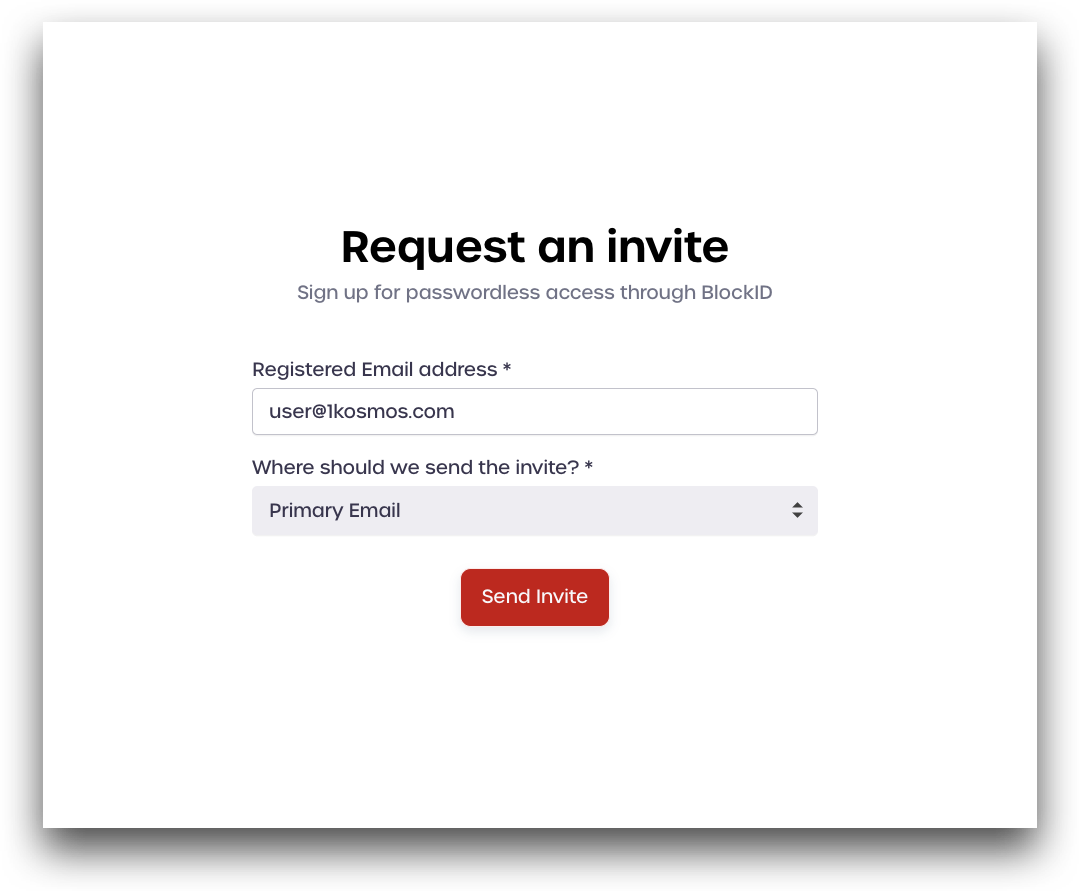
Your email would have received an invite. Use your BlockID app to scan the QR code displayed on your email. You can then login to the appropriate tenant.
Enabling Users to Self-Onboard Devices from the User's Profile Page
When the Allow users to self onboard devices from user’s profile page option is enabled, users can link their mobile device directly from their profile page in AdminX.
To enroll the user's device from the Devices tab, follow these steps:
-
After logging in to AdminX, navigate to My Profile > Devices.
-
Under the Setup drop-down menu, click Smartphone.

-
To setup your new phone for the passwordless login, you must have installed the BlockID app to your new device. If you have the app, click I have the app button.
-
Scan the displayed QR code using the BlockID Mobile App to link your smartphone.
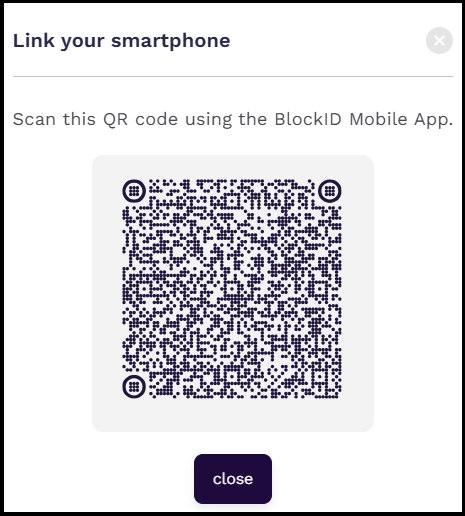
After linking your device, the enrolled device can be seen under the Devices tab.
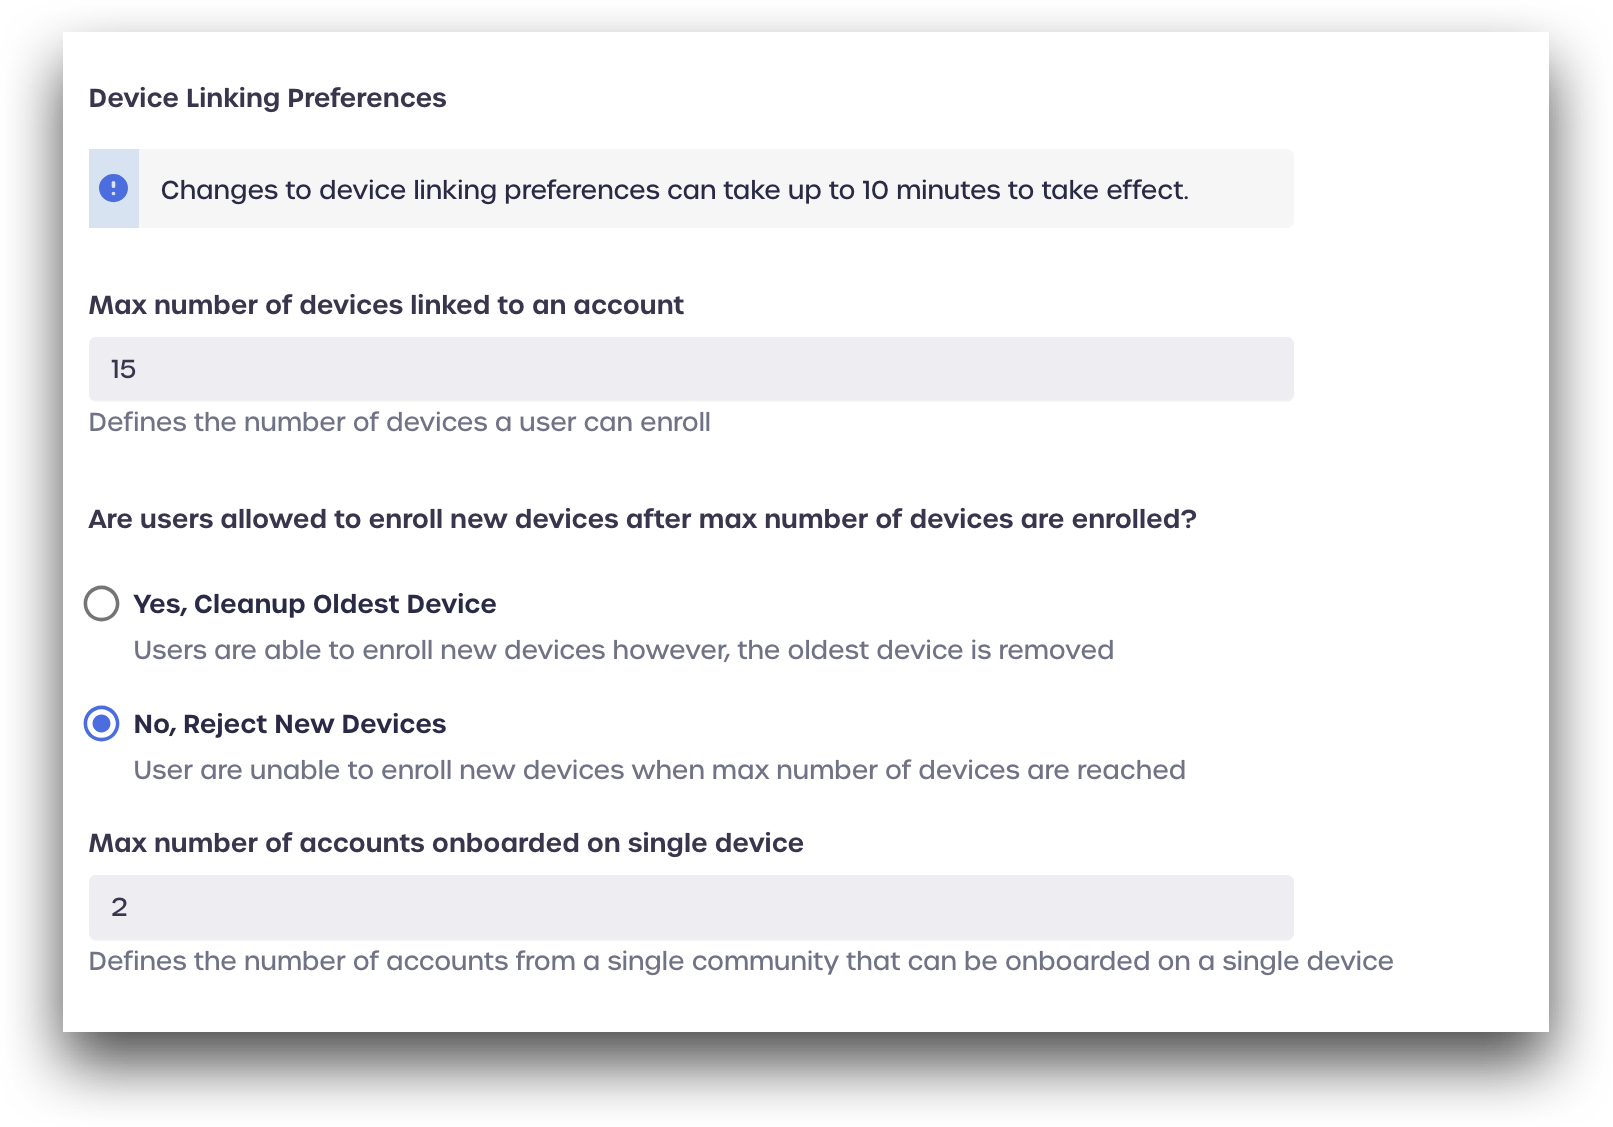
Device Linking Preferences
Use this section to manage the number of devices for passwordless login.
The following table provides information on the device configurations:
| Setting | Description |
|---|---|
| Max number of devices linked to an account | Specify the number of devices that the user can enroll. |
| Are users allowed to enroll new devices after max number of devices are enrolled? | Select whether users are allowed to enroll additional devices when the user reaches the maximum enrolling capacity. The following options are available to select: - Yes, Cleanup Oldest Device: Select this option to remove the accounts from the older devices. - No, Reject New Devices: Select this option if the user has already reached the maximum capacity of enrolling devices and preventing the additional device to enroll. |
| Max number of accounts onboarded on single device | Spcify the maximum number of accounts that can be onboarded on a single device from one community. This setting can be useful in situations where users might require multiple accounts, such as having a basic user account for typical activities and a helpdesk administrator account for troubleshooting problems. |
After configuring the appropriate settings, click Save.