Setting up IP-based Authentication Journey in AdminX
Overview
This guide explains how to create an IP-based authentication journey in AdminX, allowing you to manage a range of IP addresses for specific user journeys, allowlists, or blocklists. The CSV upload feature in AdminX streamlines the process of adding IP addresses.
Prerequisites
Before proceeding, ensure the following:
- You are logged in as a community admin in AdminX.
- The page with Adaptive Authentication Journeys is accessible.
- You have a valid CSV file containing IP addresses in different formats (single IP, CIDR, IP Range).
Step 1: Adding a New Adaptive Auth Journey
- Navigate to the Adaptive Authentication section in AdminX.
- Click on Add new adaptive auth journey to create a new journey.
- Provide a name for the journey. For example,
External Vendor IP allowlist. - Under Conditions, select IP Address and choose the operator is in the range of.
Step 2: Uploading IP Addresses from CSV
- Within the IP Address condition section, click on the Choose IP input field or click the + icon.
- A modal window titled Add IP Address will appear.
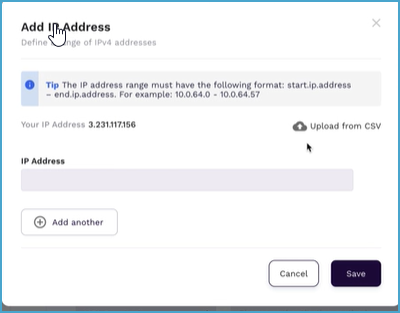
- Select Upload from CSV.
Step 3: Verifying File Upload
- Choose the *.csv file from your device and click Open.
- Once the file is selected, its name will be displayed in a separate field.
- A File is uploaded message will confirm the successful upload.
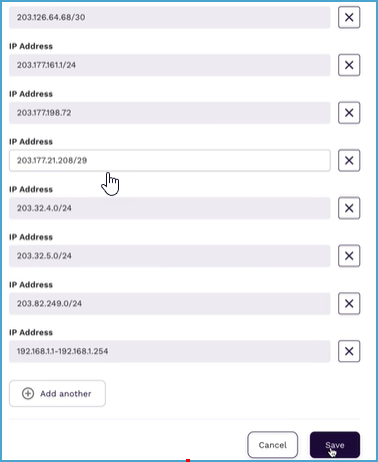
- Review the list of IP addresses to ensure accuracy and validity.
Step 4: Saving and Confirmation
- Click the Save button to proceed.
- If all IP values are valid, the modal window will close, and the added values will be displayed in the IP address input field.
Step 5: Providing a Valid Decision and Saving
- Enter a valid decision and click Save.
- You will be redirected to the Adaptive Authentication Journeys page.
- The new authentication journey, with IP as one of the conditions, will be visible.
Next Steps
- Create a user journey using Adaptive Authentication.