User Management
User management involves creating and managing users, roles, and their access levels to manage functionlities in 1Kosmos applications. A typical user management implementation involves a wide range of functionality such as adding or removing users, managing user's activity through permissions, and associating appropriate roles to users.
This topic describes how to create and manage users and their profile details. Additionally, it also provides information on different actions that can be performed on users.
Managing Users
Managing users involves creating and defining which user can perform what action within 1Kosmos applications.
To create a new user, follow these steps:
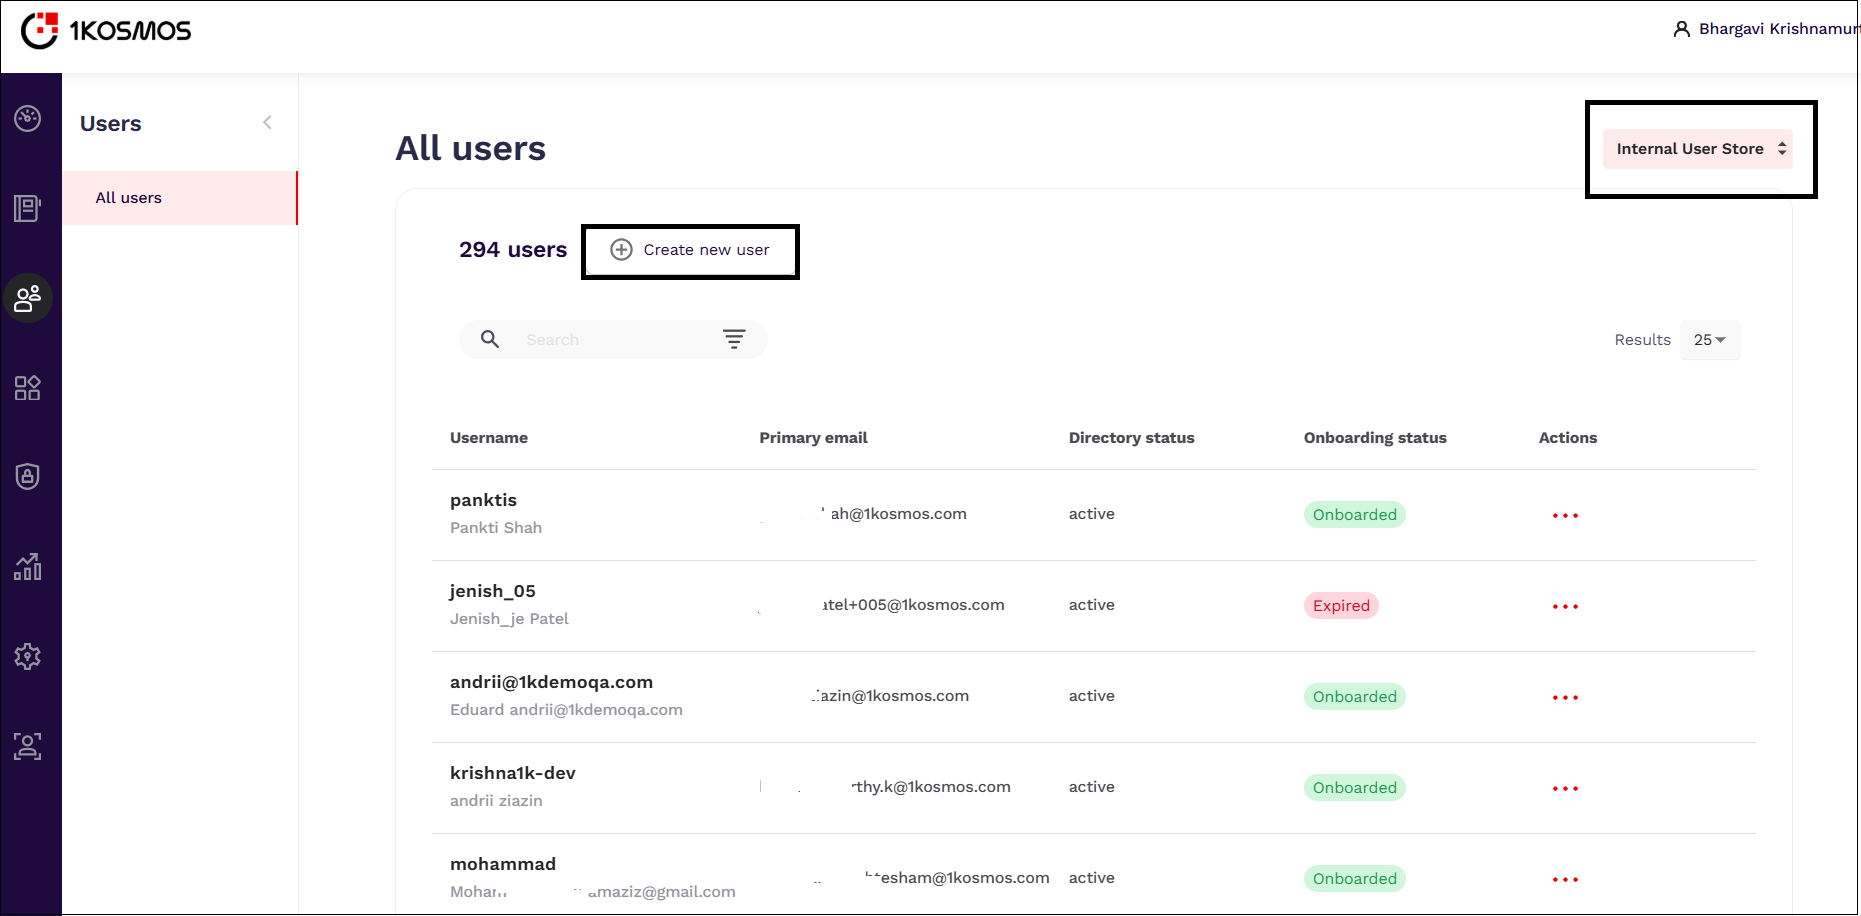
- Log in to your AdminX interface and navigate to the Users page.
- Select the appropriate user directory into which the new user must be created.
- Click Create New User.
- Enter the user's Account Information:
- Username: Enter a username to associate with the account.
- Role: Select a role that has to be assigned to the user. The following values are available to select.
-
Basic User
-
Community Administrator
-
Helpdesk Administrator
For more information on each roles, see Roles.
-
- Status: Select the status of the user as Active or Disabled. Disabled accounts cannot log in or access any account information.
- Under the User information section, provide the following details:
- Firstname: Enter the first name of the user.
- Middlename: Enter the middle name of the user. This is an optional field.
- Lastname: Enter the last name of the user.
- Under the Contact Information section, specify the following details:
- Primary Email Address: Specify the primary email address of the user.
- Secondary Email Address: Specify the secondary email address of the user. This is an optional field where fallback email to use in the event the primary email cannot be accessed.
- Phone Number: Enter the user's phone number, which will be used to deliver the One-Time Passcodes (OTP). When entering the phone number, it is recommended to specify the country code.
- Send user invitation email to: Select the mode to which the user invitation has to be sent. The following values are available to select:
- Primary email address
- Secondary email address
- Phone Number
- Don't send Invite
-
After entering all the user information, click Create. The created user is displayed on the All users page.

Managing User Profiles
After a user is created, their status will be in the Not Invited state. The administrator must send an invitation to the user to onboard them and can perform the following actions on that user:

Inviting Users for Passwordless
To onboard users, the administrator must send an invitation to users and onboard them using a passwordless login. To send an invite, follow these steps:
-
Navigate to the user to whom the invite has to be sent.
-
Under the Actions column, click ...
-
Click Invite User for Passwordless.
-
In the Invite User page, click Send Invite.

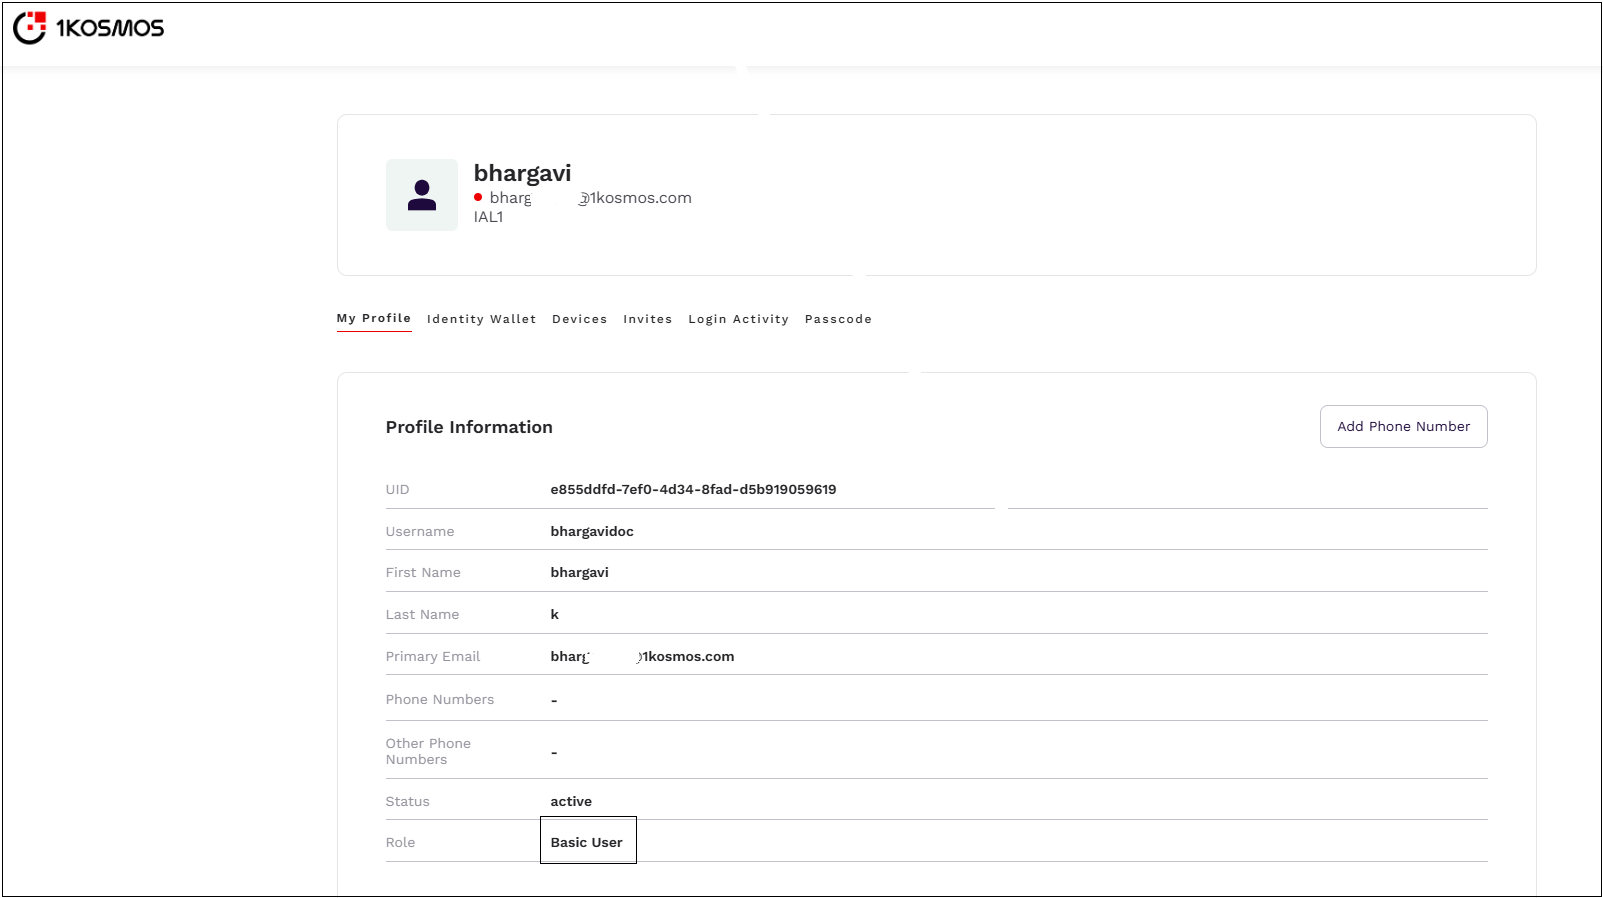
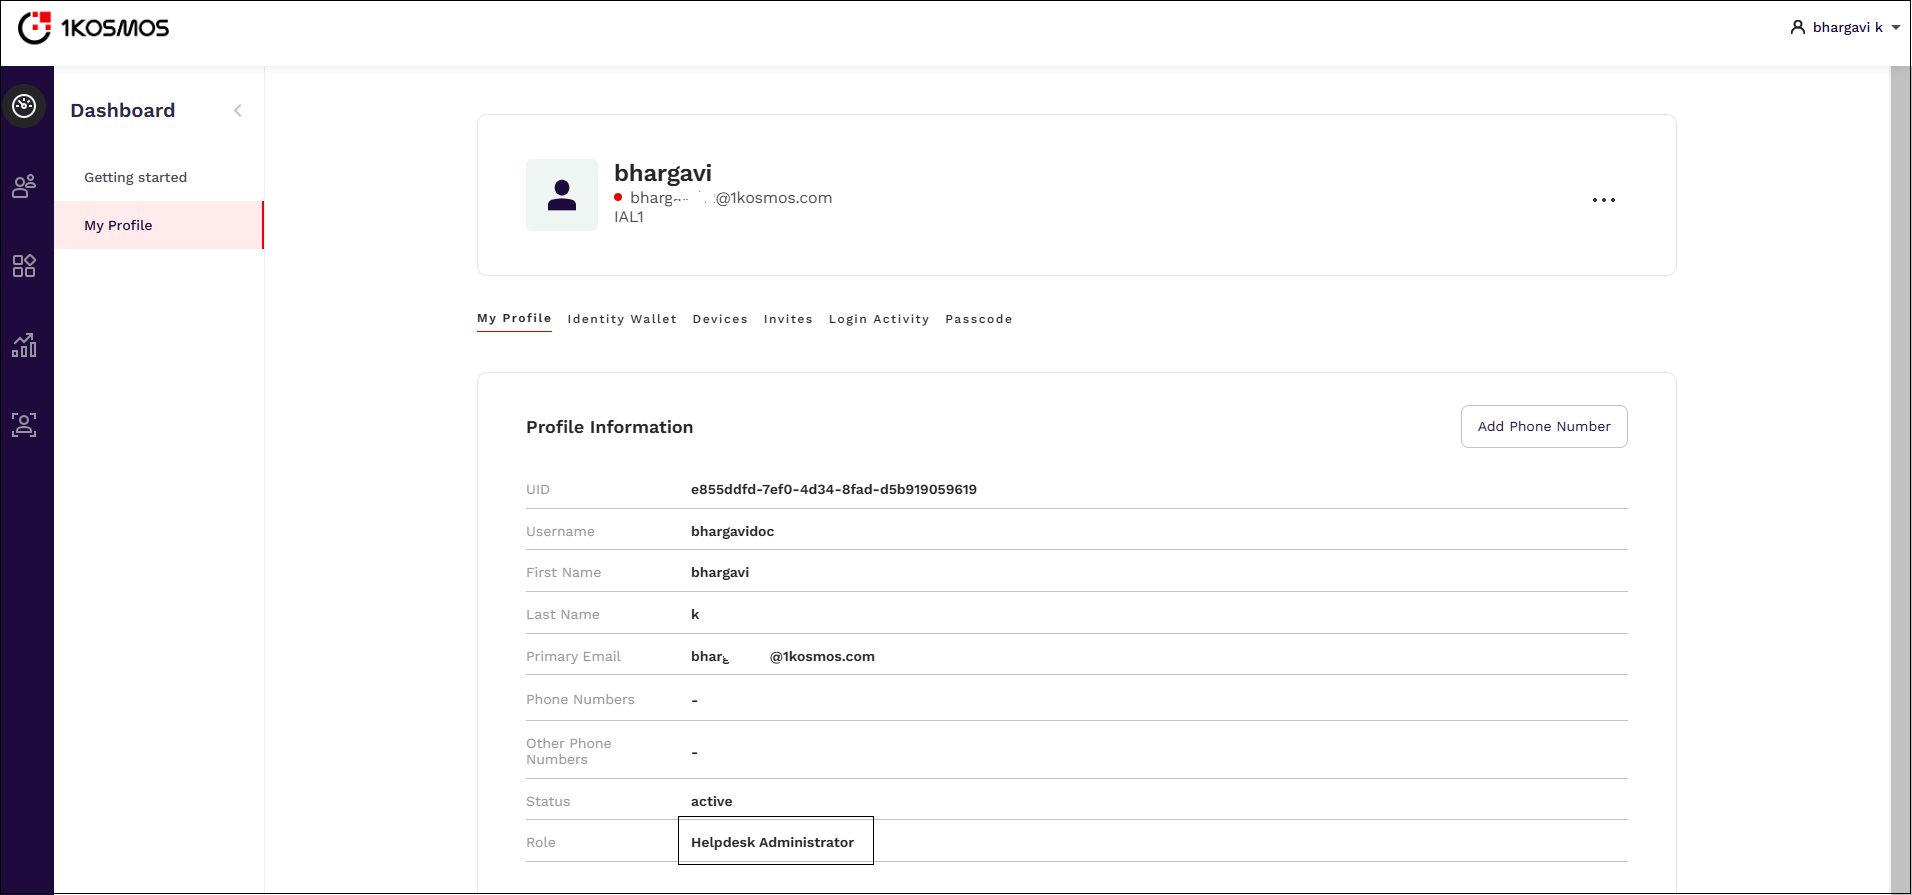
Viewing Profile
Administrators can view the user's profile details such as their first name, last name, email address, and so on. Additionally, users can add the aliases name to their username. For more information, see Aliases section in Community Administrator.
To view the user's profile, follow these steps:
-
Navigate to the user to whom the invite has to be sent.
-
Under the Actions column, click ...
-
Click View Profile.
-
View the user's details.

Editing Profile
Administrators can edit the profile details of a user in case of an update.
To edit the user's profile details, follow these steps:
- Navigate to the user to whom the profile has to be edited.
- Under the Actions column, click ...
- Click Edit Profile. The Edit Profile page will be displayed.
- As only few fields will be editable, modify the appropriate user's details.
- Click Save.
Locking Users
Administrators can use the Lock User functionality in scenarios where users can be locked due to suspicious activity on their account or if they are expected to be away for a period of time. However, if a user has been locked, they will not be able to authenticate during this time.
To lock the functionality, follow these steps:
- Navigate to the user you wish to lock.
- Under the Actions column, click ...
- Click Lock User. The Lock User window is displayed.
- Specify the time period for how long the user must be locked. The following values are available to select:
- Lock indefinitely - Select this option to lock the user for a longer time period.
- Lock until - Specify the time period until which the user cannot perform any activity on the UI.
- Click Submit.
What are Roles in 1Kosmos?
In 1Kosmos, roles use permissions to define the activities a user can perform in the AdminX interface. Each user must be assigned one of the following roles to access the platform's features:
- Basic user - This role grants users basic privileges.
- Community Administrator - This role provides the highest level of access within 1Kosmos applications, giving users complete control over all functionalities.
- Helpdesk Administrator - This role is assigned to users who require visibility into community activity and is essential for troubleshooting and resolving issues during the user onboarding process.
Basic User
By default, users are assigned this role. It grants basic privileges, such as viewing their profile information, managing devices, enrolling identity documents, and checking invites.
Community Administrator
The Community Administrator role offers the highest level of privileges and allows users to configure Identity Provider (IdP) settings and manage the AdminX portal’s configuration.
With this role, users can manage BlockID session attributes, adjust authentication settings, add, edit, or remove user directories, configure SAML and OIDC applications for SSO, view and download reports, and modify all other AdminX configuration settings.
Community Administrators can also edit profile information for all accounts, remove associated devices, and send invites to users across all accounts.

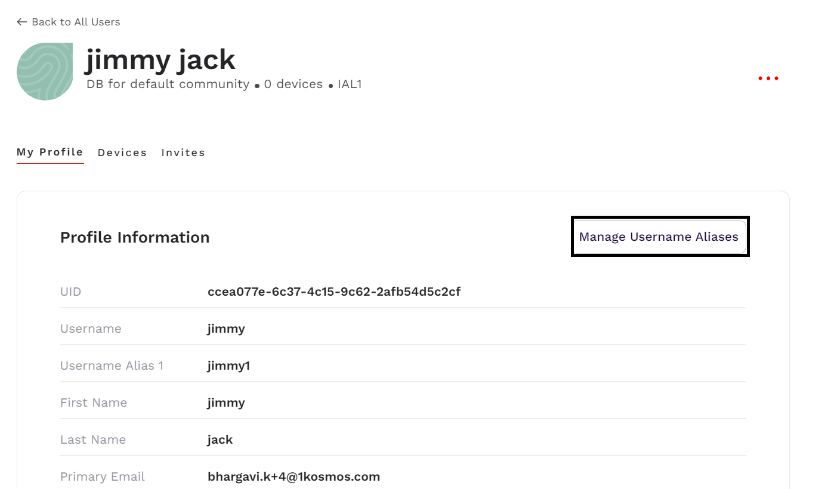
Managing Aliases
With the introduction of the aliases feature, the community administrator can use the Manage Username Aliases button on the Profile Information page to associate a maximum of eight aliases name to the user. These aliases are displayed as attributes and the administrator can use them while mapping to SAML claims. The user can then use the aliases name to login into the following applications:
- AdminX
- Linux Credential Provider
- Mac Credential Provider
- Windows Credential Provider
- Radius Applications
- Step-up OIDC
To associate an aliases name to a user, follow these steps:
-
After navigating to the Profile Information page of a user, click Manage Username Aliases. The Manage Username Aliases page window is displayed.

-
In the Username Aliases field, specify one or more aliases name and click Save. The user can use the aliases name to login.
Note:- Aliases must be unique. They are only supported on the login page, specifically in the username tab.
- Aliases are NOT supported in:
- QR code
- Reset Password, Forgot Password, or any other flows
Applications Utilizing Aliases for Authentication
This section provides information on using Aliases in various applications:
- Accessing Radius Applications
- Using Aliases in Credential Provider
- Performing SAML/OIDC authentication using Aliases
Accessing Radius Applications
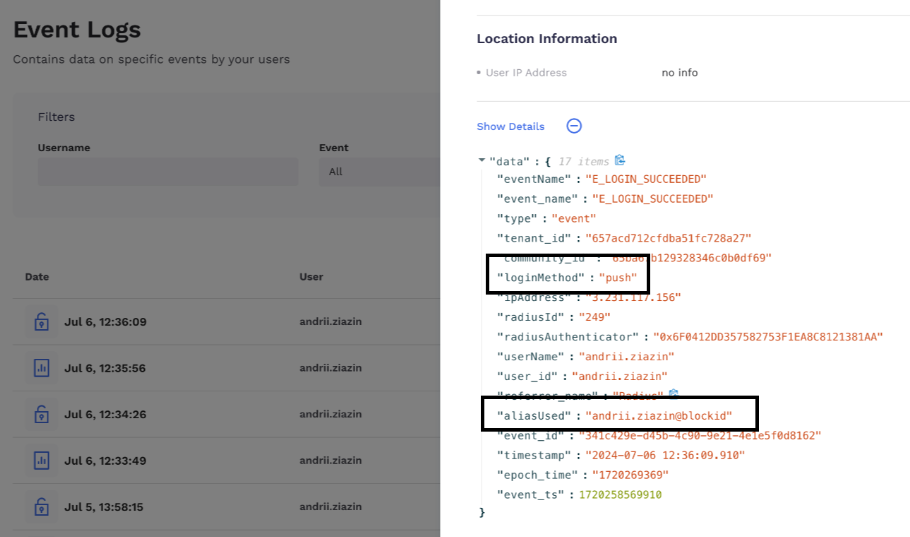
When using a radius application, you can input an alias name of a user instead of the username while performing the authentication using password, Interactive voice response (IVR), push notification, or OTP.
After authenticating into the Radius application using the aliases name, you can use the Event Logs page to view the aliases name as shown below. The following screenshot illustrates an example of push authentication in Radius
Using Aliases in Credential Provider
The V2 credential provider (CP) module uses the adaptive authentication journey mechanism to tailor authentication configurations for users based on the business needs. When using a credential provider to login, you can input an alias name of a user instead of the username while performing the authentication using password, push notification, OTP, or FIDO.
- The adaptive authentication journey for CP can only be configured through the database instead of the AdminX interface. It’s recommended not to use the adaptive auth journey in the AdminX interface as it will override the existing DB settings.
- If no adaptive auth journeys are configured for CP, then the CP uses the following default journeys:
- Password
- OTP
- FIDO
- Password + OTP
- Password + FIDO
- OTP + FIDO
If you have configured Windows CP with the OTP option, it is mandatory to enter your password to login.
The following example illustrates a scenario on the usage of windows v2 CP:
Connecting to Virtual Machines Through RDP Using Aliases
To connect to virtual machines using Aliases, follow these steps:
Prerequisites:
- Make sure that you have configured the aliases name for the user.
- You must have installed CP on the host machine or the home machine from which you are trying to connect to the Remote system.
-
Login to a Remote Desktop Connection.
-
Login with BlockID.

-
In the Enter your username field, specify your aliases name.

-
Select the appropriate authentication method. The following screenshot shows an example of selecting OTP.
Note: While configuring the adaptive authentication journey, if only one authentication method has been configured, the user will directly be prompted to use that method.
-
After selecting the OTP option, enter the verification code and then type the password.
You will then be able to login to the remote system.
note- In the case of Windows credential provider, it is mandatory to use the password when you use aliases to login into the server.
- In case of Linux SSH login with aliases, password authentication does not work because the password cannot be validated through 1Kosmos as the directory is not linked. If there are multiple authentication methods configured in adaptive auth journeys and password is one among them, then the Linux SSH pam will not display the password option to the user on the menu. However, if the administrator has configured only the password option for the user, then the Linux SSH pam will deny access to the user.
Performing SAML/OIDC authentication using Aliases
During SAML assertion or OIDC setup, you can use the NameID attribute to be an alias1,2, and so on. When you use the aliases name in the SAML authentication, the id_token parameter displays the name of the aliases used. If you have not associated the aliases name for the user, then id_token carries the default value configured in the claims, where the claims are the user attributes transferred during SAML assertion. If the aliases name is not added to the user as well as the default value is not configured in claims, then the authentication fails displaying the reason for the failure.
Helpdesk Administrator
The Helpdesk Administrator role provides the privileges required to troubleshoot issues users may encounter with the tenant. Helpdesk Administrators can view and download reports and logs, as well as access SAML and OIDC application information. To aid in troubleshooting, they can view profile details for all user accounts, see the devices associated with those accounts, and review invites for all user accounts.
Additionally, helpdesk administrators can also perform the following actions:
Unlinking Users' Devices
Community and helpdesk administrators can use the Adminx interface to unlink a user’s device in cases where the device is lost, the user has accidently uninstalled the BlockID app and is unable to login, or if the user has been offboarded from the organization. Furthermore, a user.unlink.device permission has been introduced, which is necessary for Helpdesk administrators to perform the device unlinking. The Delete icon is displayed only if the user.unlink.device permission has been granted to administrators.
To unlink a user’s device, follow these steps:
-
Login to the Adminx interface.
-
Navigate to the Users tab.
-
Select a user for whom the device must be delinked.
-
Navigate to the Devices tab and click the Delete icon under the Actions column.

Generating Onboarding Invites on Behalf of Another User
Community administrators or helpdesk administrators with the user.generate.qr permission can generate a QR code on behalf of another user, enabling them to onboard devices in the user's presence. In addition to the user.generate.qr permission, helpdesk administrators will also need the following permissions to generate the QR code.
- users.all-users
- users.view-user
- users.edit
To generate an onboarding invite, follow these steps:
-
Login to the Adminx interface as a community administrator.
-
Navigate to the Users > All Users tab.
-
Select a user for whom the device has to be onboarded in your presence.
-
Navigate to the Devices tab and click ... on the top right corner.

-
Click Generate Onboarding Invite. The Generate Onboarding Invite window is displayed.

The user must scan the QR code to onboard their device. Once the scan is successful, the UI notifies the user that the device has been onboarded.

The QR code is valid for 2minutes. If the user fails to scan the QR code within the stipulated time limit, the invite expires. Community administrators have to regenerate the invite.
The E_ACCESSCODE_GENERATED event is created when community or helpdesk administrators generate an onboarding invite on behalf of a user to onboard their device. Additionally, the event is created on the following scenarios:
The table below outlines the different scenarios in which the E_ACCESSCODE_GENERATED event will be triggered for each QR scan. The event also includes a "purpose" parameter, indicating the reason for the event's creation. For more information, see Event Logs.
| Scenario | Access Code Type | Purpose |
|---|---|---|
| When the user self creates a new account | Verification_link | account_creation |
| When the user self invites from the login screen | User_invitation | device_onboarding_from_request_invite |
| When the user self invites from the My Profile tab | User_invitation | device_onboarding_my_profile |
| When user onboards from the My Profile tab using a QR code "onboard mobile application" | user_invitation | device_onboarding_my_profile |
| When administrators generate onboarding invite on behalf of a user using a QR code | User_invitation | device_onboarding_by_admin_via_qr |
| When administrators' onboard users by sending them the invite | User_invitation | device_onboarding_by_admin_via_email |