Connect to AD via Broker
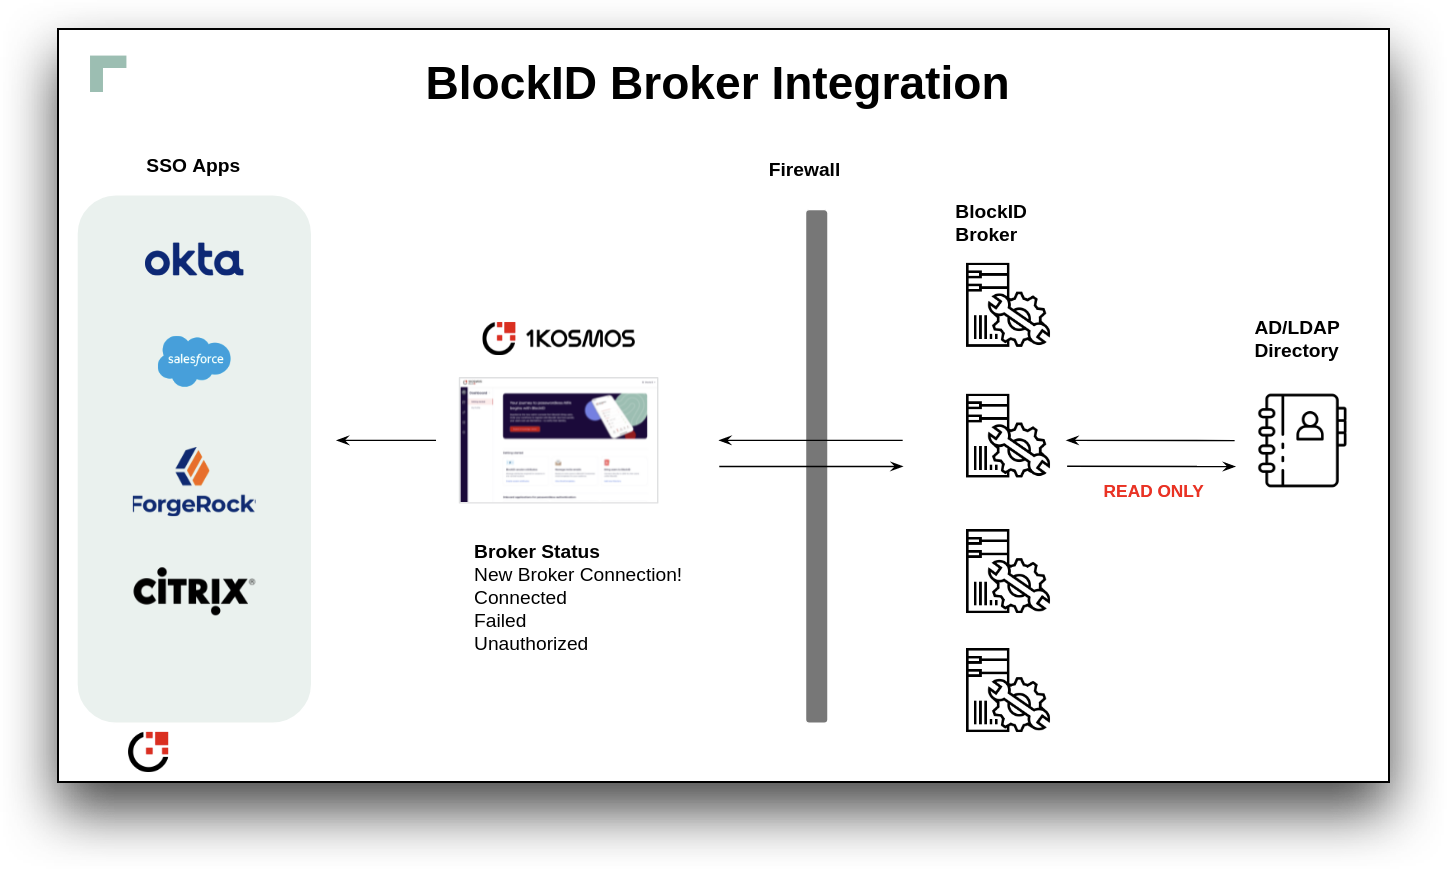
The BlockID AdminX Broker allows a tenant or community administrator to connect and integrate an existing Active Directory (AD) user directory to AdminX.
Getting Started
-
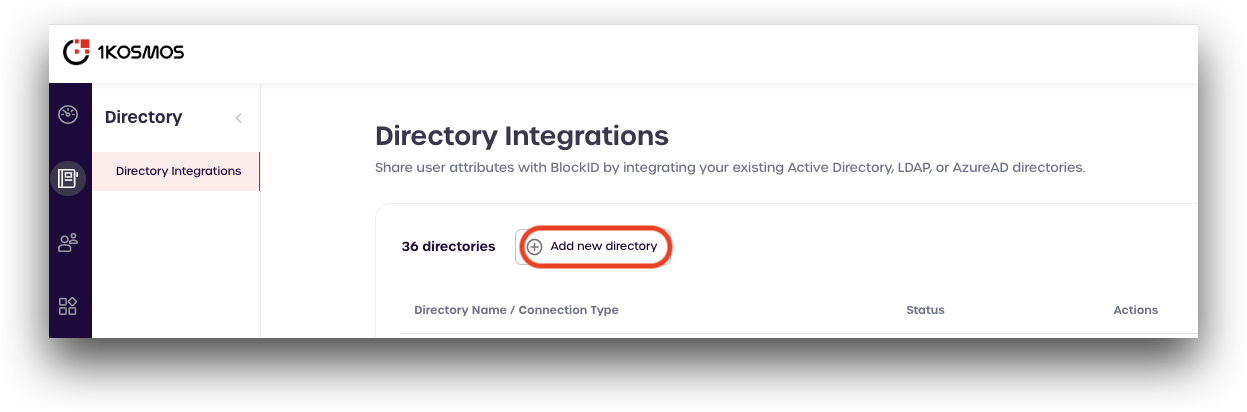
Select Directory Integrations from the main menu on the left-hand side of the page.
-
From the Directory Integrations page, click Add new directory.
-
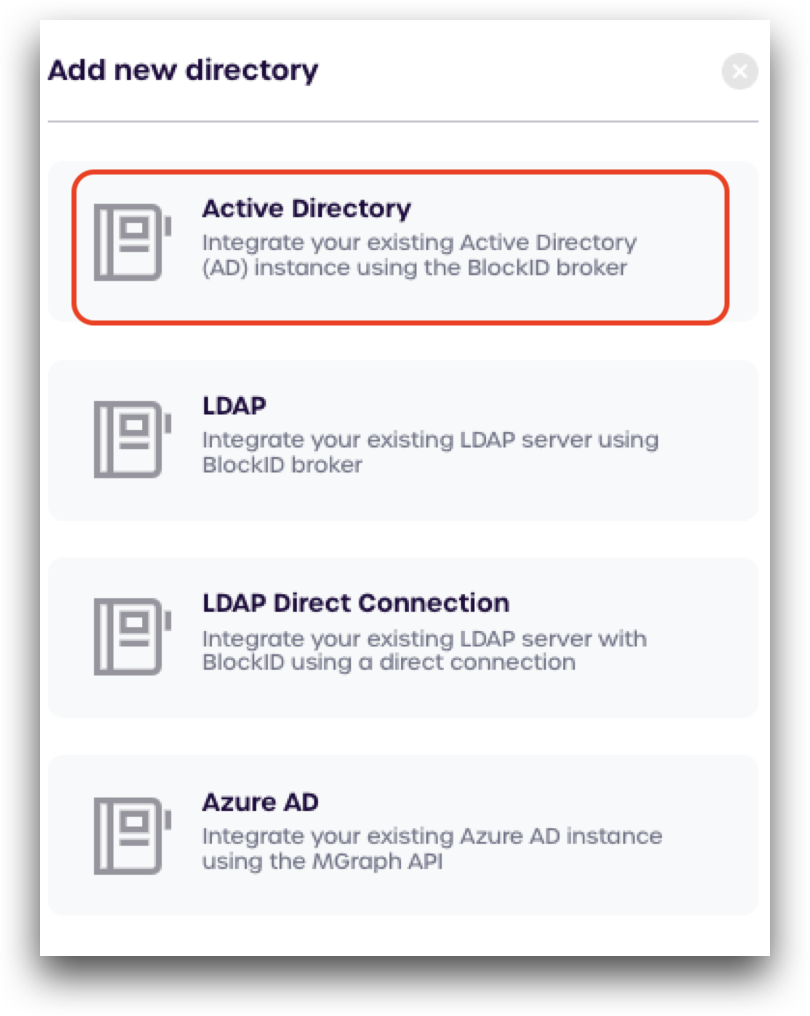
Select Active Directory from the menu.
-
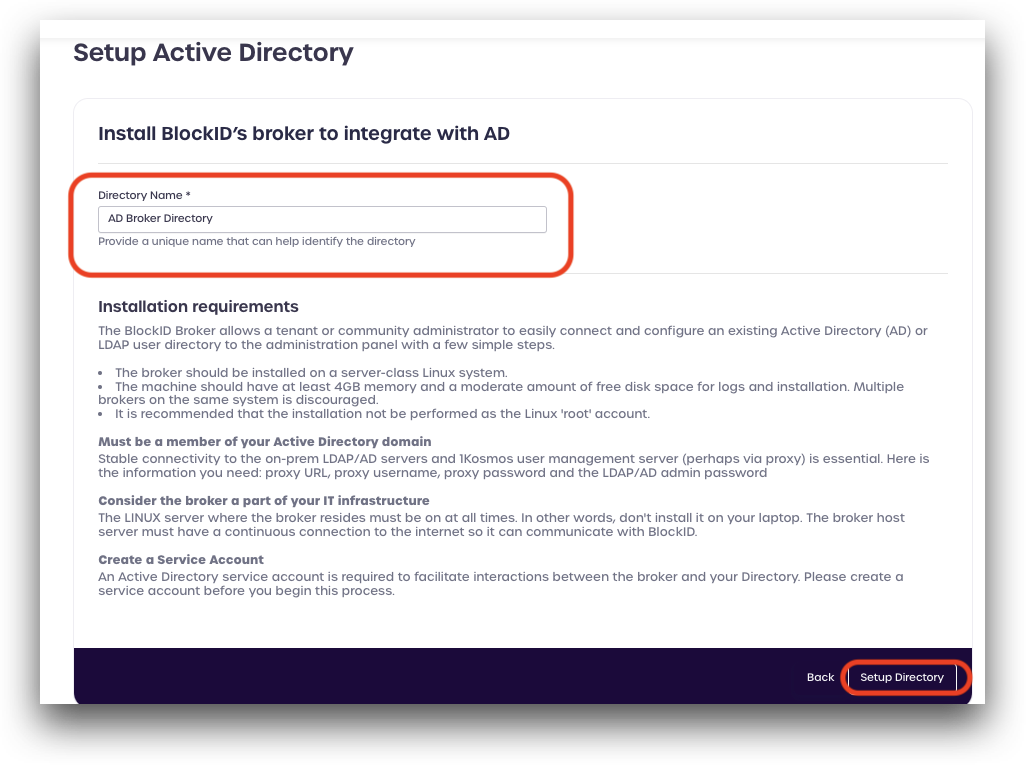
Enter a name to use for this connection, and click Setup Directory
Step 1: Download & Install Broker
Click the Download Now link to download the broker for your server operating system. The downloaded archive must be copied and installed on a Windows or Linux server as part of your Active Directory domain.
-
For users with a Windows server, please see Configuring the Windows Broker for information on configuring and installing the broker service on Windows.
-
For users with a Linux server, please see Configuring the Linux Broker for information on configuring and installing the broker service on Linux.
We recommend running only one of the two brokers (Linux or Windows) in your environment
After downloading the broker, click Next.

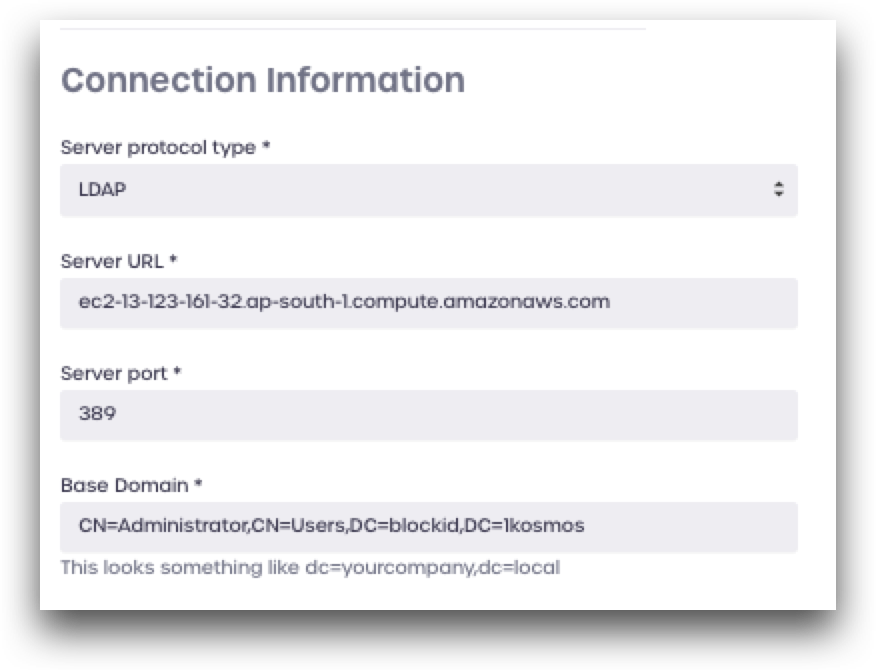
Step 2: Connection Information
Under Connection Information, enter the connection details for your Active Directory domain:
- Server protocol type: select LDAP, or LDAPS
- Server URL: AD server URL
- Server Port: AD server port
- Base Domain: AD base domain
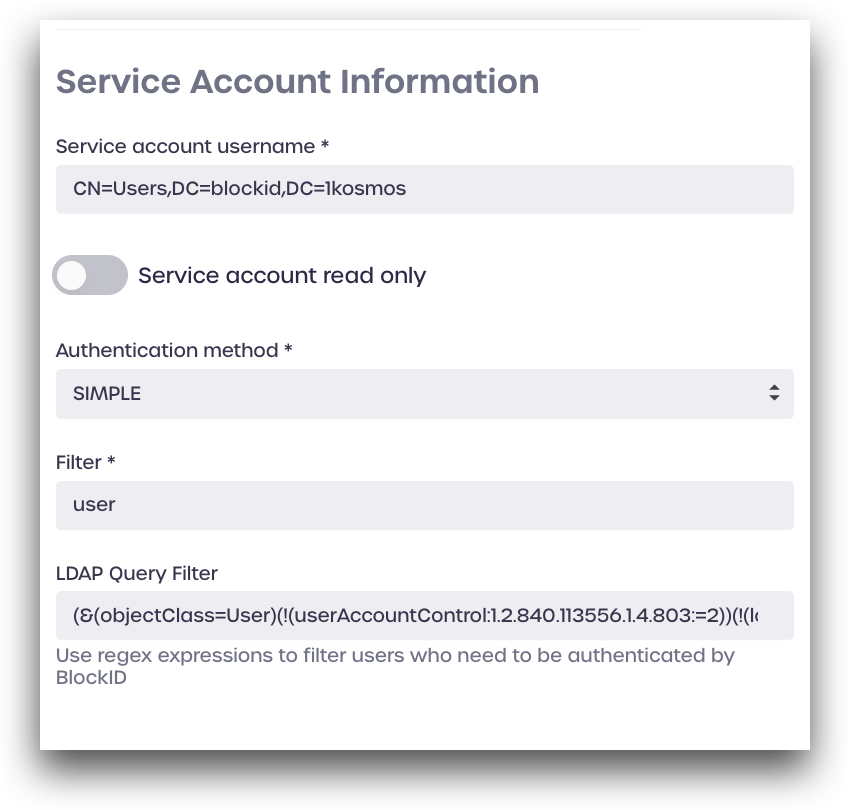
Under Service Account Information, enter the details for your Active Directory service account:
- Service account username: AD service account
- Service account read-only: enable this if you only wish to read from this directory (cannot create new users)
- Authentication method: select SIMPLE
- Filter: Enter a directory term to filter for, such as
user - LDAP Query Filter (optional): Enter LDAP query to filter for (see below for more details)
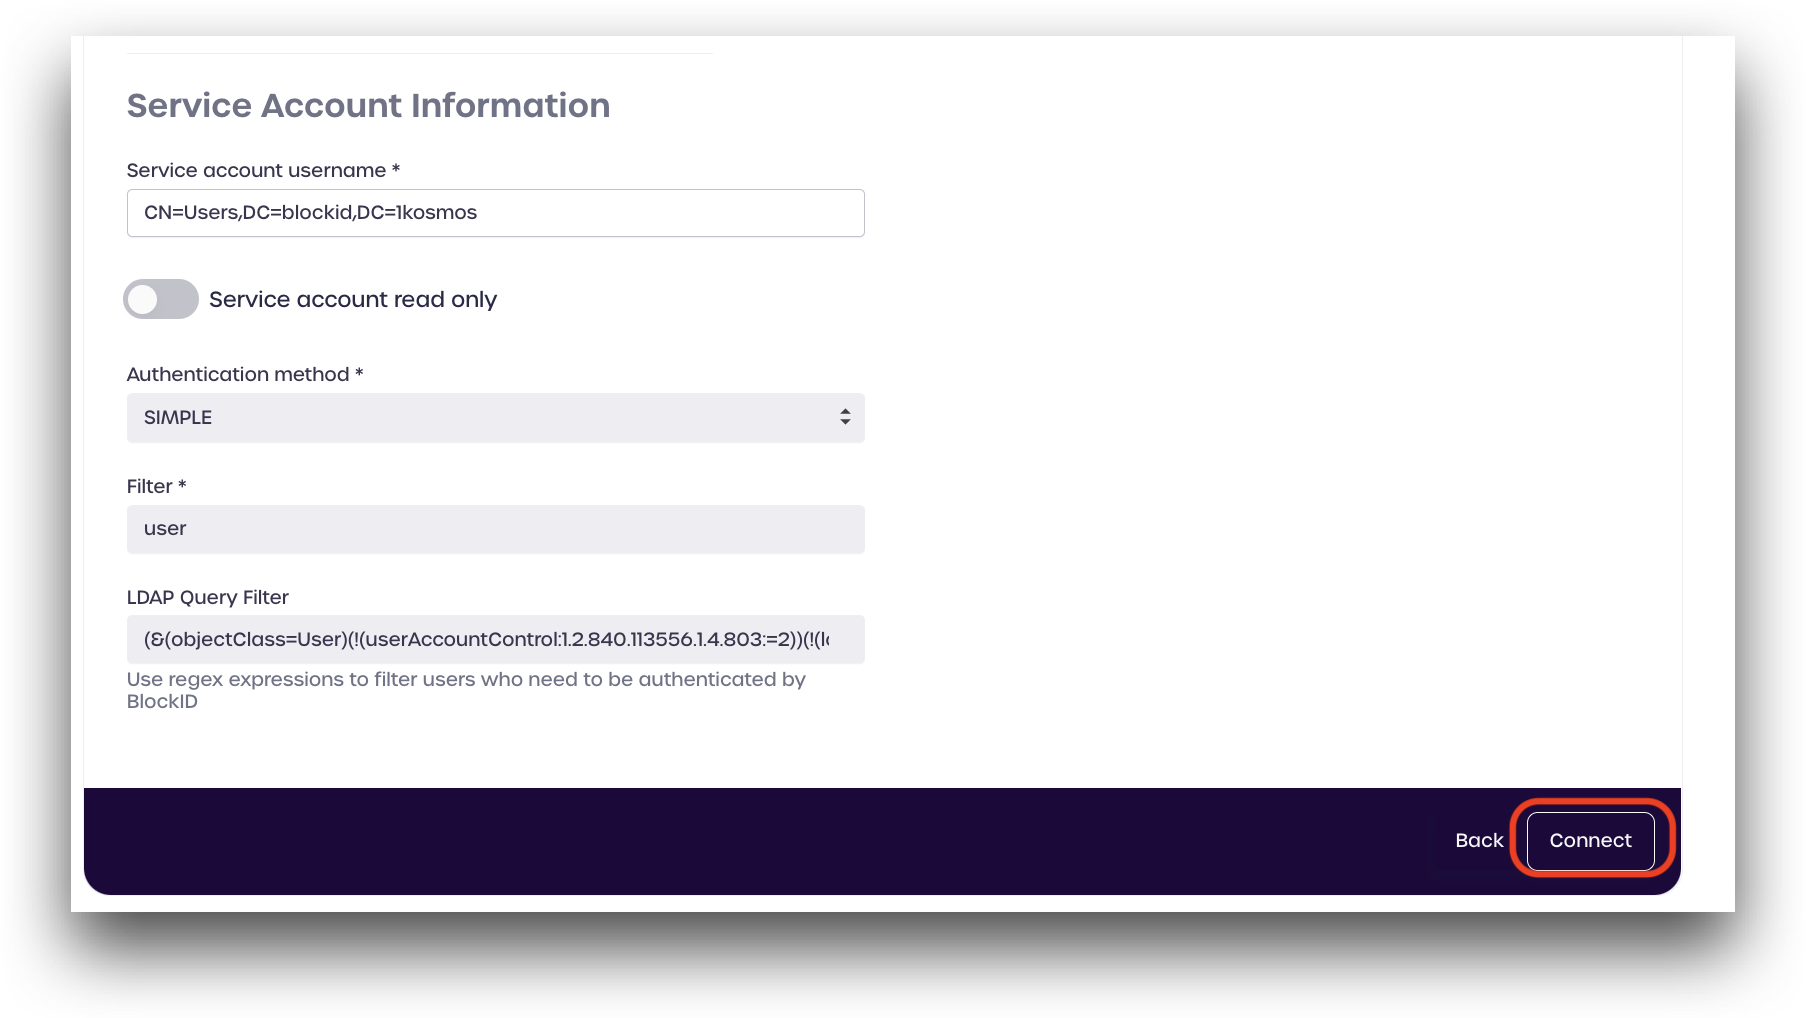
Click Connect to save your settings and enable the directory.
LDAP Query Filter
LDAP query filters are regular expressions that filter only the desired directory parameters and discard any others.
Administrators can use LDAP directory queries to filter which users can authenticate to BlockID and log in. This is useful if you only wish to allow user accounts that are marked as active to log in to your tenant. This field is optional and can be left blank.
Example LDAP Query Filter:
(&(objectClass=User)(!(userAccountControl:1.2.840.113556.1.4.803:=2))(!(lockoutTime>=1)))
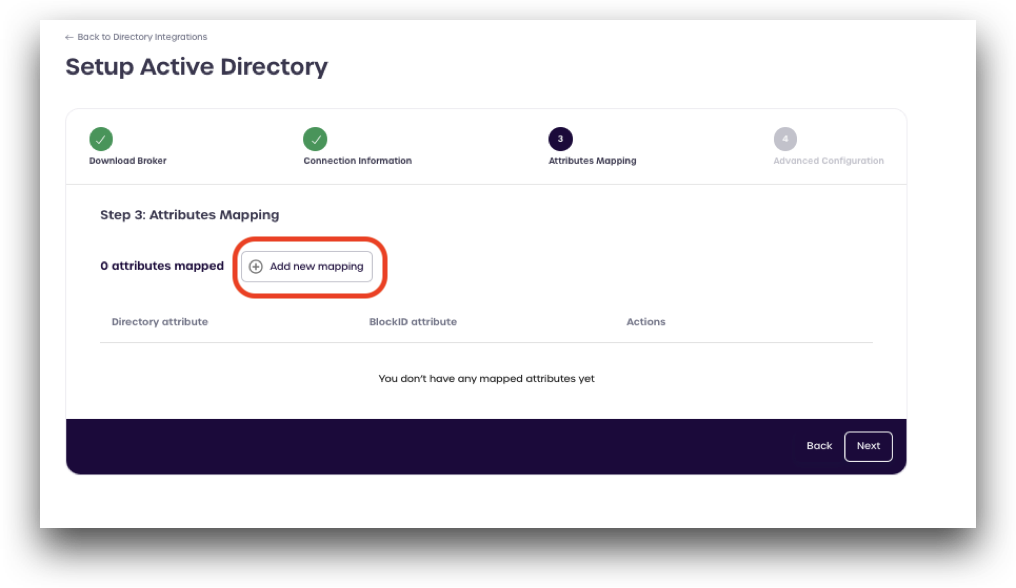
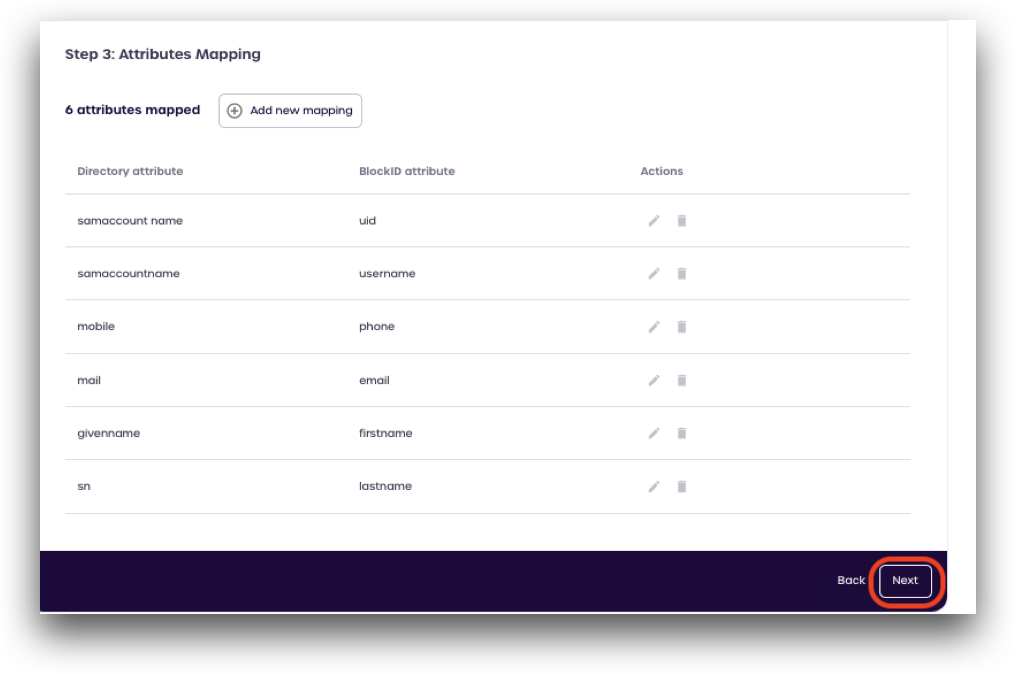
Step 3: Attributes Mapping
Next, we will set our attributes mapping for the broker to interact with the AD Directory.
Click Add new mapping.
Add each Directory attribute and the corresponding BlockID attribute from the table below:
| Directory Attributes | BlockIDAttributes |
|---|---|
| samaccountname | uid |
| samaccountname | username |
| mobile | phone |
| givenname | firstname |
| sn | lastname |
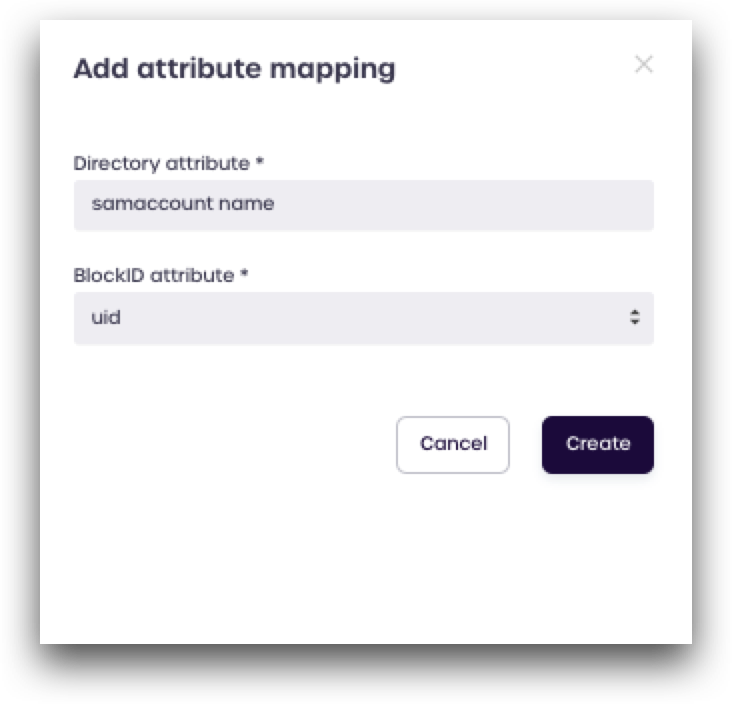
Here is an example of how to add the samaccountname attribute:
- Click Add attribute mapping
- Enter
samaccountnamein the Directory attribute box - Select
uidfrom the BlockID attribute drop-down menu - Click Create
Repeat this process for all the attributes above.
After mapping all your attributes, click Complete to save your new broker user directory.
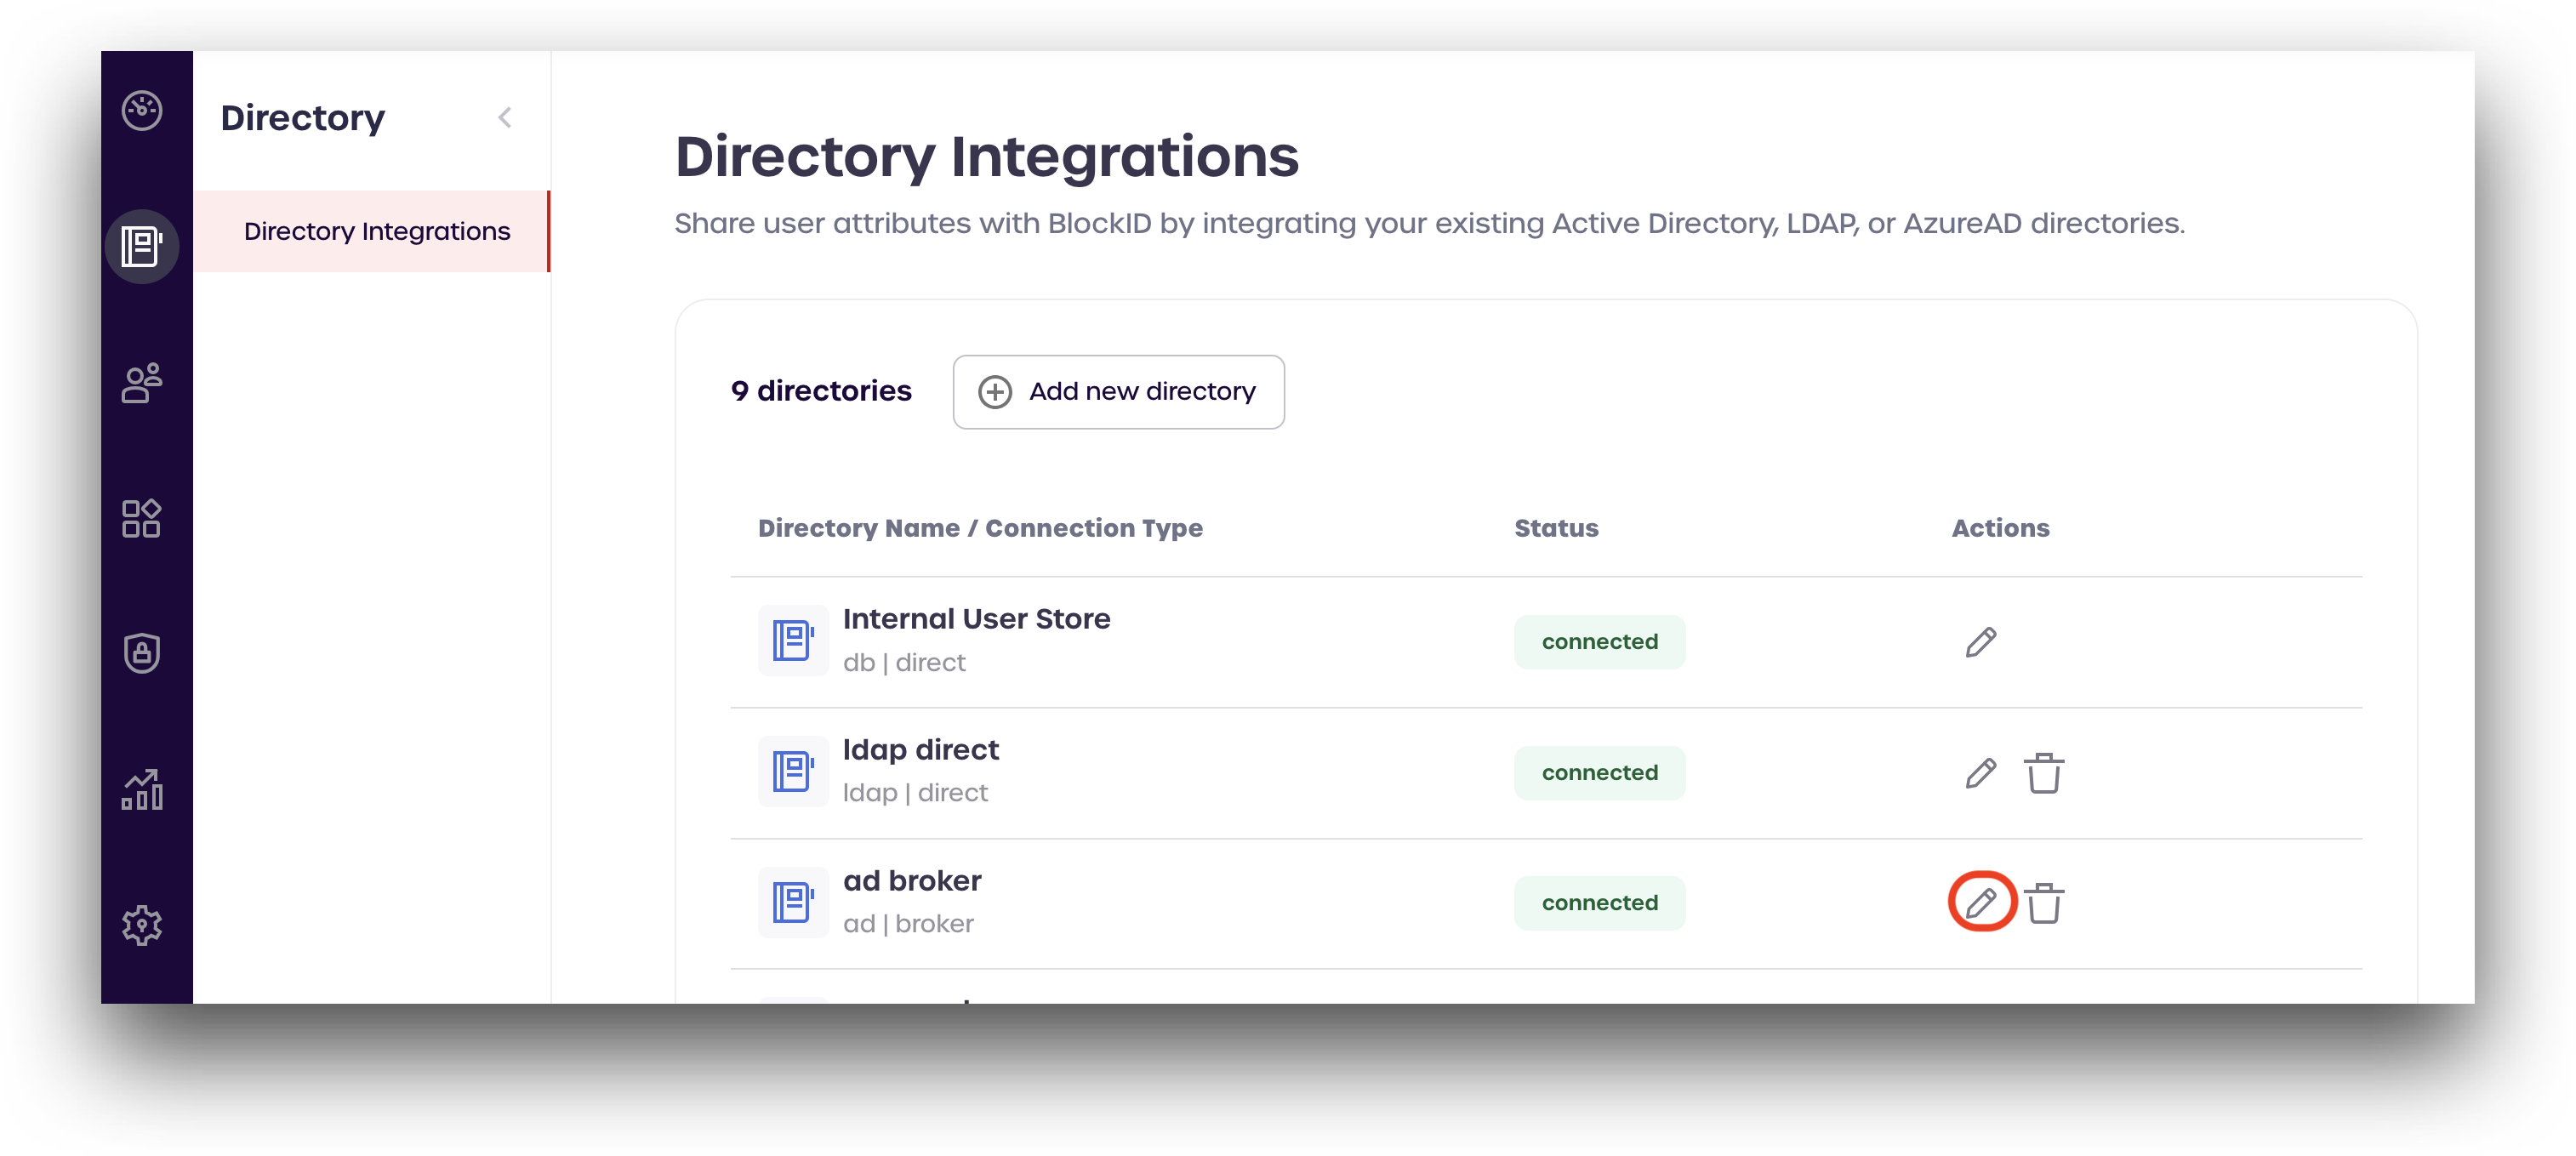
Advanced Configuration
After creating your new broker connection, you can set additional options from the Advanced Configuration page. Scroll down to the broker user directory you created and click the pencil icon.
Click Advanced Configuration.
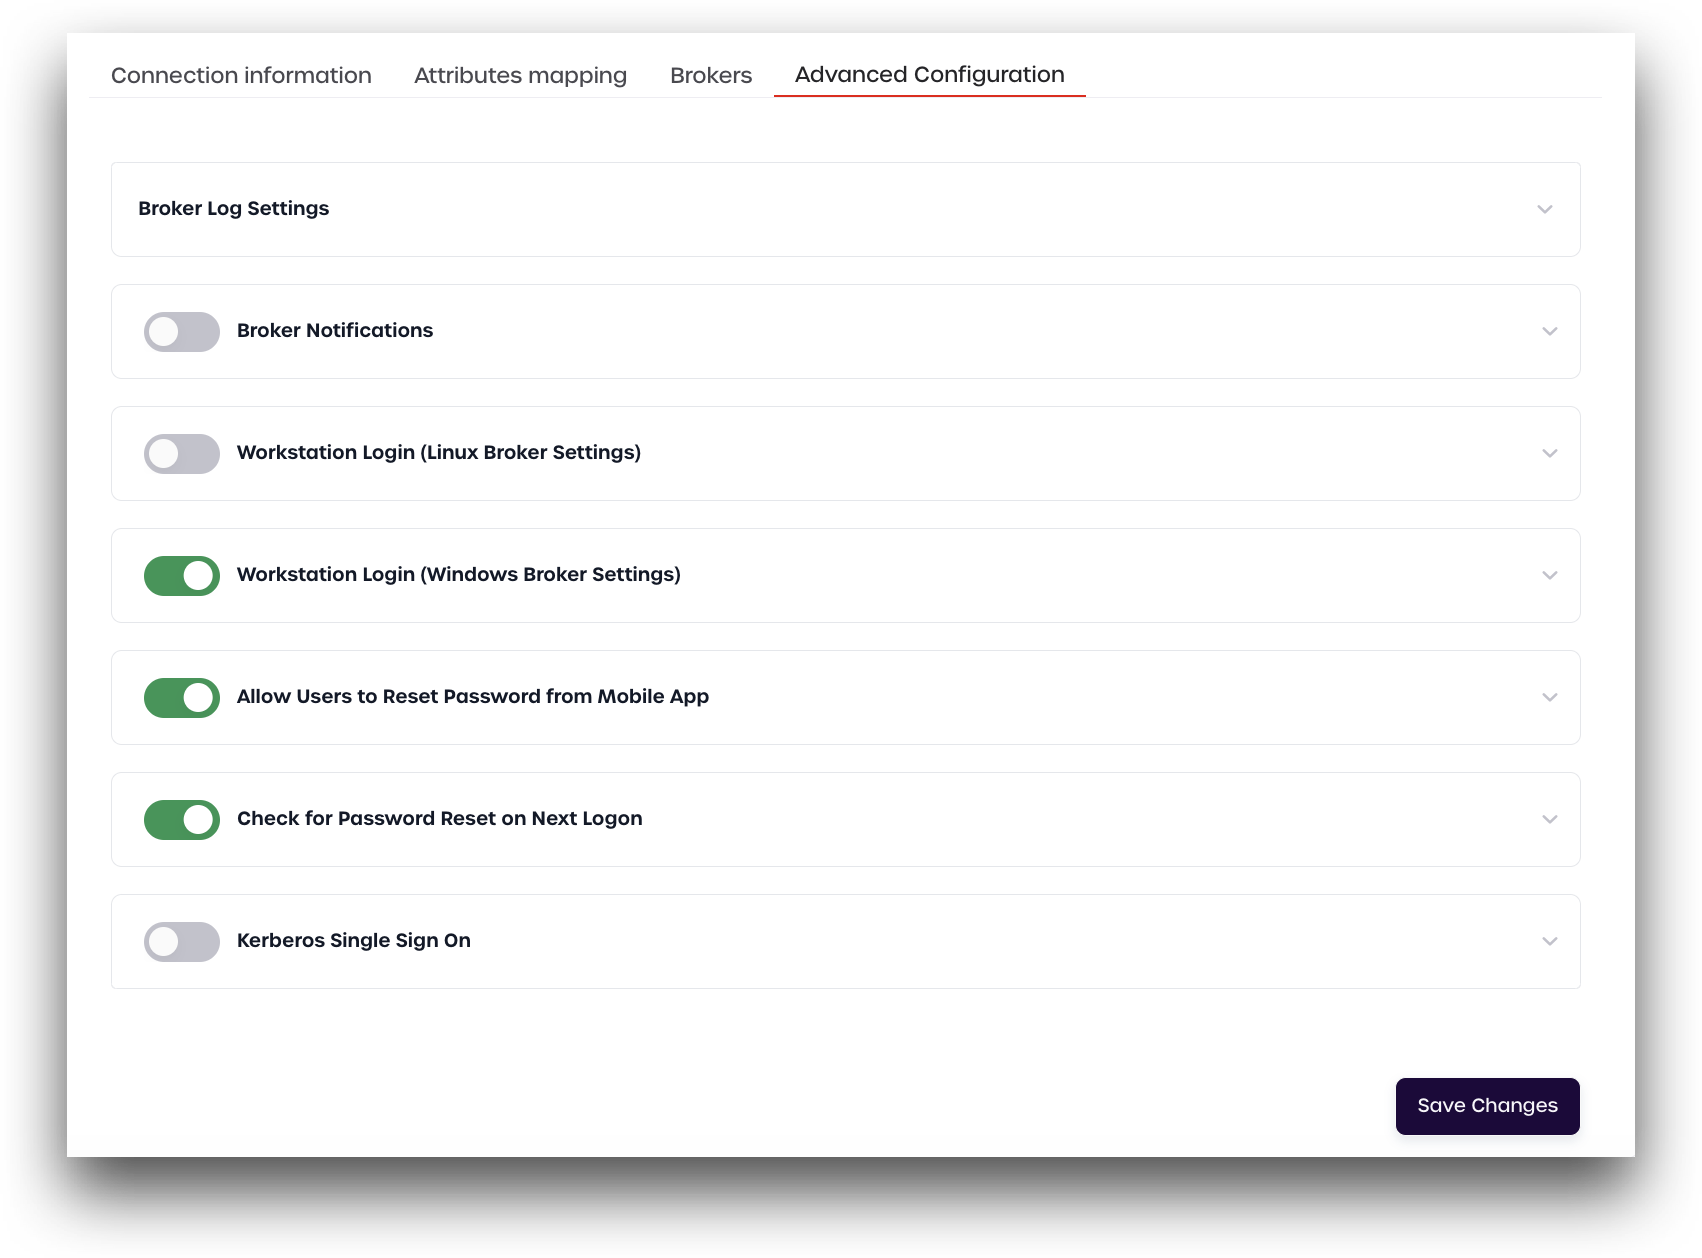
Each advanced configuration option is explored in detail below:
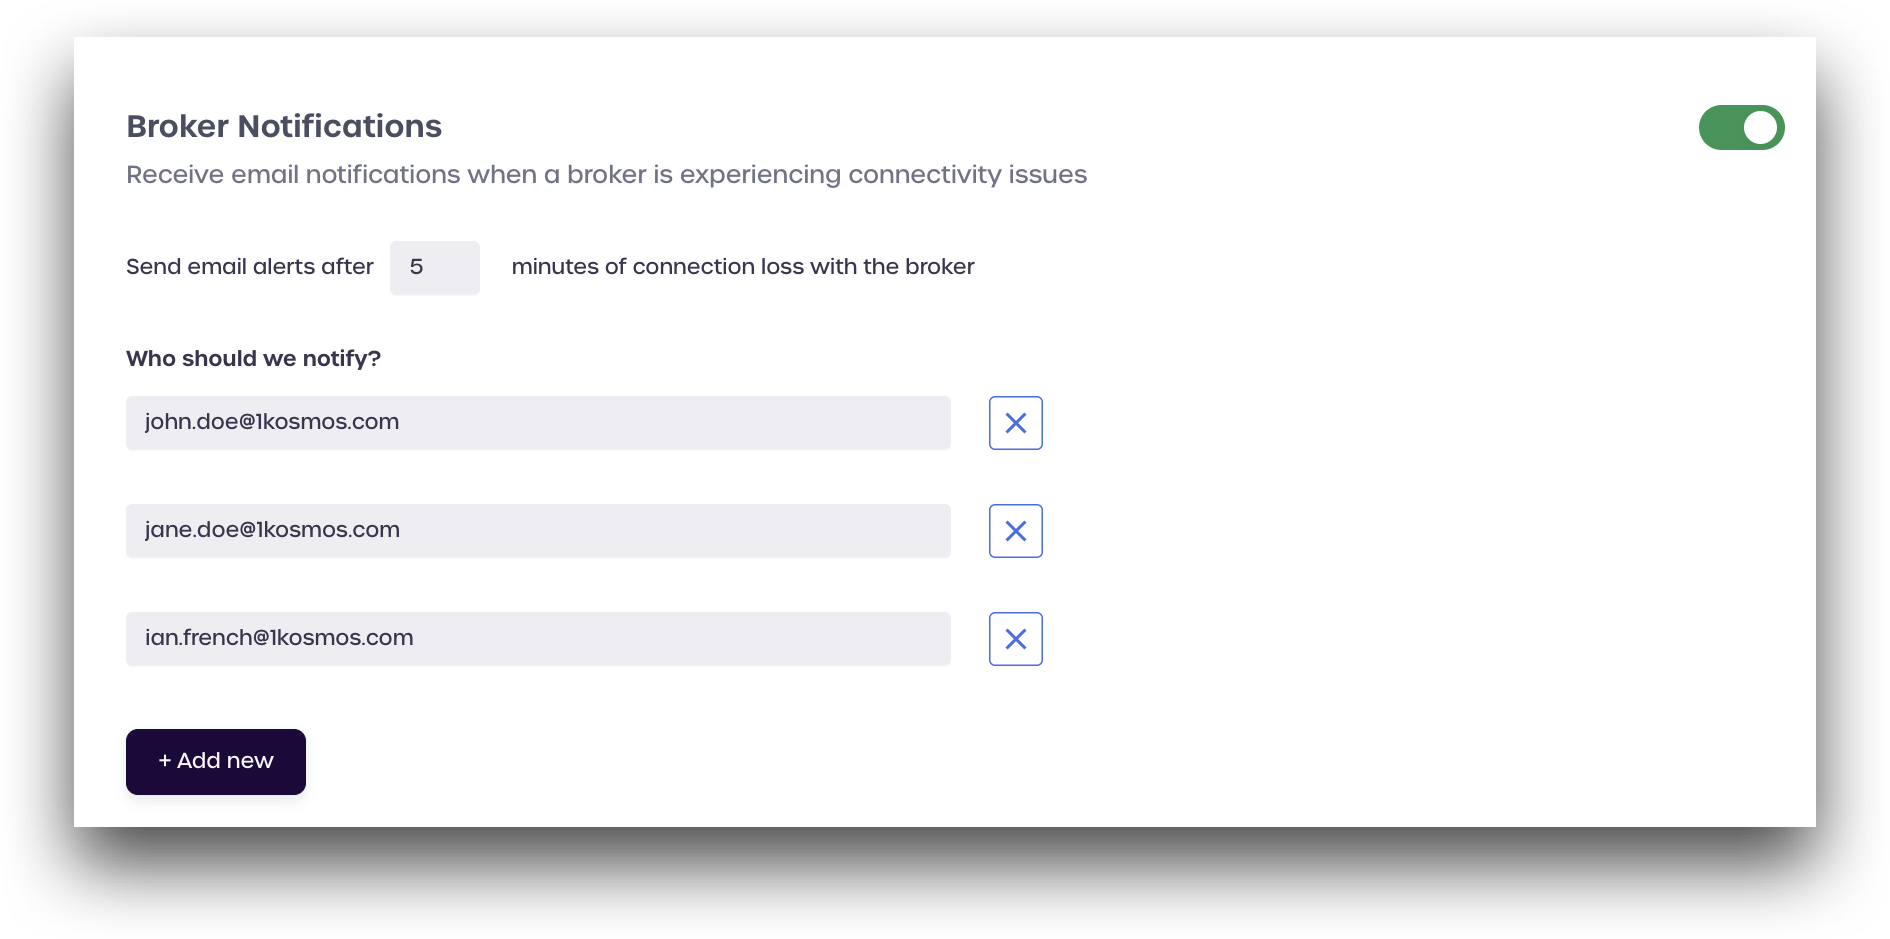
Broker Notifications
When enabled, the Broker Notifications setting will send emails to the listed addresses if the broker is experiencing connectivity issues.
Toggle the Broker Notifications switch to activate this feature. Administrators can set how many minutes should elapse before sending out email alerts.
Under Who should we notify?, enter the email address of the person who should receive the alert.
To add additional emails, click + Add new.
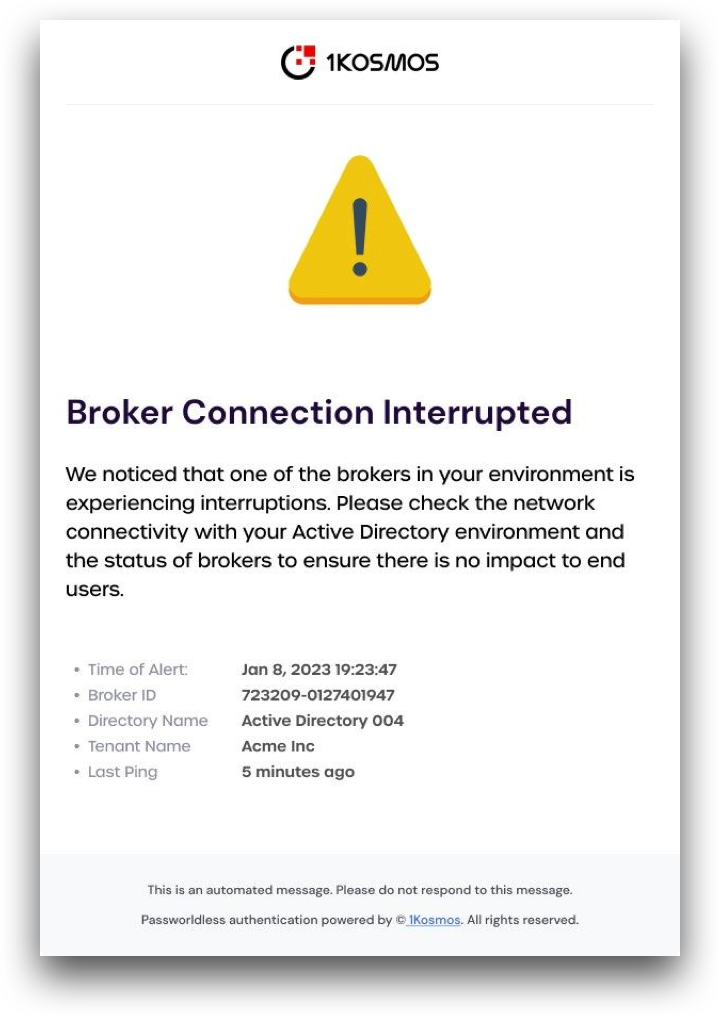
An example of the email can be seen below:
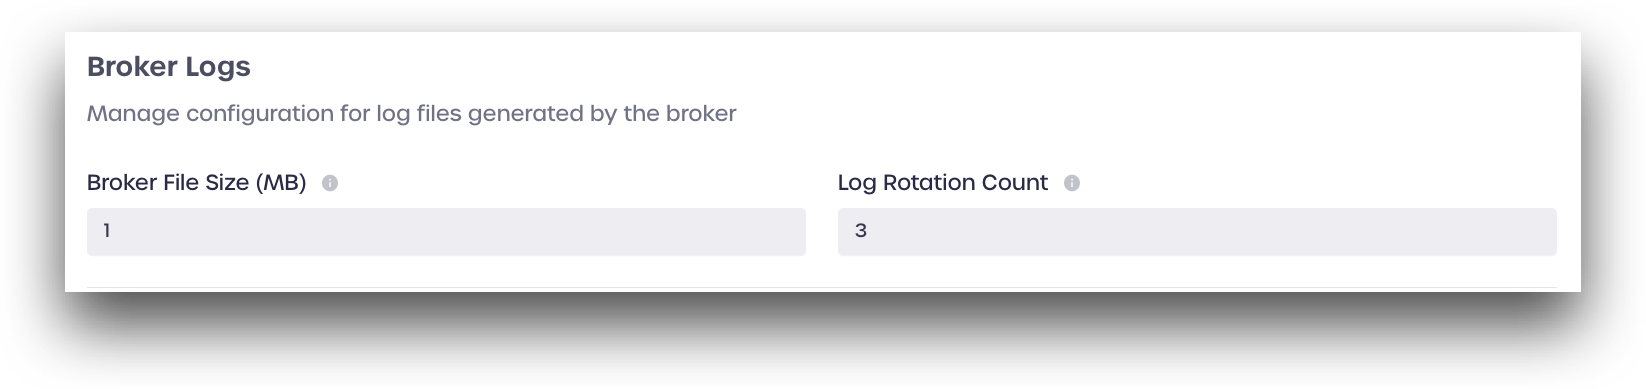
Broker Logs
Users can set a maximum file size for the broker log files in this section and a maximum number of allowable log files.
-
Broker File Size (MB): Enter a maximum file size in megabytes (whole numbers only) for your log files. A new log file will be created once the entered file size has been reached.
-
Log Rotation Count: Enter the maximum number of log files that should be retained in the
logsdirectory. Once the maximum number of log files has been reached and a new log file has been created, the oldest log file in the directory will be deleted
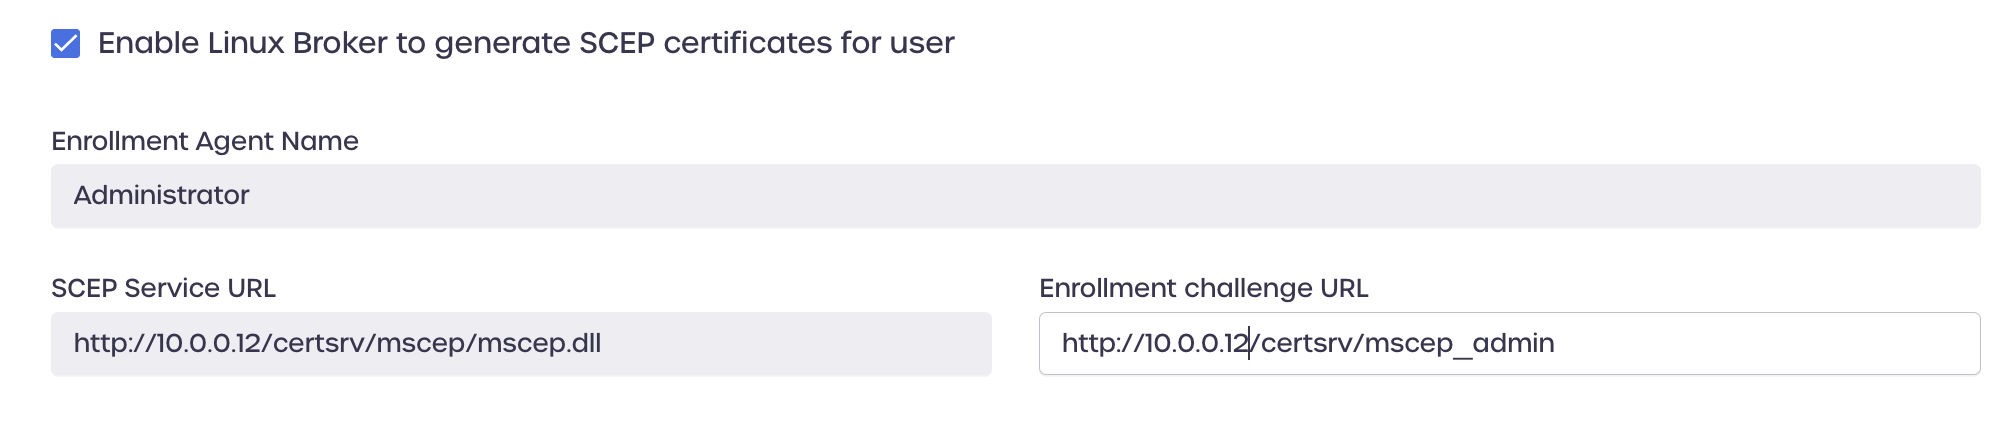
Enable Linux Broker to Generate SCEP Certificates for User
Check the Enable Linux Broker to generate SCEP certificates for user box to enable Passwordless Login for Workstations on your tenant using SCEP certificates. Once configured and enabled, this option allows users to use the BlockID mobile app to log in to their workstations.
Please note that additional setup is required before this option can be used. For more information on using this feature, visit the following links.
- For Windows workstations, see Passwordless for Windows Workstations
- For Mac workstations, see Passwordless for Mac Workstations
Once the Enable Linux Broker to generate SCEP certificates for user box has been checked, enter the following configuration details:
- Enrollment Agent name: Enter a name to use for the enrollment
- SCEP Service URL: your SCEP service URL, usually
https://<IP-of-NDES-server>/CertSrv/mscep/mscep.dll - Enrollment Challenge URL: Your challenge URL, usually
https://<IP-of-NDES-server>/CertSrv/mscep_admin
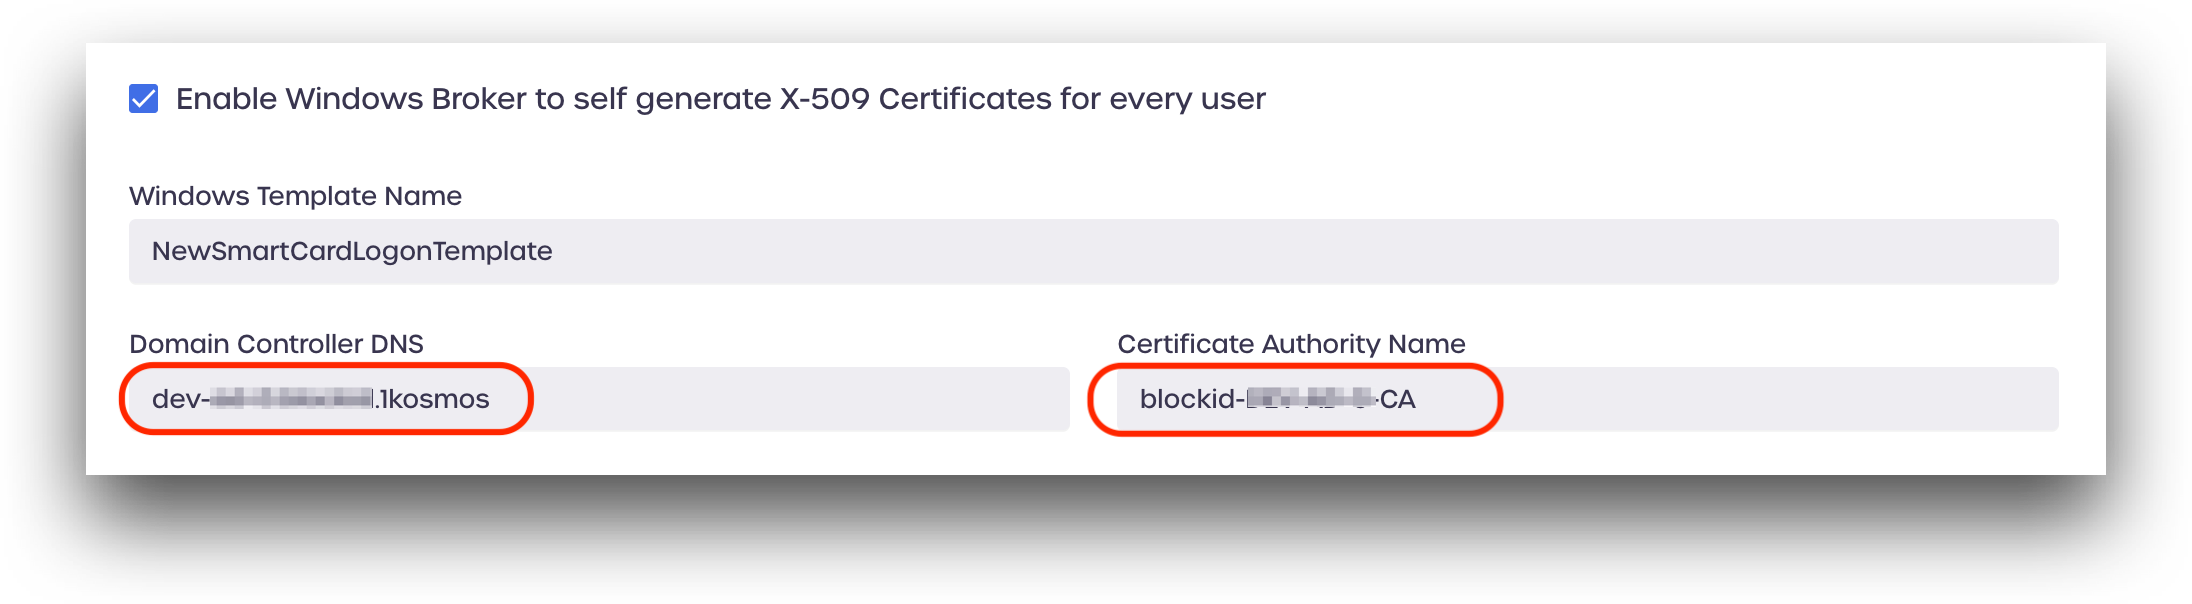
Enable Windows Broker to Self-Generate X-509 Certificates for Every User
Check the Enable Windows Broker to self-generate X-509 Certificates for every user box to enable Passwordless Login for Workstations on your tenant using X-509 certificates self-generated by the Windows Broker. Once configured and enabled, this option allows users to use the BlockID mobile app to log in to their workstations without relying on NDES.
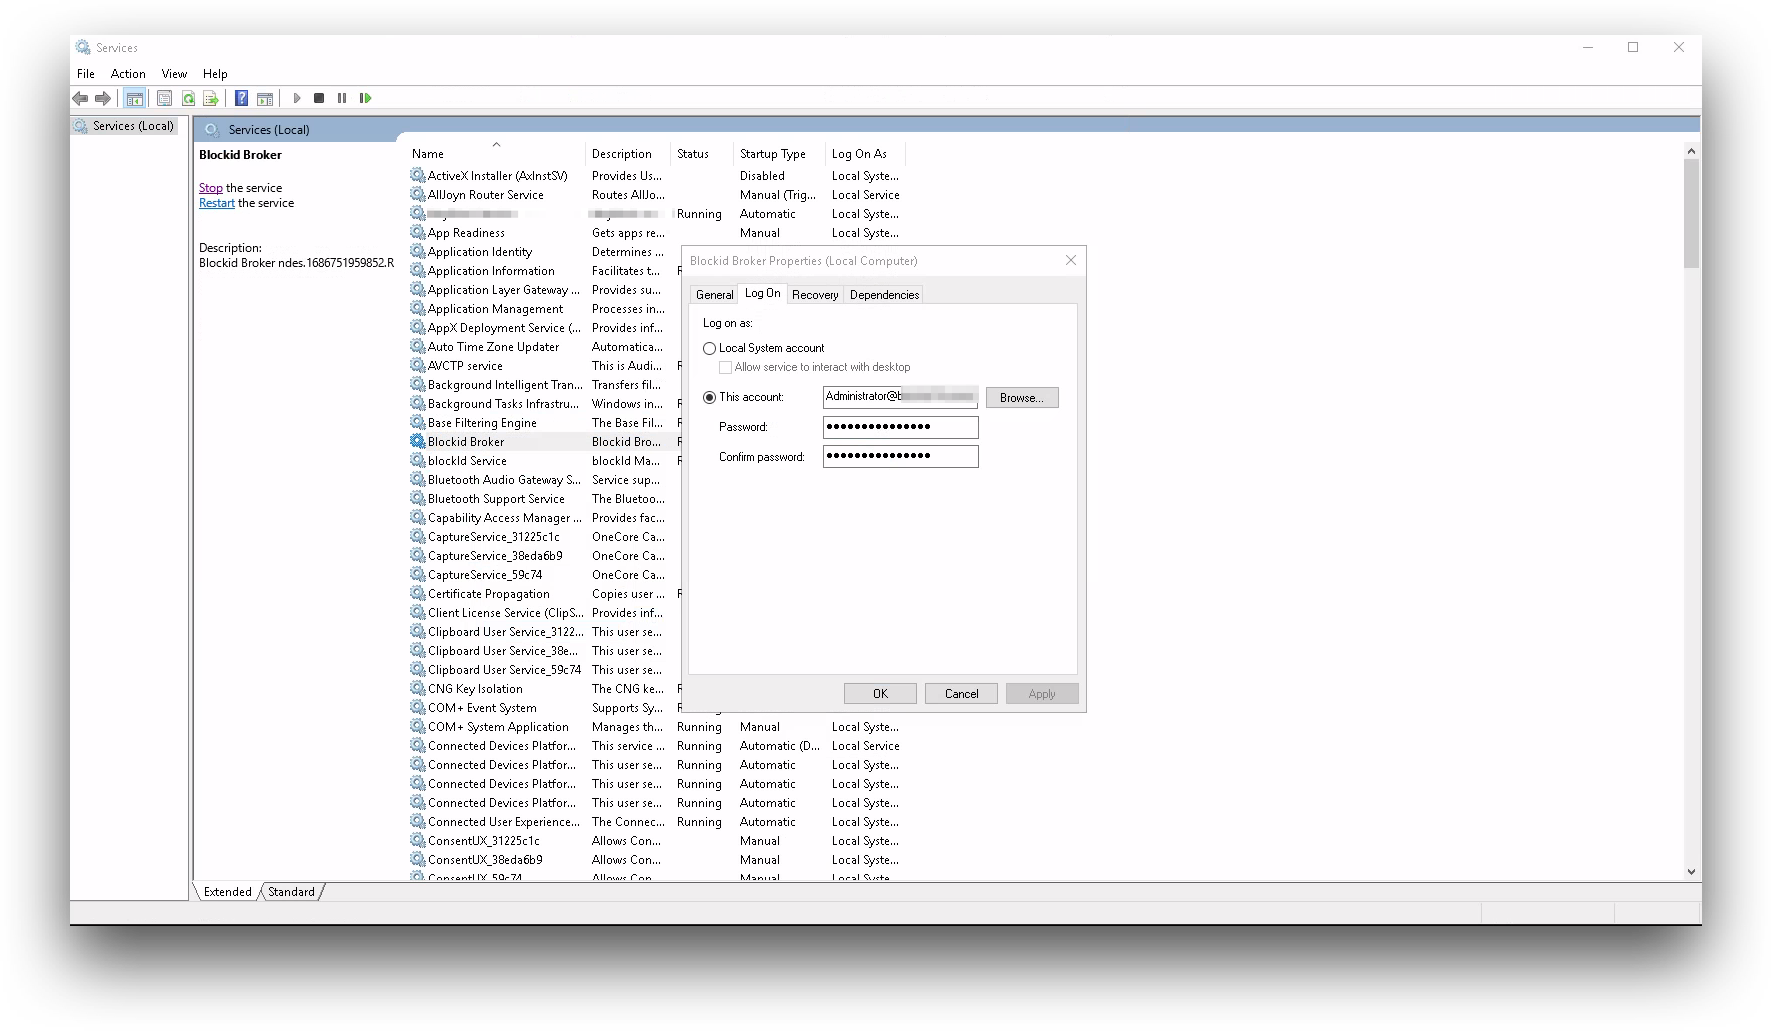
Some additional setup is required on the Windows server before this option can be enabled. The AD Broker service entry needs special permissions to execute the Windows certutil command. To configure, please do the following:
- Stop the AD Broker service
- Open Administration Tools → Services → BlockID Broker→ Properties
- Select Logon On tab
- Click This Account and enter user in
<user>@<domain>format. Note: You must enter your user in this format - Enter Password. Confirm Password then apply
- Restart the AD Broker service.
Once the Enable Windows Broker to self-generate X-509 Certificates for every user box has been checked, enter the following configuration details:
Windows Template Name
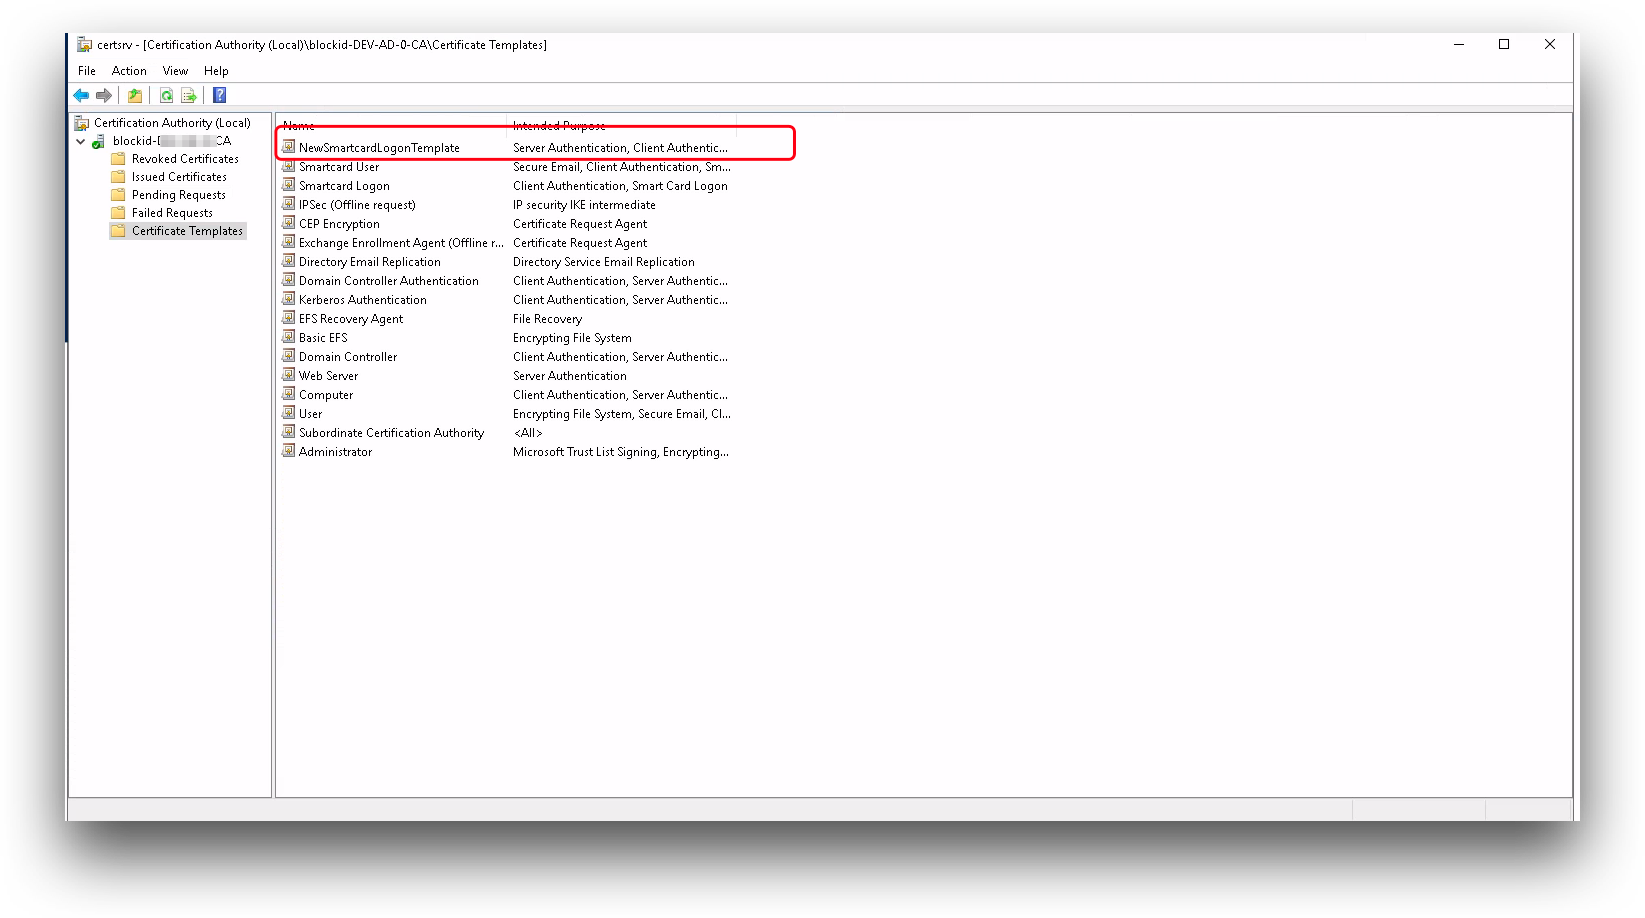
System Administrators with Domain Controller access can find their Template Name by running the following command:
certsrv
Select your Domain Controller from the Certification Authority group and select Certificate Templates.
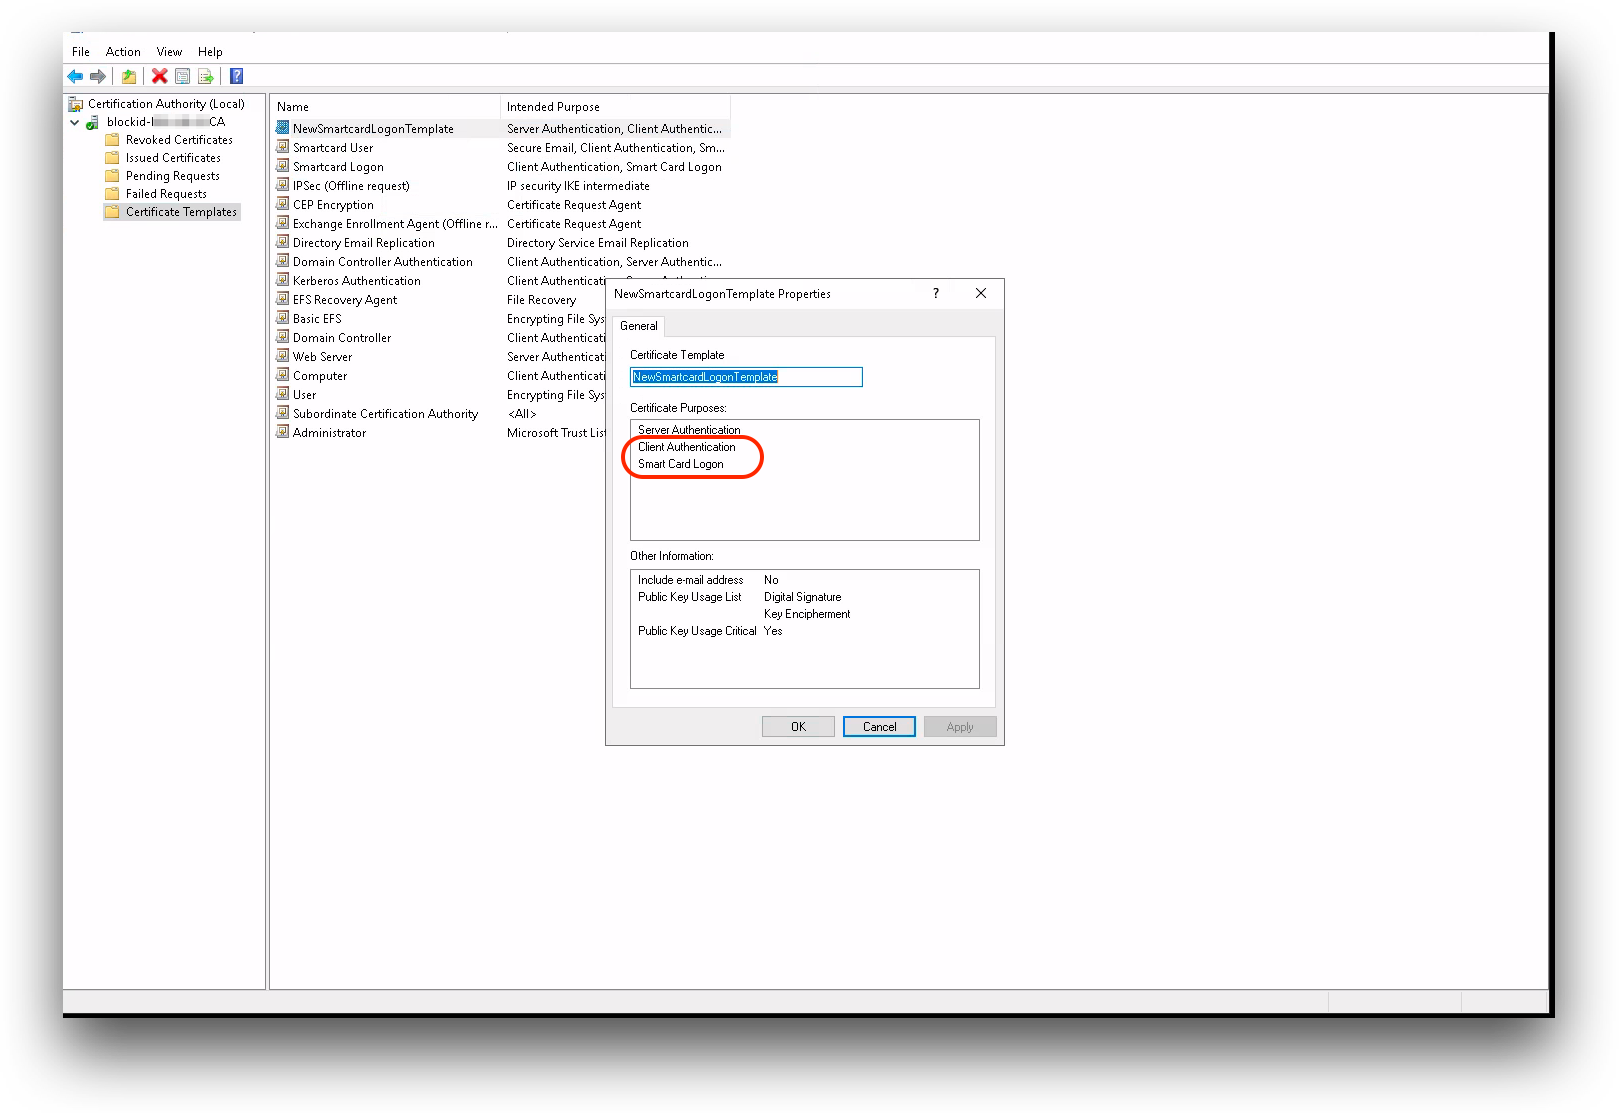
Your template needs to have Client Authentication and Smart Card Logon listed under Certificate Purposes, as shown below:
Enter this same Template Name in AdminX, under Windows Template Name:
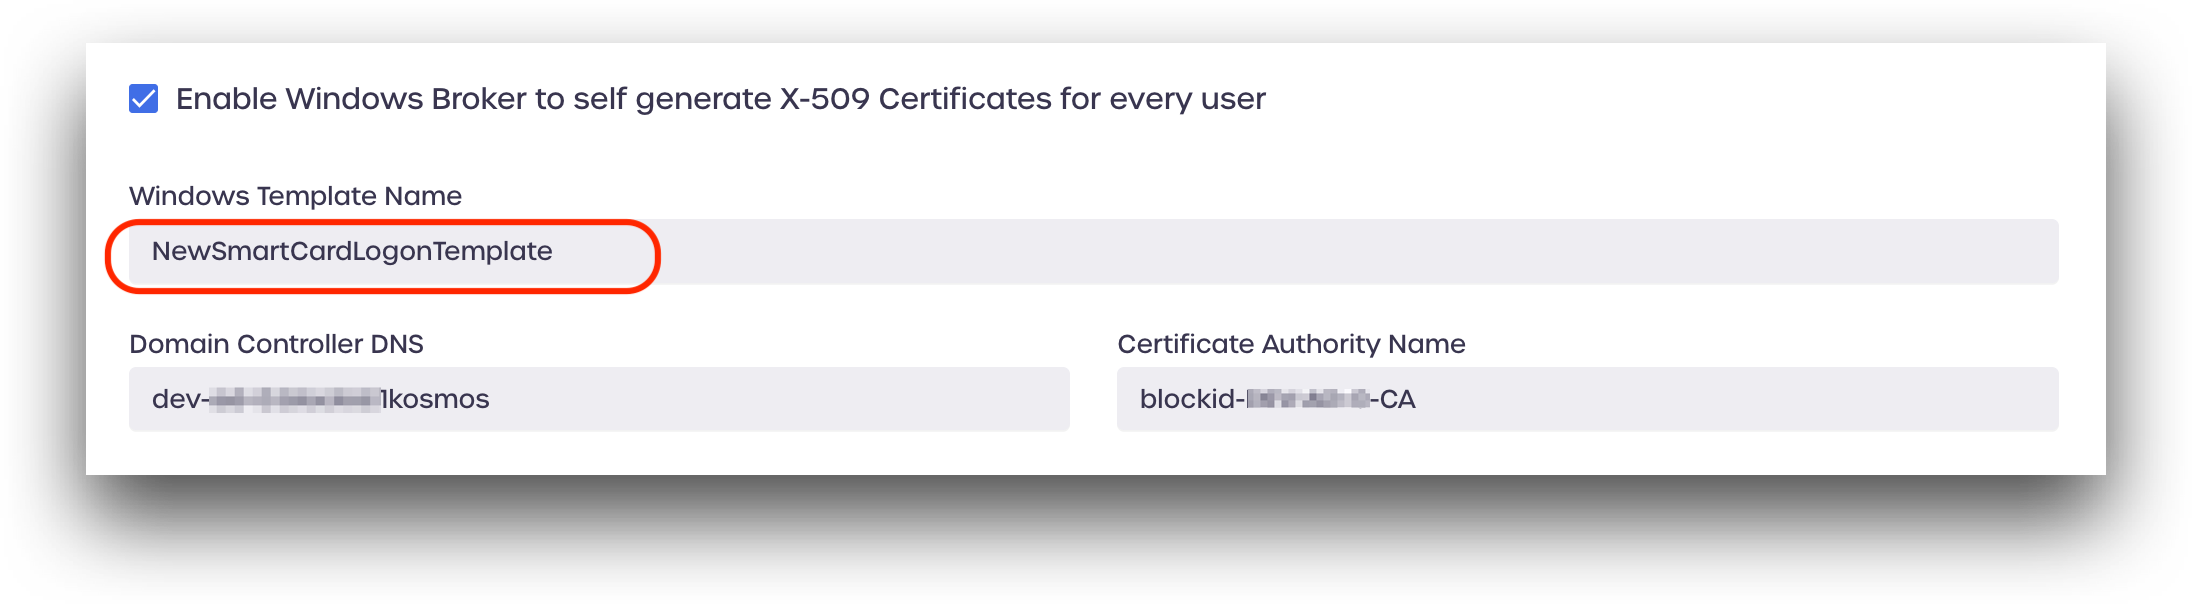
Domain Controller DNS and Certificate Authority Name
Enter your Active Directory Domain Controller domain and Certificate Authority name. This information can be found by running the following powershell command from your Windows Server host:
certutil
This command will display the entries for the CAs configured for that system. Note: There might be multiple entries - select the CA entry that is to be used to generate x509 certificates for your Windows workstations.
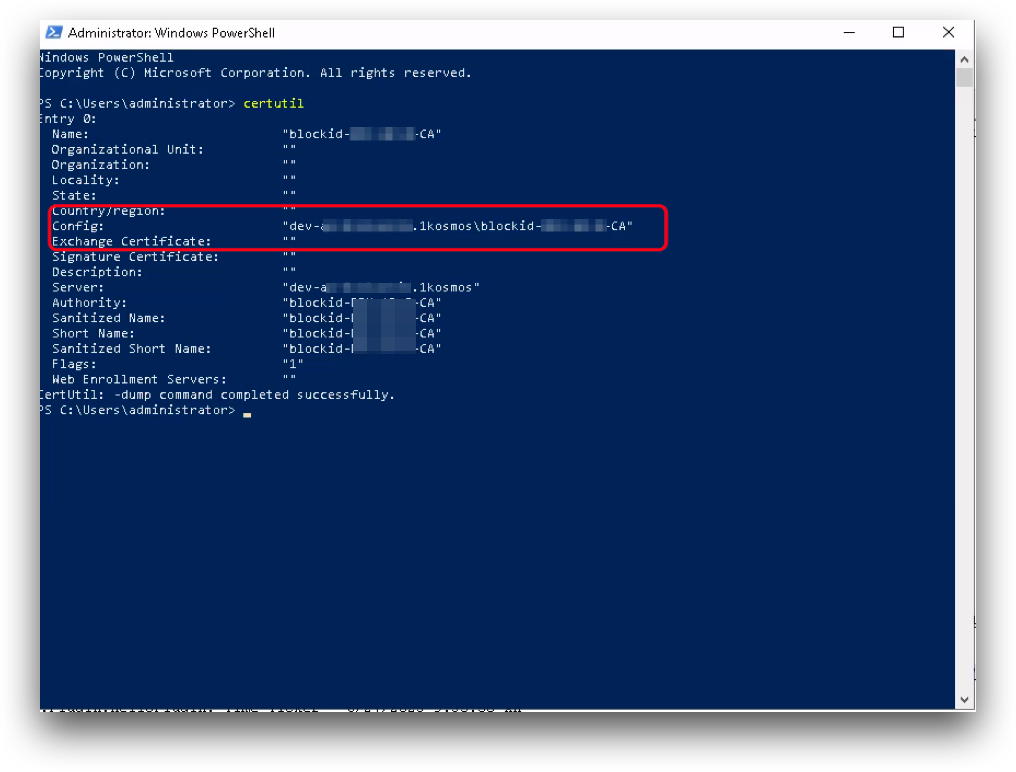
Enter the highlighted information in AdminX, under Domain Controller DNS and Certificate Authority Name:
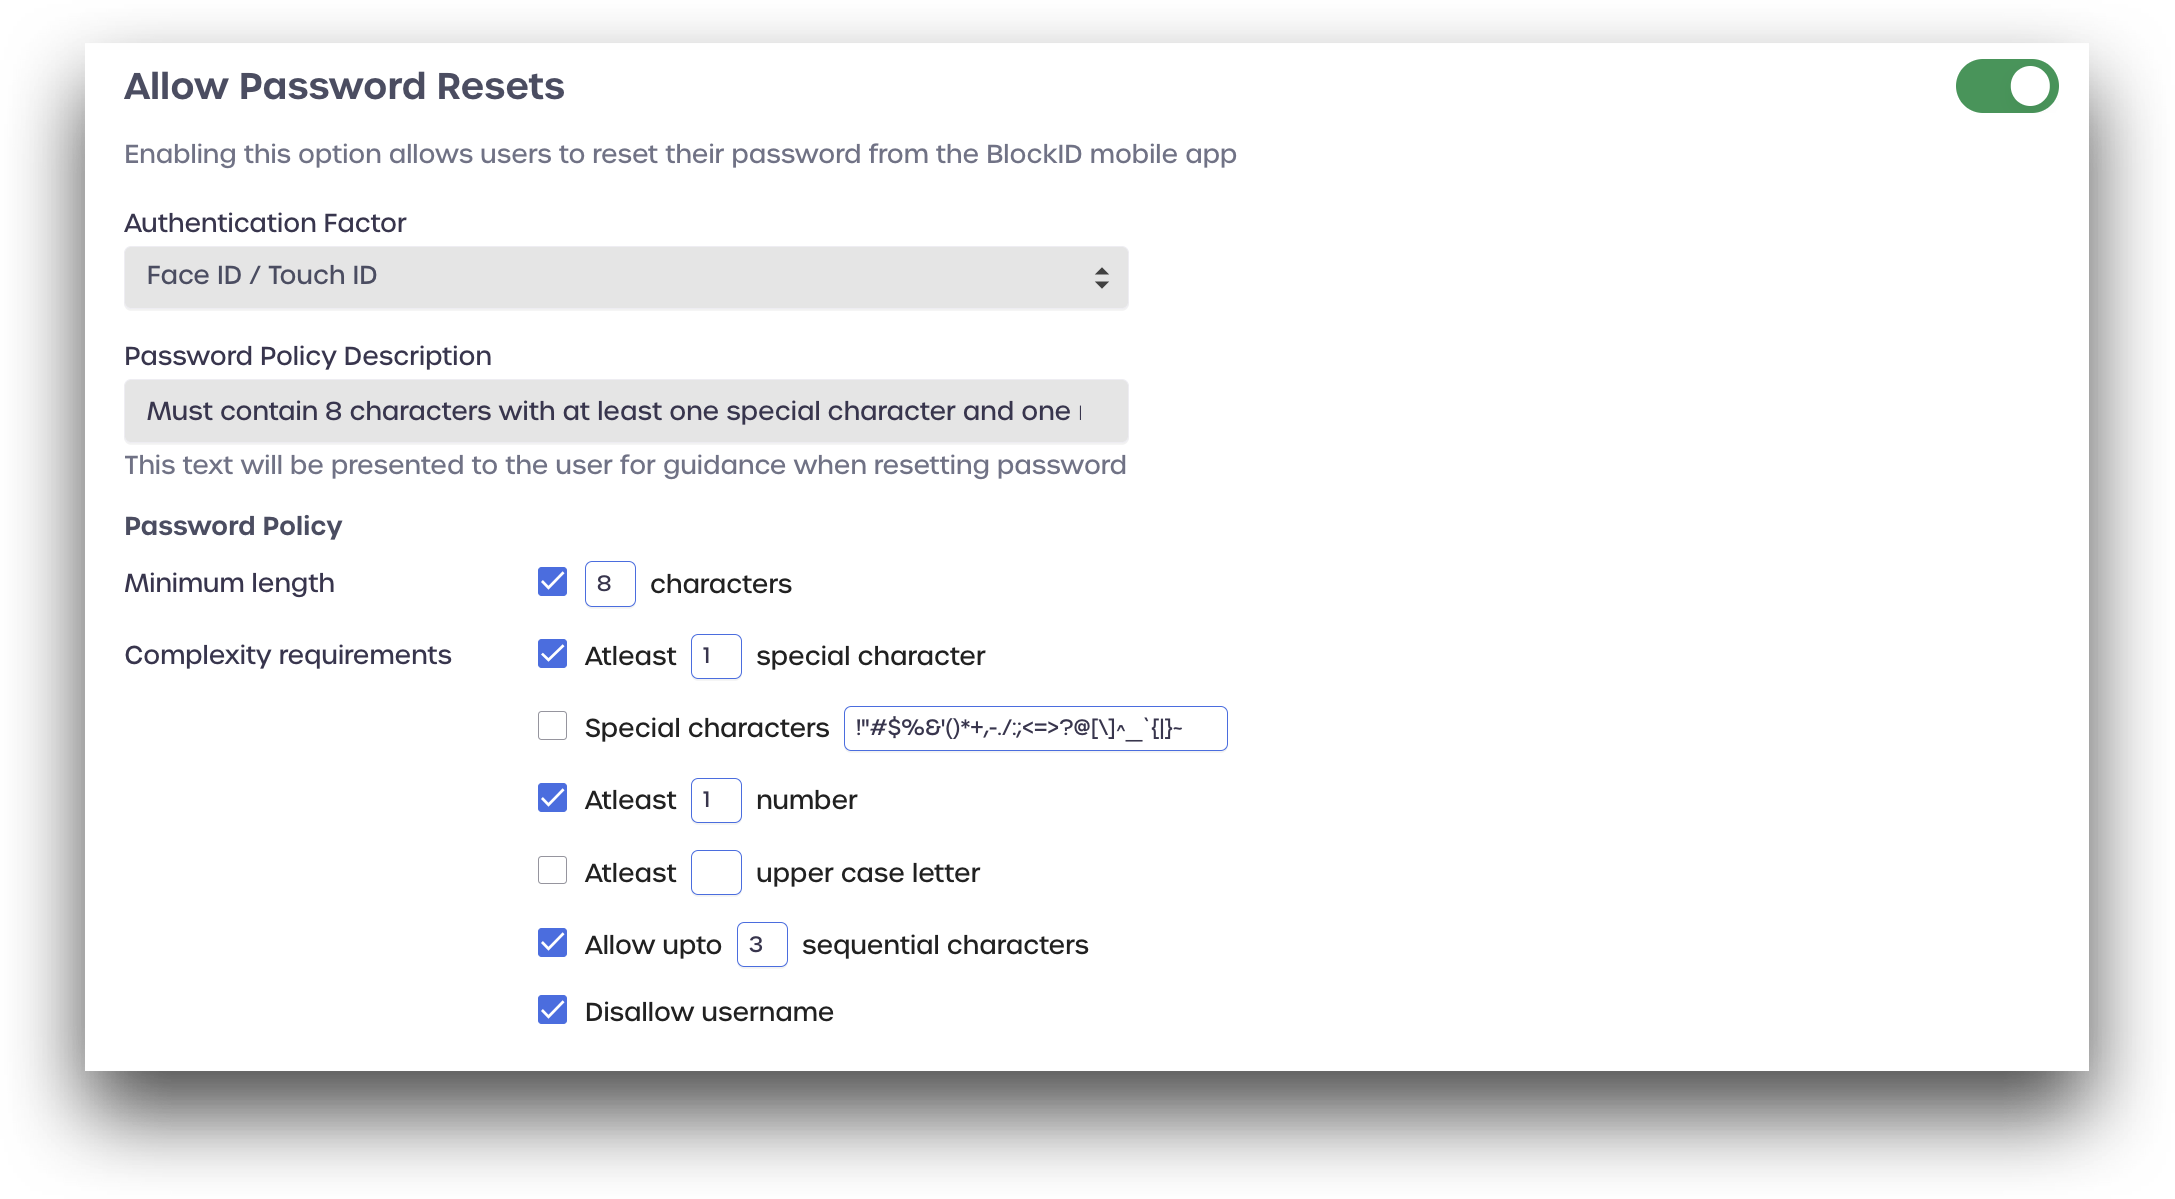
Allow Password Resets from BlockID Mobile App
Toggle the Allow Password Resets from BlockID Mobile App switch to allow users to reset their password from the BlockID mobile app. In this section, you can set new password requirements, such as password length and the number of special characters.
-
Authentication Factor: Select a passwordless authentication factor to use for authenticating your user identities:
- Face ID/Touch ID: use biometrics to authenticate the user
- Live ID: Use live gestures to authenticate the user
-
Password Policy Description: Enter text to be presented to the user for guidance when resetting their password
-
Password Policy: Set the new password requirements
- Minimum length: Set a new password minimum length
- Complexity requirements: Mark each requirement you wish to enable and enter details where indicated
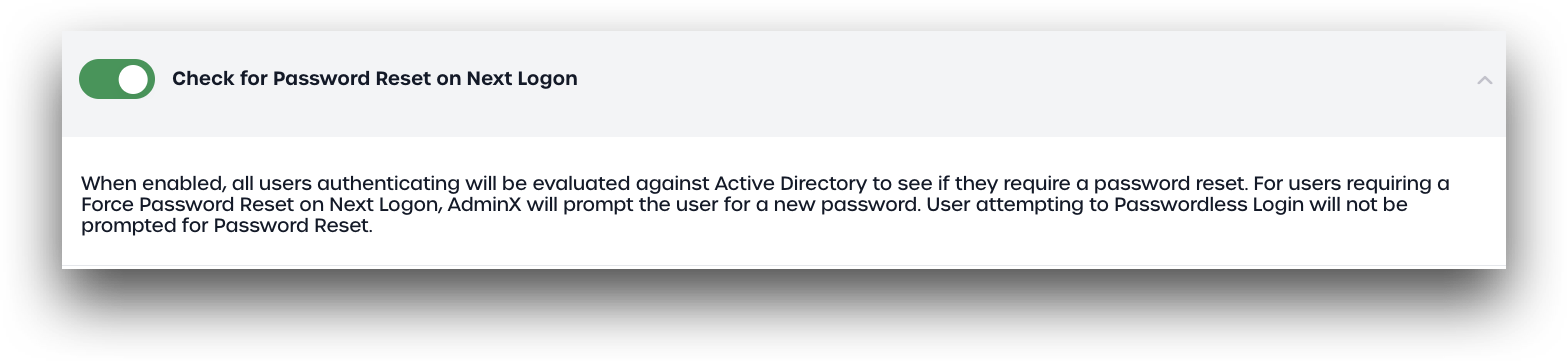
Check for Password Reset on Next Logon
When enabled, all users authenticating will be evaluated against Active Directory to see if they require a password reset. For users requiring a forced password reset on their next logon (AD Error Code: 773), AdminX will prompt the user to set a new password. Users authenticating using passwordless login methods will not be prompted for a password reset.
When toggling the switch, administrators should ensure that they have marked the user must change password at next logon box in Active Directory, as shown below:

When the user next logs in to AdminX using an authentication method that uses a password, they will automatically be prompted to change their password.
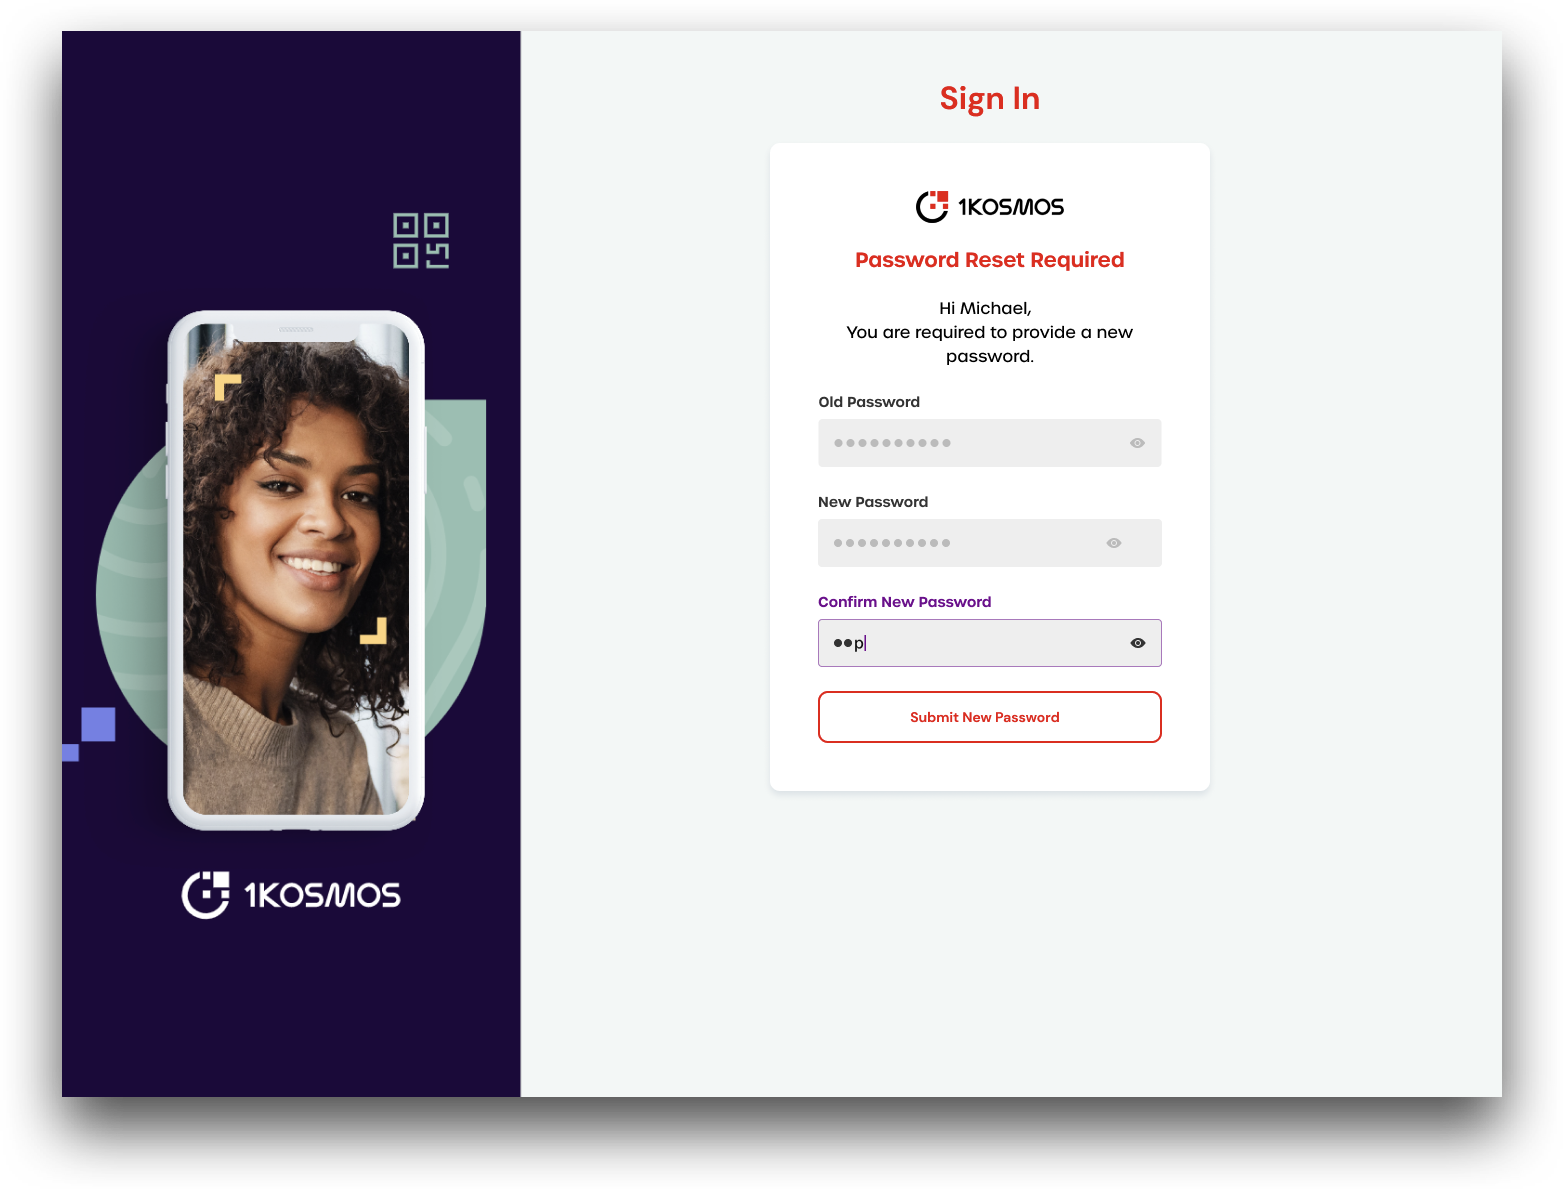
Users will next be prompted to enter a six-digit one-time passcode (OTP). After successful authentication of the OTP, users will be logged in with their new password set.
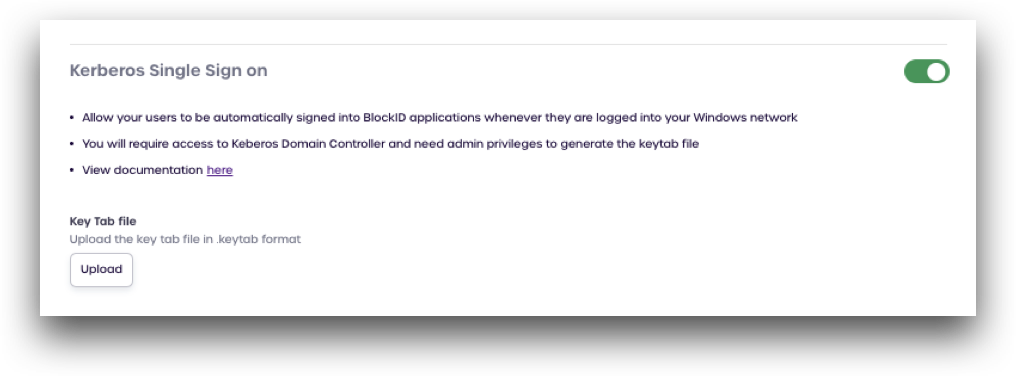
Kerberos Single Sign on
Toggle the Kerberos Single Sign-on switch to enable Kerberos Desktop SSO. This allows your users to automatically sign in to BlockID applications when logged into their Active Directory domain.
Once the Kerberos settings have been enabled, users need to add their Kerberos keytab file by clicking Upload and selecting their keytab file.
Please see the Kerberos SSO documentation for more information on configuring your Active Directory domain for Kerberos.
Configuring the Windows Broker
Copy the broker you downloaded during Step 1 above to your Windows server running the broker. Unzip the broker.
Installing the Broker Service on Windows
The broker service must be kept running indefinitely for the connection between Active Directory and AdminX to remain valid
Open a powershell terminal and change to the directory where you unzipped the broker. Start the broker by running the following command:
.\setupBroker.ps1
On some machines, the powershell script fails to execute due to a PSSecurityException error. To fix this, enter the following command in powershell:
Set-ExecutionPolicy -Scope Process -ExecutionPolicy Bypass setupBroker.ps1
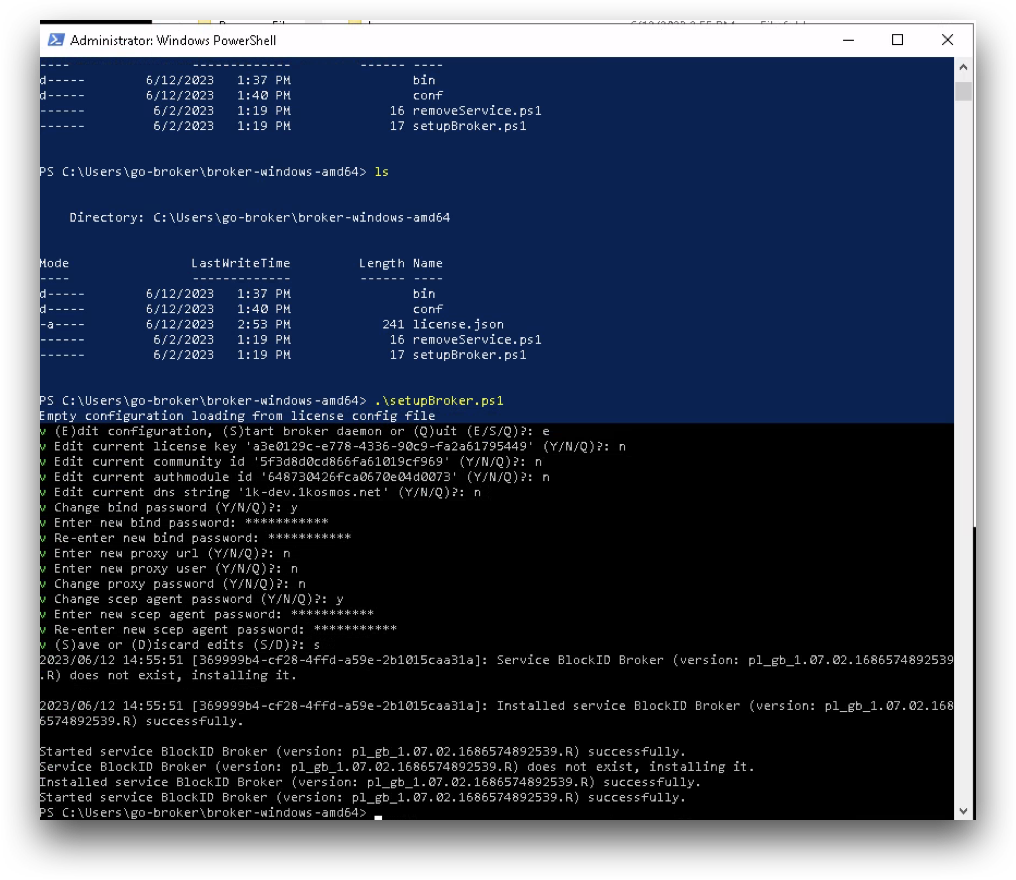
Follow the on-screen instructions to configure and start the broker service.
Enter E to edit the existing configuration and setup. An example is shown below:
Edit current license key 'd2a36a85-e81b-4956-b7c0-****** ' (Y/N/Q)?: n
Edit current community id '5f3d8d0cd866fa61****' (Y/N/Q)?: n
Edit current authmodule id '621e17cfd24493001****' (Y/N/Q)?: n
Edit current dns string 'blockid.1kosmos.net' (Y/N/Q)?: n
Change bind password (Y/N/Q)?: y
Enter new bind password: ********
Re-enter new bind password: ********
Enter new proxy url (Y/N/Q)?: n
Enter new proxy user (Y/N/Q)?: n
Change proxy password (Y/N/Q)?: n
Change scep agent password (Y/N/Q)?: y
Enter new scep agent password: ********
Re-enter new scep agent password: ********
(S)ave or (D)iscard edits (S/D)?: S
Broker Logs
After installing the broker service, a new logs folder will be created. The logs folder can be found in the same directory from which the broker service started.
Logs will be viewable after starting the broker service.
If you ever need to troubleshoot a broker connection, checking the logs folder will provide the most information
Removing the Broker Service on Windows
The broker service can be removed by executing the broker removal script included in the archive. To remove the broker service, navigate to the directory where you unzipped the archive and run the following command:
.\removeService.ps1
The broker service must be stopped before it can be removed
If the powershell script fails to execute due to a PSSecurityException error, enter the following command in powershell:
Set-ExecutionPolicy -Scope Process -ExecutionPolicy Bypass removeService.ps1
Configuring the Linux Broker
Copy the broker you downloaded during Step 1 above to your Linux server running the broker. Unzip the broker.

Starting the Broker Service on Linux
The broker service must be kept running indefinitely for the connection between Active Directory and AdminX to remain valid
Open your command terminal and change to the directory where you unzipped the broker. Start the broker by executing the following command:
./startBroker.bsh
Follow the on-screen instructions to configure and start the broker service.
Enter E to edit the existing configuration and set up. An example is shown below:
Edit current license key 'd2a36a85-e81b-4956-b7c0-****** ' (Y/N/Q)?: n
Edit current community id '5f3d8d0cd866fa61****' (Y/N/Q)?: n
Edit current authmodule id '621e17cfd24493001****' (Y/N/Q)?: n
Edit current dns string 'blockid.1kosmos.net' (Y/N/Q)?: n
Change bind password (Y/N/Q)?: y
Enter new bind password: ********
Re-enter new bind password: ********
Enter new proxy url (Y/N/Q)?: n
Enter new proxy user (Y/N/Q)?: n
Change proxy password (Y/N/Q)?: n
Change scep agent password (Y/N/Q)?: y
Enter new scep agent password: ********
Re-enter new scep agent password: ********
(S)ave or (D)iscard edits (S/D)?: S
After saving your changes, the broker service will start.
Broker Logs
After installing the broker service, a new logs folder will be created. The logs folder can be found in the same directory from which the broker service started.
Logs will be viewable after starting the broker service.
If you ever need to troubleshoot a broker connection, checking the logs folder will provide the most information
Stopping the Broker Service on Linux
To stop the broker, execute the following command:
./stopBroker.bsh