Verification Journey in AdminX
Overview
The Verification Journey feature allows you to create a verification session for users, enabling them to verify their documents. This topic aims to help you efficiently create and manage verification sessions in AdminX.
Creating a Verification Session
Community/Helpdesk administrators can use the AdminX interface to create a verification session. To create a verification session, follow these steps:
-
Log in to your tenant as a community/helpdesk administrator.
-
Navigate to Verification > Journeys.
-
In the Verification Journeys page that is displayed, click Create Session in line with a journey against which you want to create a session.
-
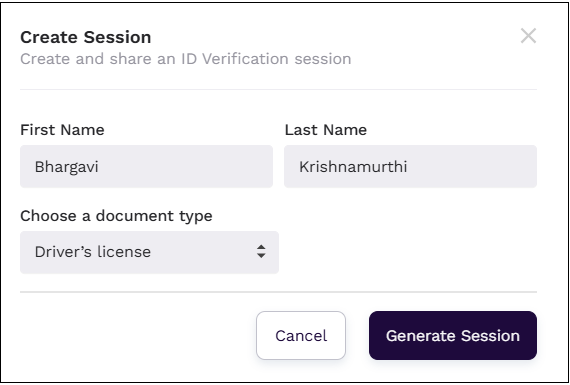
In the Create Session window that is displayed, enter the users details for whom the session has to created. The details include: first name, last name, and the document for which the session has to be created. You can create a session for the following types of documents:
- Driver's license
- Passport
- Other ID Cards
-
Click Generate Session.
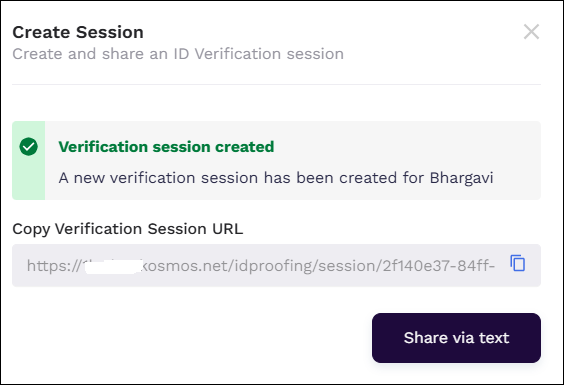
Sharing the Verification Session
After generating the session, the administrators have the following options to share the session URL with the end user:
- Copy the session URL and share it with the user directly.
- Click the Share via text button to share the session link through SMS.
To share the session URL through SMS, follow these steps:
-
Click Share via text.
-
In the Share via text window that is displayed, enter the user's phone number.
-
To configure the SMS template, click the Manage template for SMS link. For more information on templates, see Messaging Templates.
To configure an SMS provider, click the Configure an SMS Provider link. For more information, see Gateway Settings.
-
Click Send. The session URL is generated.

-
Click Share via text to send the session URL as an SMS.
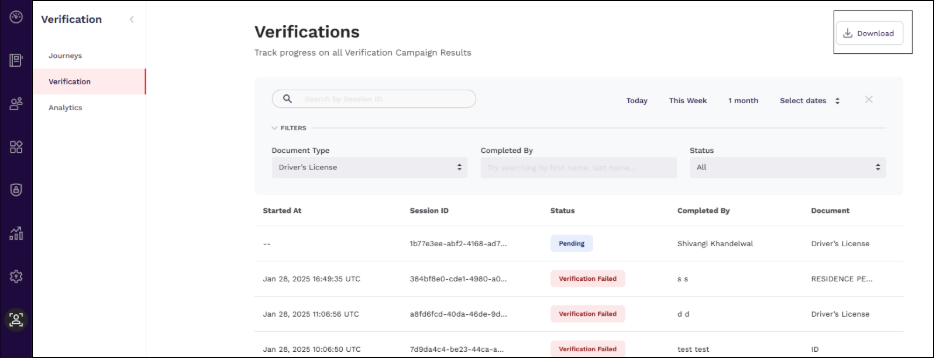
Managing Verification Sessions
Once the session is created, it will appear on the Verifications page. This page shows all sessions created by administrators, along with the status of each verification session. Additionally, you can filter the sessions by journey name, UID, document type, and other criteria.
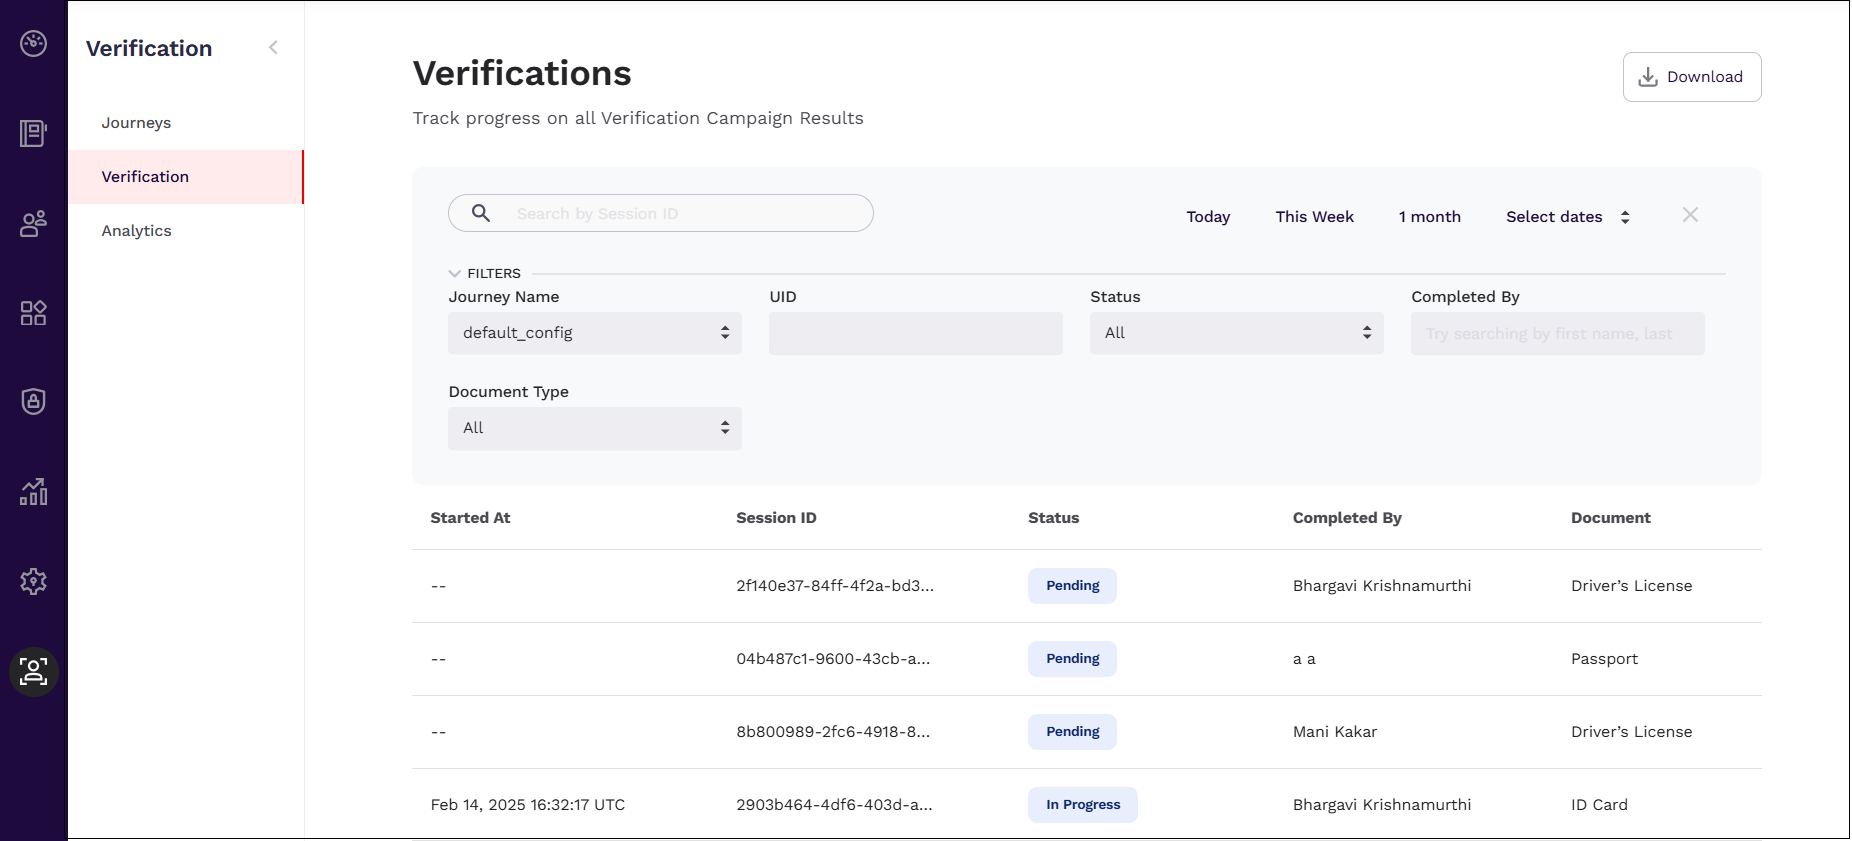
The following table outlines the filters of the Verifications page.
| Filter | Description |
|---|---|
| Journey Name | Select the journey name and display the session details based on it. |
| UID | Enter the UID and display the sesssion details based on it. |
| Status | Filter the session based on the status. The following values are available to select: - All - Select this to display all the sessions irrespective of the status. - Verification Pass: Select this to display the session that has passed the verification. - Verification Failed: User has completed the verification, but the document verification has failed. - Verification Not Performed: This status is displayed when the verification process has been partially completed. - In-Progress: This status is displayed when the user clicks the consent check box and hit “Let’s get started”. - Pending: This status is displayed when the user has not started their verification journey even though the session has been created. - Declined: User has clicked the Decline button on the Welcome screen. - Expired: This status is displayed when the user has never initiated the session. - Abandoned: This status is displayed when the user has started the session but has left the session incomplete. Note: Two new timestamps have been added: expireSessionInMin (time to start) and abandonSessionInMin (time to complete after starting). These timestamps distinguish between Expired and Abandoned sessions. - Completed: This status is displayed when the user has submitted the document and has given the selfie (if session is configured for selfie). |
| Completed By | Enter the user that has completed the session. |
| Document Type | Filter the session based on the document type. The following values are available to select: - All - Driver's License - Passport |
Two new events, E_IDV_SESSION_EXPIRED and E_IDV_SESSION_ABANDONED, are triggered when the session is marked as Expired and Abandoned respectively. These events capture the following details:
- A history parameter that tracks the session activity trail, including details such as IPAddress, UserAgent, and screenName.
- The reason for session abandonment or expiration.
- Two key timestamps: expireSessionInMin (time taken for the session to transition from created to in-progress) and abandonSessionInMin (time taken for the user to complete the session after it started).
Verifying Identity
End users can use the generated session URL to begin identity verification. Ensure you have the appropriate identity document ready for scanning and submission. To verify your identity, follow these steps:
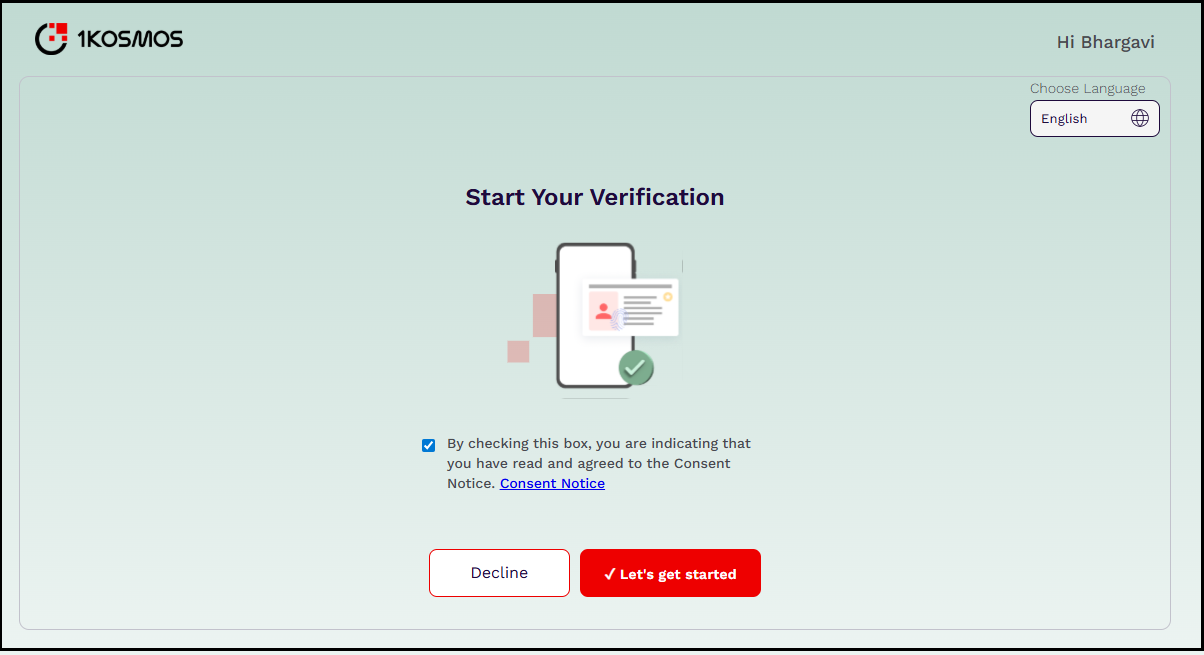
- Click the session URL you received. The Start your Verification page appears.
- Provide your consent by clicking the Consent check box and click Let's get started.
You can choose one of the following languages in which the instructions have to appear.
- English
- French
- Spanish
- Chinese
-
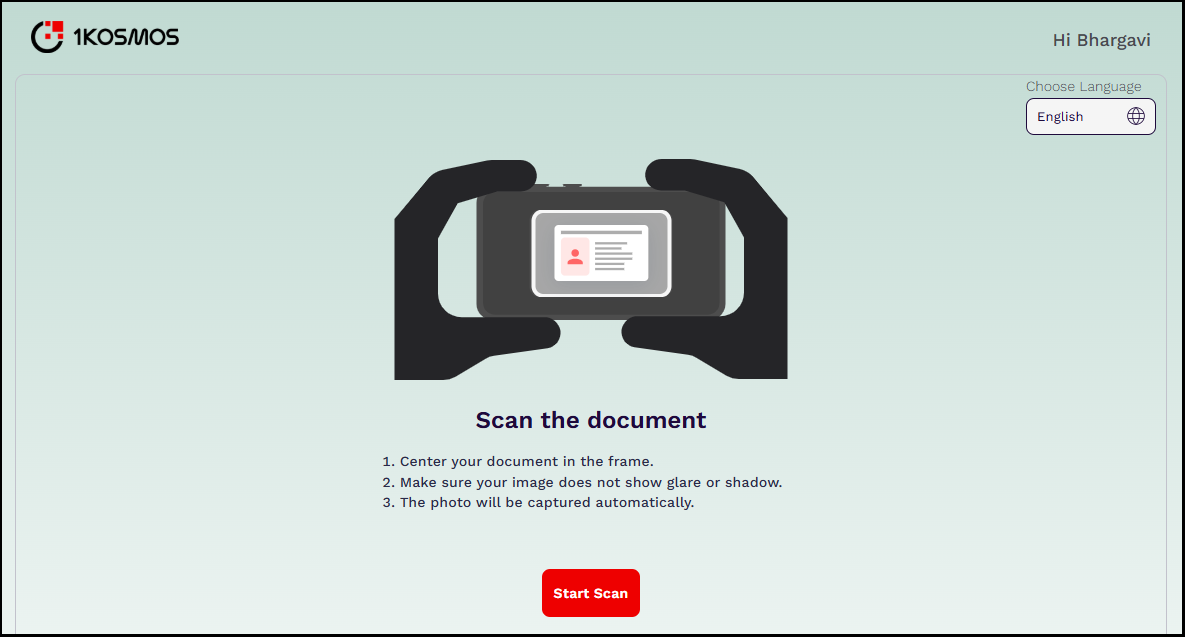
Click Start Scan. The camera opens up; Scan the front side of your identity document.
-
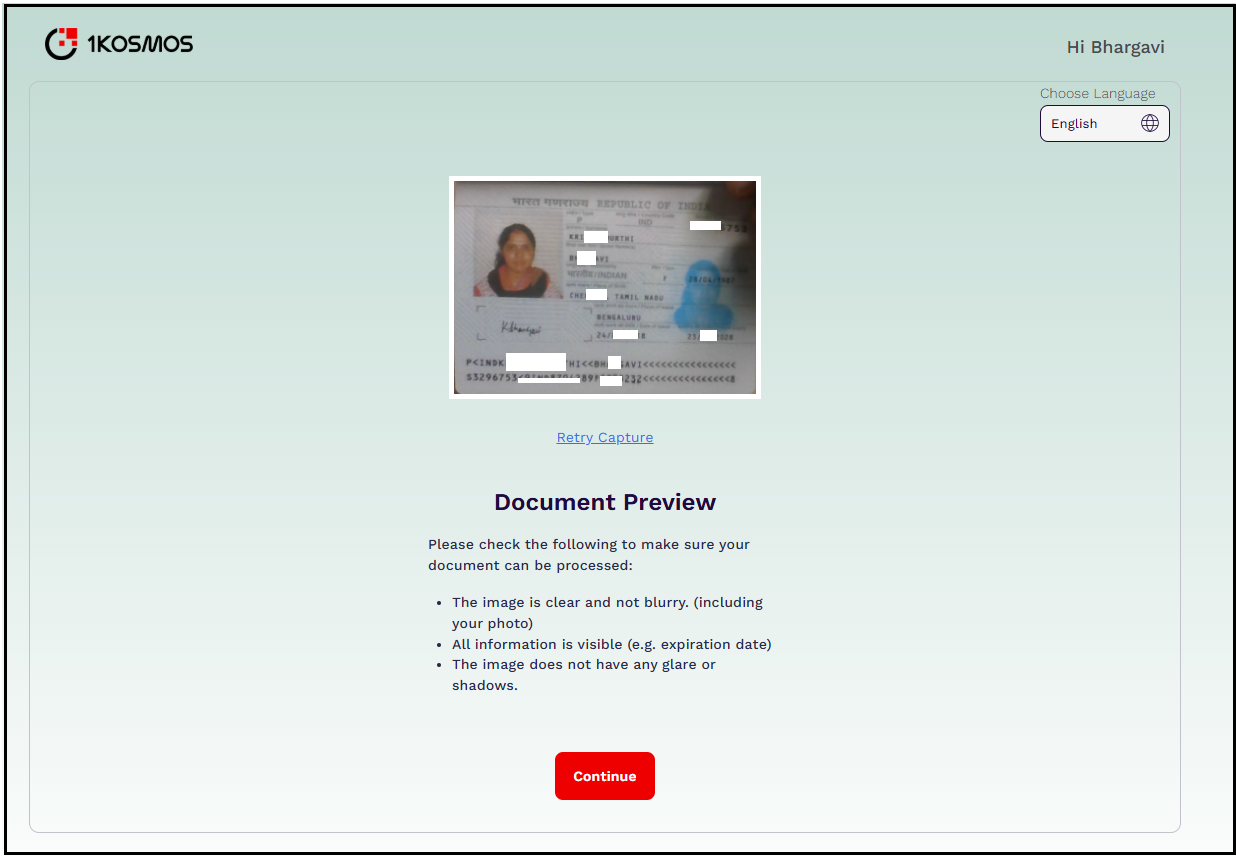
Once the scan is successful, a preview of the document will appear; Click Continue.
In scenarios where documents like Yukon ID/DL are presented, the verification UI may be unable to capture the front side of the document. This causes the verification journey to become stuck, preventing users from completing the process.
To address this, the UI has been enhanced to display the following buttons when the document is not detected for capture within 40 seconds, despite the camera being open:
- Manual Capture – Navigates the user to manual capture mode.
- Retry Auto – Returns the user to the previous screen to retry the automatic capture flow.
noteThe visibility of the Manual Capture button is controlled by the
enableManualCaptureflag, configured at the DVCID level. This flag is exposed through the session fetch API (/proofingsession/{sessionId}) and must be set to true for the option to appear.When the user clicks Manual Capture, they are prompted to capture the front side of the document manually.
- After successful capture, the Capture Back or Skip Capture options are presented. Users can either capture the back side of the document or skip it, depending on their document type or specific situation.
- On desktop devices, the front-facing camera is used by default.
- On mobile devices, the back-facing camera is used to optimize the experience.
- A Back button is available at the top of the manual capture screen, allowing users to return to the automatic capture flow if desired.
Once the manual captures are completed:
- The images are uploaded and processed.
- If a valid result is returned, the journey proceeds to the Document Preview screen, as in the regular flow.
- If no result or an empty response is returned, the system still proceeds by submitting the images, ensuring the user is not blocked and the verification journey continues.
-
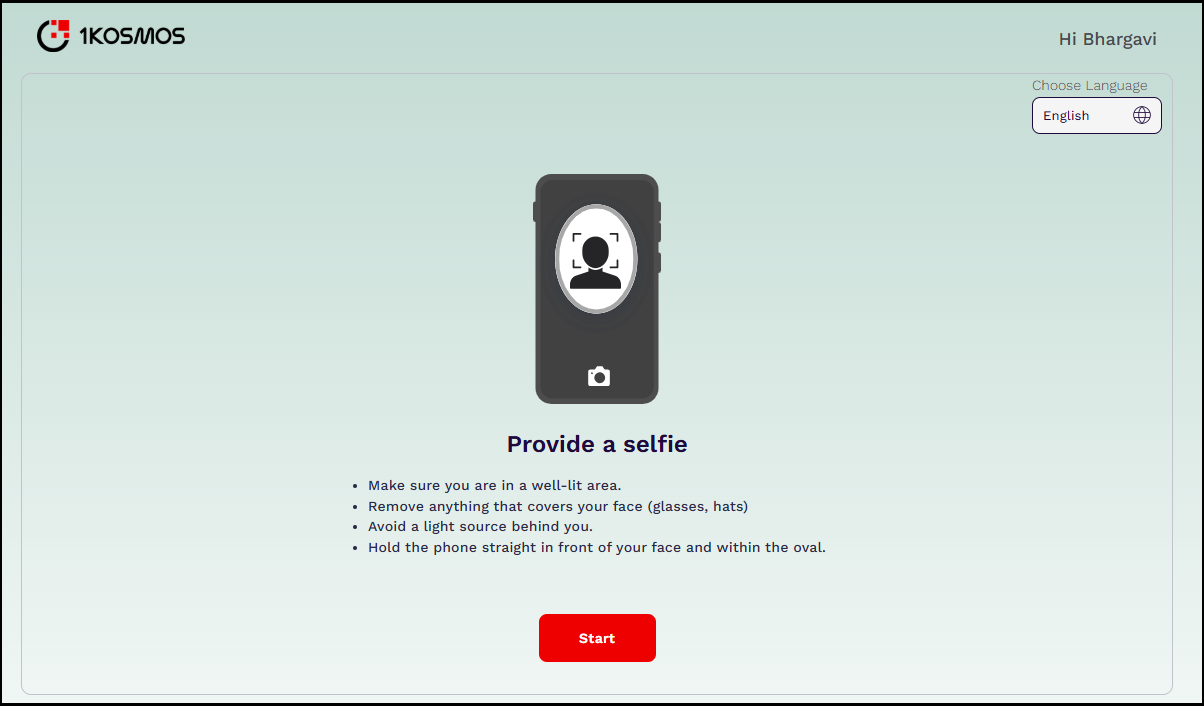
If selfie verification is enabled, you will be prompted to provide a selfie. Click Start.
-
Position your face within the oval shown on the screen. When aligned properly, click Take Selfie.
-
A selfie preview will appear. Click Continue.
-
The UI will confirm that your images have been submitted. Once document verification is complete, the session status will be displayed on the View Results page.
Viewing Session Results
Community/helpdesk administrators can view the session results in two ways:
-
From the Text Message Sent window: Click the Click here to view results button displayed in the Text Message Sent pop-up window.
-
From the Verifications page: Navigate to Verification > Verifications, then click on the specific session for which you want to view the results.
When the session status is Verification Not Performed, the Session Details section now displays the number of failed attempts the user has made to complete the verification process. This is managed in DVCID via a new parameter, maxRetries. In 1Kosmos, the status "Verification Not Performed" indicates that the captured image does not meet the required quality criteria, prompting users to retry document scanning.
By default, the maximum number of retry attempts is set to 2. If users are unable to complete verification within the allowed attempts, their status remains "Verification Not Performed." The UI also displays a number selector to show how many attempts the user has made.
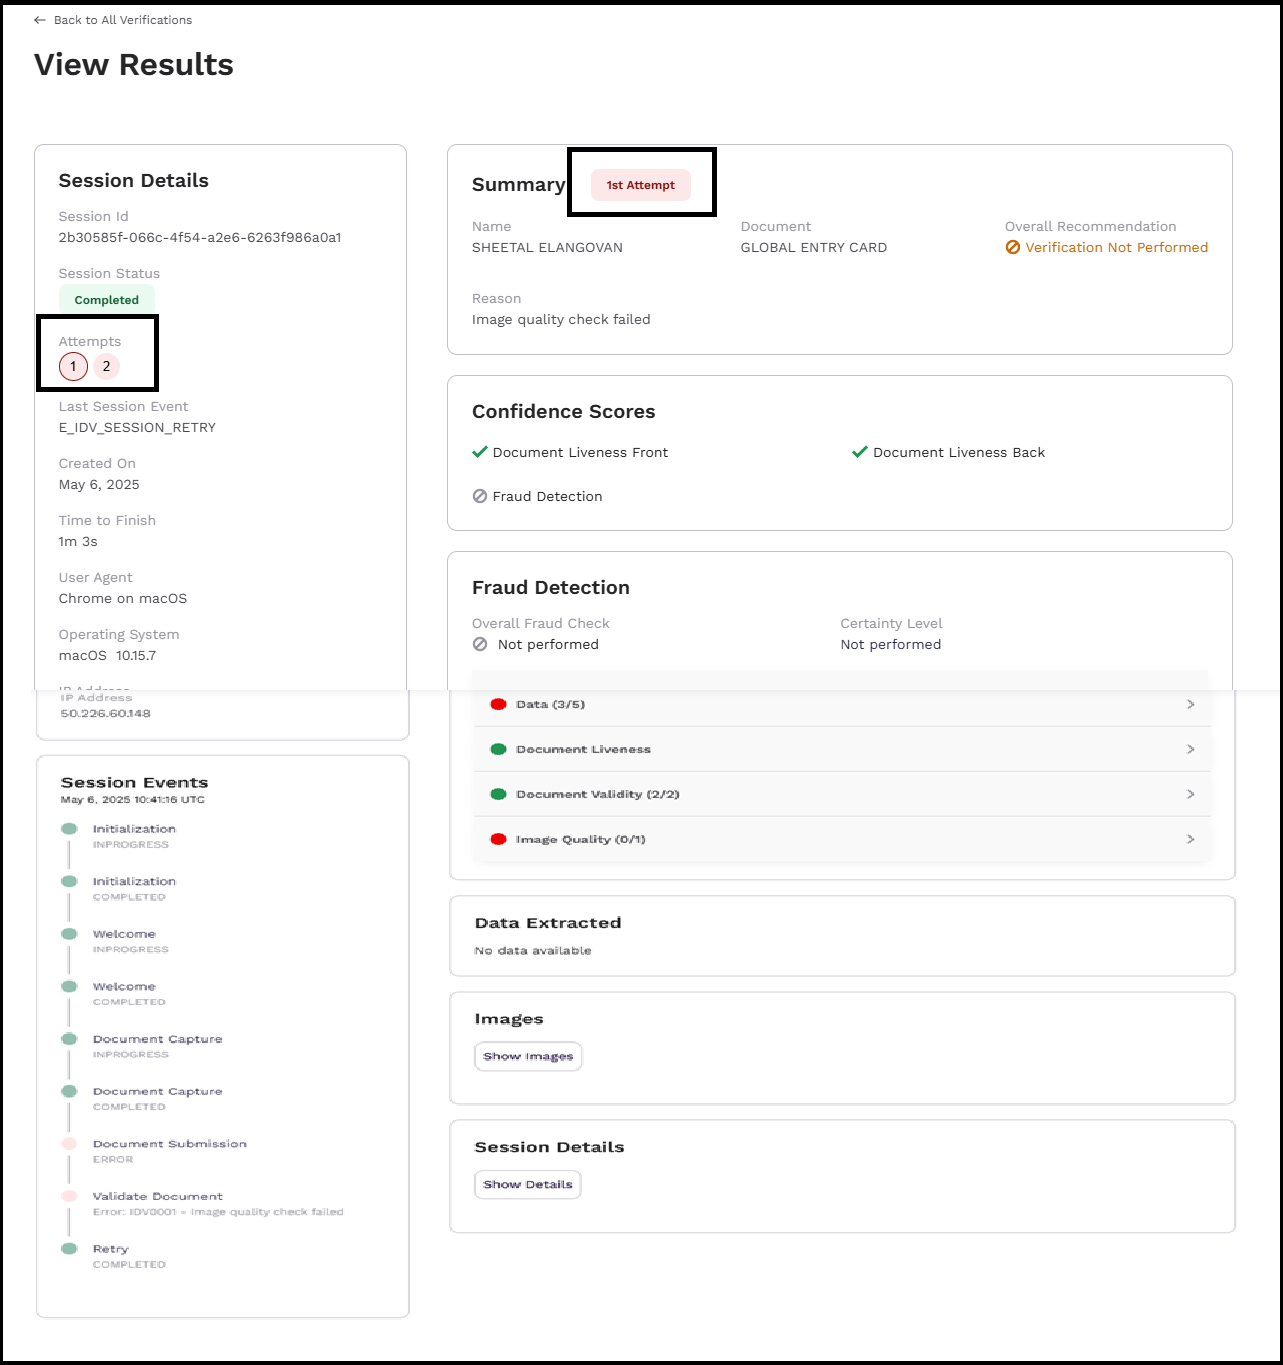
The View Results page displays the following information:
-
Session Details: Provides a summary of the session, including Session Id, Session Status, Attempts, Created On, Operating System, and IP Address.
-
Summary: An overview of the verification session, including the scanned document, verification results, and the reason for failure (if applicable).
-
Confidence Score: Lists the attributes that passed the liveness check.
- Document Liveness Front
- Document Liveness Back
- Fraud Detection
-
Fraud Detection: Details the attributes used to detect fraudulent activity.
- Data - Type of checks performed to detect fraud.
- Document Liveness - Type of checks applied during liveness verification.
- Document Validity - Parameters checked during document validation.
- Image Quality - Indicates whether the image met verification criteria.
-
Data Extracted : Summarizes the details extracted from the document including document type, document id, first name, last name, dob, and so on.
-
Images : Displays the images captured during the verification process, including document photos and selfies.
The image retention period is determined by the pii_retention_policy setting. If set to 0, 1Kosmos does not store the data. Adjust this policy to define how many days data should be retained.
- Session Details: Displays detailed information on the attributes extracted from the document.
- Session Events: Step-by-step status updates of the verification process, including:
- Initialization: The session has been initialised.
- Welcome: The session has been started by the user.
- Document Instruction: User received instructions for capturing document images.
- Document Capture: The user is capturing images of their ID.
- Document Preview: User previewed the captured document.
- Selfie Instruction: The user is following the instructions for taking a selfie.
- Selfie Capture: The system successfully captured the user's selfie for verification.
- Selfie Preview: The user is currently previewing their selfie before submission.
- Document Submission: User submitted their ID for verification.
- Validate Document: System validated the document.
By following these steps, you can effectively manage the verification process and ensure accurate and secure document verification for your users.
Downloading Verification Reports
The community administrator or users with the following permissions can download the report from the AdminX interface under Verification > Verification page.
- idproofing.reports.verification-sessions-download
- idproofing.session-management
Download reports by filtering records based on document type, verification status, and the user who completed the verification process. If the report exceeds 2 million records, users will be prompted to refine their search.
To download the report, follow these steps:
- Log in to a tenant as a community administrator.
- Navigate to Verification > Verification menu.
- In the Verifications page that is displayed, filter the records according to your requirement and click Download.
The UI alerts the user that the report will be emailed.