Identity Provider (IdP) Configuration
Overview
Configure your identity provider for use in AdminX. Adding your identity provider enables you to use several user-friendly features, such as single sign-on authentication.
Adding your Identity Provider
To add your identity provider, follow these steps:
-
Log in to a tenant as a community administrator.
-
Navigate to Settings > idP Configuration.

On the IdP Configuration list page, you will be able to view any identity providers that are currently configured. To add a new identity provider, click Create Identity Provider.
Only one identity provider at a time can be added to your tenant.
Configuring Identity Provider
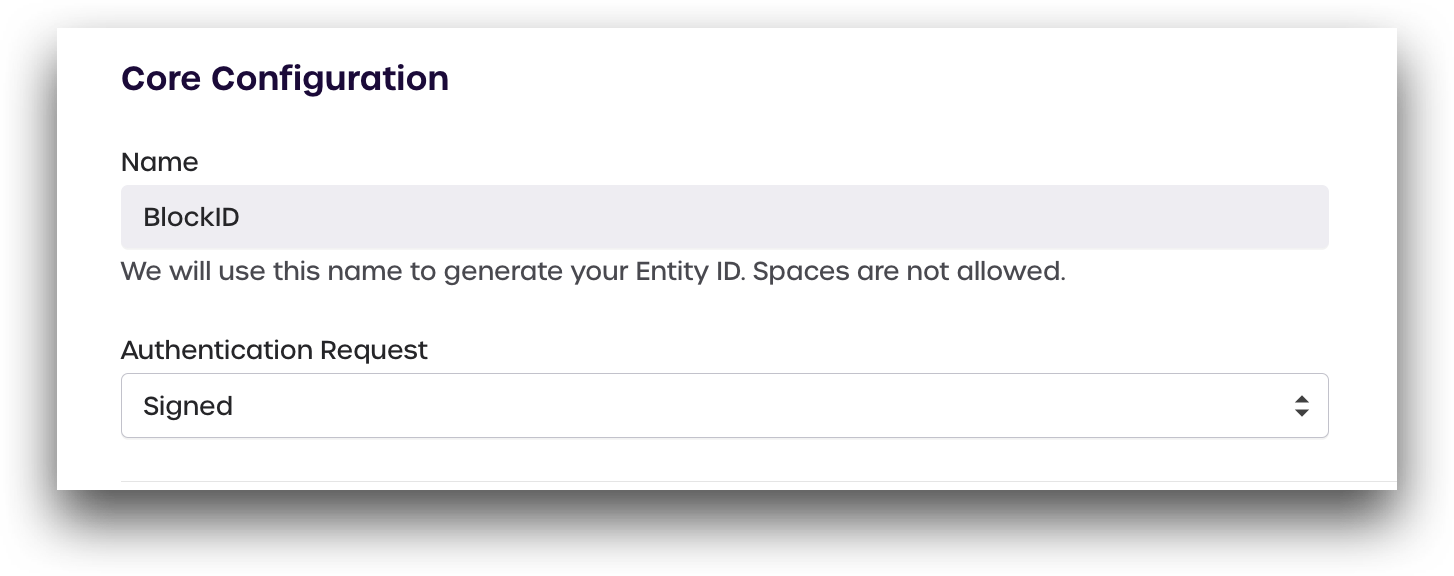
Core Configuration
Under the Core Configuration section, add the following details:
-
Name: Enter a name for generating an Entity ID. For this example, we are adding our 1Kosmos account and will name our IdP
1Kosmos. -
Authentication Request: Select whether or not your authentication request should be signed. It is recommended to select this as Signed.
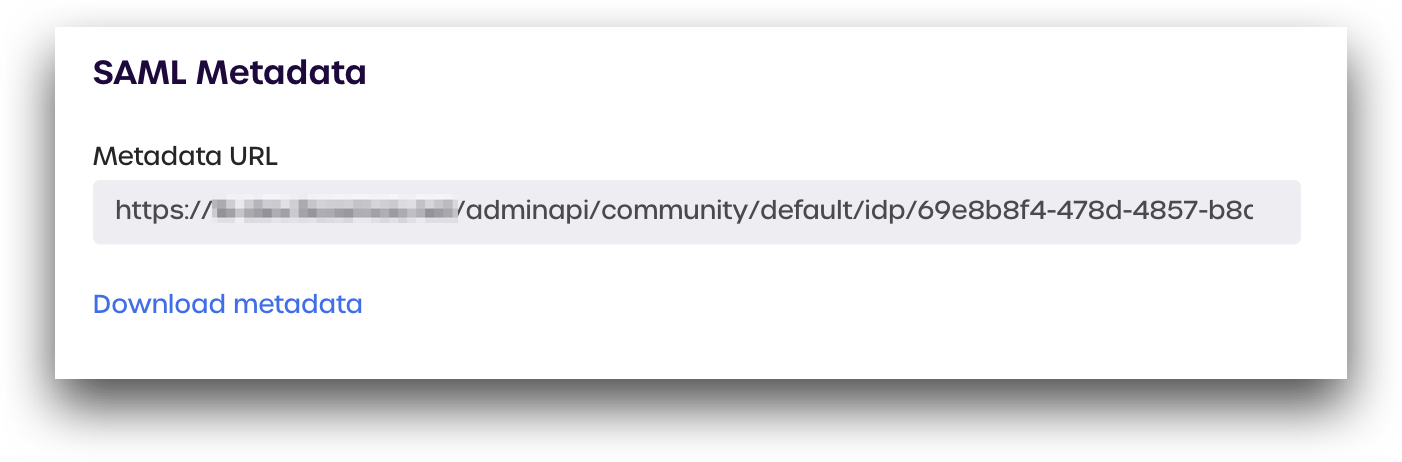
SAML Metadata
Use this section to download a copy of the SAML metadata.
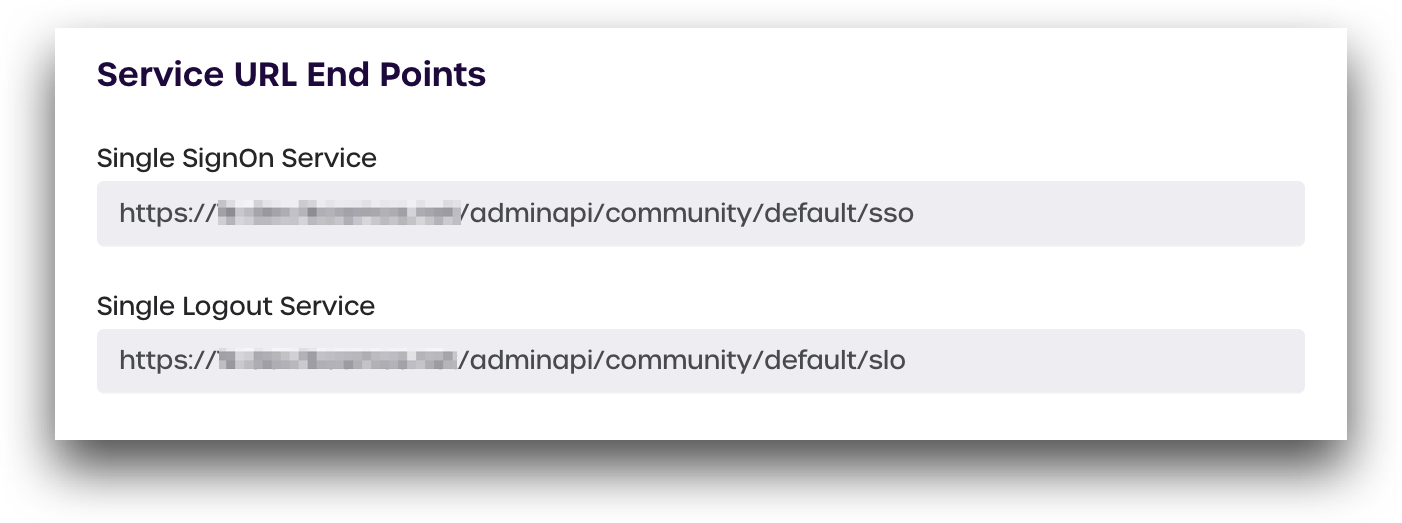
Service URL End Points
Use this section to identify your SAML Service URL endpoints.
- Single SignOn Service: Your SSO URL endpoint.
- Single Logout Service: Your SLO URL endpoint.
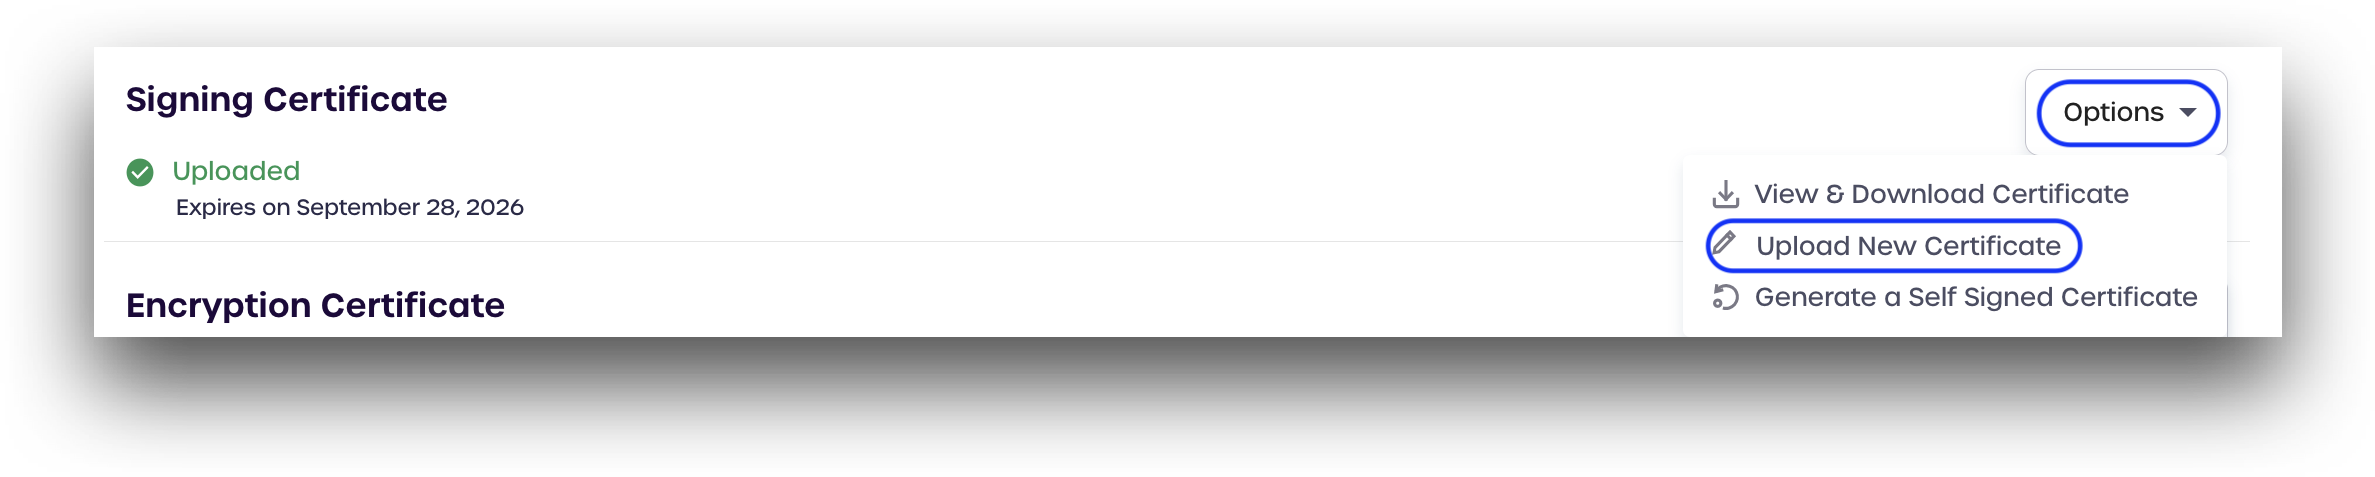
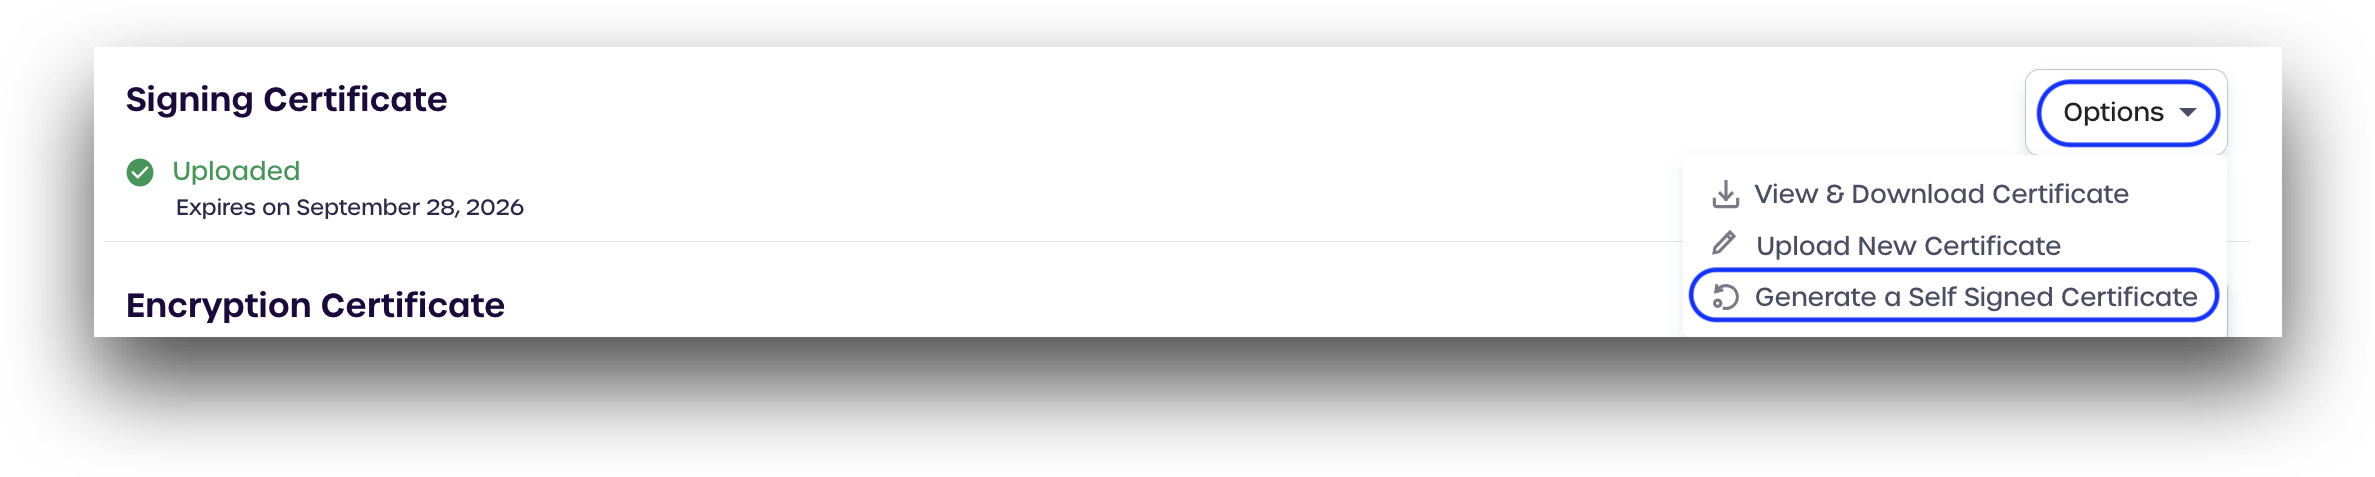
Signing Certificate
In this section, users can upload new certificates, generate a self-signed certificate, and view or download their current signing certificate. The expiration date will also be listed if you have already uploaded a certificate.

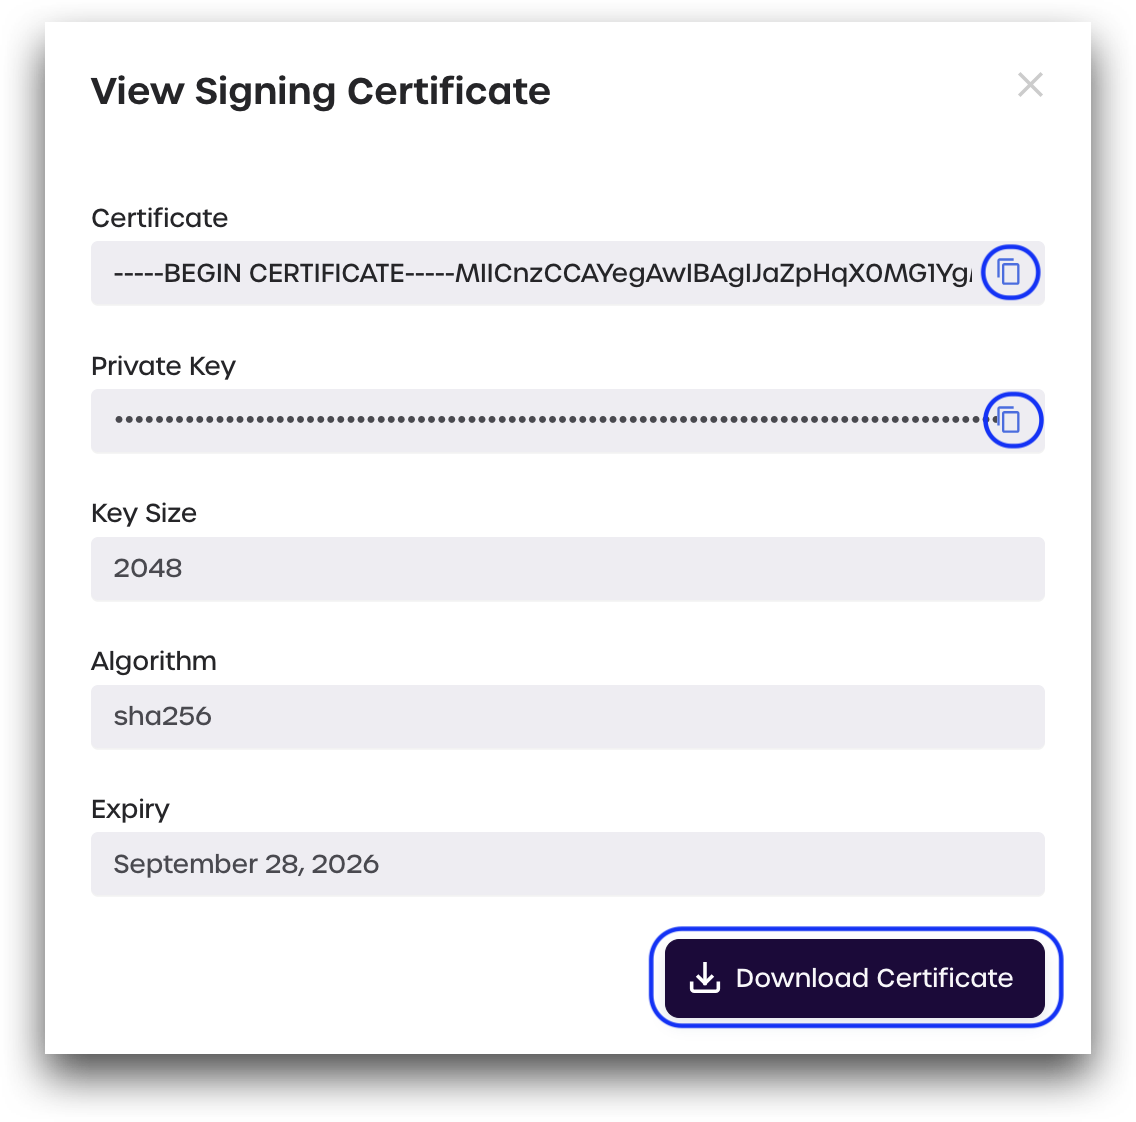
Viewing and Downloading Current Signing Certificate
- Click Options -> View & Download Certificate
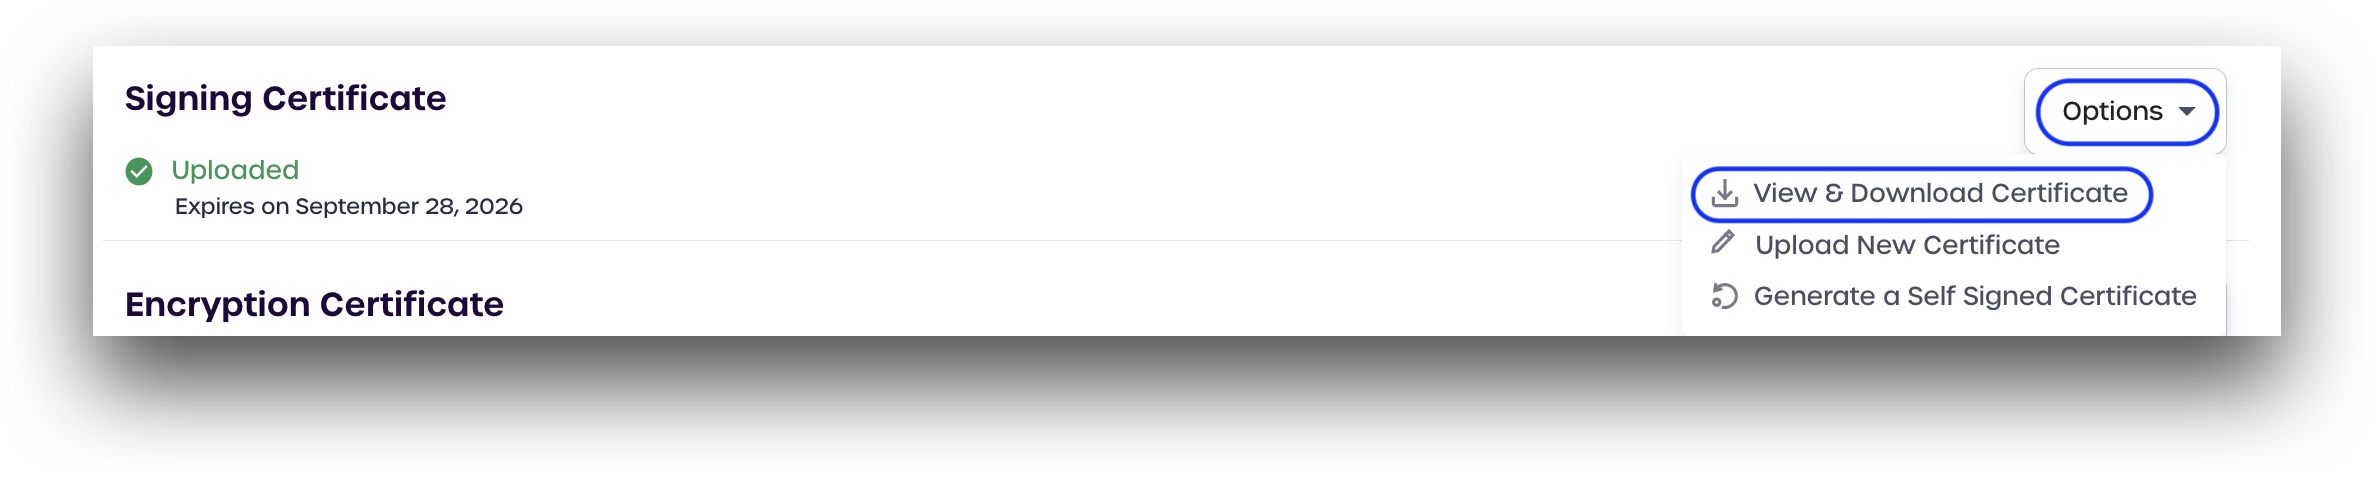
- Your signing certificate details will be displayed
- Copy your certificate to your clipboard: Click the copy icon under Certificate
- Copy your private key to your clipboard: Click the copy under Private Key
- Download your certificate: Click Download Certificate
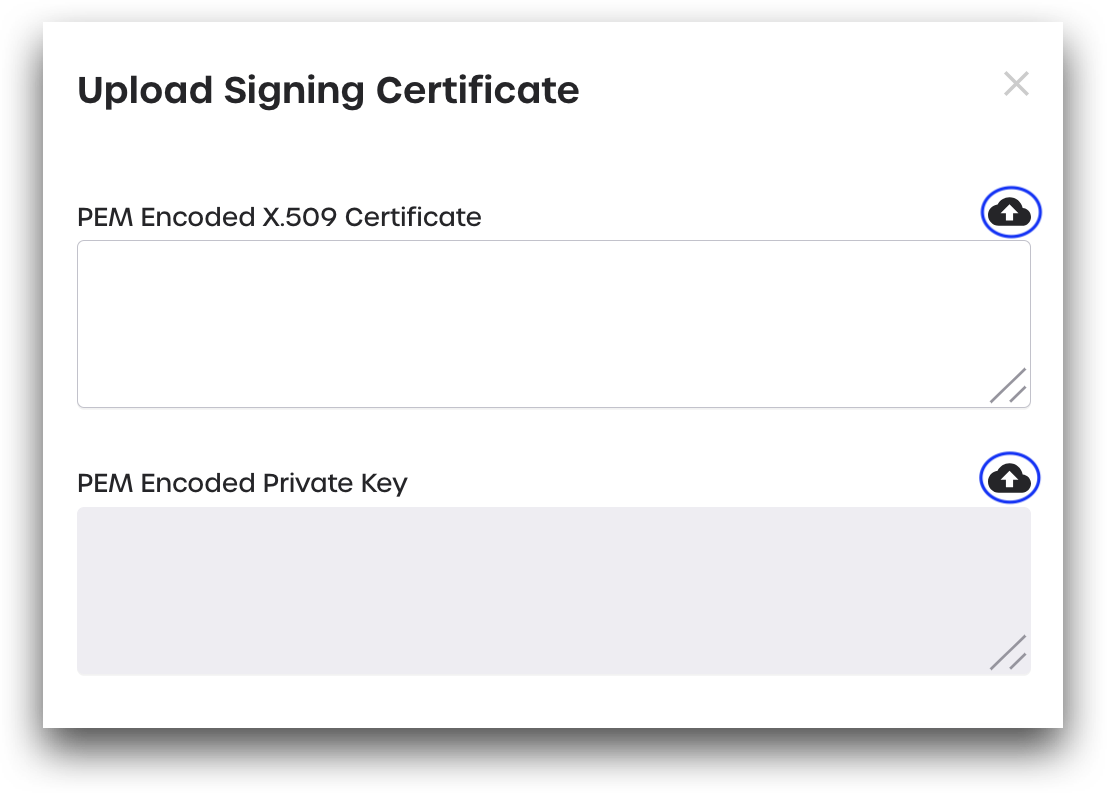
Upload a New Certificate
- Click Options -> Upload New Certificate
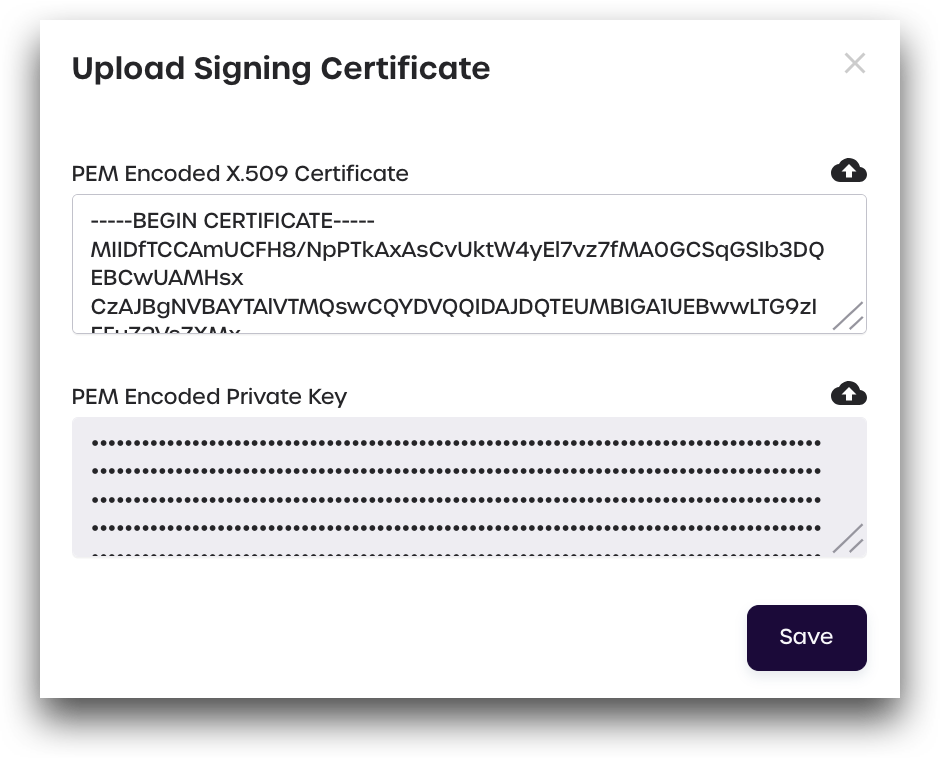
PEM-Encoded X.509 Certificate
- Paste your signing certificate in the box, or click the cloud icon to upload your certificate directly (recommended)
PEM-Encoded Private Key
- Paste your private key in the box, or click the cloud icon to upload your key directly (recommended)
- Click Save to finish adding your new signing certificate and key
Generate a Self-Signed Certificate
- Click Options -> Generate Self-Signed Certificate
- Select your desired key details:
- Algorithm: SHA1 or SHA256
- Key Size: 1024 or 2048
- Expiry: 1, 3, or 5 years
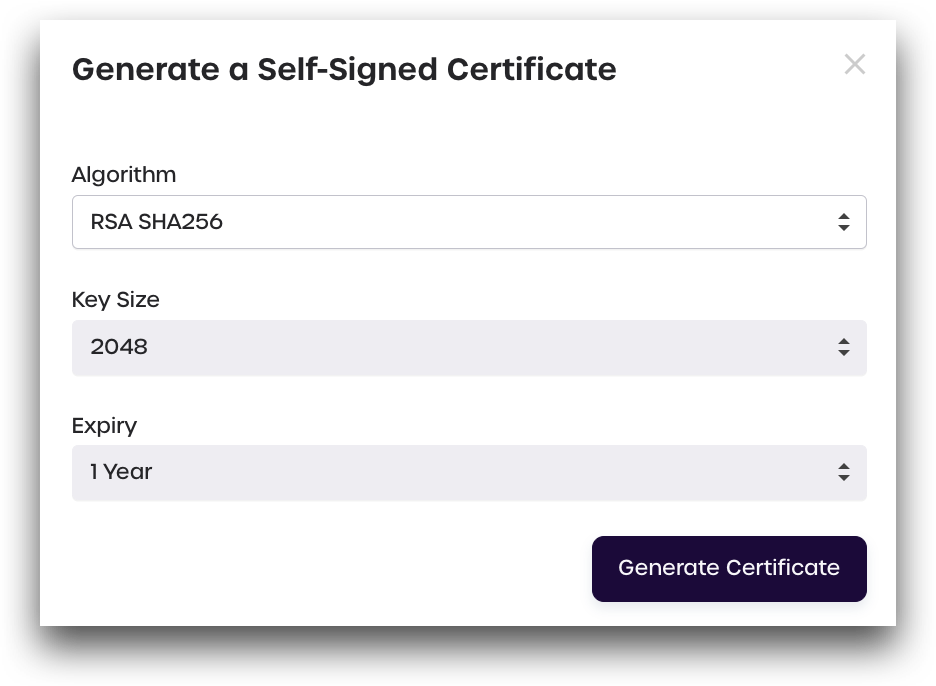
-
Click Generate Certificate
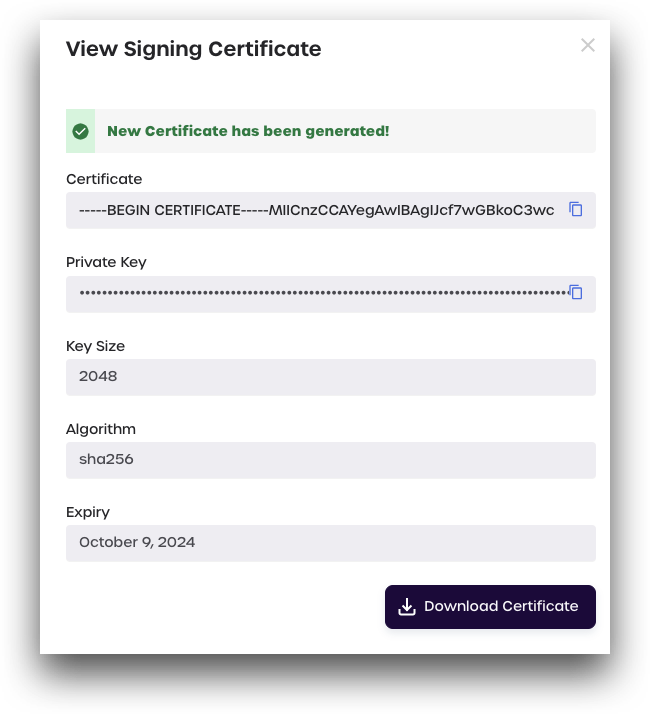
-
Your new certificate details will display. Click Download Certificate to save a copy to your machine.
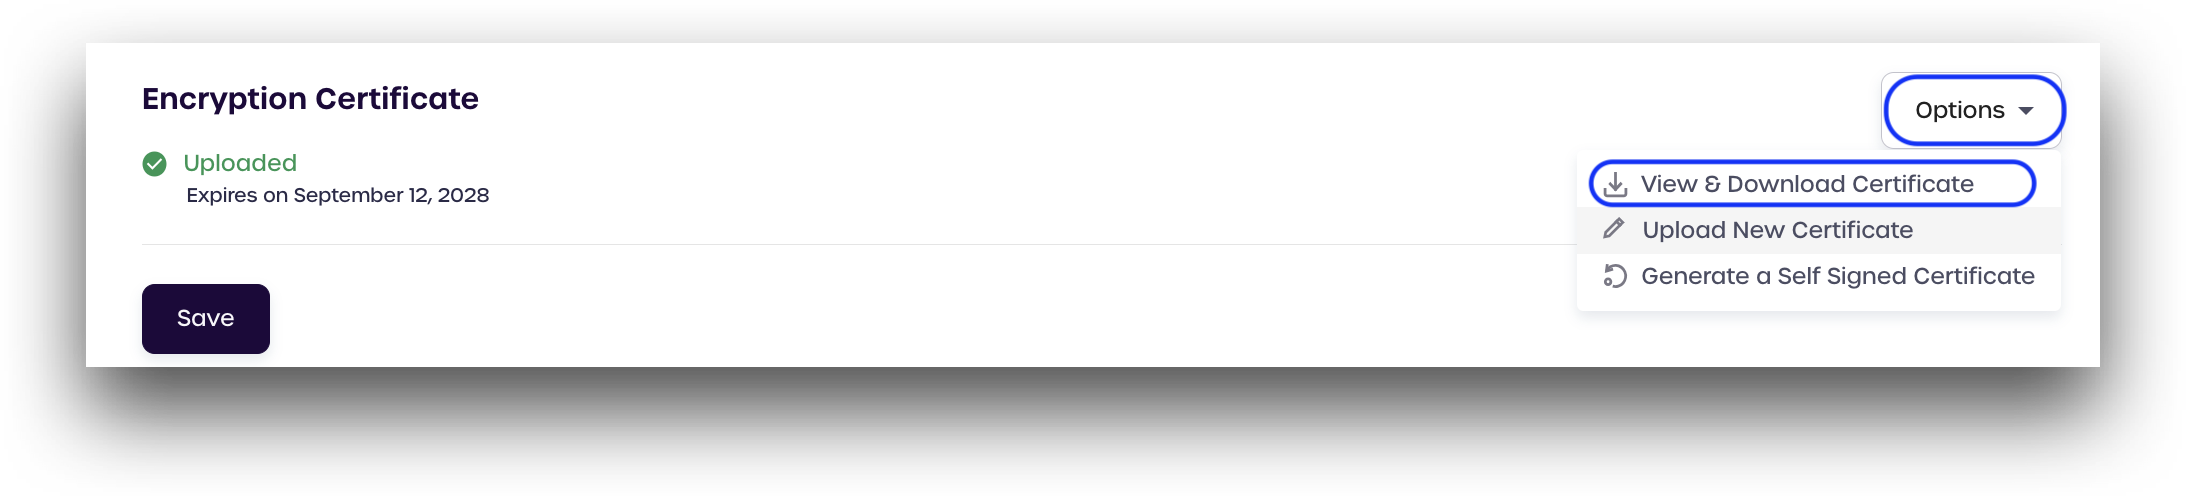
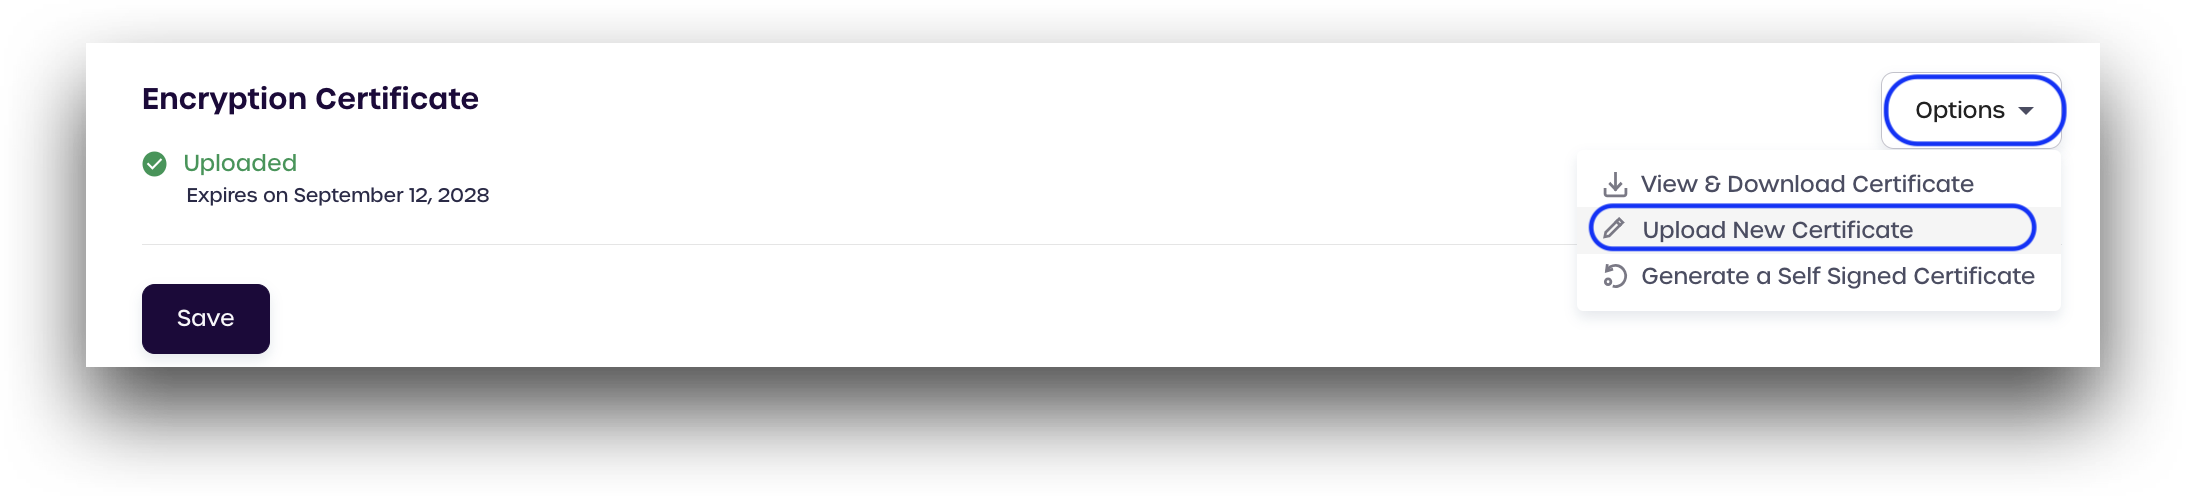
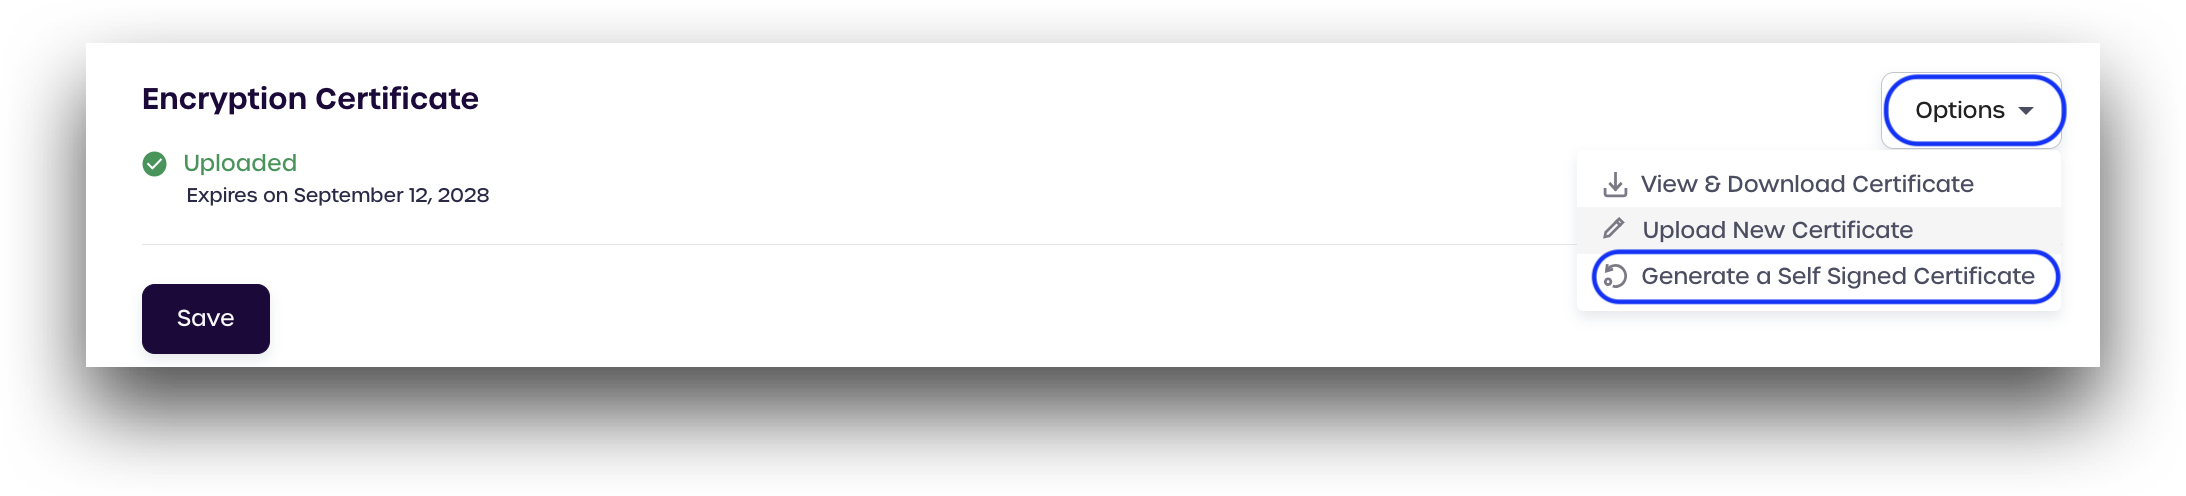
Encryption Certificate
In this section, users can upload new certificates, generate a self-signed certificate, and view or download their current encryption certificate. The expiration date will also be listed if you have already uploaded a certificate.

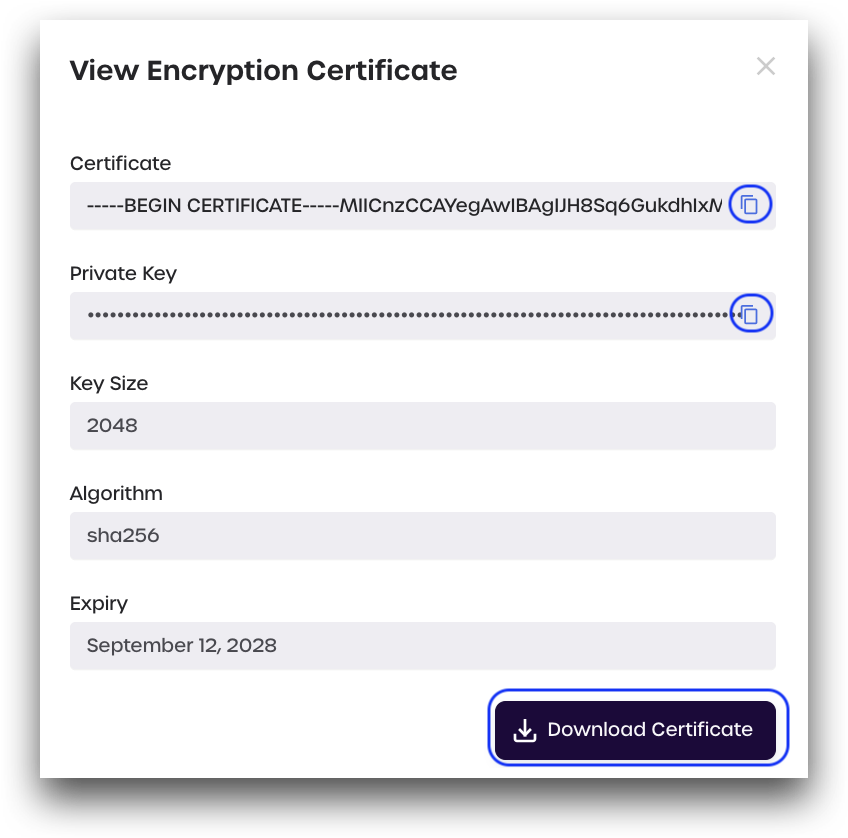
View & Download Current Encryption Certificate
- Click Options -> View & Download Certificate
- Your encryption certificate details will be displayed
- Copy your certificate to your clipboard: Click the copy icon under Certificate
- Copy your private key to your clipboard: Click the copy under Private Key
- Download your certificate: Click Download Certificate
Upload a New Certificate
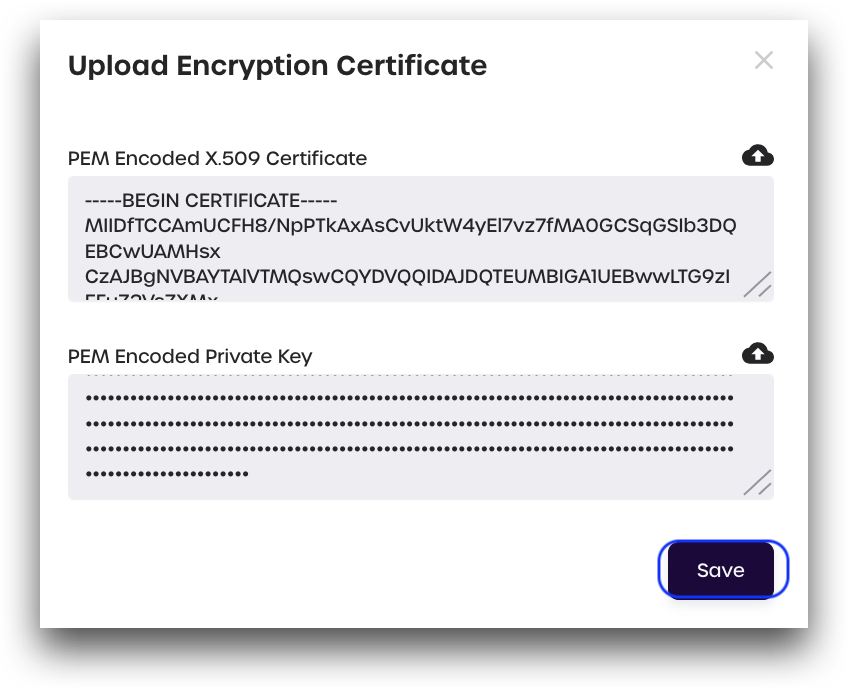
- Click Options -> Upload New Certificate
PEM-Encoded X.509 Certificate
- Paste your signing certificate in the box, or click the cloud icon to upload your certificate directly (recommended)
PEM-Encoded Private Key
- Paste your private key in the box, or click the cloud icon to upload your key directly (recommended)
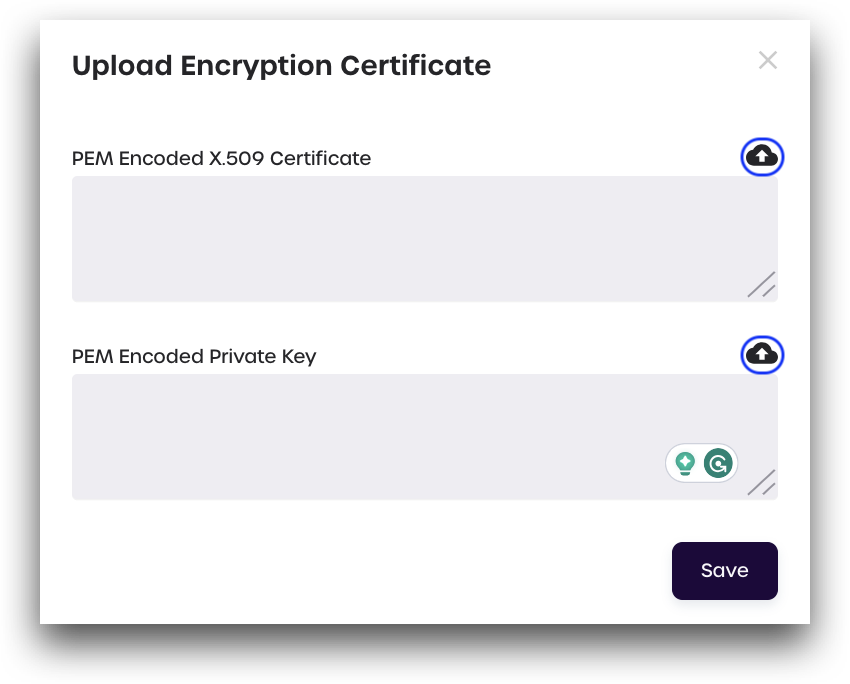
- Click Save to finish adding your new signing certificate and key
Generate a Self-Signed Certificate
- Click Options -> Generate Self-Signed Certificate
- Select your desired key details:
- Algorithm: SHA1 or SHA256
- Key Size: 1024 or 2048
- Expiry: 1, 3, or 5 years
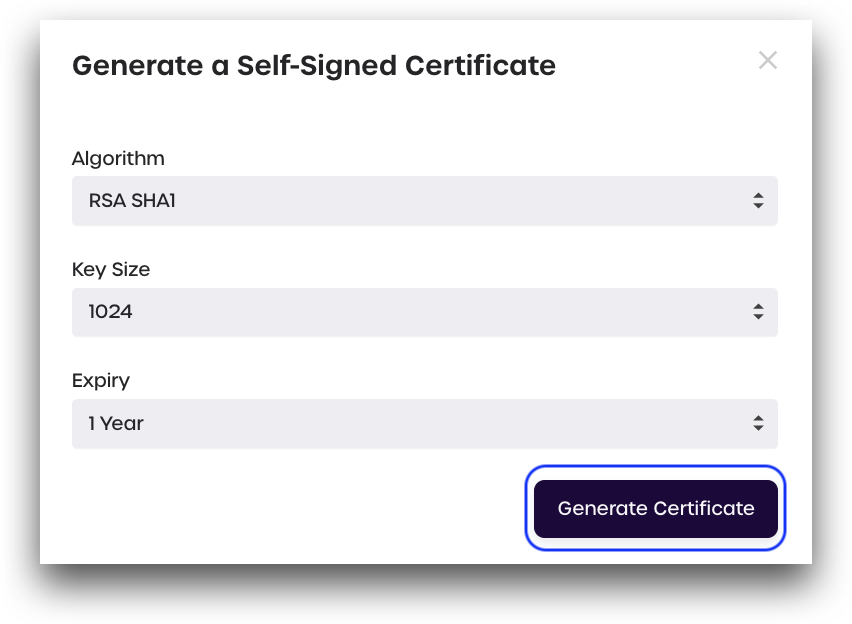
-
Click Generate Certificate
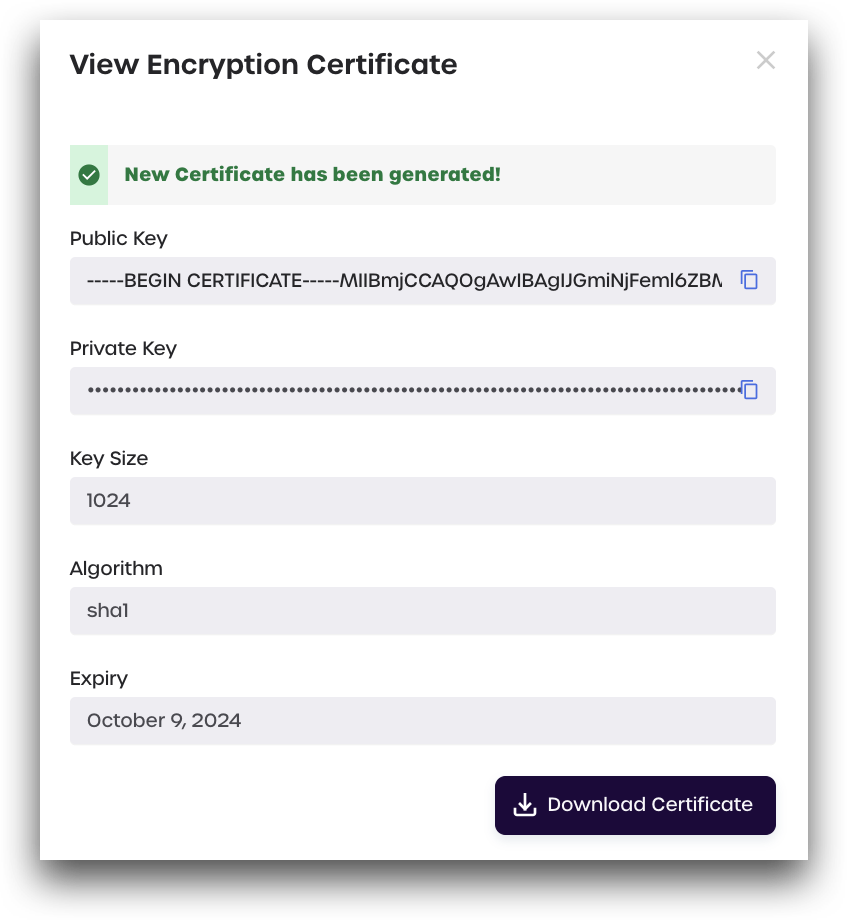
-
Your new certificate details will display. Click Download Certificate to save a copy to your machine.
Create a Self-Signed Certificate Using OpenSSL
Administrators can use the command line tool openssl to generate a PEM-encoded X.509 certificate and private key if desired.
Using your terminal, run the following commands:
Step 1: Create 2048-bit Private Key
openssl genrsa -traditional -out private_key.pem 2048
Step 2: Generate a Certificate Request Using SHA256 with a Lifetime of 365 Days
openssl req -new -key private_key.pem -out cert_request.pem -sha256 -days 365
When generating the certificate, fill out the metadata correctly to specify the correct Organizational Unit parameter
Step 3: Generate a New Certificate from the Certificate Request
openssl x509 -req -days 365 -in cert_request.pem -signkey private_key.pem -out signing_certificate.pem
Step 4: Upload your Signing Certificate and Key
Follow the steps in Upload a New Certificate.
- Click the cloud icon to upload your files directly rather than pasting them in the box.
- Click Save to finish adding your signing certificate and key
Next Steps
After completing the IdP configuration in AdminX, you should finalize your changes by clicking the Save button at the bottom of the page.
You must then log on to your Service Provider (SP) account to set it up for SSO using the Signing Certificate, Encryption Certificate, SAML Metadata, and the Service URL End Points. The process differs slightly for each provider. Reach out to your SP's documentation for instructions on configuring your IdP from their configuration panel.