PingOne DaVinci Connector
The 1Kosmos DaVinci connector allows for easy integration with the 1Kosmos passwordless experience by performing an OIDC redirect to 1Kosmos for device authentication, redirecting back to PingOne DaVinci to finish the authentication flow.
Requirements
To use the connector, you'll need:
- 1Kosmos tenant with community admin access
- PingOne DaVinci account
Connector Settings
Setting Up the 1Kosmos Connector
The easiest way to set up the 1Kosmos Connector for DaVinci is to open two tabs in your browser so you can access your DaVinci and 1Kosmos accounts at the same time, as information needs to be copied and pasted between the two pages.
DaVinci
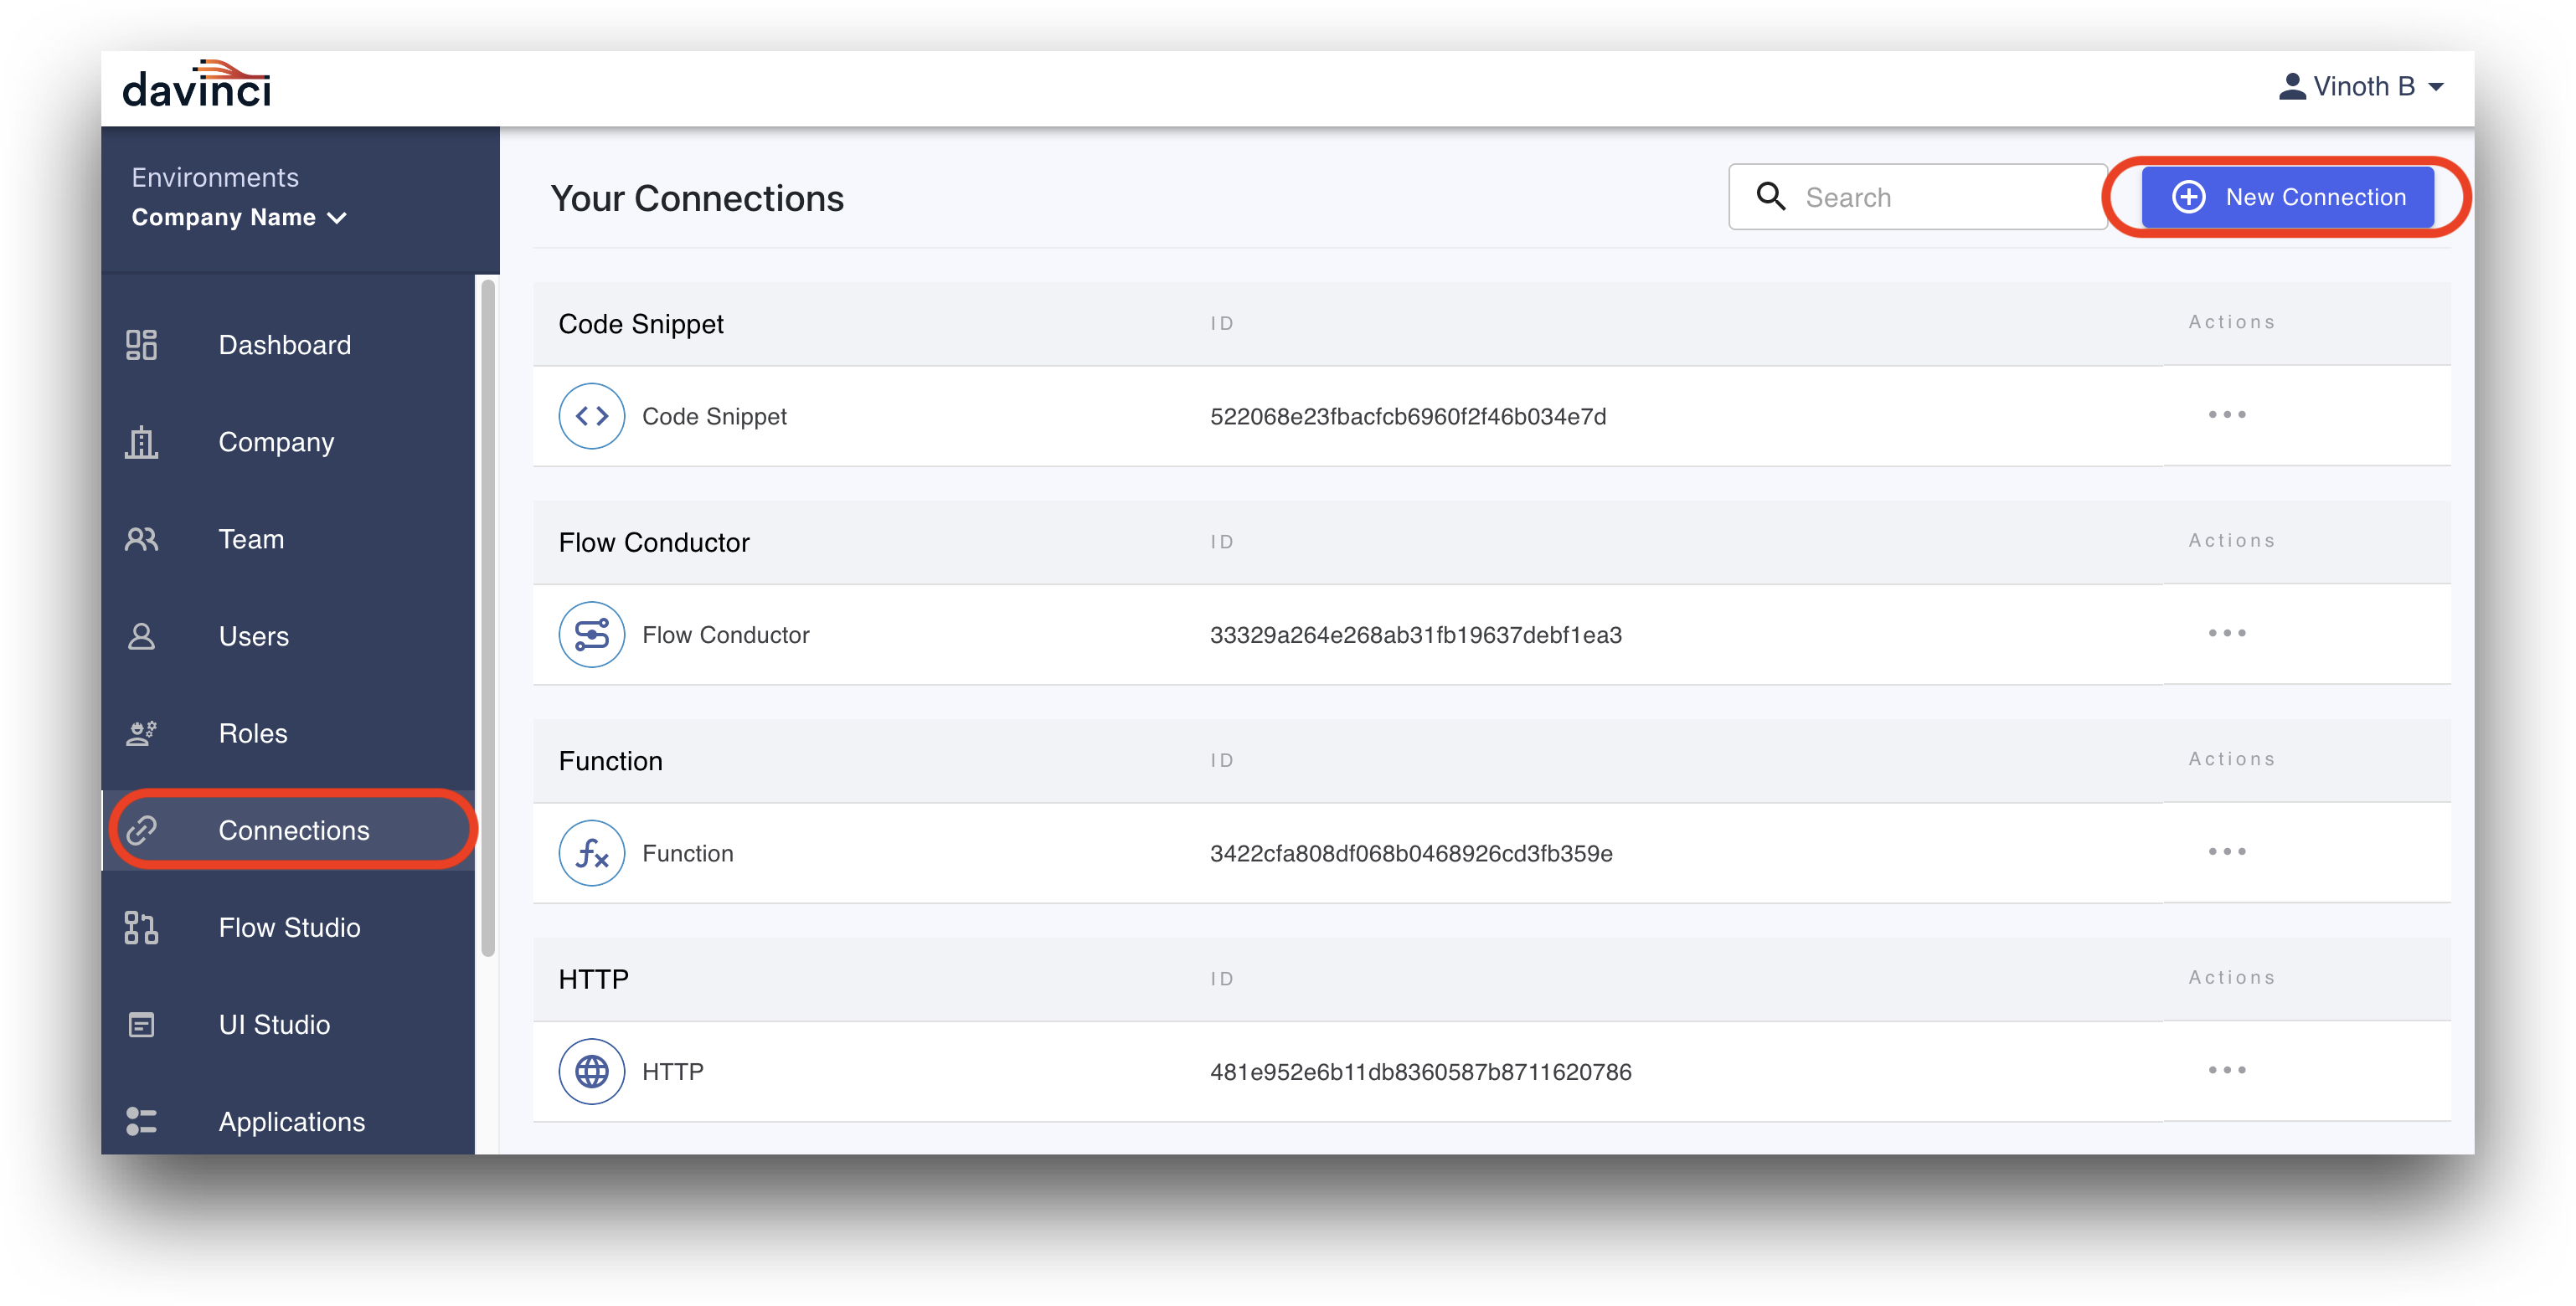
In DaVinci, navigate to the Connections page and click New Connection.
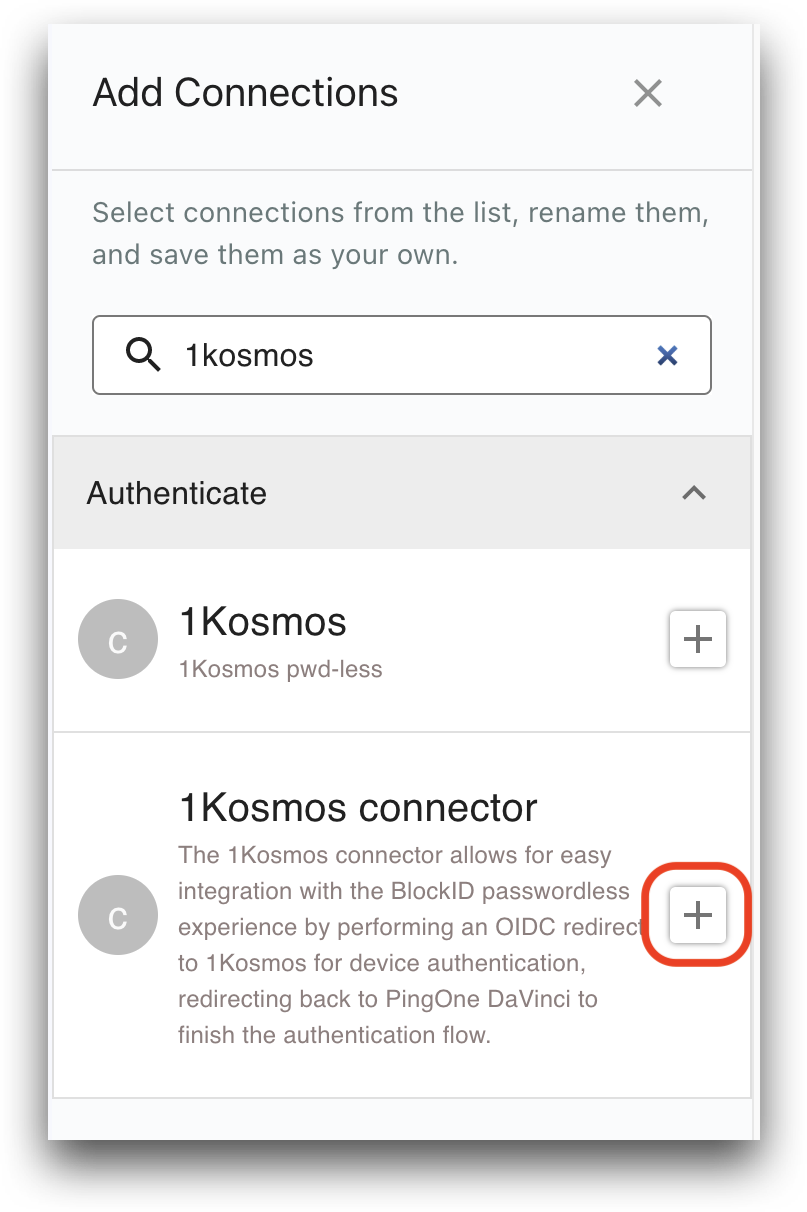
In the search bar, type 1kosmos to find the 1Kosmos connector. Click + to add the connector.
Enter a name to use, such as 1Kosmos OIDC, and click Create.

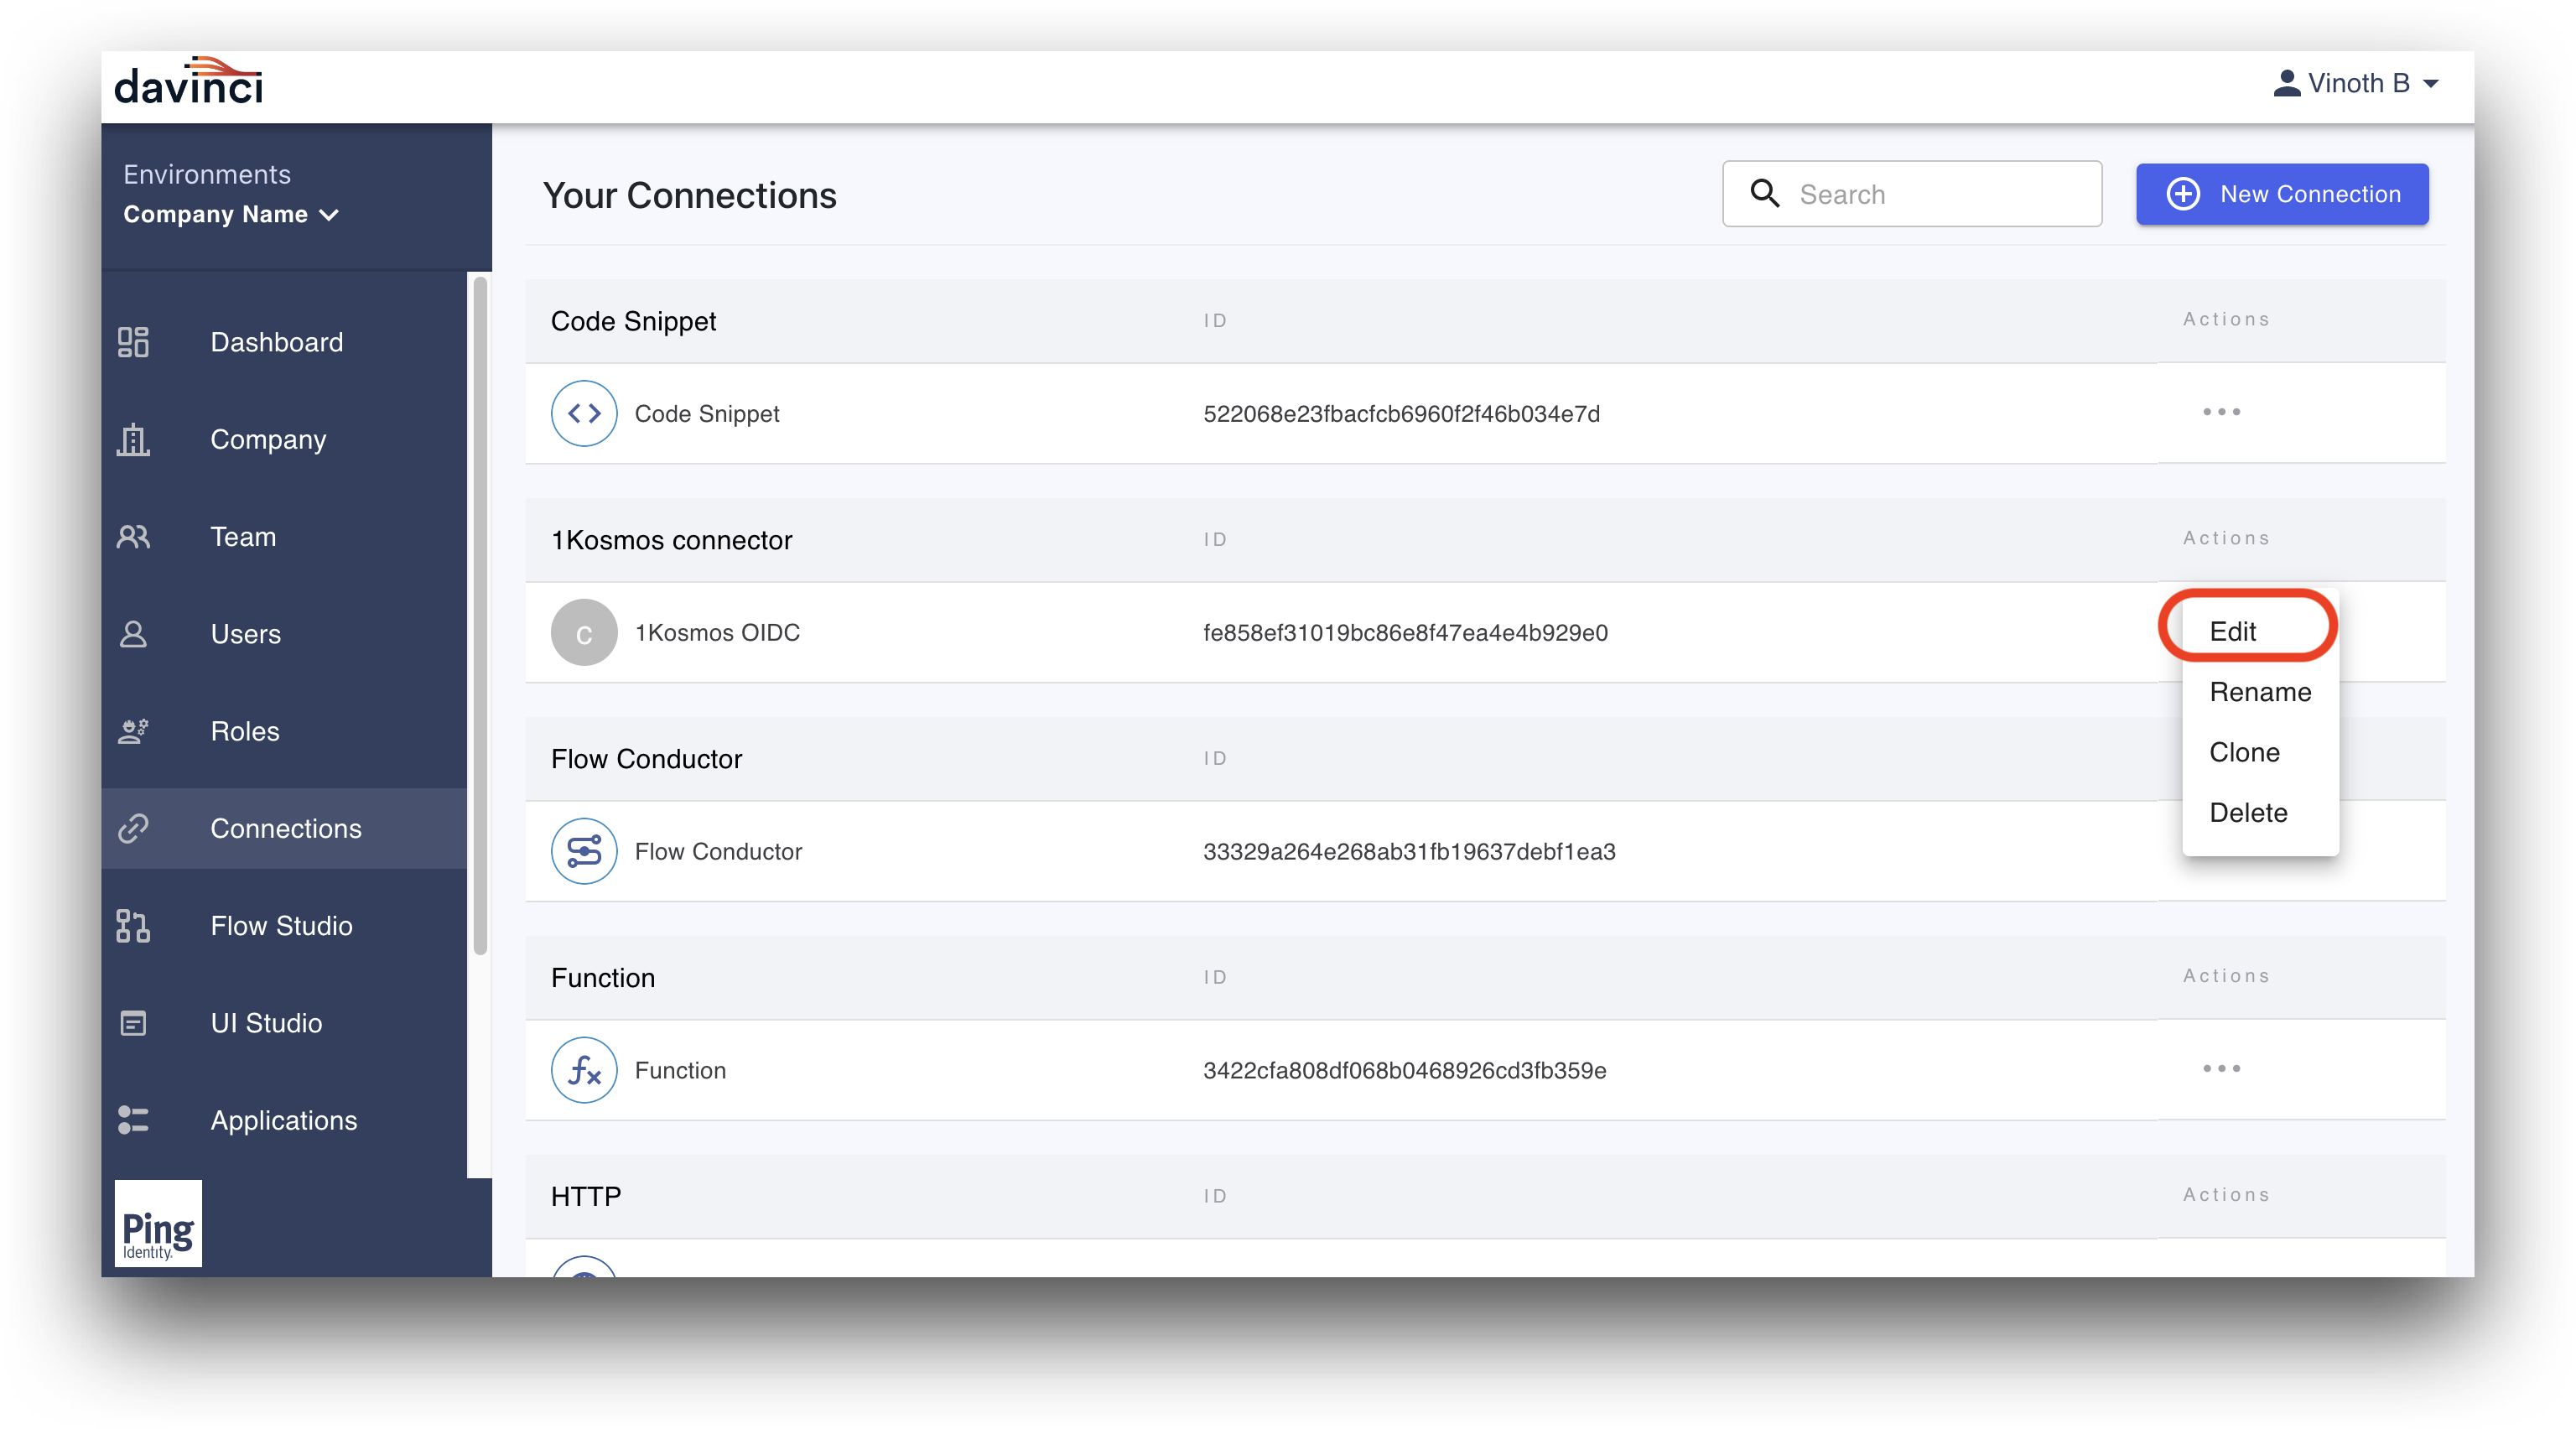
Next, locate the connector we just created from the list of connections. Click the three elipses actions menu and select Edit.
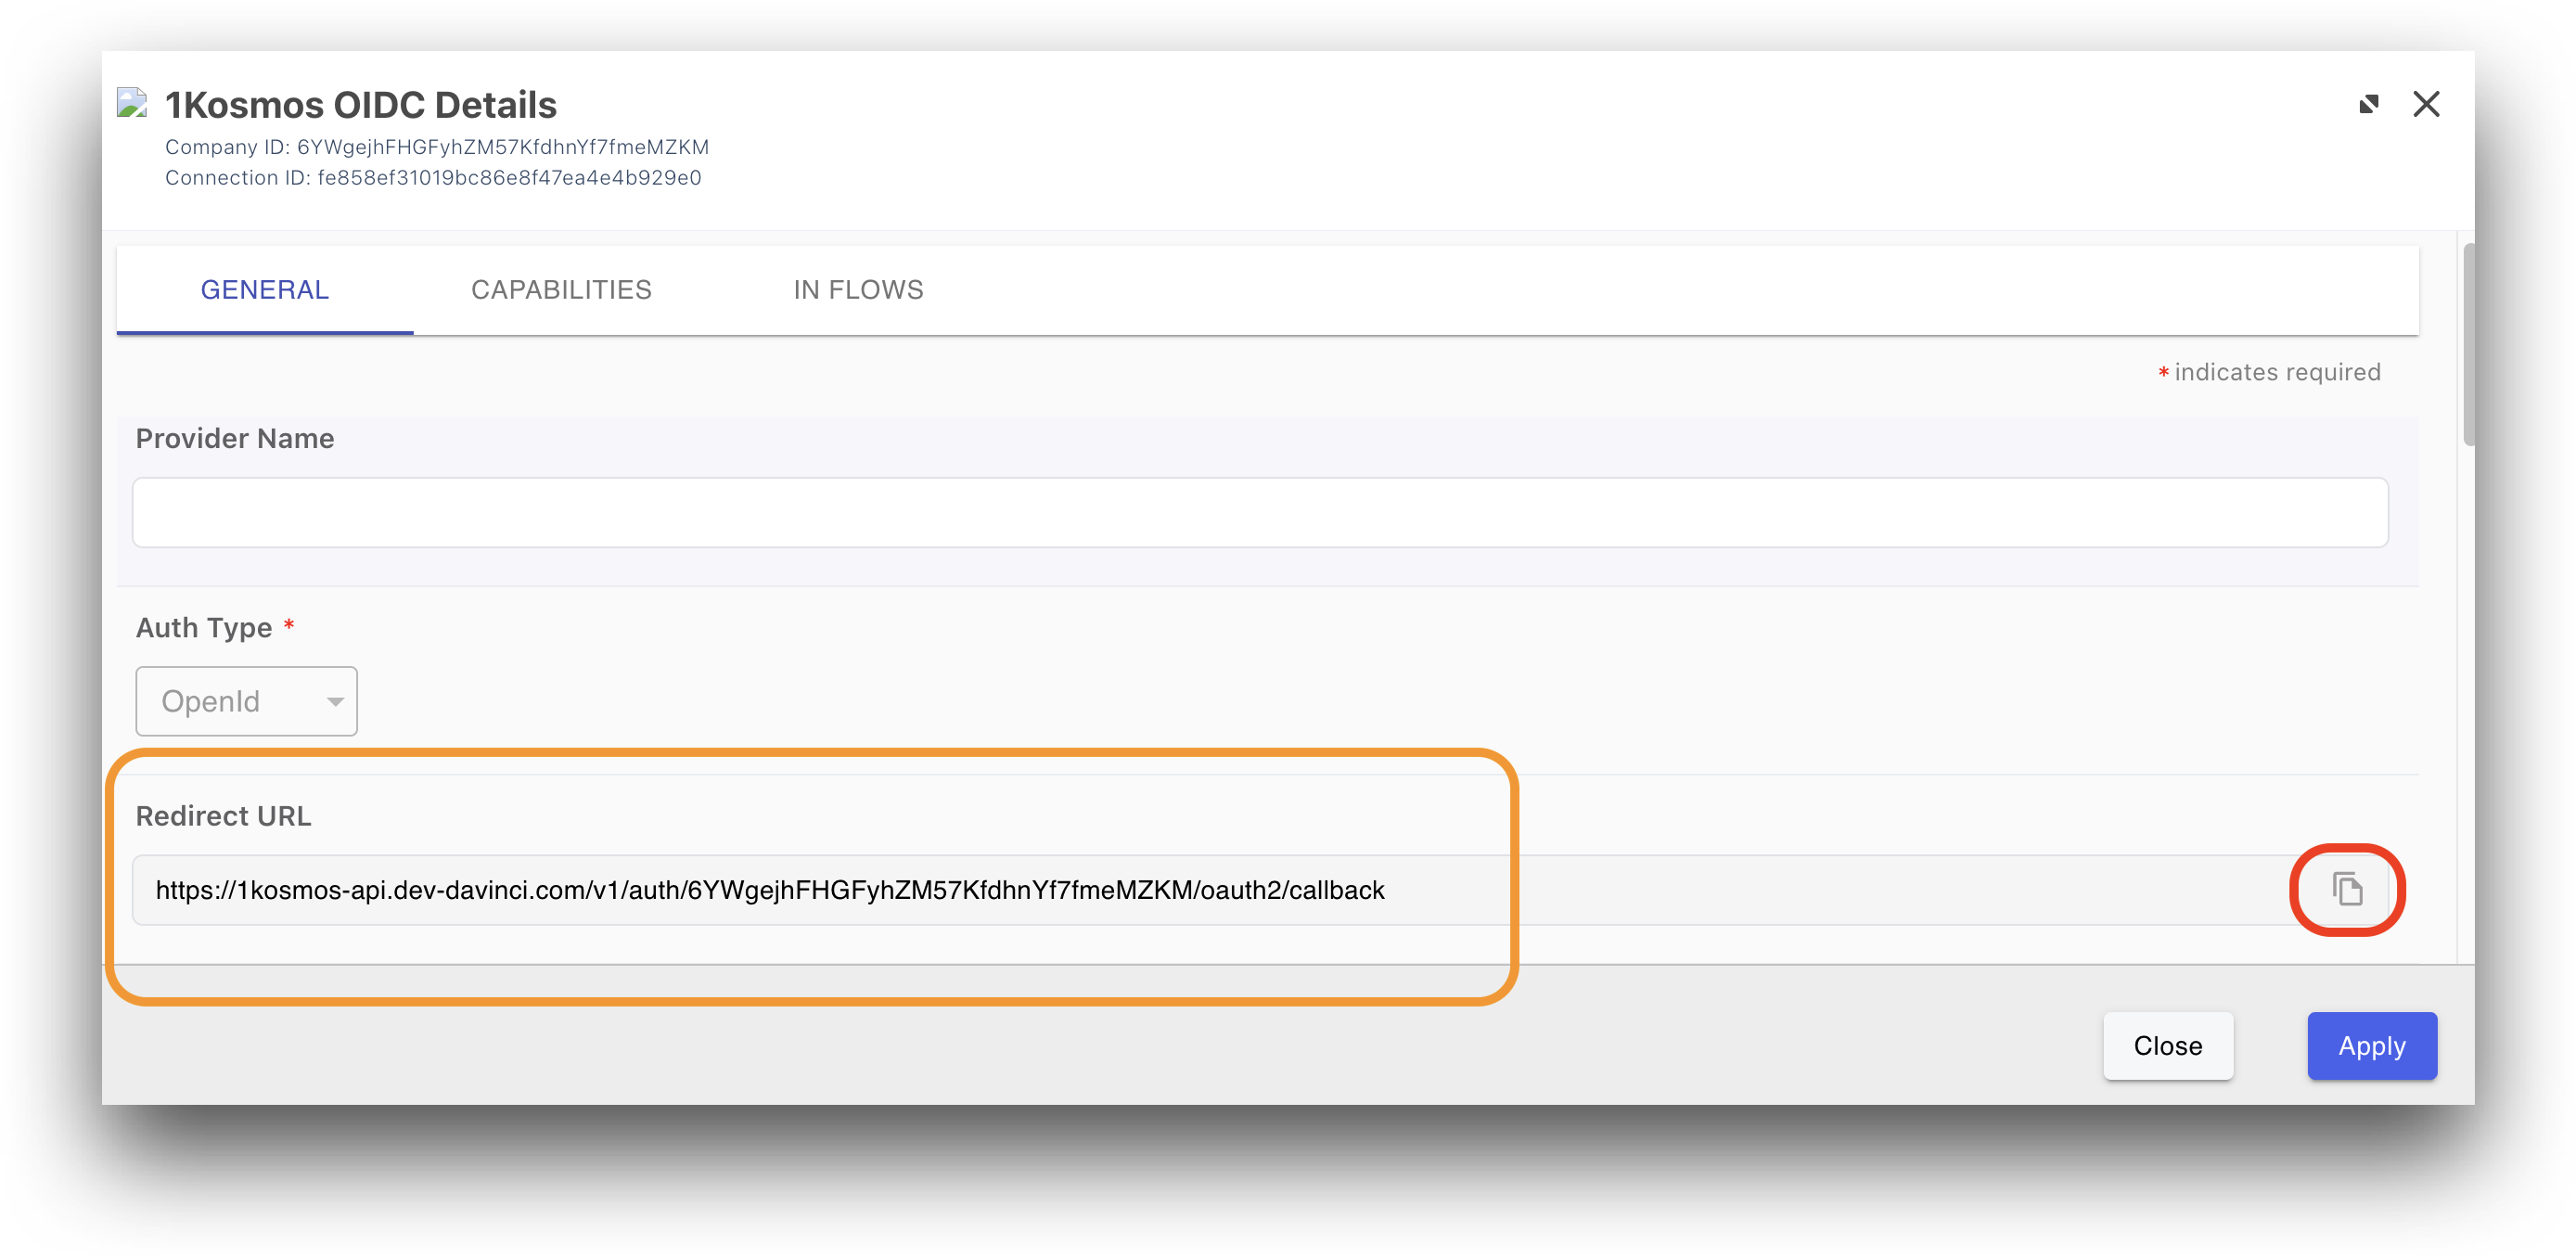
Copy the Redirect URL for use in 1Kosmos. The remaining details will be filled out shortly after getting the required information in 1Kosmos.
Open a new tab and log in to your 1Kosmos tenant as a community admin if you haven't already done so as we will need to copy information between the two applications.
1Kosmos
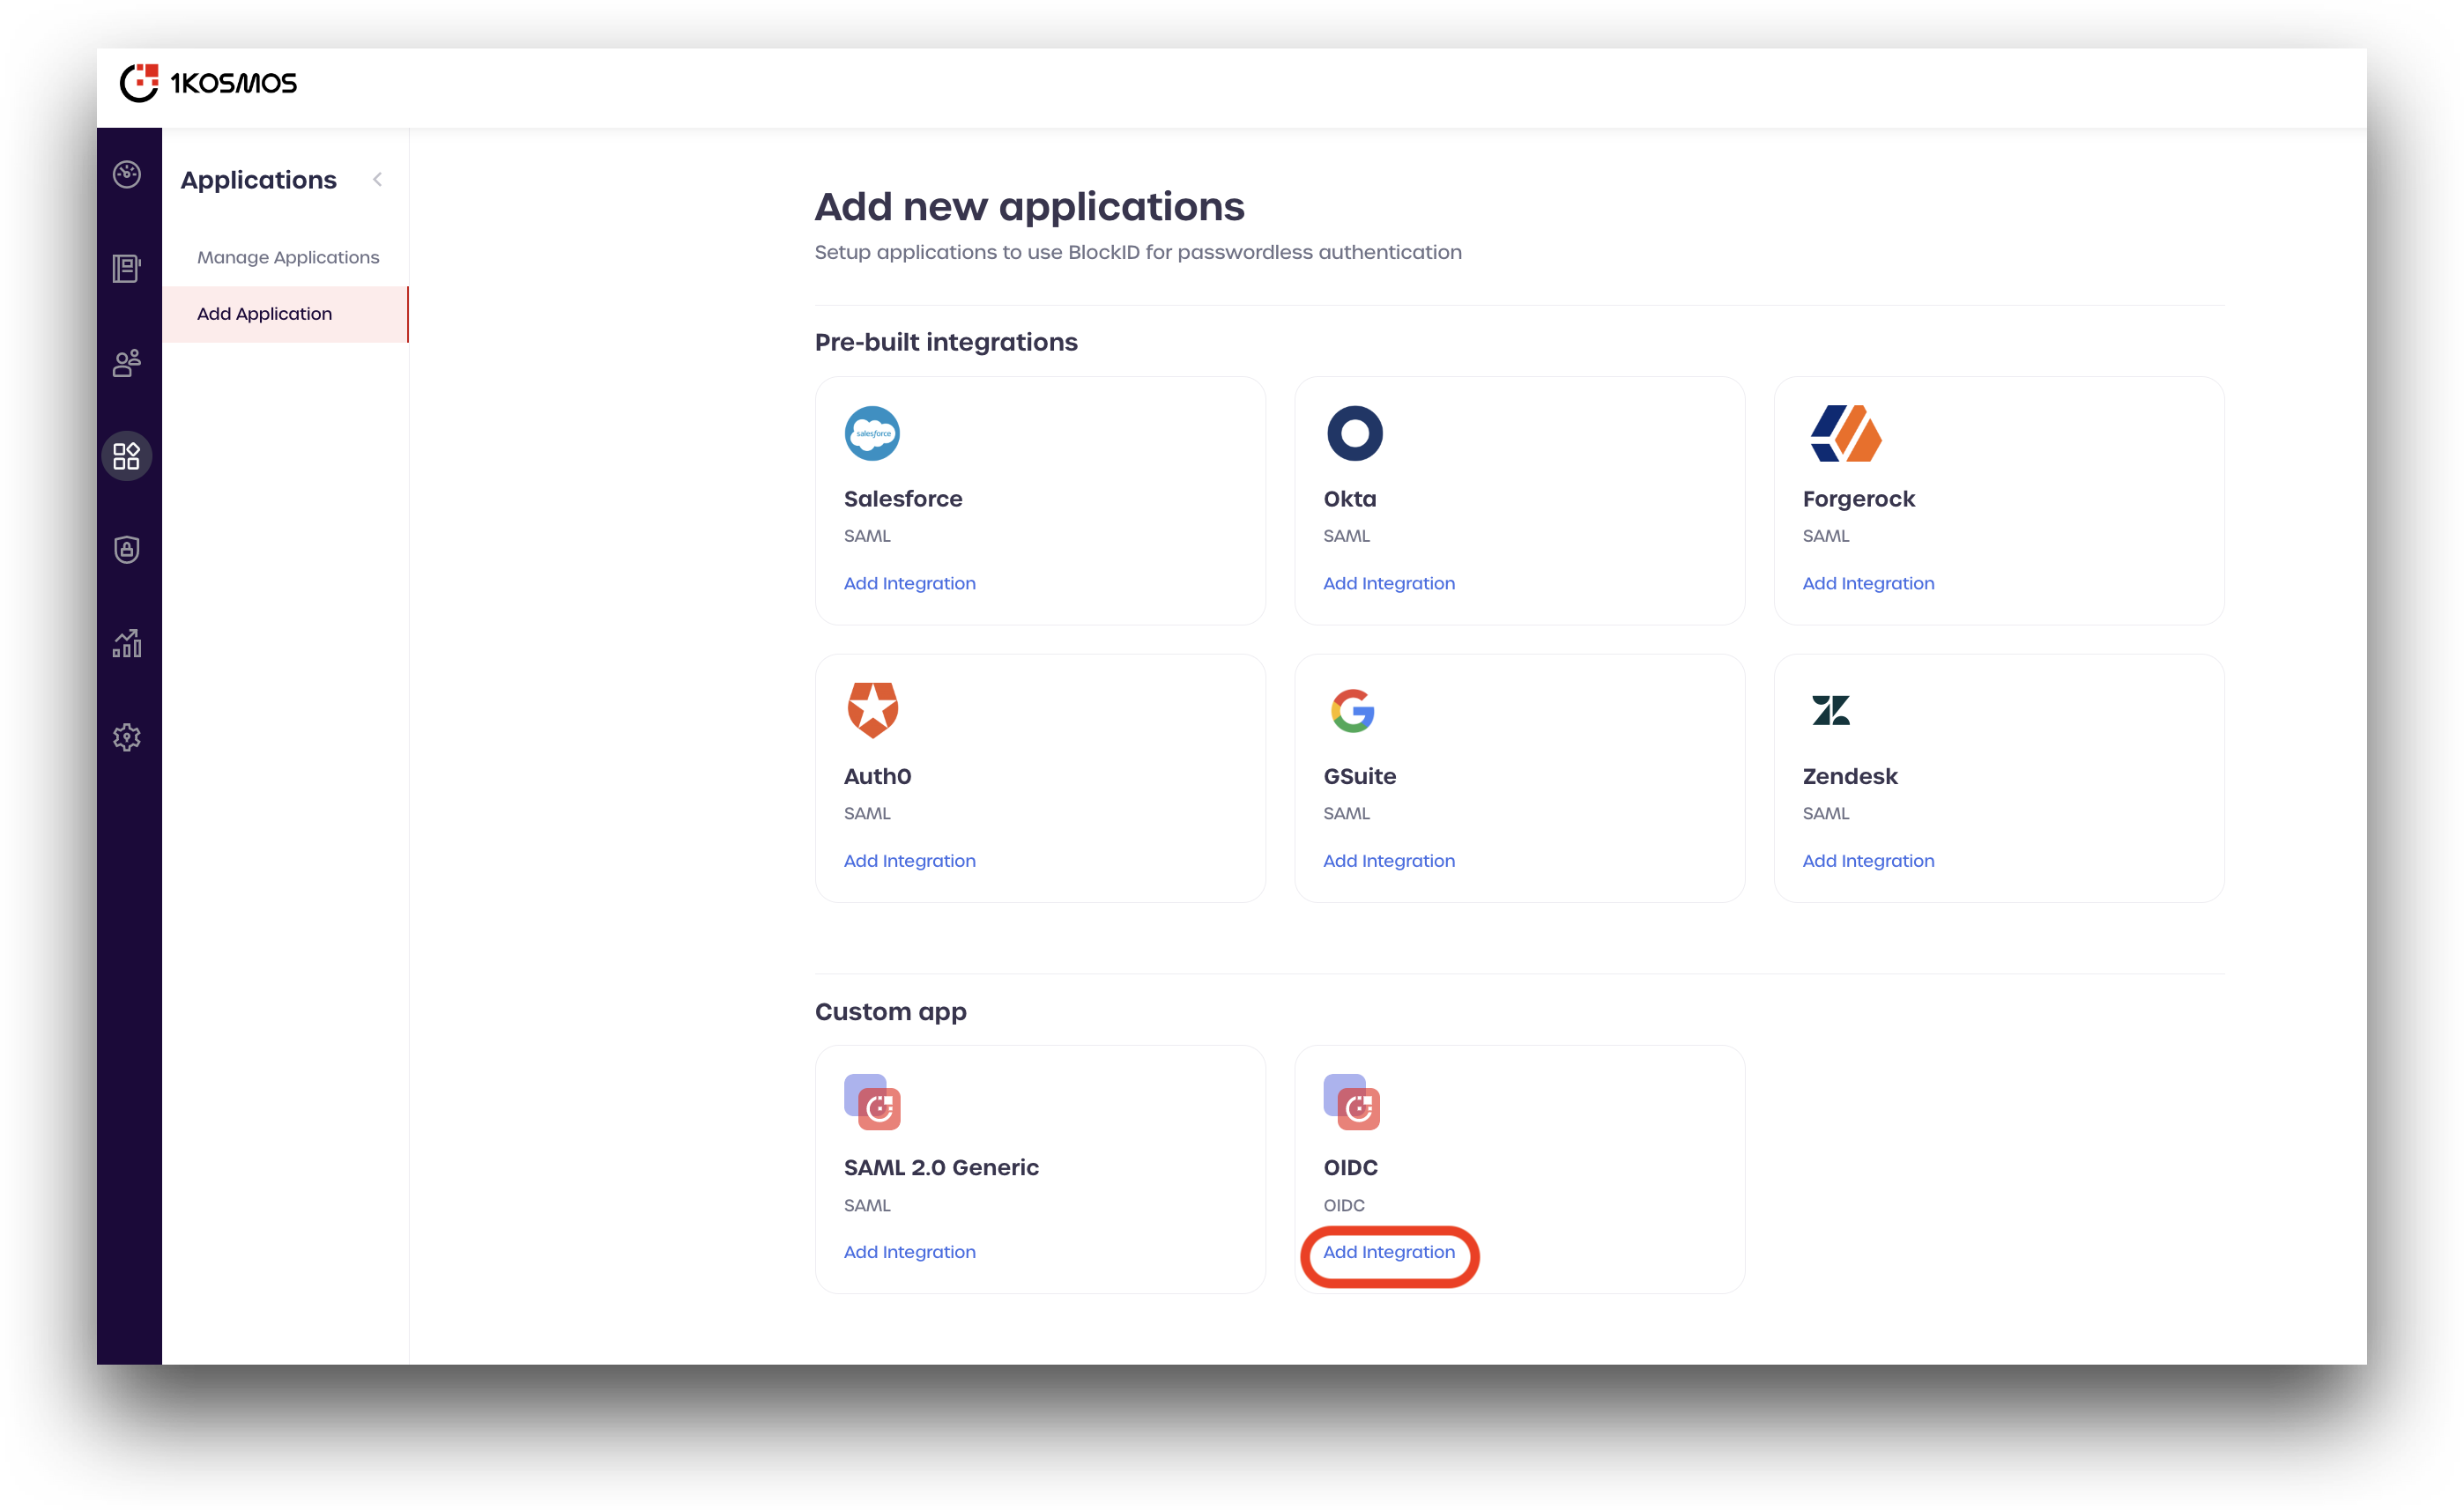
In 1Kosmos, click Applications -> Add Application -> OIDC -> Add Integration
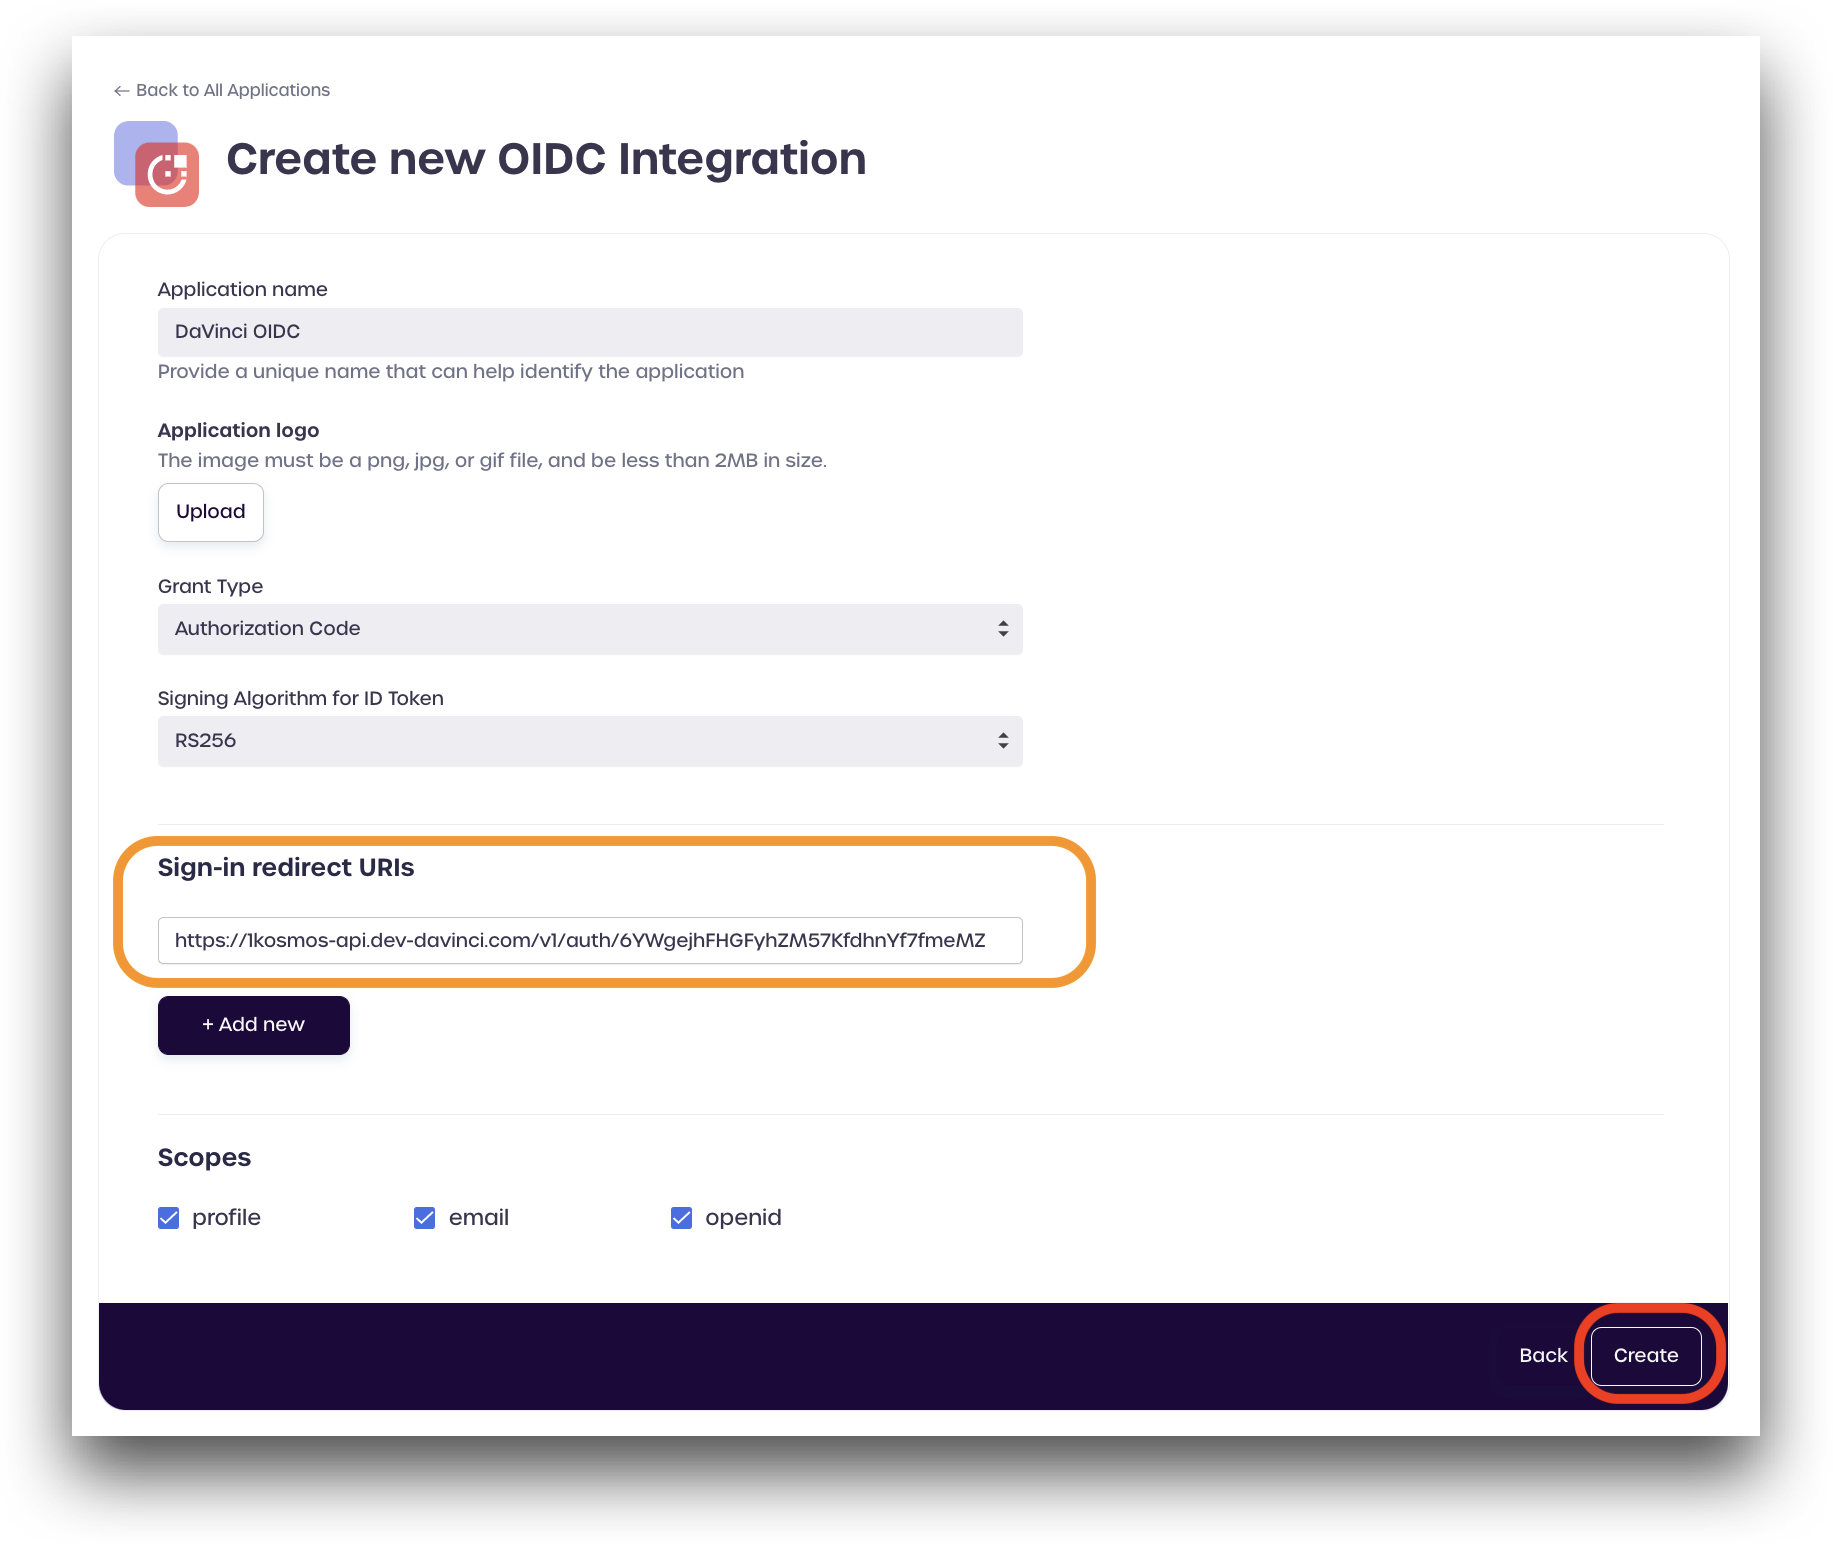
Enter a name to use, such as DaVinci OIDC, and enter the following recommended details:
- Grant Type: Authorization Code
- Signing Algorithm for ID Token: RS256
- Sign-in Redirect URIs: Enter your DaVinci Redirect URL we copied earlier
- Scopes: Leave all the options enabled
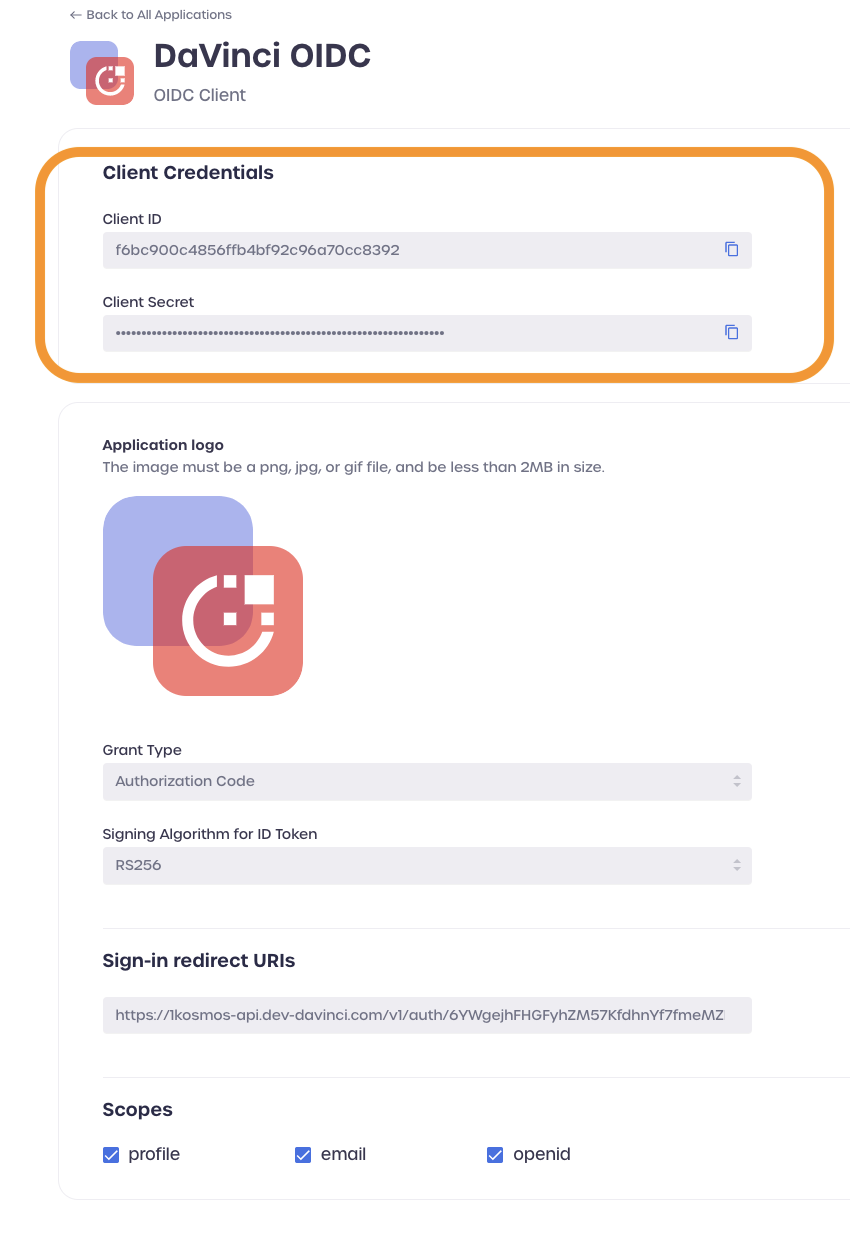
Click Create to finish adding the integration. After creation your new OIDC application will now be visible, along with the connection details.
Copy the following Client Credentials as we will need to use them in DaVinci:
- Client ID
- Client Secret
Return to the DaVinci tab in your browser.
DaVinci
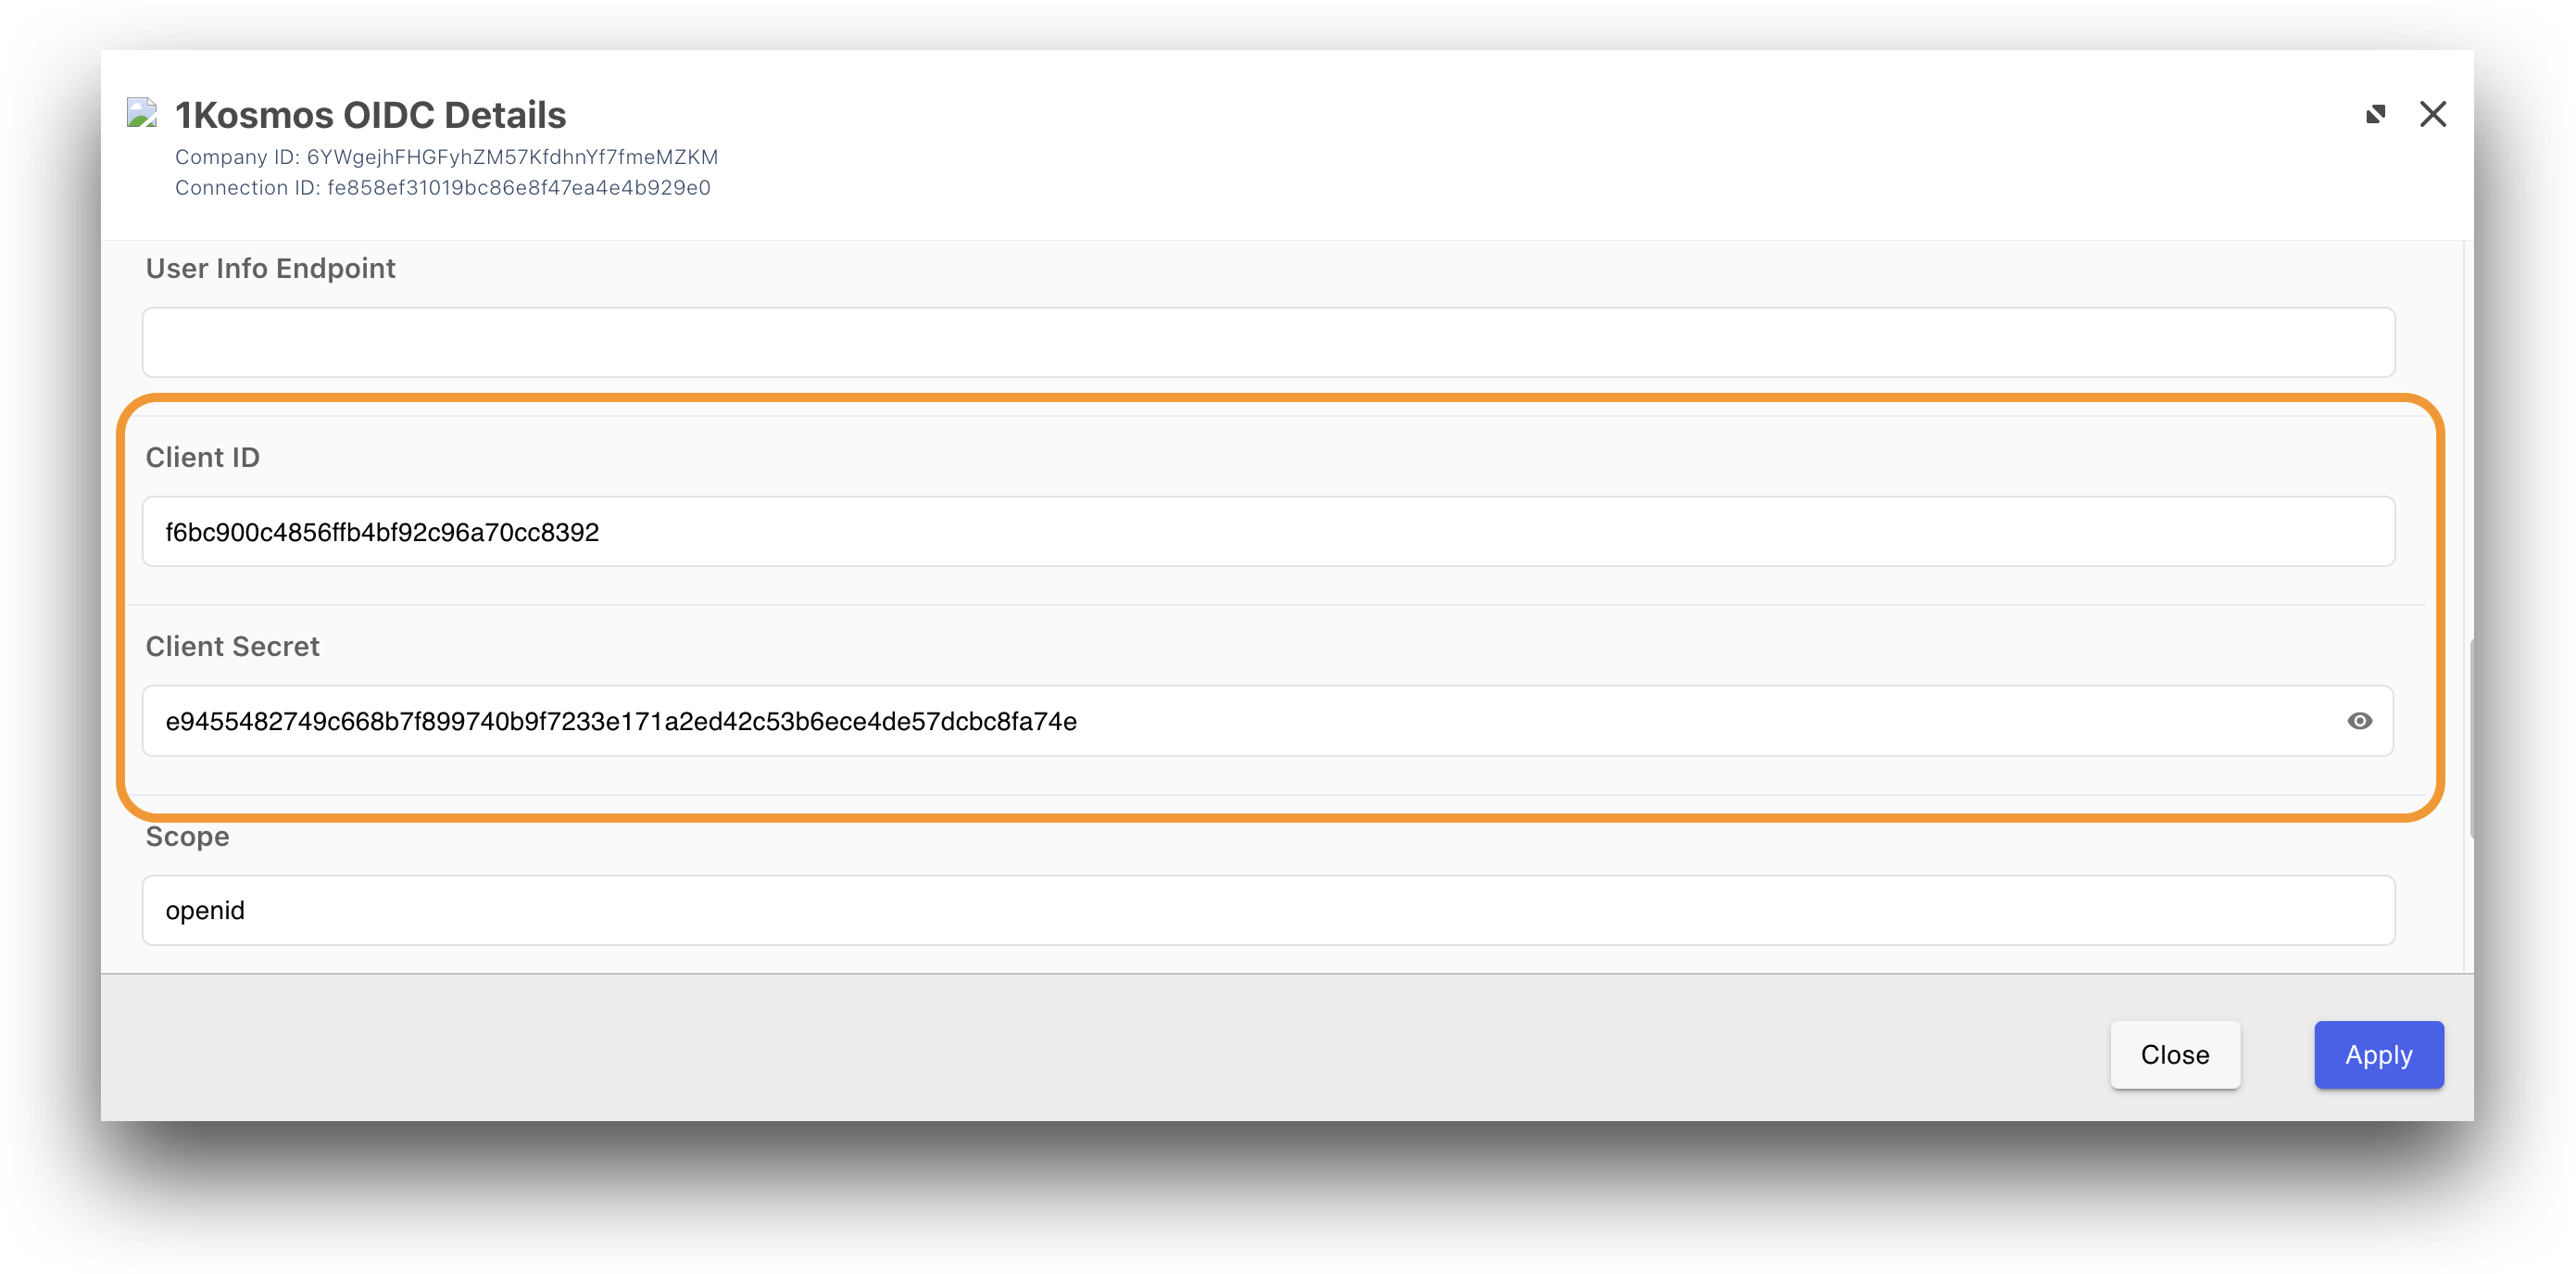
Back in DaVinci, paste the Client ID and Client Secret you copied from 1Kosmos.
Return to your 1Kosmos tab.
1Kosmos
Back in 1Kosmos, we need to view and copy some metadata details.
Click link found under Settings -> Authorization Server -> Metadata URI
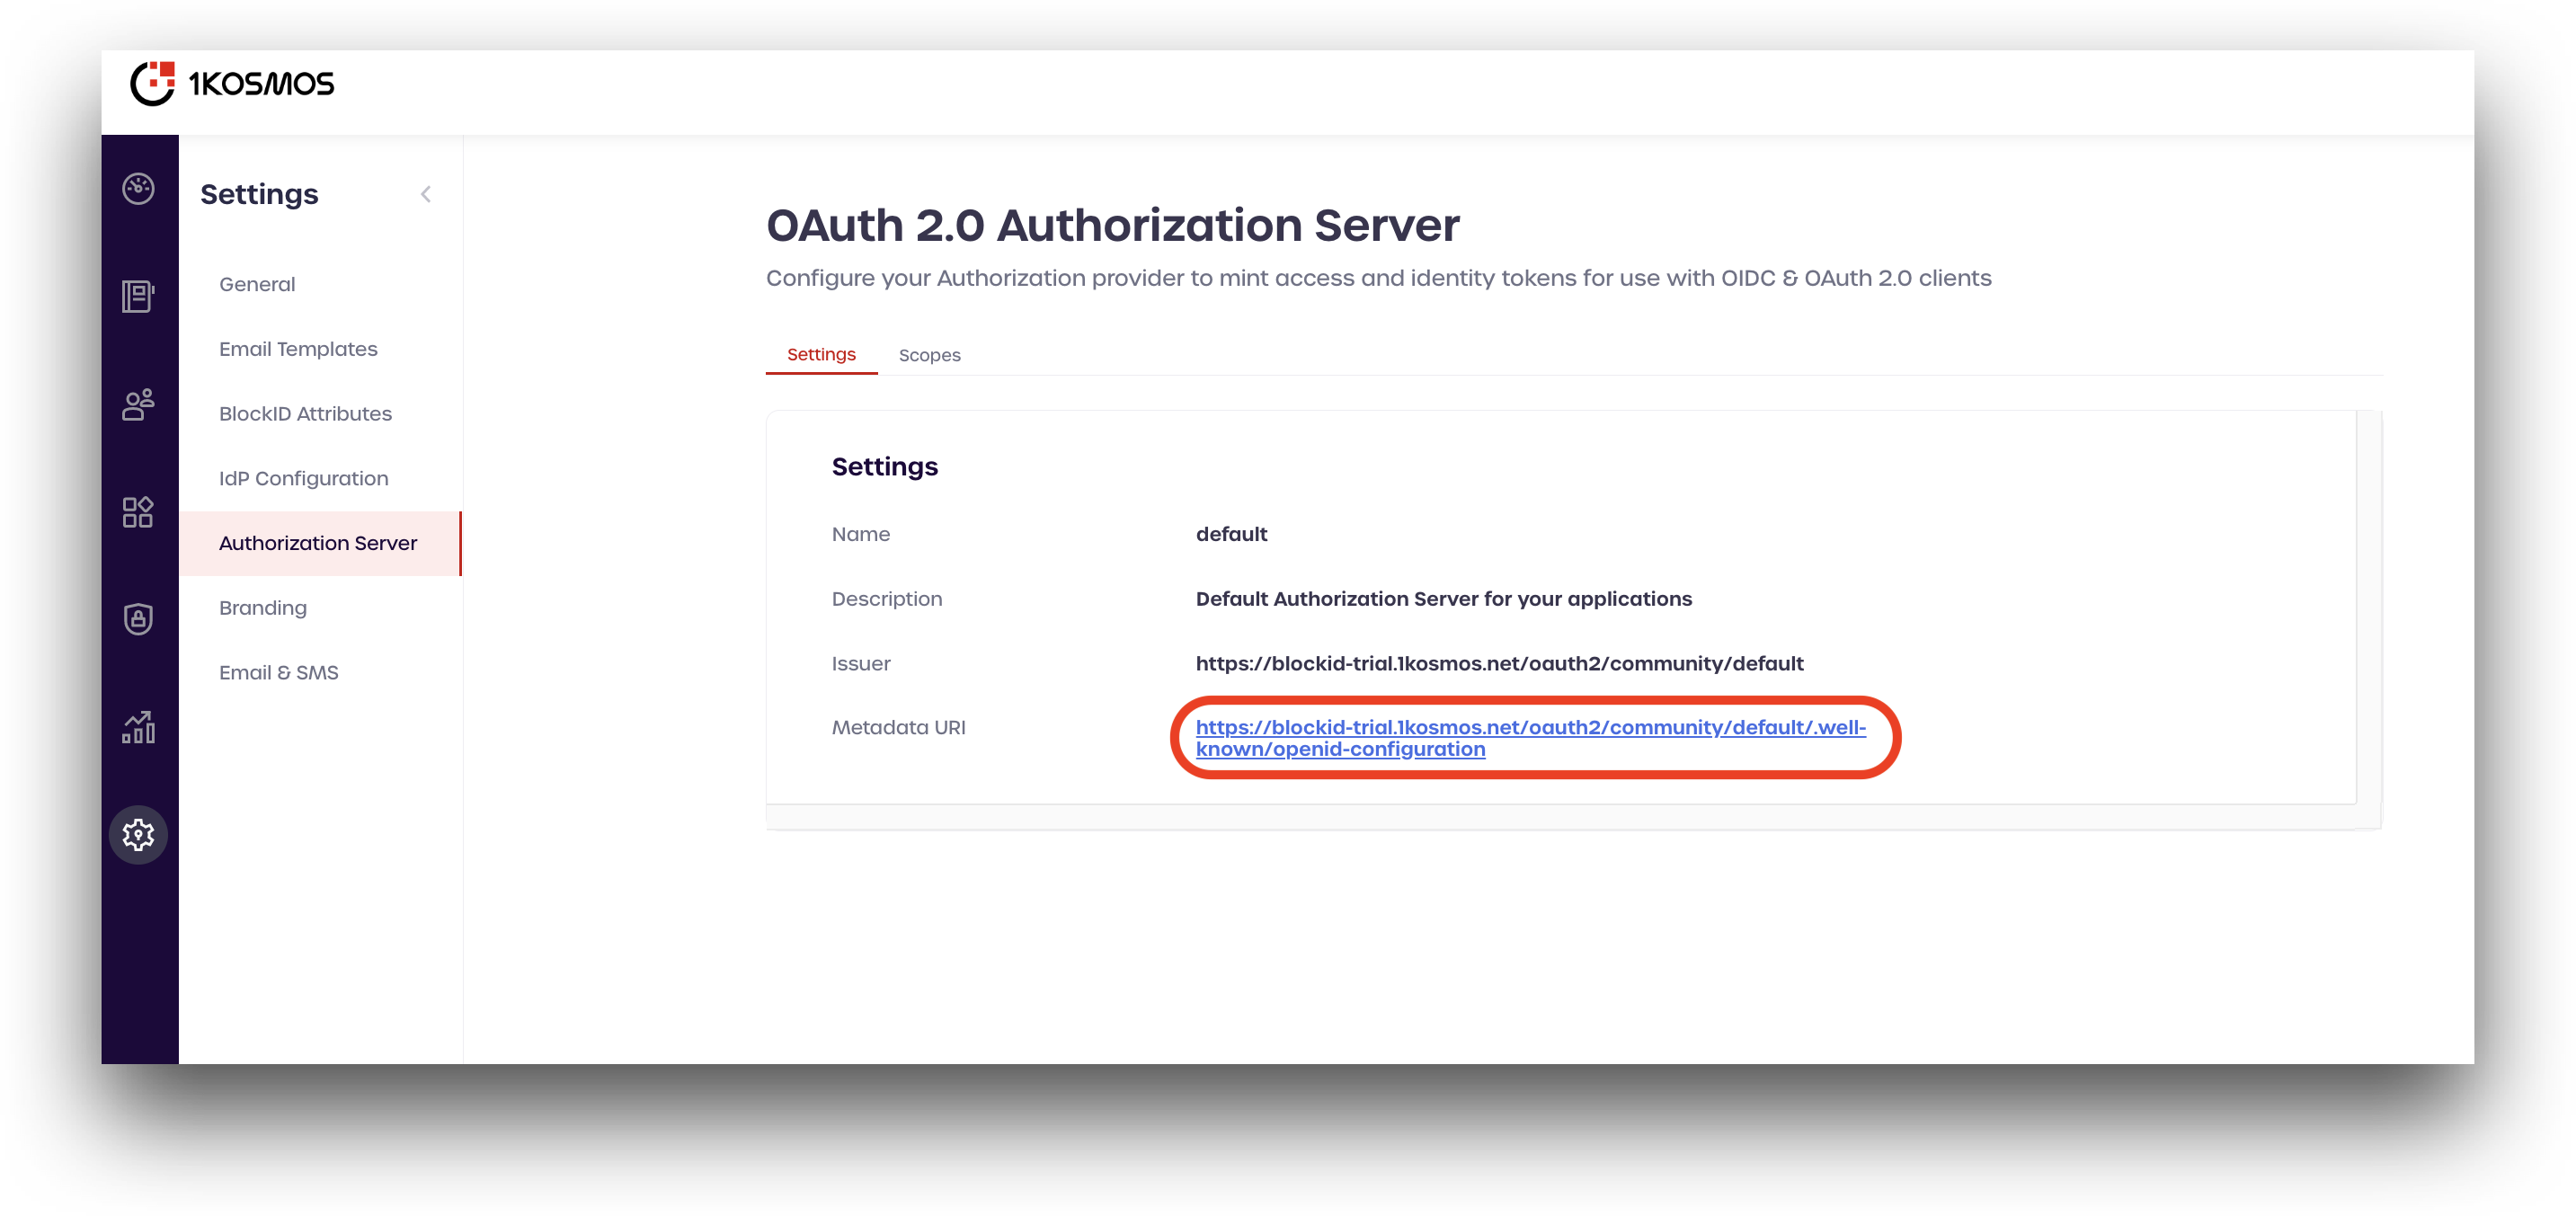
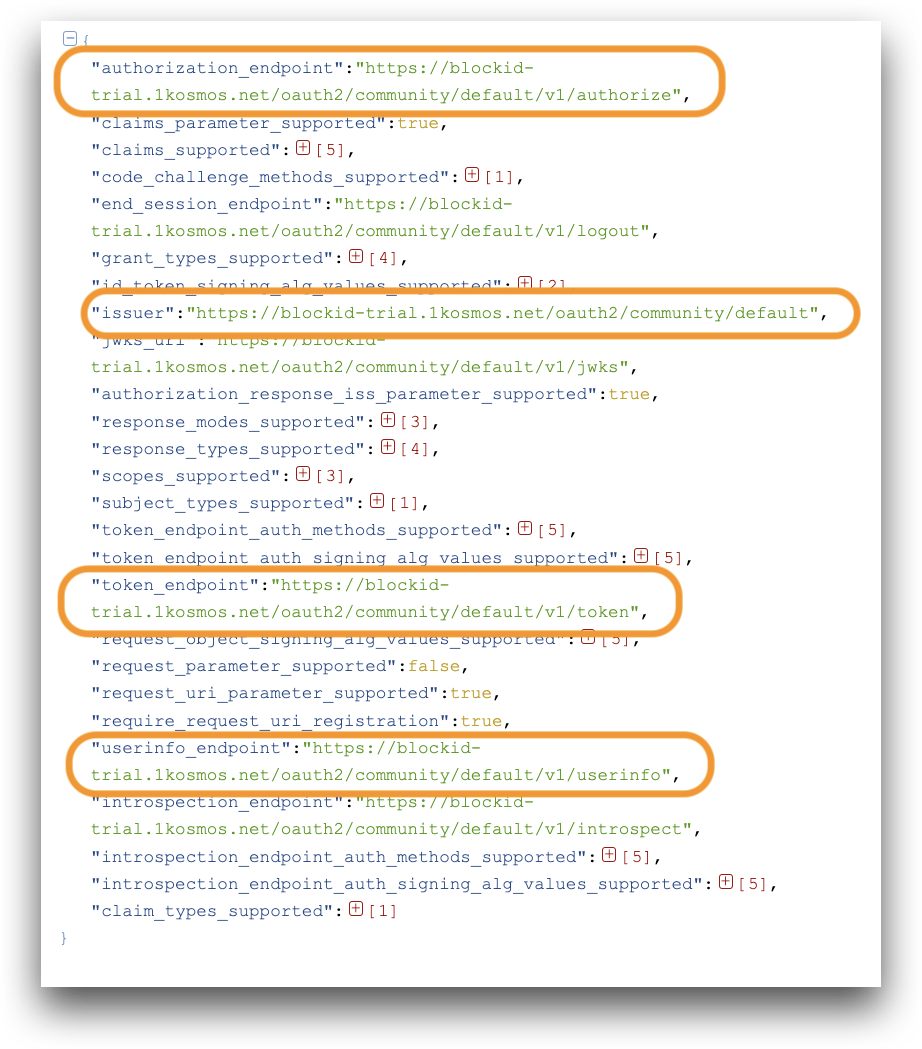
Copy the following parameters from the metadata response for use in DaVinci. It can be helpful to paste the entire metadata response into a JSON parser for easier viewing:
- Authorization Endpoint
- Issuer
- Token Endpoint
- User Info Endpoint
Return to DaVinci to add the metadata information.
DaVinci
Paste the remaining details copied from the metadata repsonse in 1Kosmos:
- Authorization Endpoint
- Issuer
- Token Endpoint
- User Info Endpoint.
Add openid, email, profile to Scope.
Toggle Send state with request to enable the setting.
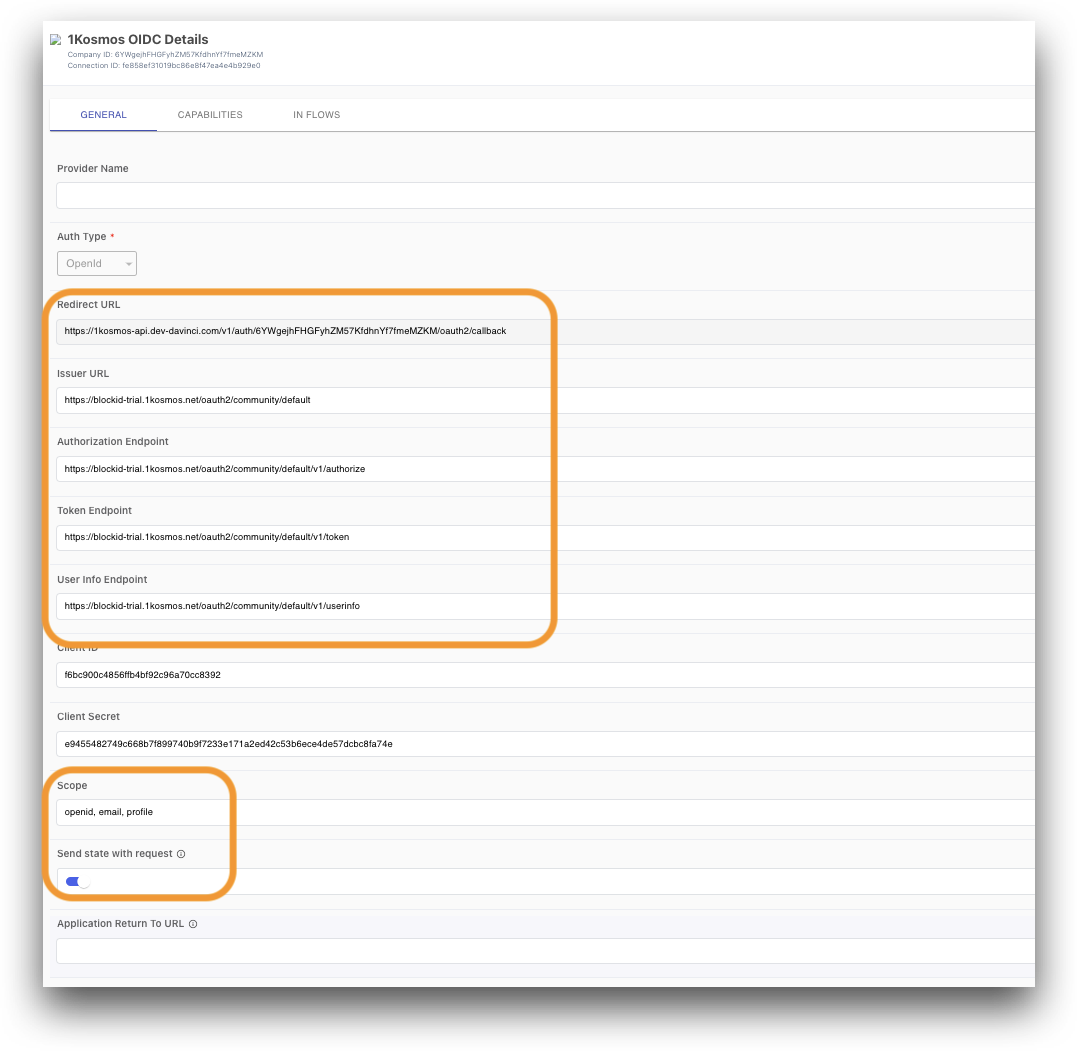
Finally, click Apply to save your settings and finish creating the 1Kosmos connector.
Using the 1Kosmos Connector in a Flow
DaVinci
In DaVinci, create a new HTTP connector and select the HTML Form capability.
Configure the HTML Form node:
- Enter a Title, such as
Sign in with 1Kosmos - In the Fields List section, click Add
- In Property Name, type
email - In Display Name, type
Email - Click Apply.
Select the 1Kosmos connector from the list and connect it to the flow.
Configure the 1Kosmos node and add the following:
- Click Redirect to 1Kosmos
- Under Query Parameters, add a new parameter
- Enter
login_hintas the Key - Under Value, click
{}and select theemailoutput variable from your HTML Form - Click Apply
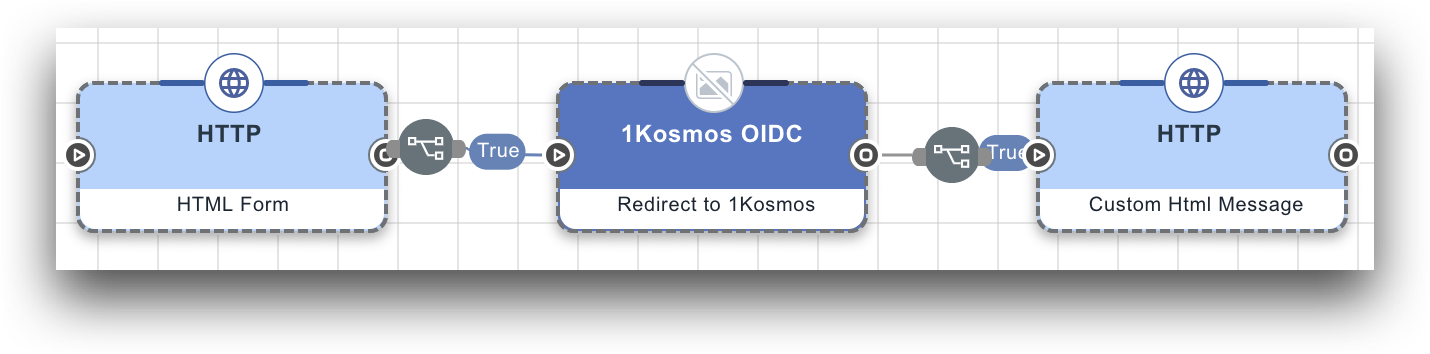
To test the flow, connect another HTTP connector to your 1Kosmos node and select the Custom HTML Message capability.
Configure the Custom HTML Message node:
- Enter a Message Title, such as
Information - Under Message, click
{}and select the 1Kosmos node - Add
output (object) - Click Apply
Next, click the play button at the top-right of the screen to trigger the flow.
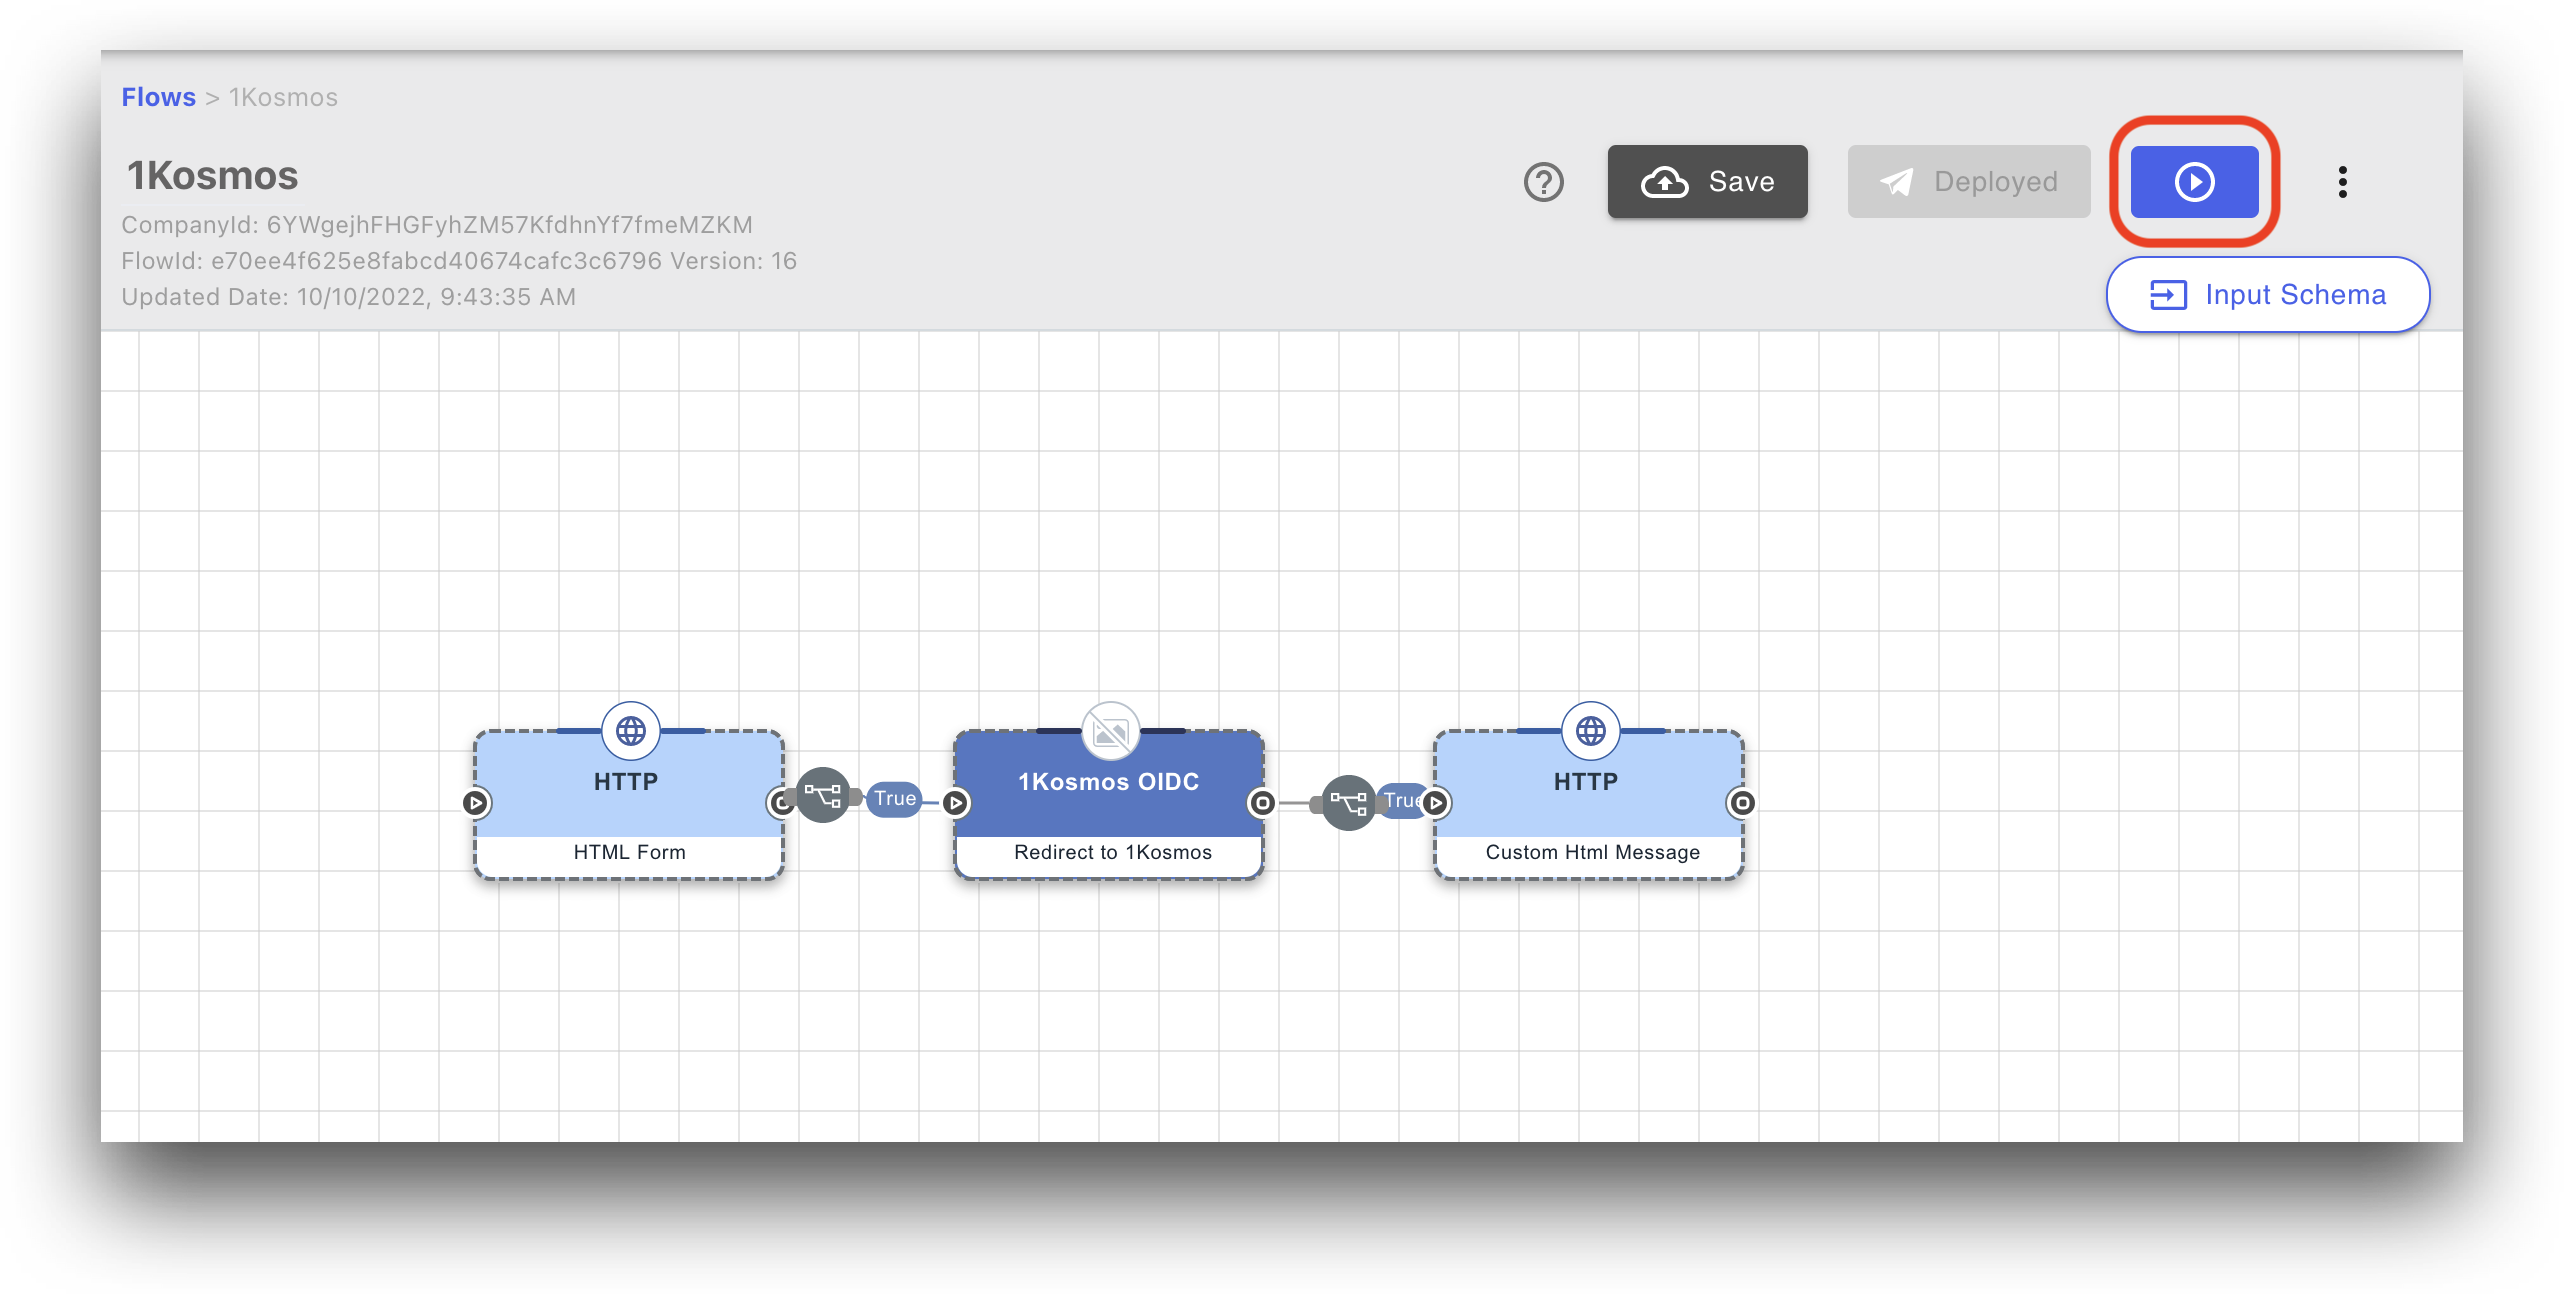
The connector will redirect you to the 1Kosmos login portal. The connector is working properly if you are able to login using your 1Kosmos credentials. In a production environment you will be redirected back to your target application. For this article, the output is a text response containing the response metadata.