Setting up Azure as an External Identity Provider (IdP) for 1Kosmos Service Provider (SP)
Introduction
This documentation outlines the steps to configure Azure as an External Identity Provider (IDP) for 1Kosmos Service Provider (SP) using SAML (Security Assertion Markup Language) for authentication. The integration allows users to authenticate through Azure and access applications and services provided by 1Kosmos.
Prerequisites
- Access to Azure portal.
- Access to 1Kosmos AdminX for configuring SP settings.
- Basic understanding of SAML configuration and identity management concepts.
Step-by-Step Configuration
Step 1: Configuring Azure as IDP
-
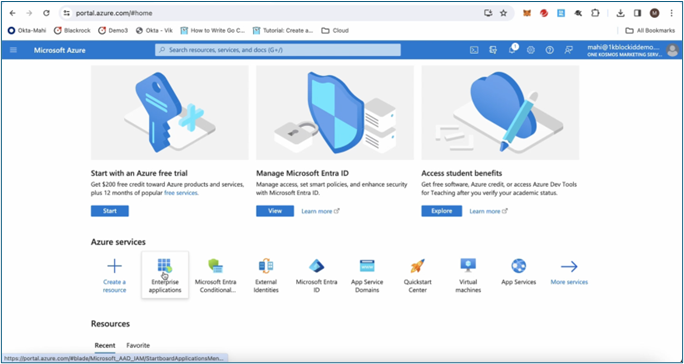
Navigate to Azure portal.
-
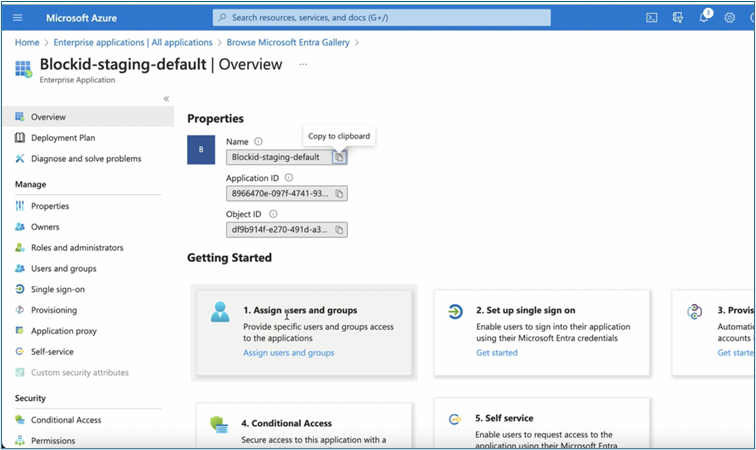
Go to Azure Services > Enterprise Applications.
-
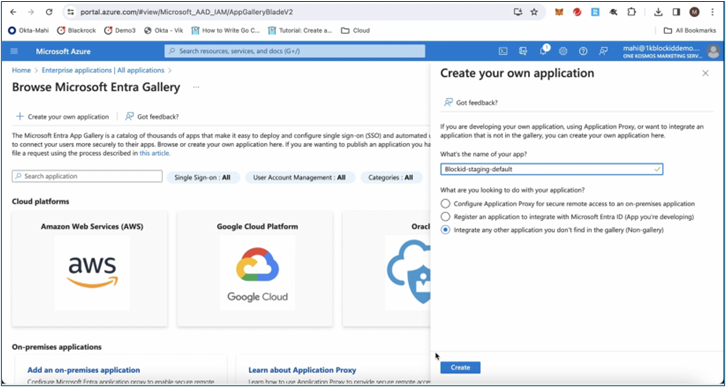
Select an existing application or create your own application.
-
If creating a new application, provide a name and select Integrate any other application you don't find in the gallery (Non-gallery), then click Create.
-
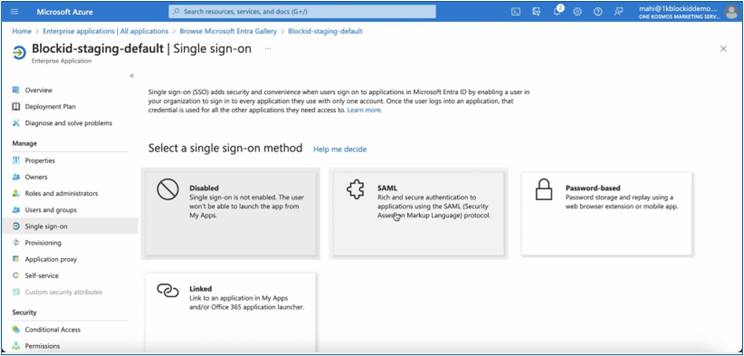
Under Configure Single sign-on, select SAML as the single sign-on method.
-
Fill in the following Basic SAML Configuration:
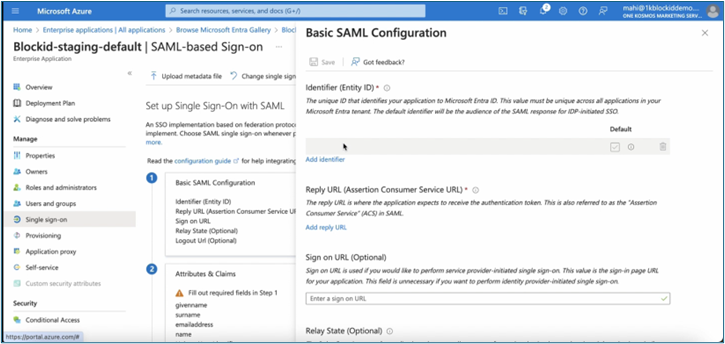
- Entity ID: Enter the Entity ID from the IDP configured in 1Kosmos AdminX.
- Reply URL: Copy the ACS URL value from the IDP configured in 1Kosmos AdminX.
-
Click Save.
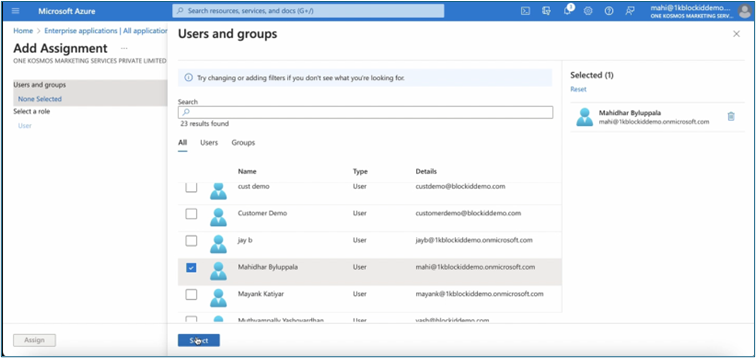
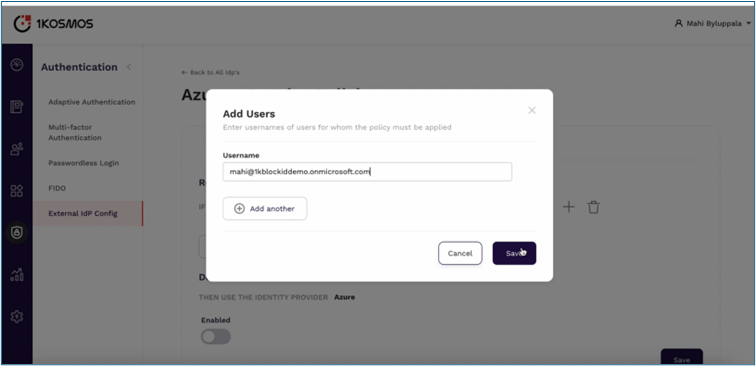
Step 2: Assigning and Setting Users
-
Navigate to Azure portal.
-
Click Add users and groups.
-
Select the user(s) from the list to assign.
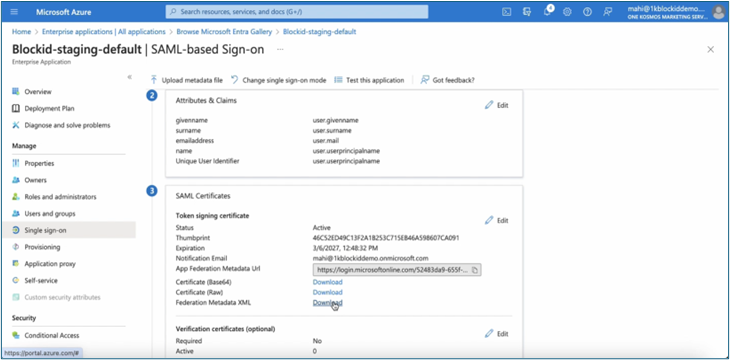
Step 3: Claims Mapping and Authentication Request Verification
Claims Mapping: This ensures accurate user information during authentication.
-
Go to Attributes & Claims on Azure.
-
Click Edit.
-
Configure the Unique User Identifier to the attribute containing the user's username on 1Kosmos SP.
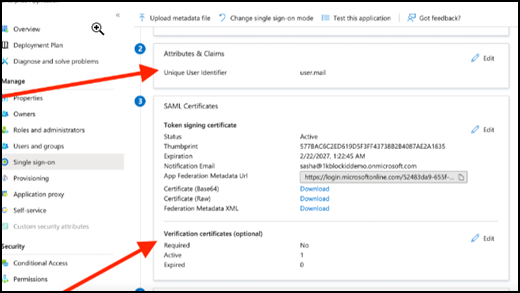
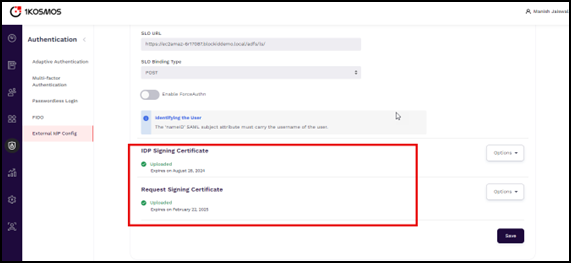
Authentication Request Verification:
- Go to Verification certificates on Azure.
- Edit the Required field to
Yes. - Additionally, upload the 1Kosmos Request Signing certificate by downloading it from External IDP Config in AdminX.
Step 4: Configuring 1Kosmos as SP
- Download Federation Metadata XML certificate from Azure:
- Go to your application in Azure portal.
- Under SAML single sign-on, click Download Federation Metadata XML.
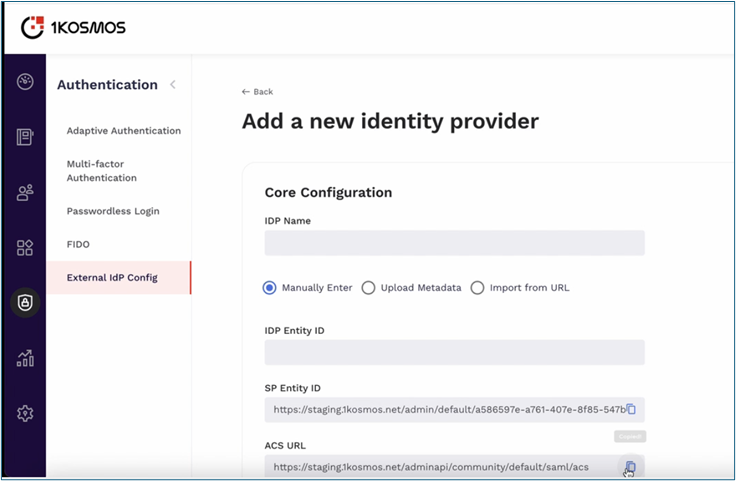
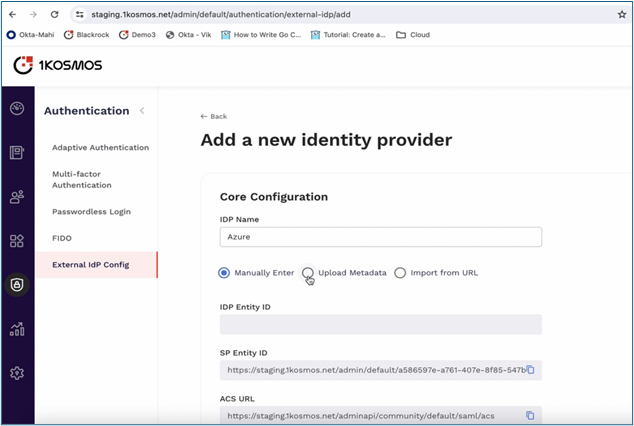
- In 1Kosmos AdminX:
- Go to Authentication > External IDP > Add a new Identity Provider.
- Configure Core Configurations:
-
Enter IDP Name.
-
Select Upload Metadata and upload the metadata XML downloaded from Azure.
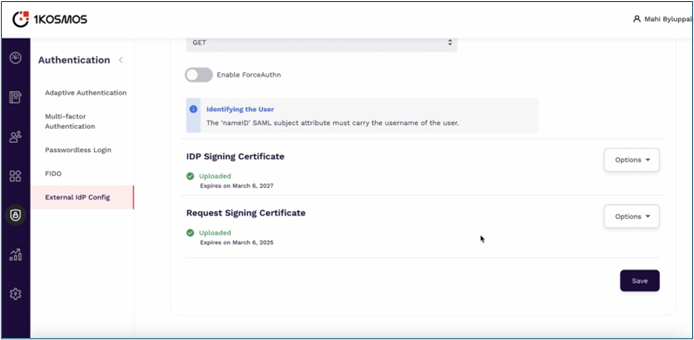
-
All the configurations are auto updated. Click Save.
-
Step 5: Defining Routing Policies
Define routing policies in 1Kosmos AdminX to specify under what conditions Azure IDP should be used for authentication. Below are examples of routing policies: 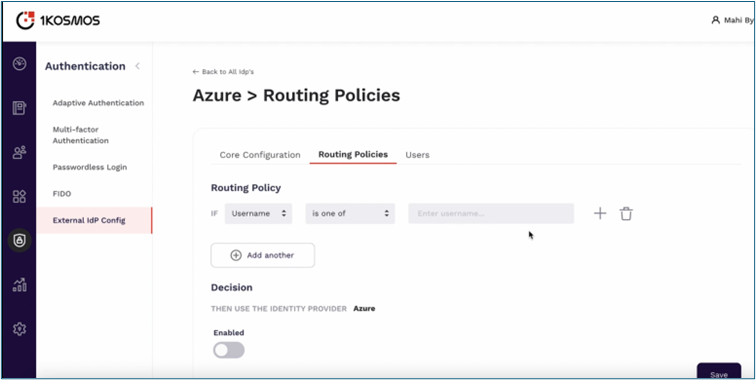
Routing Policy with IF condition only:
- If the username, group, or all users from the External Identity Provider meet specific criteria:
- is one of: Route users whose username or group exactly matches the specified value to the specified identity provider.
- is not one of: Route users whose username or group does not exactly match the specified value to the specified identity provider.
- contains: Route users whose username or group contains the specified substring to the specified identity provider.
- does not contain: Route users whose username or group does not contain the specified substring to the specified identity provider.
- starts with: Route users whose username or group starts with the specified prefix to the specified identity provider.
- does not start with: Route users whose username or group does not start with the specified prefix to the specified identity provider.
- ends with: Route users whose username or group ends with the specified suffix to the specified identity provider.
- does not end with: Route users whose username or group does not end with the specified suffix to the specified identity provider.
Routing Policy with the combination of IF + AND condition only:
- Create a secondary criteria for groups. For example, if users belong to a specific group AND meet additional conditions, route them to the specified identity provider.
Routing Policy with the combination of IF + AND + AND condition:
- All users from the External Identity Provider must meet an additional condition in addition to the initial criteria. For instance, if all users from the External IDP belong to a specific group AND meet further conditions, route them to the specified identity provider.
This structure ensures that each subsequent condition builds upon the previous ones, defining the specific criteria that determine which users are routed to the designated identity provider.
Step 6: Managing User Store
-
Create new external IDP users in 1Kosmos AdminX.
noteJust-In-Time (JIT) provisioning is not supported. Users who need to be redirected to the external Identity Provider (IDP) must be pre-created within the IDP store or connected through a directory.
-
Enter all required information and click Create.
Step 7: Testing Integration
Before deploying the integration into production, thoroughly test the configuration by:
- Expanding the test scope to include different user scenarios, including users who meet the IDP condition.
- Logging in with Azure credentials to access applications and services provided by 1Kosmos.
- Verifying that routing policies are correctly applied.
Conclusion
This documentation provides a comprehensive guide to setting up Azure as an external IDP for 1Kosmos SP using SAML authentication. By following these steps, administrators can effectively manage user authentication and access control in a hybrid cloud environment.