Orion Authenticator
Overview
Orion Authenticator is an advanced authentication solution designed for Mac and Windows workstations. It enables users to onboard their accounts and generate TOTPs for MFA login to applications. Additionally, Orion helps collect information about the workstation's security posture, ensuring robust security through an intuitive interface.
Orion is especially beneficial for implementing MFA in environments where mobile devices are restricted. In such cases, users provide their password and passcode from Orion as an extra layer of authentication. This approach allows users to secure their data while maintaining simplicity.
The authenticator also serves as a health agent, gathering essential information to enforce adaptive authentication policies set by organizations. To allow users to onboard accounts and use passcodes from Orion, the community administrator must enable the Login with Orion Authenticator setting in the AdminX control panel under Authentication > Orion Authenticator. Once users log in to their 1Kosmos portal, they can enroll their account by navigating to the Devices tab in the My Profile section.
After account onboarding, community administrators can view the details of the workstation where the onboarding took place.
Open Ports
One of the following ports must be available for Orion to function: 47061 to 47069.
Orion launches a local HTTPS server to enable secure communication with the 1Kosmos AdminX login page, simplifying the sharing of information and facilitating account onboarding.
System Requirements
The system requirements for the Orion Authenticator are as follows:
For Mac
- Operating System : macOS 13 and above
- Required Disk Space : 350 MB of available disk space
- Port Availability : 47061 – 47069
For Windows
- Operating System : Windows 10, Windows 11, Windows Server 2016, Windows Server 2019, and Windows Server 2022
- Port Availability : 47061 – 47069
Installing Orion Authenticator Agent
The Orion Authenticator can be distributed to end machines through SCCM or any Mobile Device Management (MDM) solution. It can also be installed manually by double clicking the installer and following the installer wizard.
By default, the Orion Authenticator Agent is installed in the directory C:\Program Files\1Kosmos\Orion.
Windows
Prerequisite Libraries
The following runtime libraries are required for Orion to function on Windows:
| Software | Version |
|---|---|
| Microsoft Visual C++ 2015-2022 | - x86 - x64 |
| ASP .Net Core Runtime 8.0 or greater | - x86 - x64 |
| .Net Desktop Runtime 8.0 or greater | - x86 - x64 |
The Windows Orion installer manages the download and installation of the required prerequisites. However, if an organization's policy prevents installers from downloading third-party libraries, these libraries must be installed manually.
To perform the automated installation on Windows, run the following commands:
For installations where no user input is required, but the progress of the installation wizard is displayed:
OrionWindowsAuthenticator-1.0.0.0.exe /SILENT /NORESTART
shutdown /r /t 20 /d p:4:2 /c "Windows Orion Authenticator"
In the case of silent installation, the user is not shown any installation wizard:
OrionWindowsAuthenticator-1.0.0.0.exe /VERYSILENT /SUPPRESSMSGBOXES /NORESTART
shutdown /r /t 20 /d p:4:2 /c "Windows Orion Authenticator"
-
It is required to restart the Windows workstation after installing or upgrading the Orion Authenticator agent.
-
During the Orion Authenticator agent upgrade on a Windows machine, if prompted to close applications, it is recommended to choose the Automatically close the applications option for a smooth installation process. However, if you select the Do not close the applications option, the upgrade will not proceed, and the installer will prompt you to either roll back or cancel the installation.

Mac
To perform an automated installation on a Mac, run the following command:
sudo installer -pkg "1Kosmos-Orion-Authenticator_v1.0.0.pkg" -target /
In the command above, ensure that you provide the full path of the .pkg installer within double quotes.
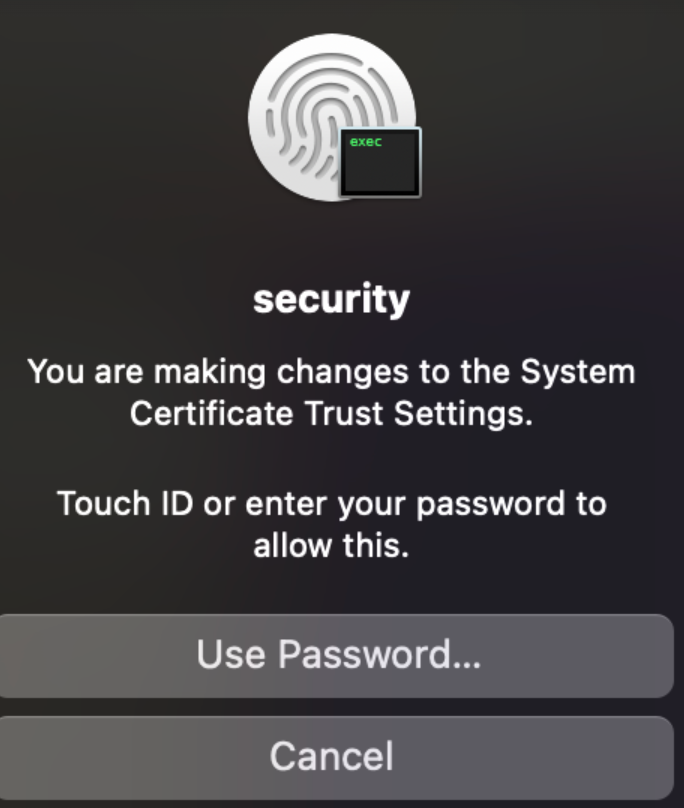
If you encounter a certificate settings issue while installing the Orion Authenticator agent on a Mac, it is recommended to click the Use Password... button to continue the installation. However, if you click Cancel, the agent will not be installed, and the factsSubmitted section under the E_LOGIN_SUCCEEDED event will remain empty.
Performing In-place Upgrades
To execute an in-place upgrade, launch the installer for the new version on the target machine. This process will replace the older binary with the updated agent.
Note: Current enrollments and data will remain intact.
Enabling Orion Authenticator
The community administrator can use the Login with Orion Authenticator setting under Authenticator > Orion Authenticator page to enable the Orion Authenticator.
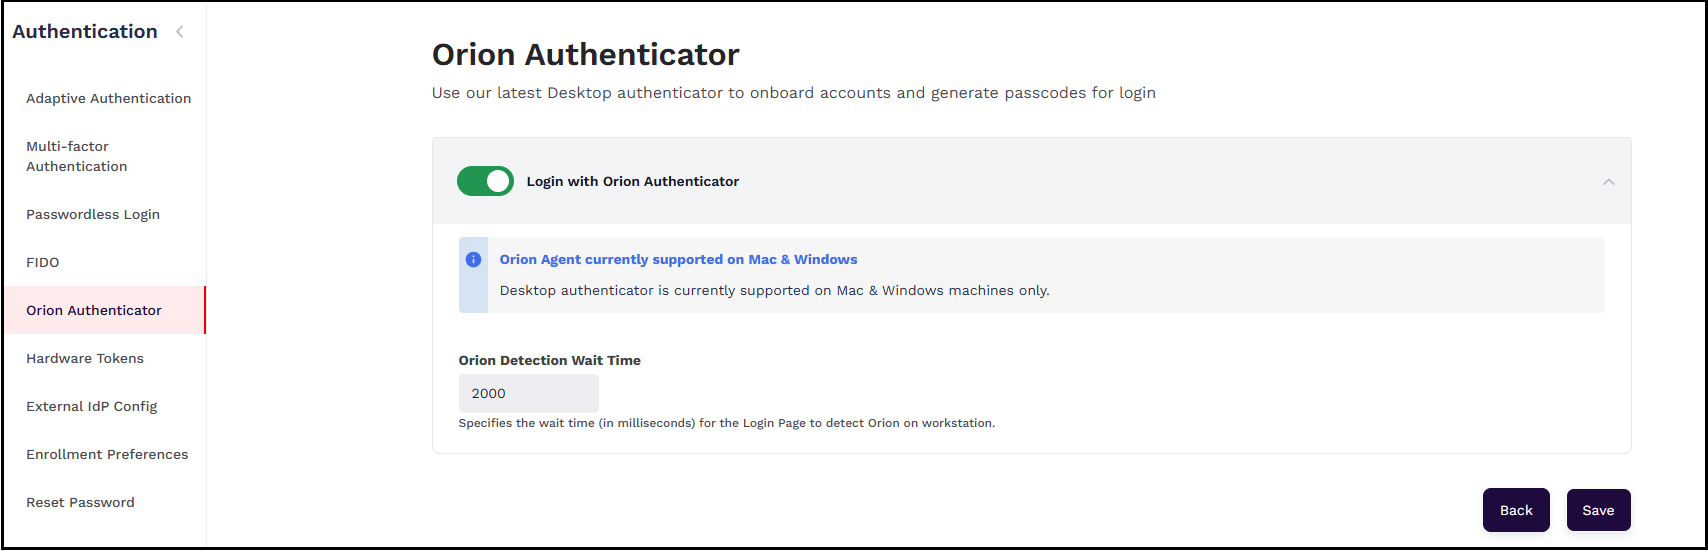
When the setting is enabled, all users in the community can use the Orion Authenticator option under the Setup drop-down menu of your profile, else cannot access the option if the setting is disabled.
To enable the Orion authenticator, follow these steps:
- Navigate to the AdminX interface.
- Go to Authentication > Orion Authenticator. The Orion Authenticator page is displayed.
- Turn the Login with Orion Authenticator slider ON.
- Click Save.
Configuring Orion Detection Wait Time
Community administrators can now configure how long the UI waits for a response from Orion using a new setting, Orion Detection Wait Time, available under Authentication > Orion Authenticator. This setting specifies the wait time (in milliseconds) for the login page to detect Orion on the workstation.
Onboarding Accounts
Once users login to their 1Kosmos portal, they can enroll the account by navigating to the Devices tab in the My Profile section.
-
Navigate to the Adminx interface.
-
In the Profile icon on the right corner of the page, click the logged-in user name drop-down menu and click My profile.
-
Navigate to the Login Options tab and under the Setup drop-down menu, click Orion Authenticator.
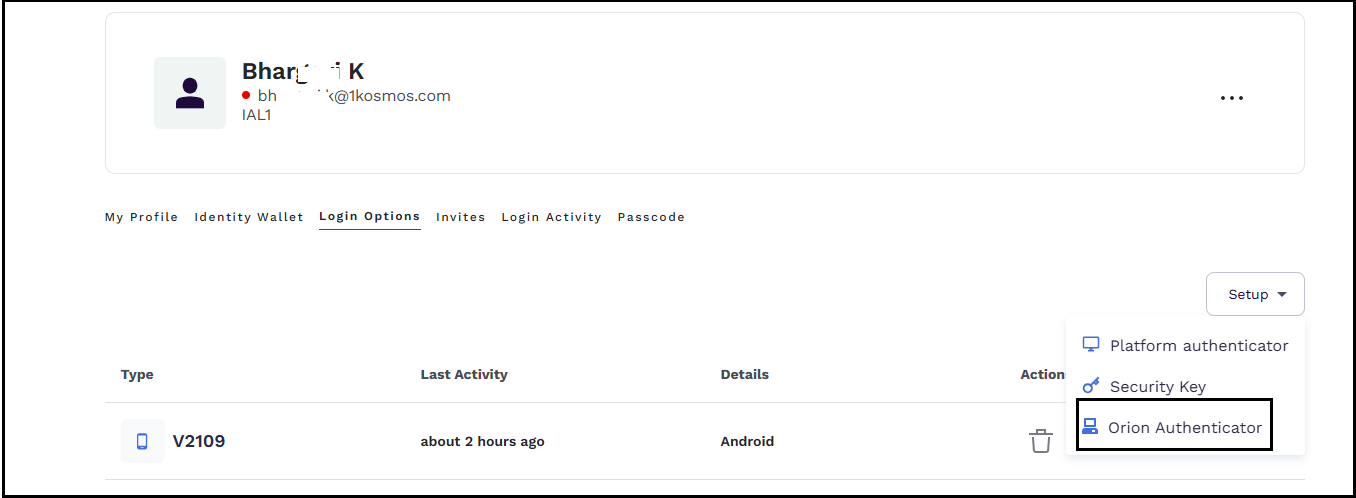
AdminX identifies the installed authenticator in the workstation and forwards an enrollment request over to Orion.
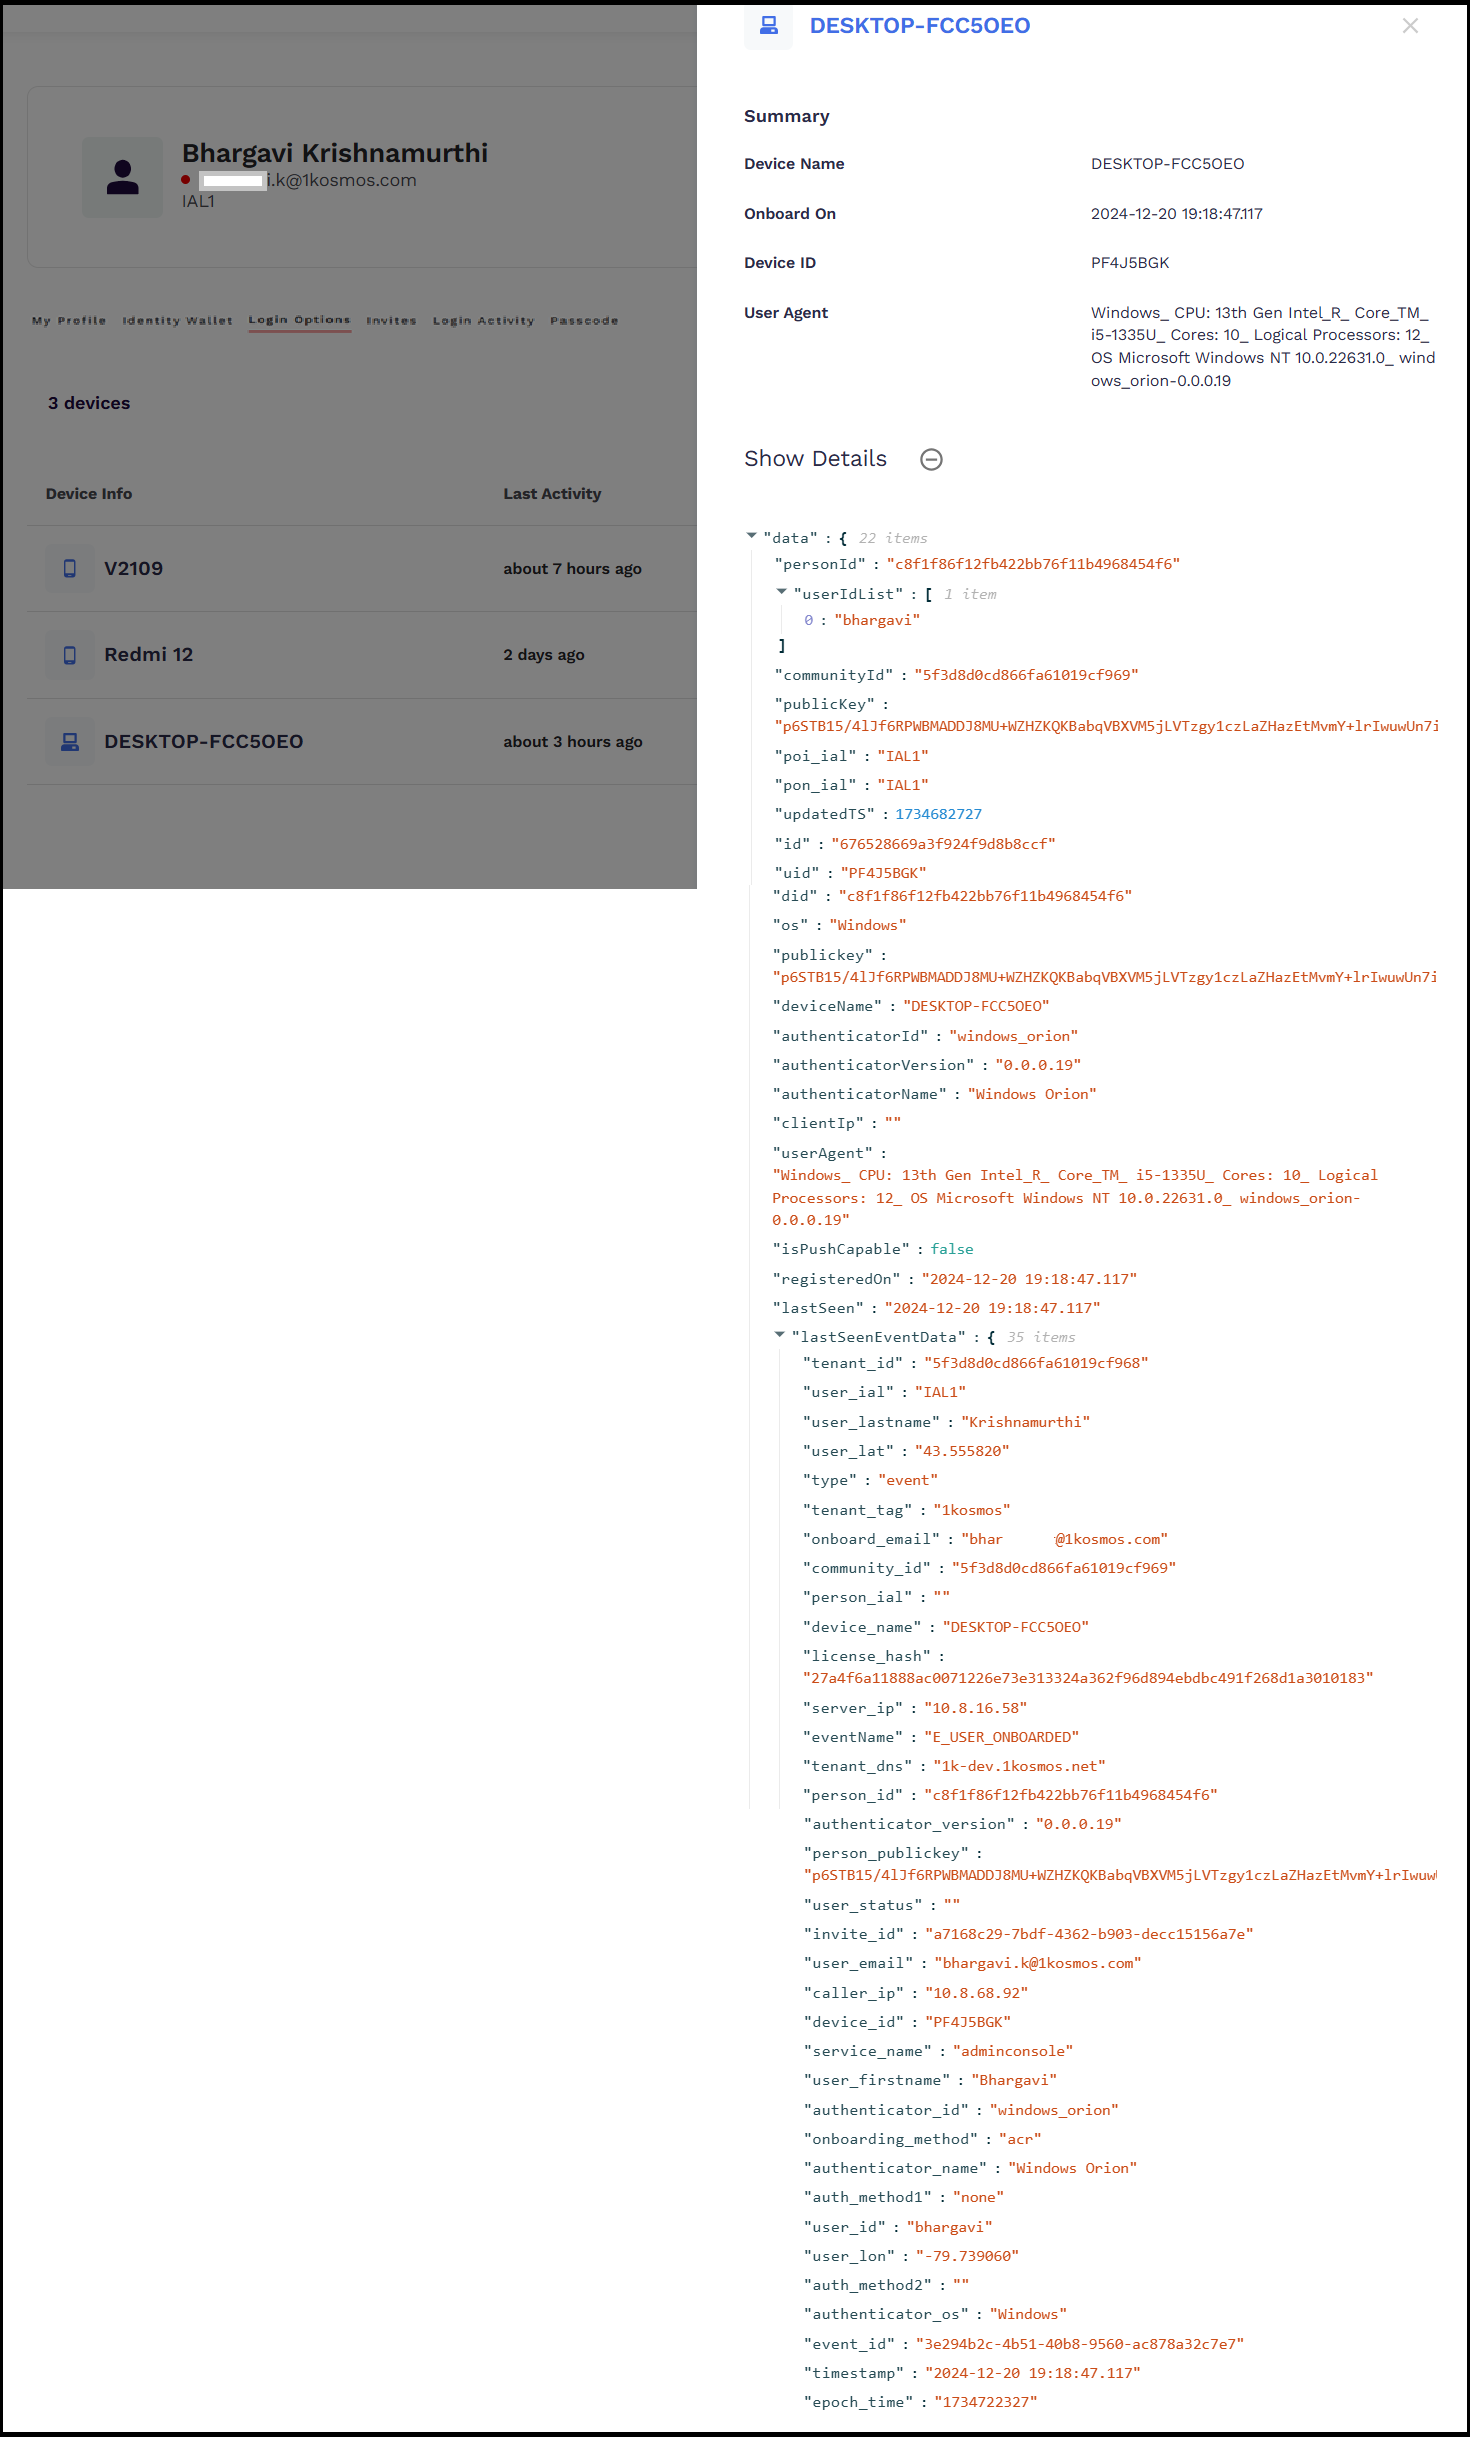
After onboarding the account, the device used during onboarding appears under the Login Options tab of the profile section of the user.

An E_USER_ONBOARDED event is also created on the AdminX where the administrator can view the details of the onboarded account. This can be accessed through the AdminX interface under Reports > Events Logs and select the E_USER_ONBOARDED event from the Event drop-down menu. For more information on different types of events, see Event Logs.
The community administrator can use the Max number of devices linked to an account and Max number of accounts onboarded on single device settings under Authentication > Passwordless Login on the AdminX interface to configure the maximum number of devices.
Currently, the Orion authenticator supports the onboarding of accounts from the following browsers:
- Safari
- Brave
- Mozilla Firefox
- Microsoft Edge
- Google Chrome
If you are using the Brave browser to onboard accounts, it is recommended to disable Shields as it blocks certain cross-origin requests or scripts for privacy and security reasons. By disabling shields, the browser can identify the Orion Authenticator.
Creating Adaptive Auth Journey For Orion Authenticator
The community administrator can create an adaptive auth journey for the Orion Authenticator to perform the multi-factor authentication. After onboarding an account through the Orion authenticator,
To create an adaptive auth journey, follow these steps:
-
In the Adminx interface, navigate to Authentication > Adaptive Authentication.
-
Click Add new adaptive auth journey. The Create New Adaptive Auth Journey page is displayed.

-
Specify a journey name and associate a rule to it.
-
In the MFA Required action, select the Authentication Method as Password & Passcodes from Orion Agent.
-
Click Save.
Performing MFA Using OTP Generated from Orion Authenticator
The OTP generated from the Orion authenticator is used while logging into the Adminx interface.
To generate the OTP from Orion Authenticator, follow these steps:
-
Open the 1Kosmos login page and enter your username, and then click Next.
-
Open the Orion Authenticator agent and click View your Passcode.
-
The authenticator generates an OTP and displays it on the Accounts page below. Copy the OTP.

-
In the Choose an authentication method screen, click Password & OTP.
-
After entering the password, click Next.
-
In the Choose an authentication method code screen, click the Codes generated by Orion Agent option and then enter the code copied from the agent.

You will be successfully logged in.
Viewing Logs
The administrator can view the logs in the ‘/logs/’ directory within the installation path of the agent.
For Mac:
/Users/{macUser}/Library/Containers/com.onekosmos.orion.mac/Data/Library/Logs/
For Windows:
C:\Program Files\1Kosmos\Orion\Logs
To view the logs, open the latest file. There could be multiple files due to log rotation implemented.
The maximum size of a log file before it rolls over to a new file is 30 MB, and up to 10 log files will be retained in the logs directory.
Resetting Orion Authenticator Agent
Resetting the agent involves restoring its default settings and clearing any stored data, effectively removing any enrolled accounts. After resetting the agent, user accounts can again be onboarded using new user identifier (did) and publicKey parameters.
To reset the agent, follow these steps:
-
Open the agent and click the i icon on the top right corner of the agent window.
-
In the device details section, click Reset Agent.
The agent notifies the user that the accounts and the data associated with them are removed.

Uninstalling Orion Authenticator Agent
To perform a silent automated uninstallation on Windows, run the following command:
"C:\Program Files\1Kosmos\Orion\unins000.exe" /VERYSILENT /SUPPRESSMSGBOXES /NORESTART
Frequently Asked Questions
Q. What happens when I reset the agent?
A. When you reset the agent, all enrolled user accounts get deleted. Orion generates a new did and public key.
Q. Which browsers allow onboarding accounts?
A. You can use the following browsers to onboard user’s account through Orion Authenticator:
- Google Chrome
- Microsoft Edge
- Mozilla Firefox
- Safari
- Brave
Q. What happens when you attempt to onboard accounts into the system where the authenticator is not installed?
A. When you try to onboard an account through the AdminX interface, a pop up is displayed alerting users about the unavailability of the agent due to which the account was not onboarded.
Q. What is the maximum number of devices that can be linked to an account?
A. Based on the value configured in the Max number of devices linked to an account and Max number of accounts onboarded on single device settings under Authentication > Passwordless Login on the AdminX interface, you can associate that many number of accounts with the device.
Q. Can I perform an in-place upgrade of the Orion Authenticator?
A. Yes, you can carry out an in-place upgrade by running the installer for the newer version on the target machine that already has the agent installed. This process will overwrite the old binaries with the new version while preserving existing enrollments and data.
Q. Why is a certificate added to the trust store of the workstation during installation?
A. This enables Orion to run a local https server that facilitates secure communication with the 1Kosmos login page loaded on the browser.