Connect to LDAP
Overview
Connect your AD users to AdminX with a direct LDAP connection. Once connected, you can view, add, and remove your AD users through the AdminX panel.
Connect to LDAP via Direct Connection
Add a New Directory
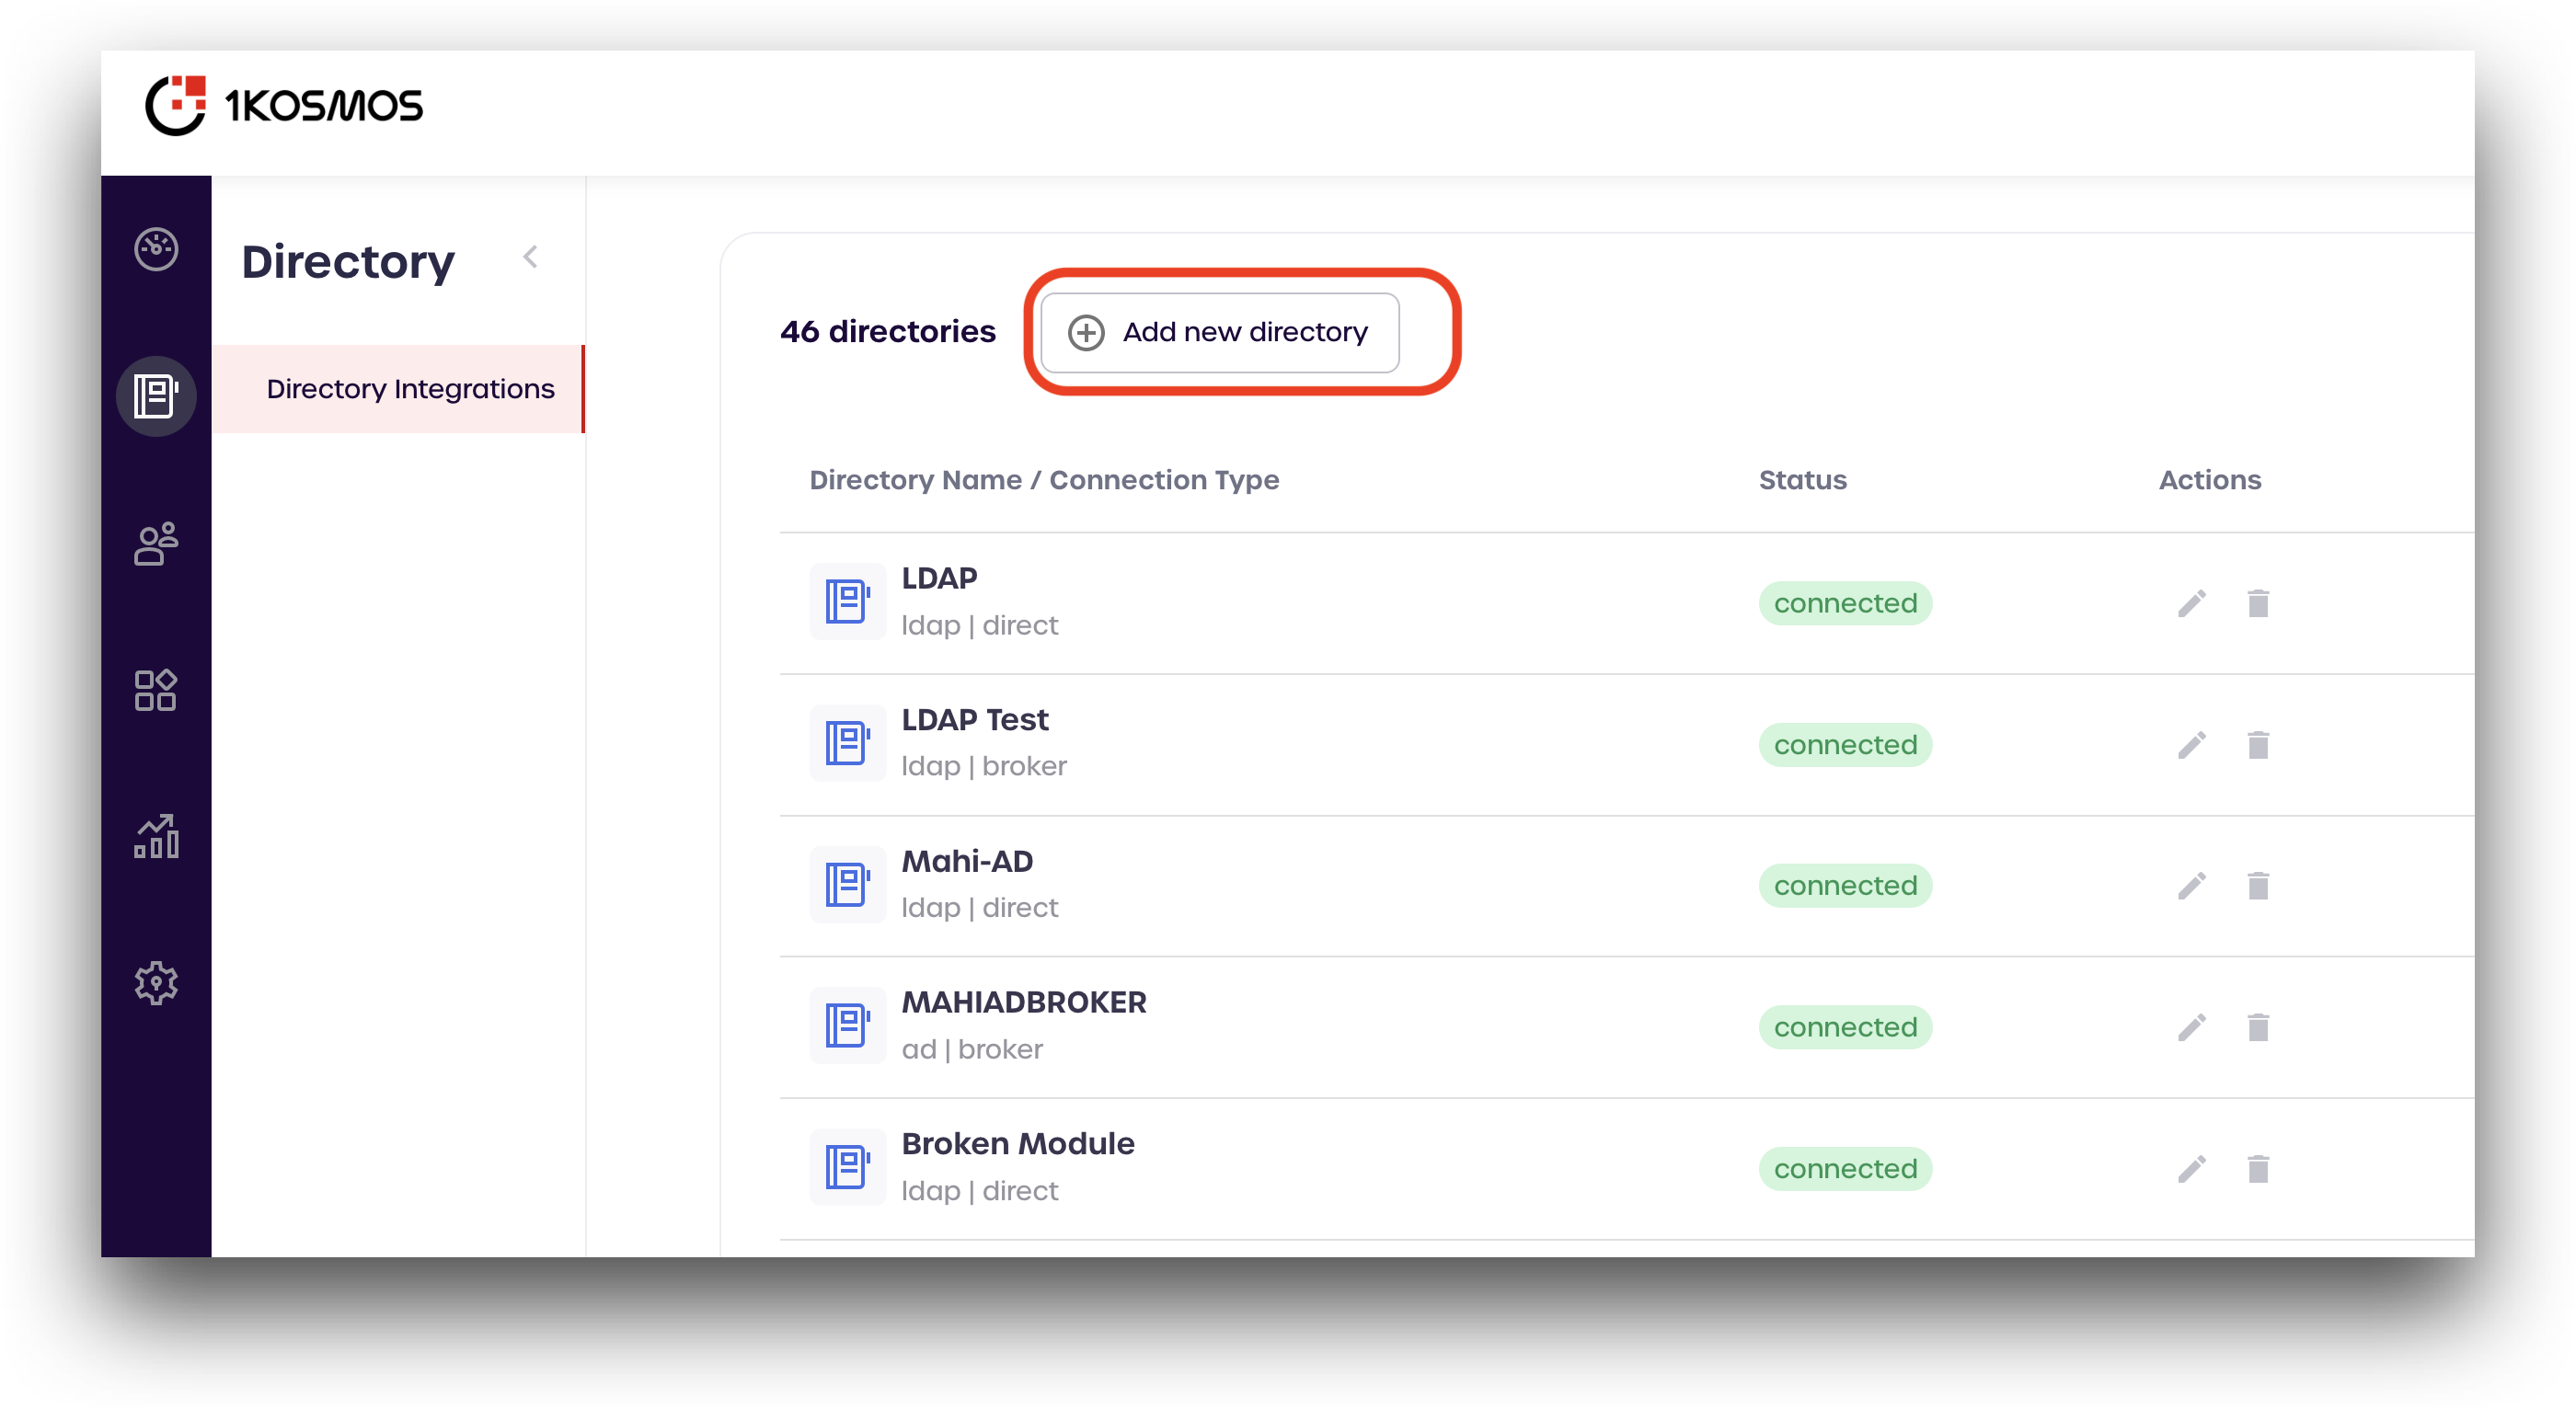
To get started, navigate to your AdminX dashboard and log in as a tenant or community administrator. Once you are logged in, navigate to the Directory Integrations page by clicking the link on the left-hand menu.
Click Add new directory
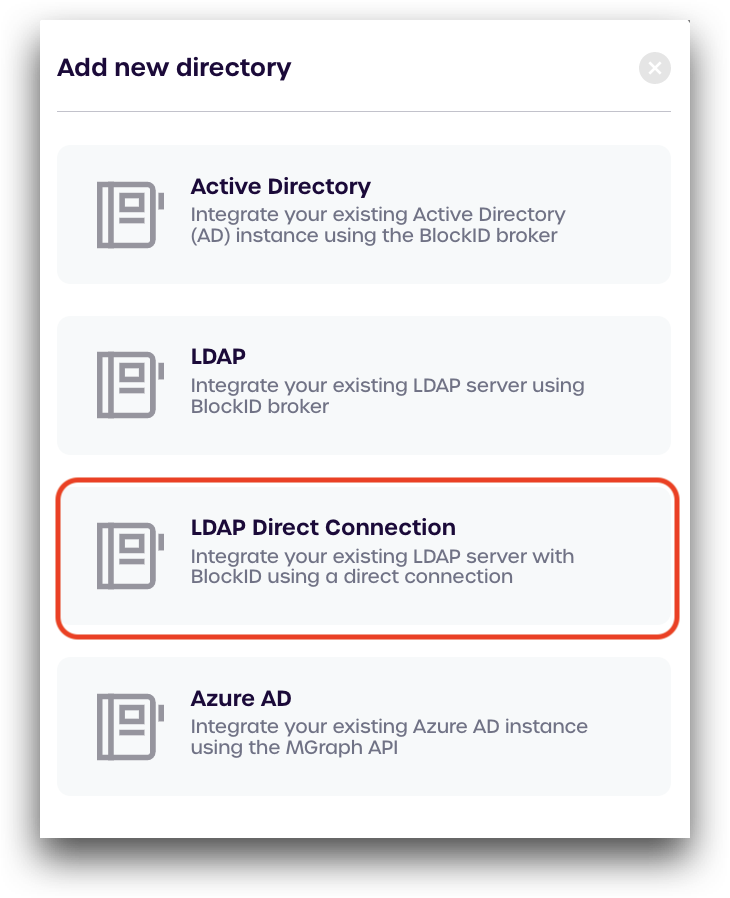
Select LDAP Direct Connection
Connection Information
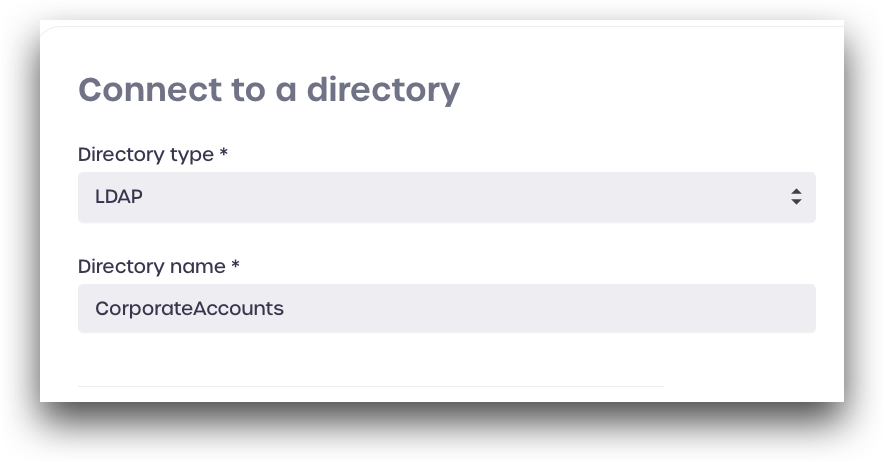
Under Connect to a directory, enter the following information:
- Directory type: select LDAP
- Directory name: enter a name to use for this connection
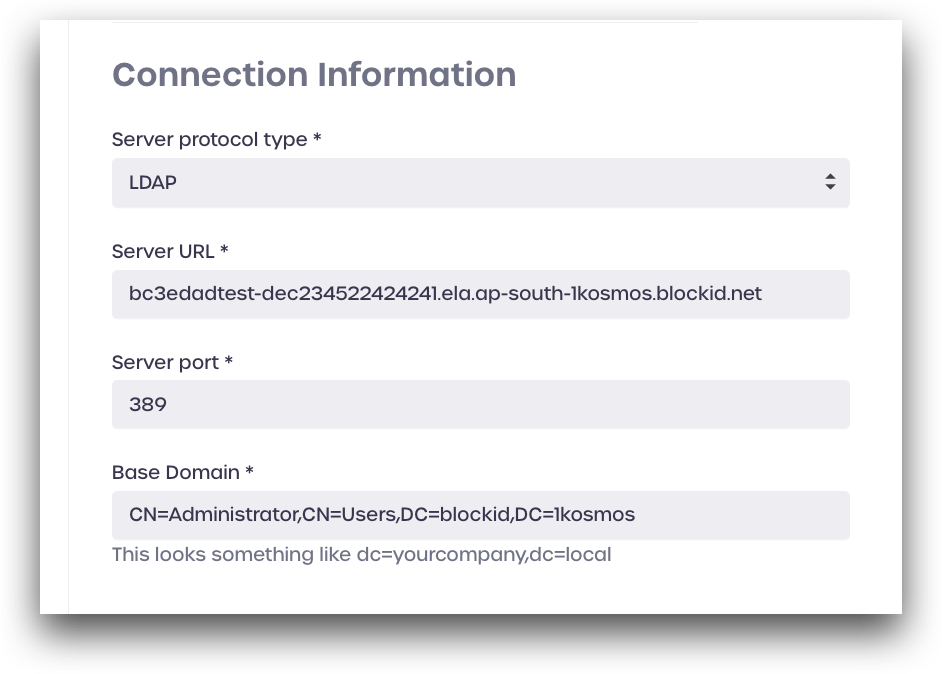
Under Connection Information, enter the connection details for your Active Directory domain:
- Server protocol type: select LDAP, or LDAPS
- Server URL: LDAP server URL
- Server Port: LDAP server port
- Base Domain: LDAP base domain
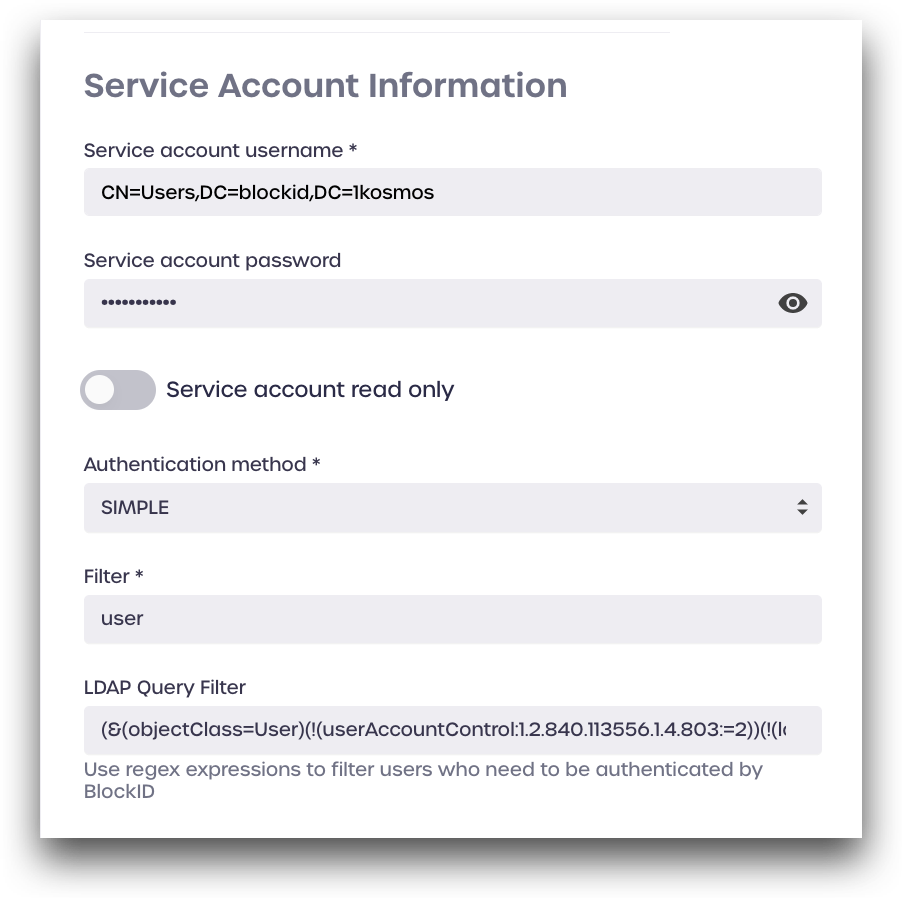
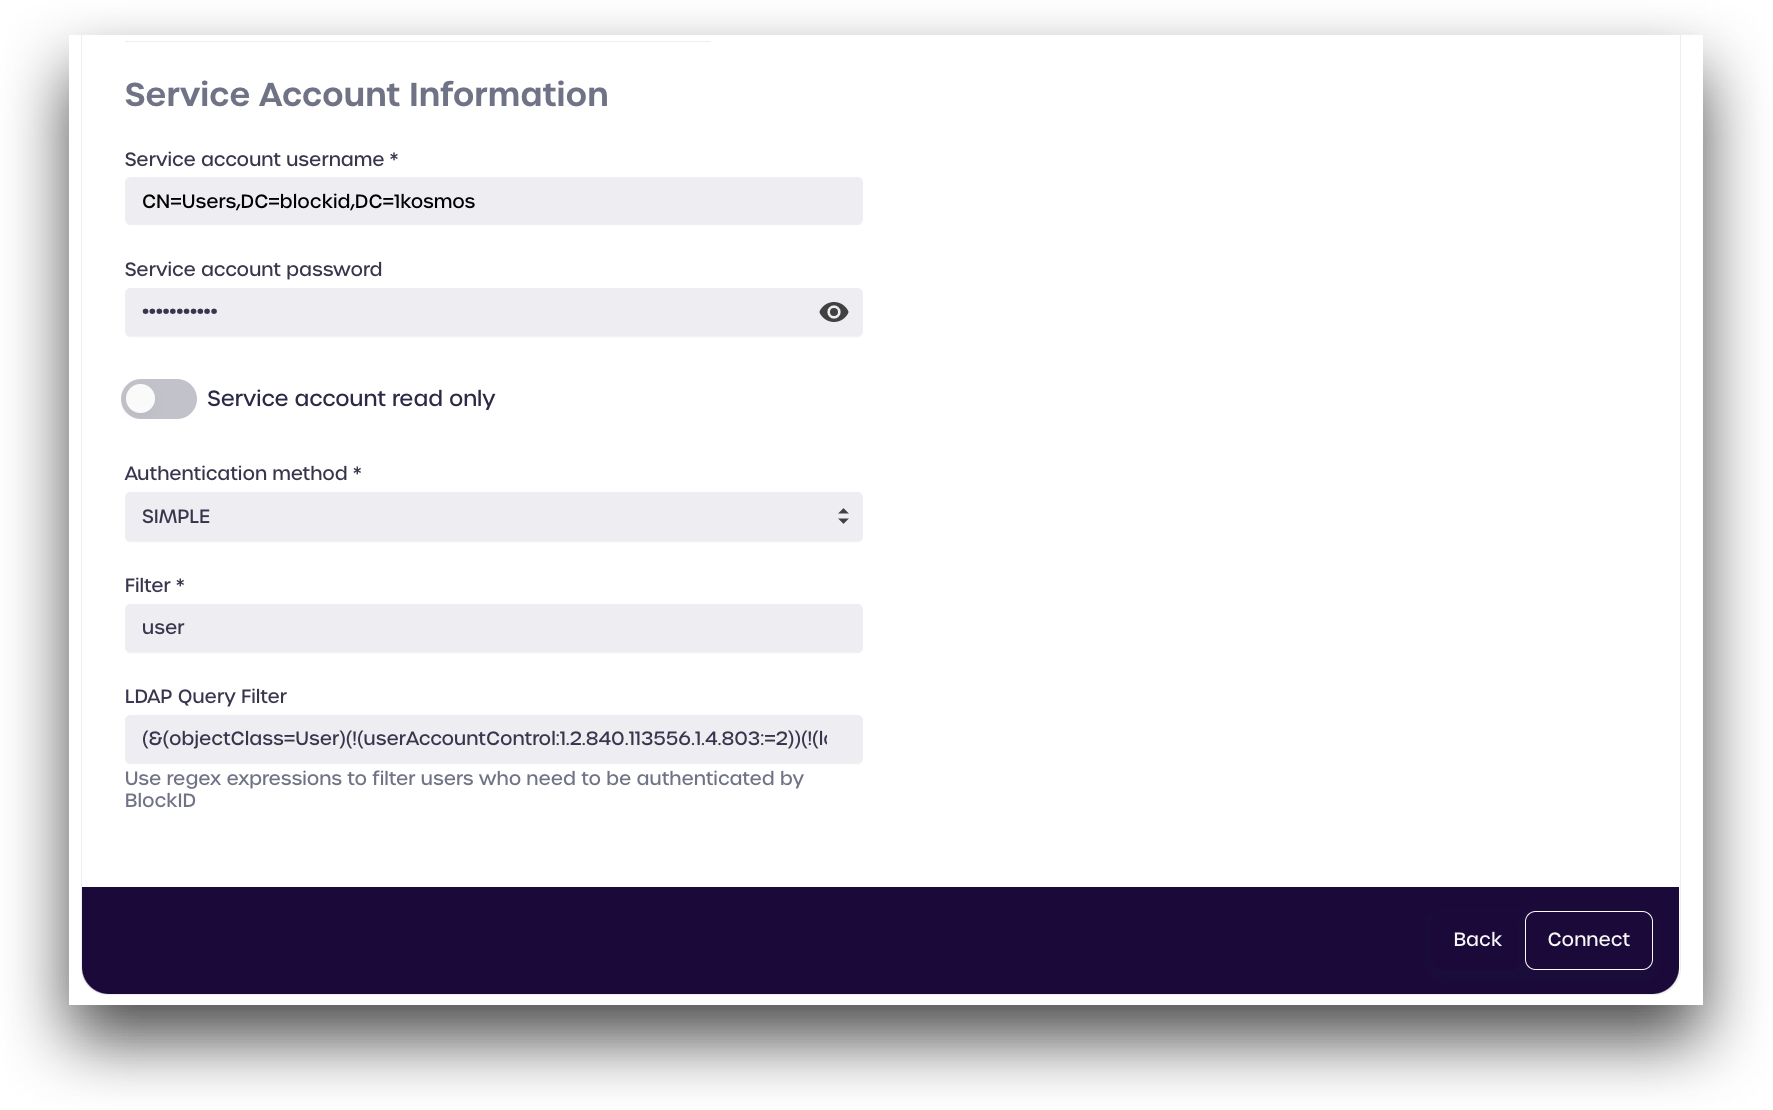
Under Service Account Information, enter the details for your LDAP service account:
- Service account username: LDAP service account username
- Service account password: LDAP service account password
- Service account read-only: enable this if you only wish to read from this directory (cannot create new users)
- Authentication method: select SIMPLE
- Filter: Enter a directory term to filter for, such as
user - LDAP Query Filter (optional): Enter LDAP query to filter for (see below for more details)
Click Connect to save your settings and enable the directory.
LDAP Query Filter
LDAP query filters are regular expression used to filter only the desired directory parameters and discard any others.
Administrators can user LDAP directory queries to filter which users can authenticate to 1Kosmos and log in. This is useful if you only wish to allow user accounts that are marked as active to log in to your tenant. This field is optional and can be left blank.
Example LDAP Query Filter:
(&(objectClass=User)(!(userAccountControl:1.2.840.113556.1.4.803:=2))(!(lockoutTime>=1)))
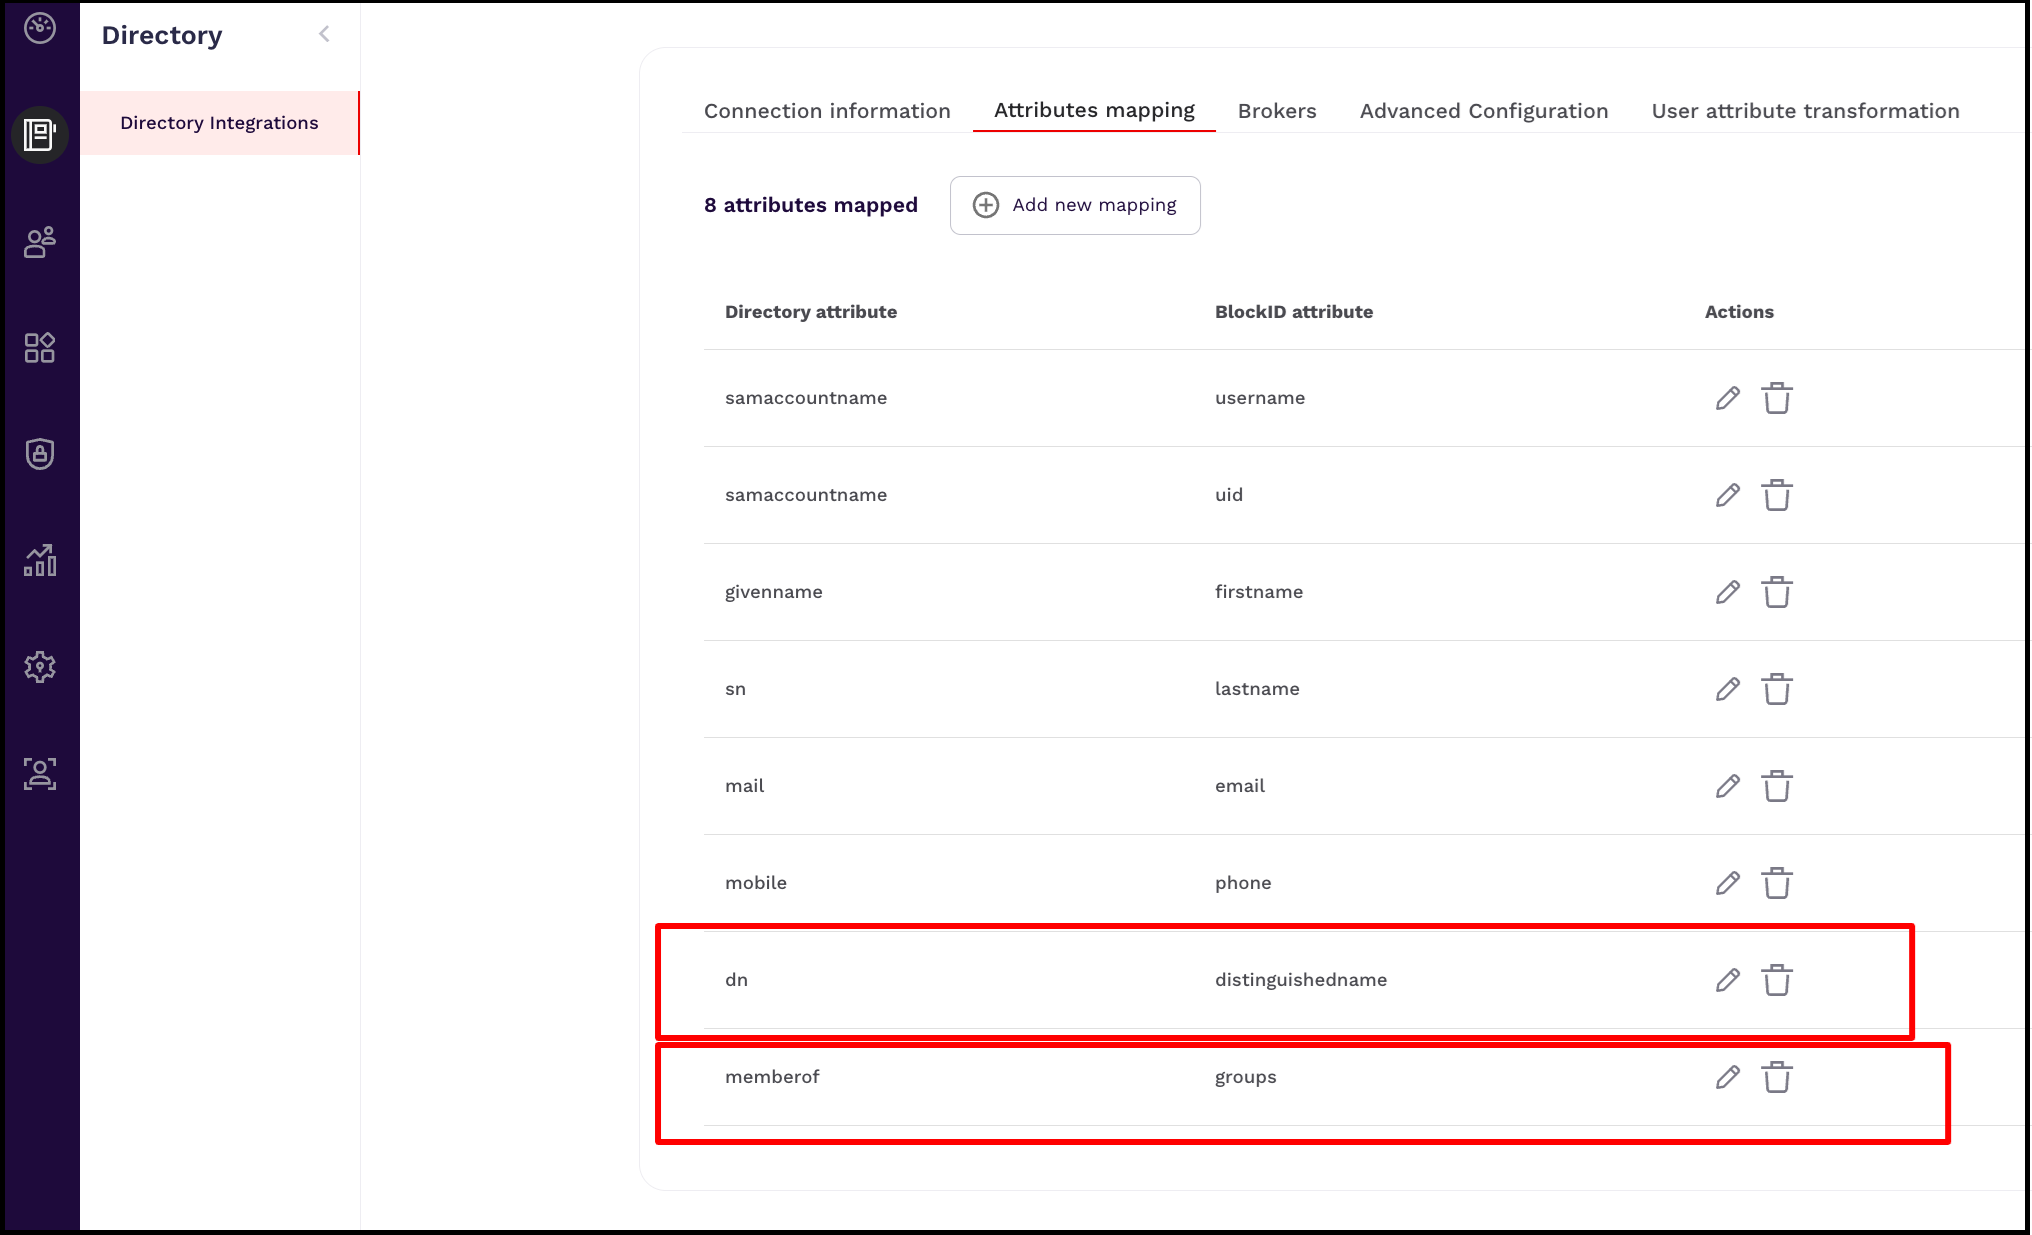
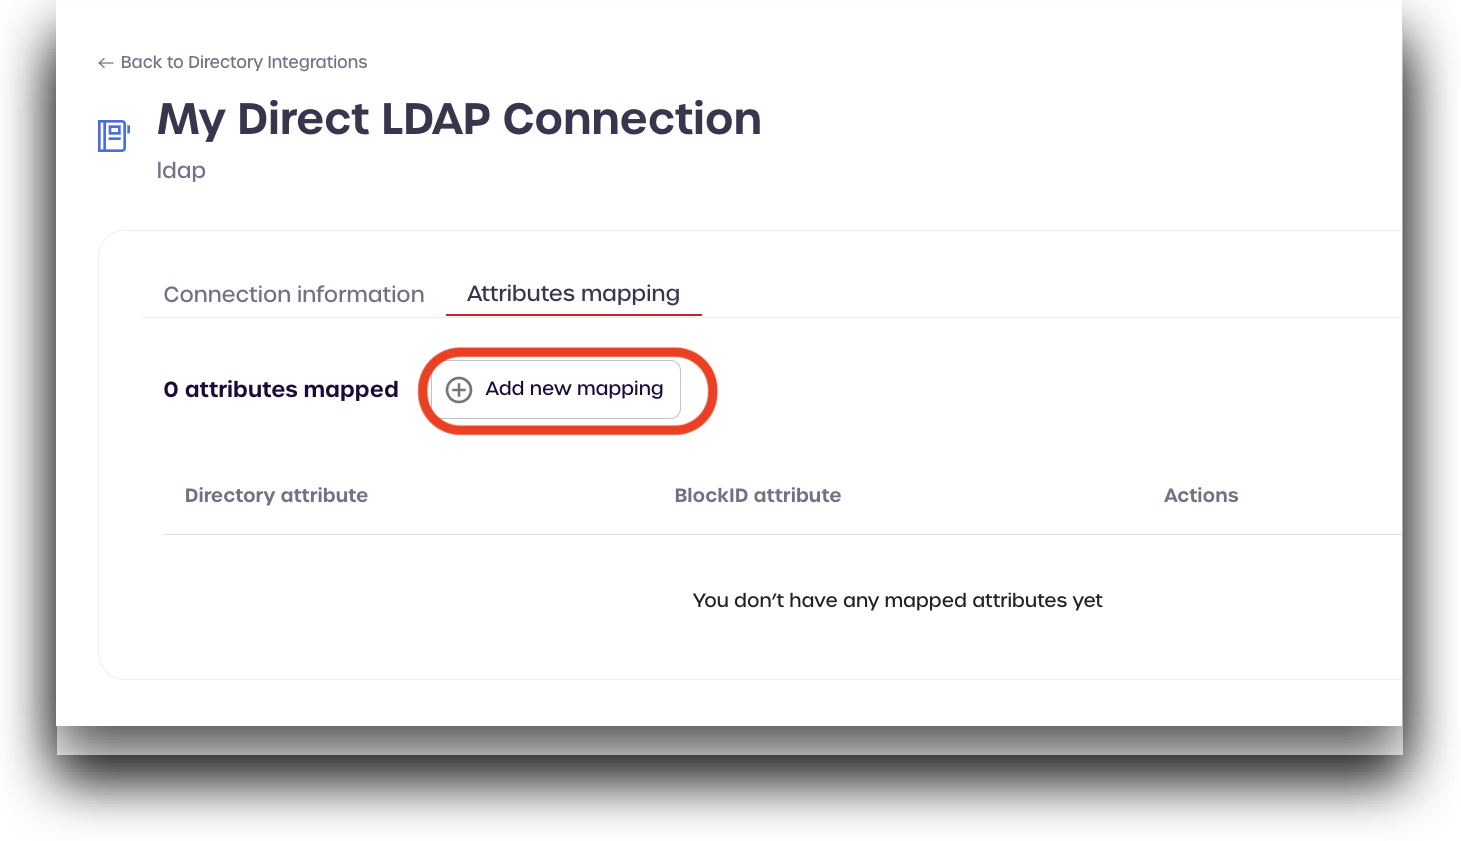
Attributes Mapping
You can now use the Attributes mapping tab to map the 1Kosmos attribute with the Directory attributes.
To perform the attribute mapping, follow these steps:
-
Click on the Attributes mapping tab and select Add new mapping.
-
Use the table below to establish a mapping between individual Directory attribute and its corresponding 1Kosmos attribute.
Directory Attribute 1Kosmos Attribute samaccountname uid samaccountname username mobile phone mail email givenname firstname sn lastname dn distinguishedname memberof groups To map an attribute, say username, follow these steps:
-
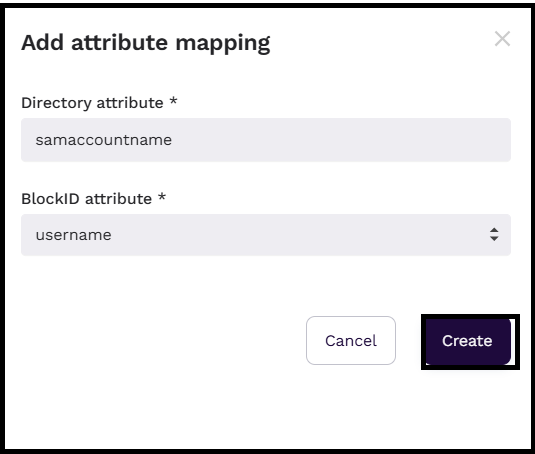
Click Add new mapping.
-
In the Add attribute mapping window that is displayed, enter
samaccountnamein the Directory attribute box. -
Select
usernamefrom the 1Kosmos attribute drop-down menu. -
Click Create.
-
-
Repeat this process for each of the Directory Attributes in the table above.