Connect to Microsoft Entra ID
Connect and integrate your Microsoft Entra ID user store into your AdminX tenant. Once integrated, all your Azure AD users can be managed from AdminX.
Prerequisites for Azure
AdminX and 1Kosmos integrate with Microsoft Entra ID natively using Microsoft Graph. To set up this integration, we need to create a few things in Azure.
Please ensure that your Azure environment has permission to perform the following steps
Registering an Application
-
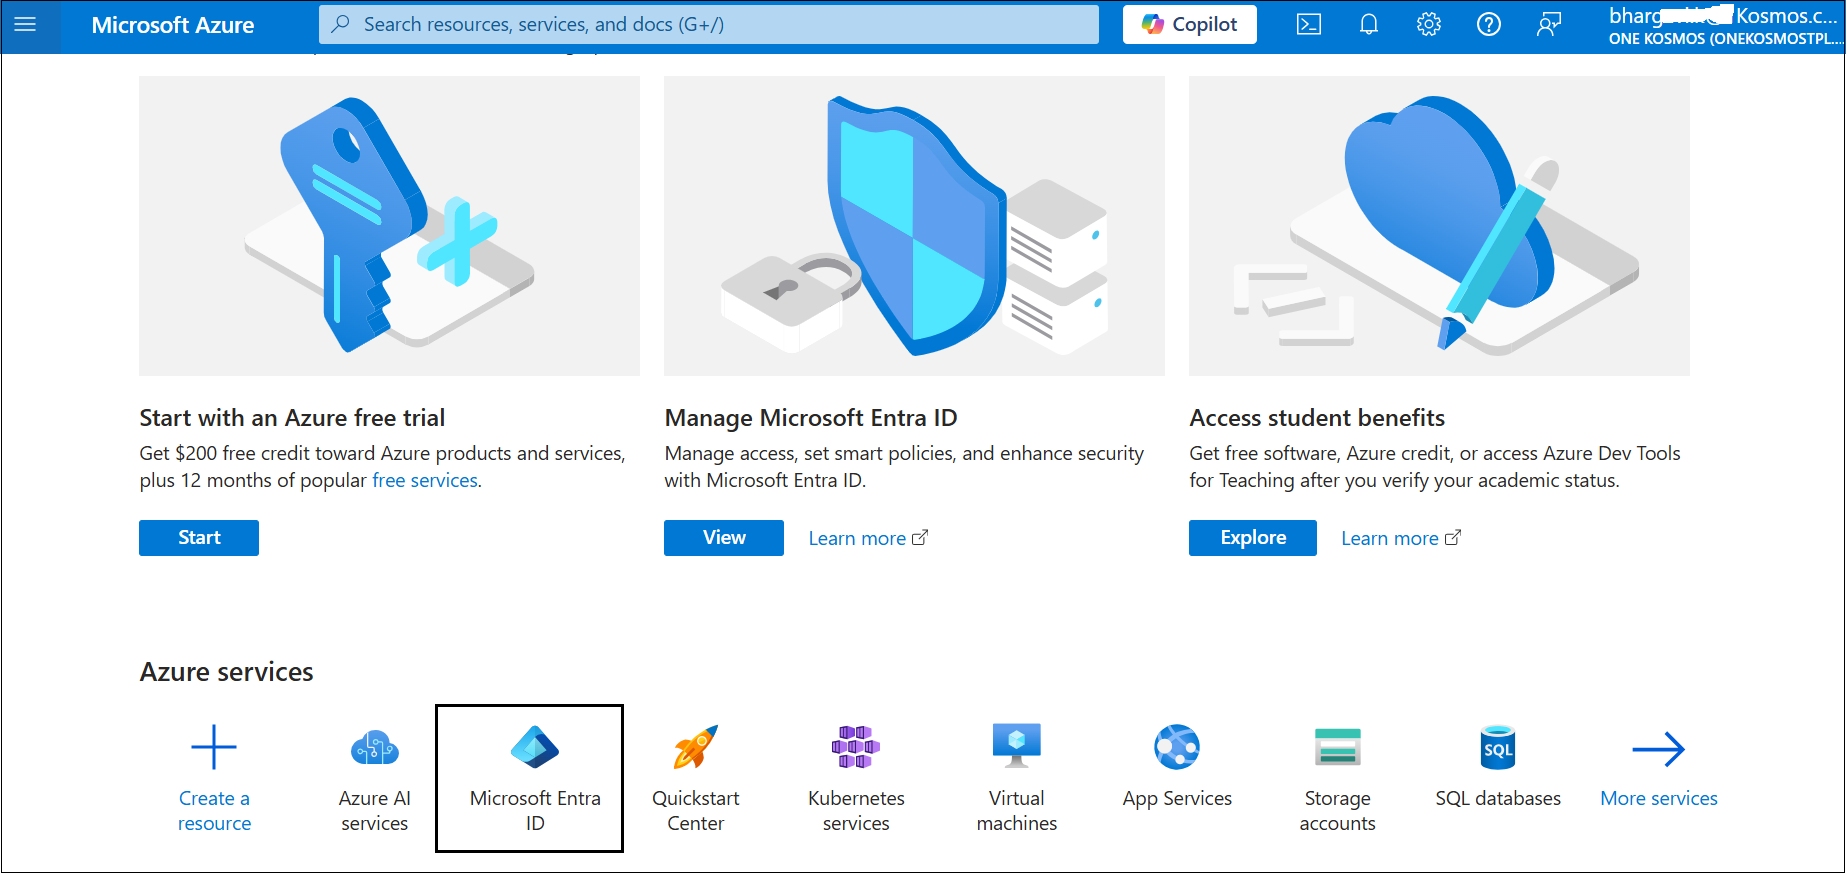
Navigate to https://portal.azure.com/ and log in using your Azure credentials. Once you are logged in, scroll down to Azure services.
-
Click Microsoft Entra ID.
-
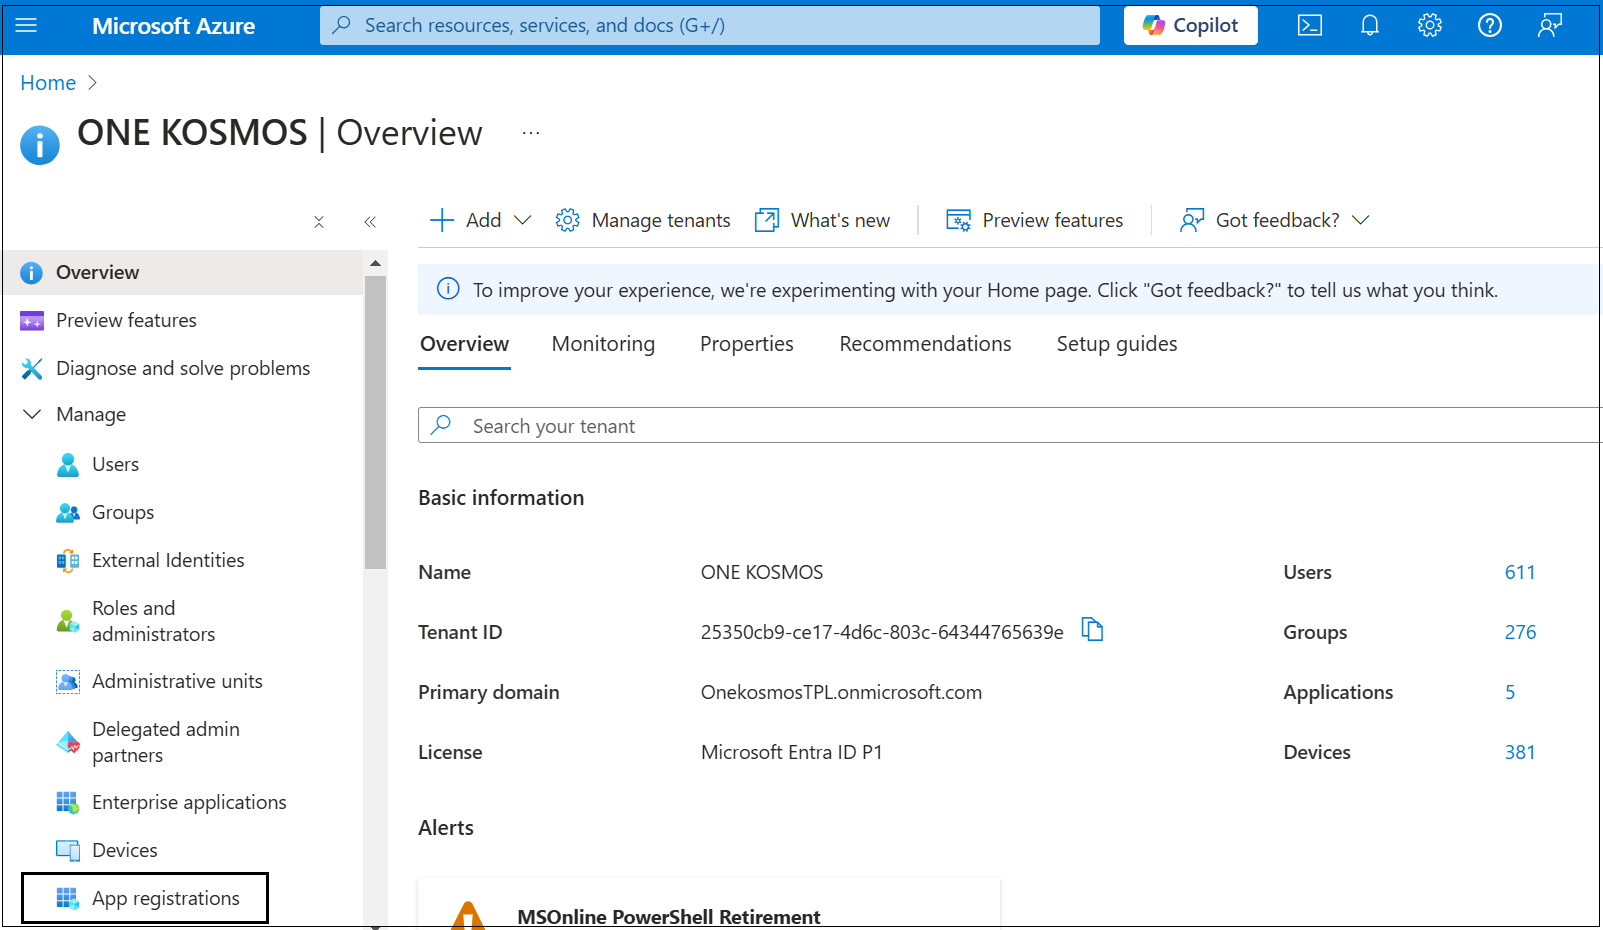
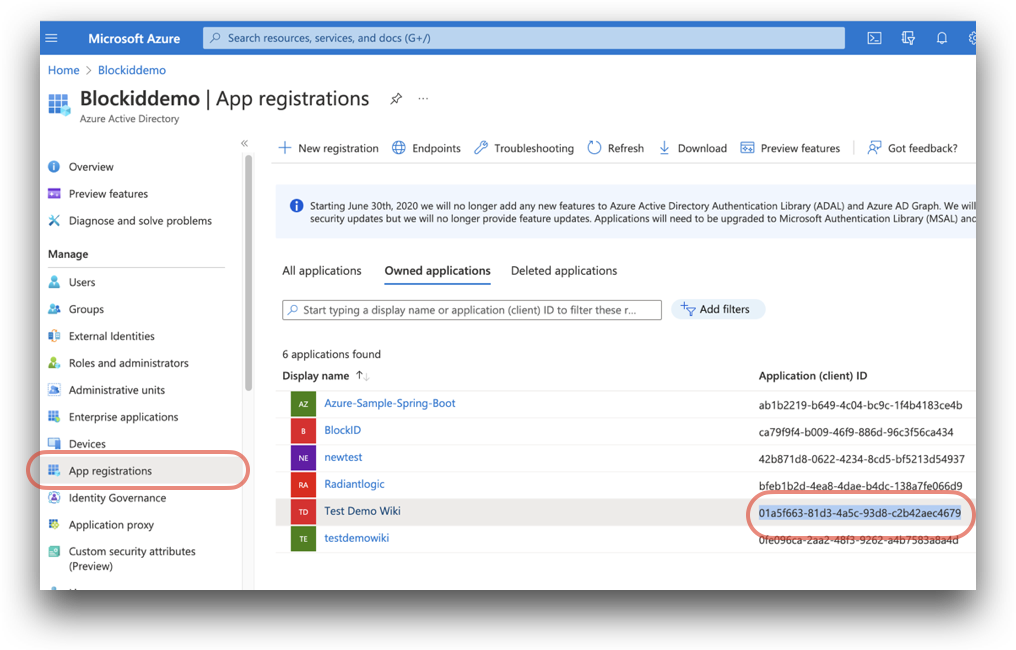
From the application Overview page, under the Manage drop-down menu, click the App registrations link.
-
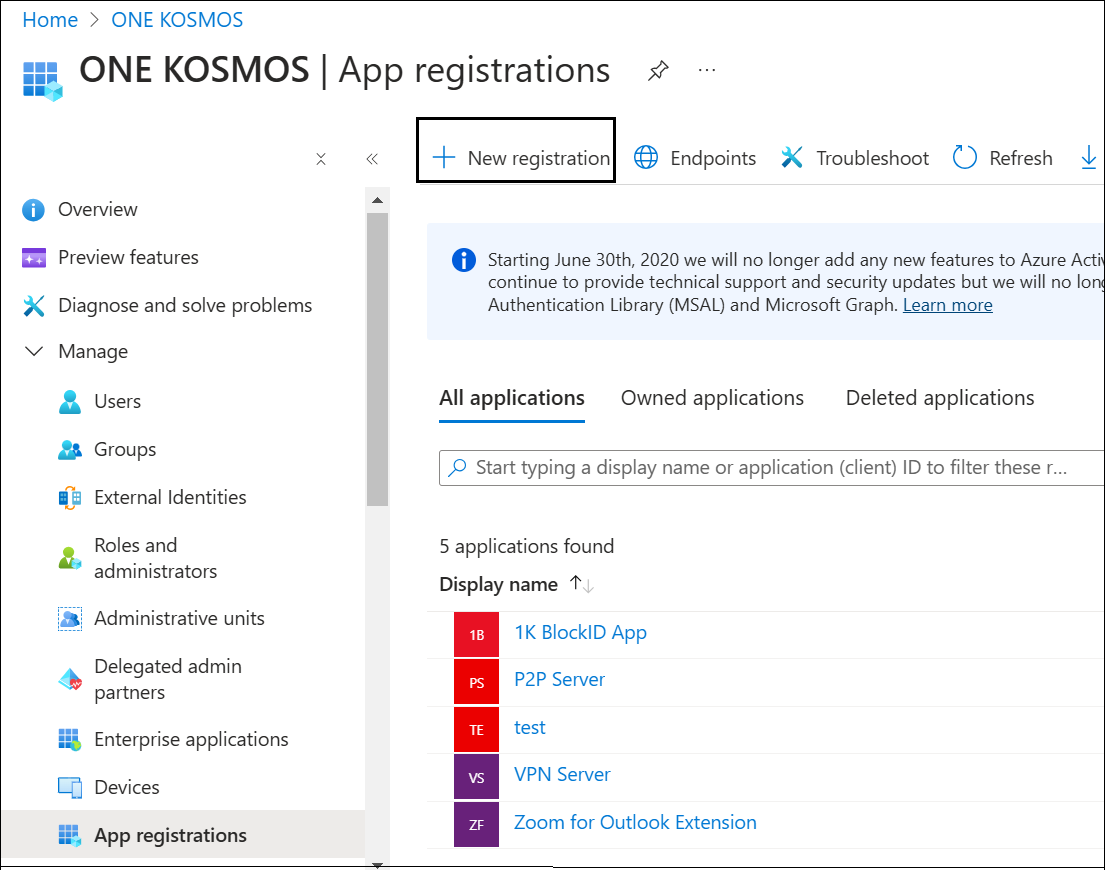
From the App registrations page, click New registration
-
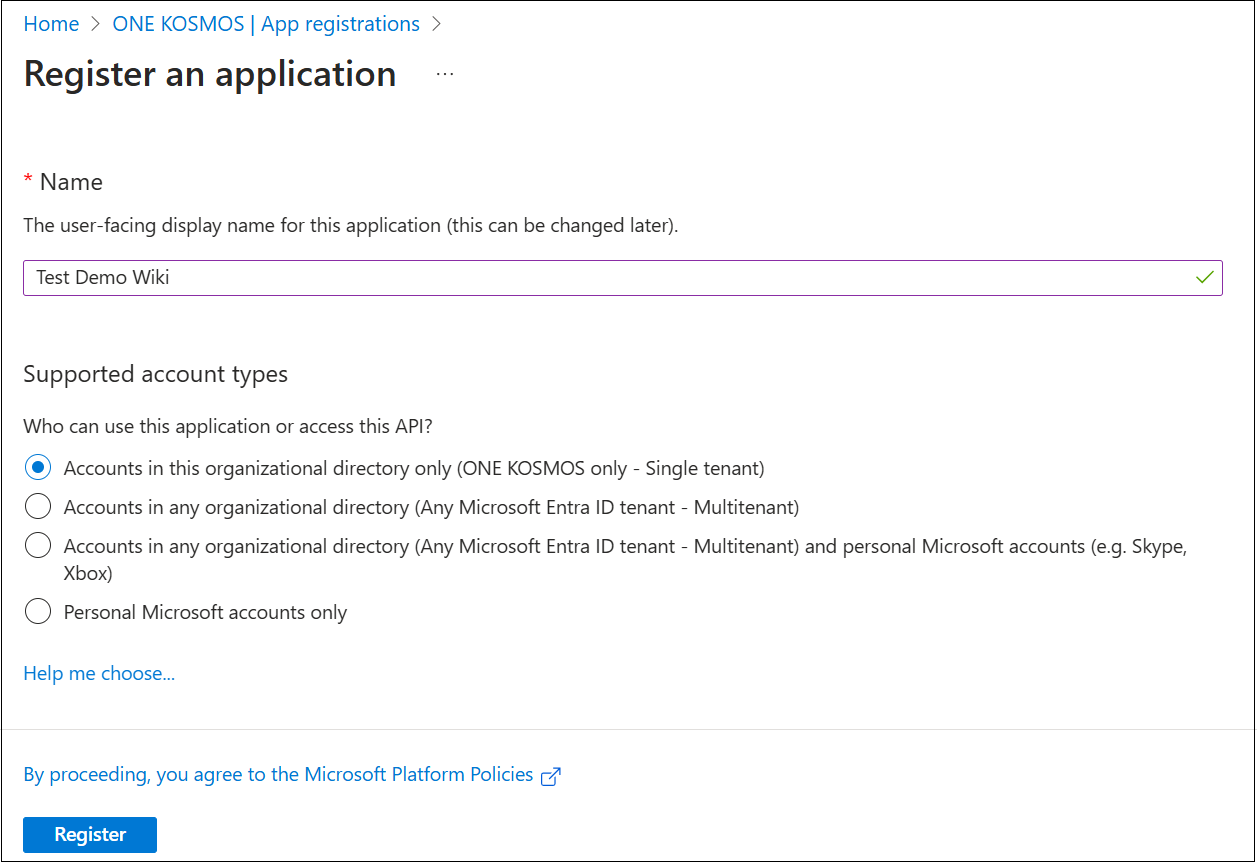
In the Register an application page that is displayed, enter a user-facing display name for your application. For this example, we are using the name Test Demo Wiki.
-
Under the Supported account types section, select Accounts in this organizational directory only (application name only - Single-tenant).
-
Leave the Redirect URI (optional) section blank.
-
Review your selections and then click Register.
-
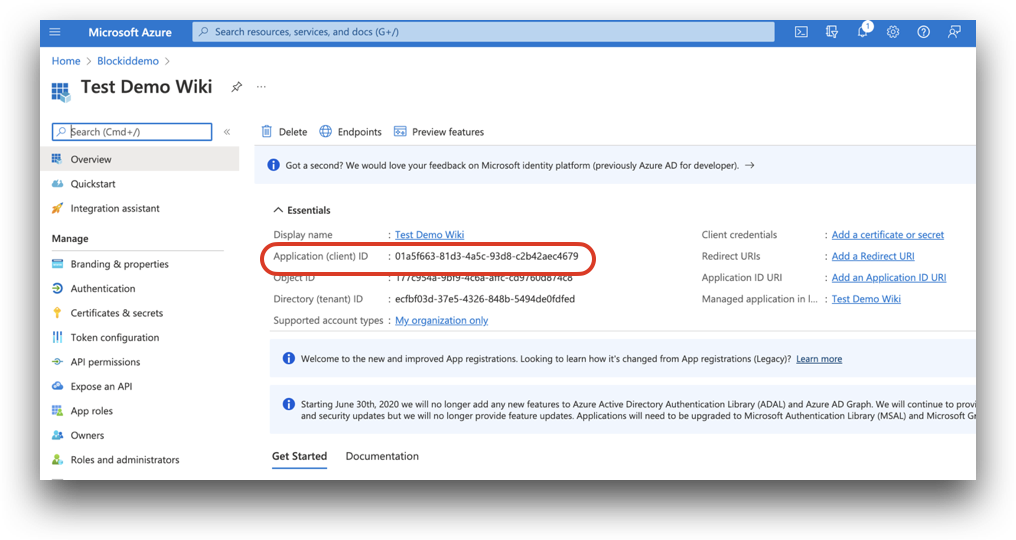
Once the app is registered, you will be redirected to the page listing various details. Make a note of or copy the Application (client) ID as we will need this to configure AdminX for Azure AD.
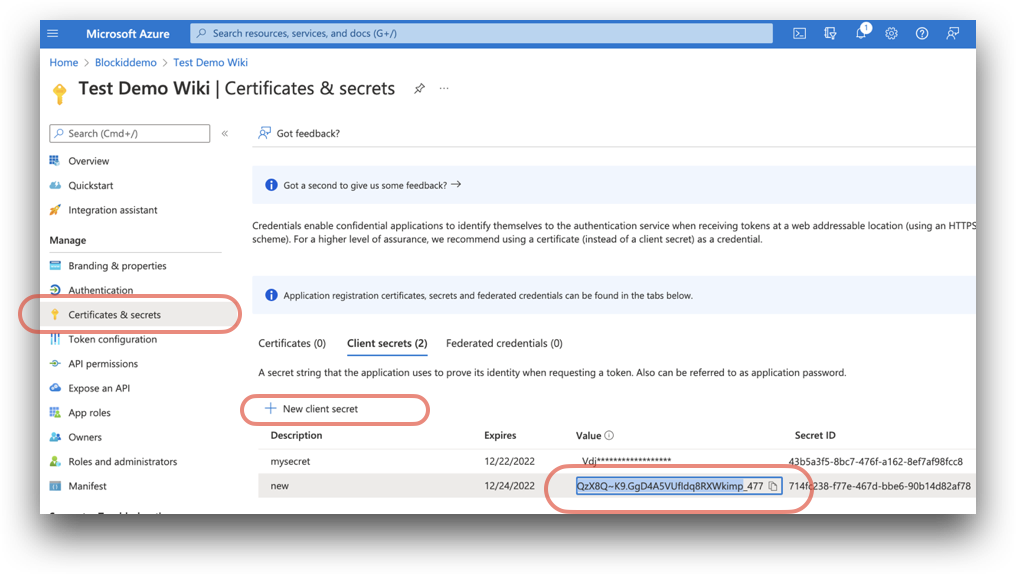
Creating the Application Secret
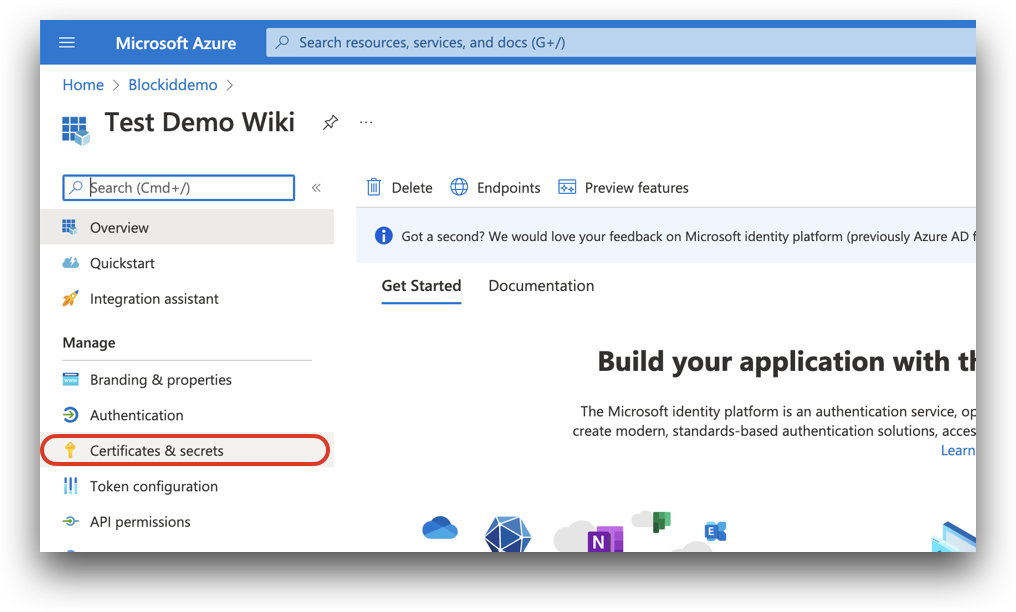
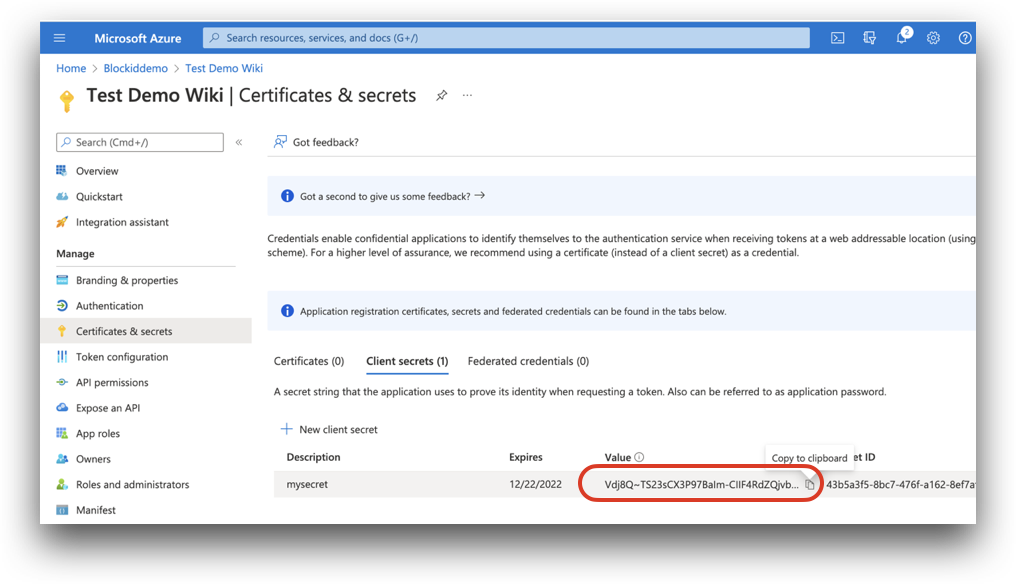
From the same application overview page, click the Certificates & secrets link located on the left-hand menu, under Manage.
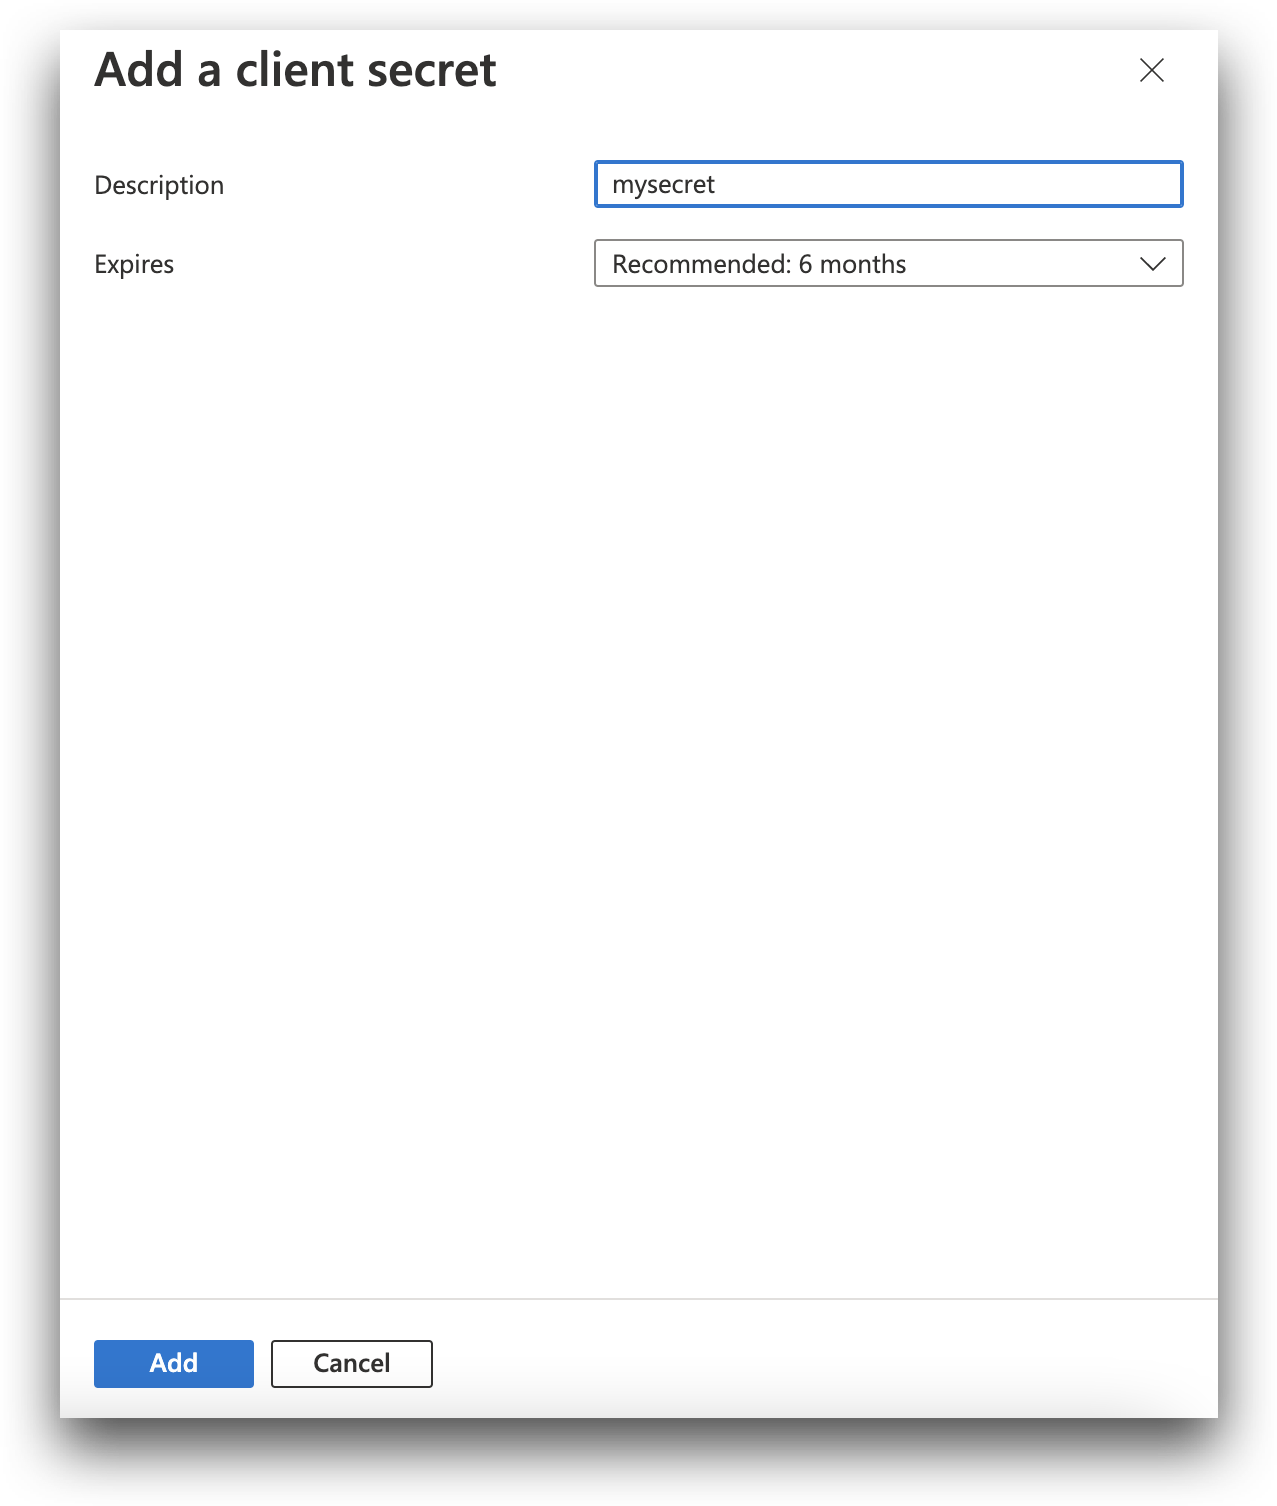
From Certificates & secrets click New client secret. Enter a name in the Description box, and select how soon the secret should expire.
Click Add.
You will now see your secret listed under Client secrets. Make a note of, or copy the Value parameter. We will need this secret to configure AdminX for Azure AD.
Creating the Application Permissions
To use Microsoft Entra ID with AdminX, follow these steps:
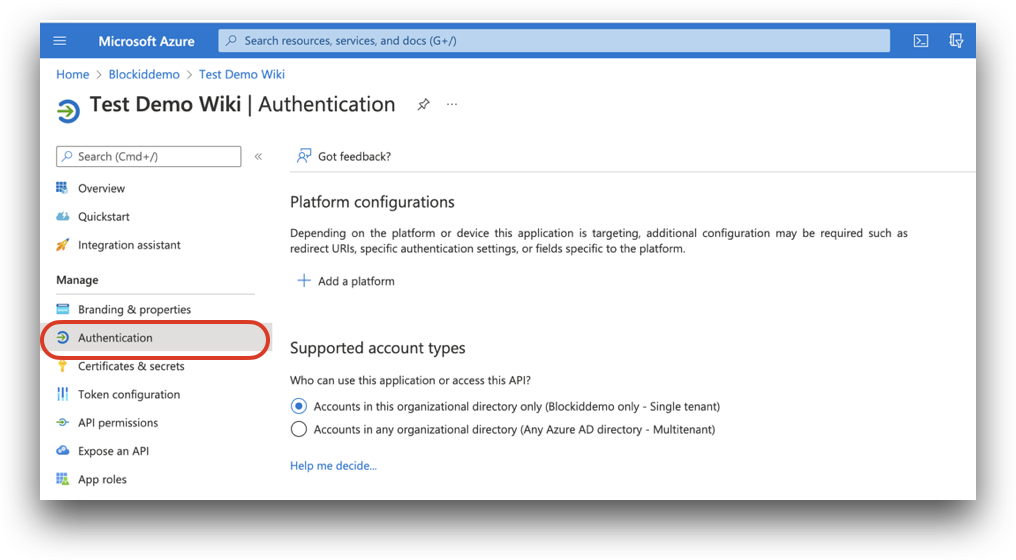
- Under the Manage drop-down menu of the applications overview page, click Authentication.
-
Scroll down to Advanced settings, and toggle the Allow public client flows option to Yes.
-
Click Save.
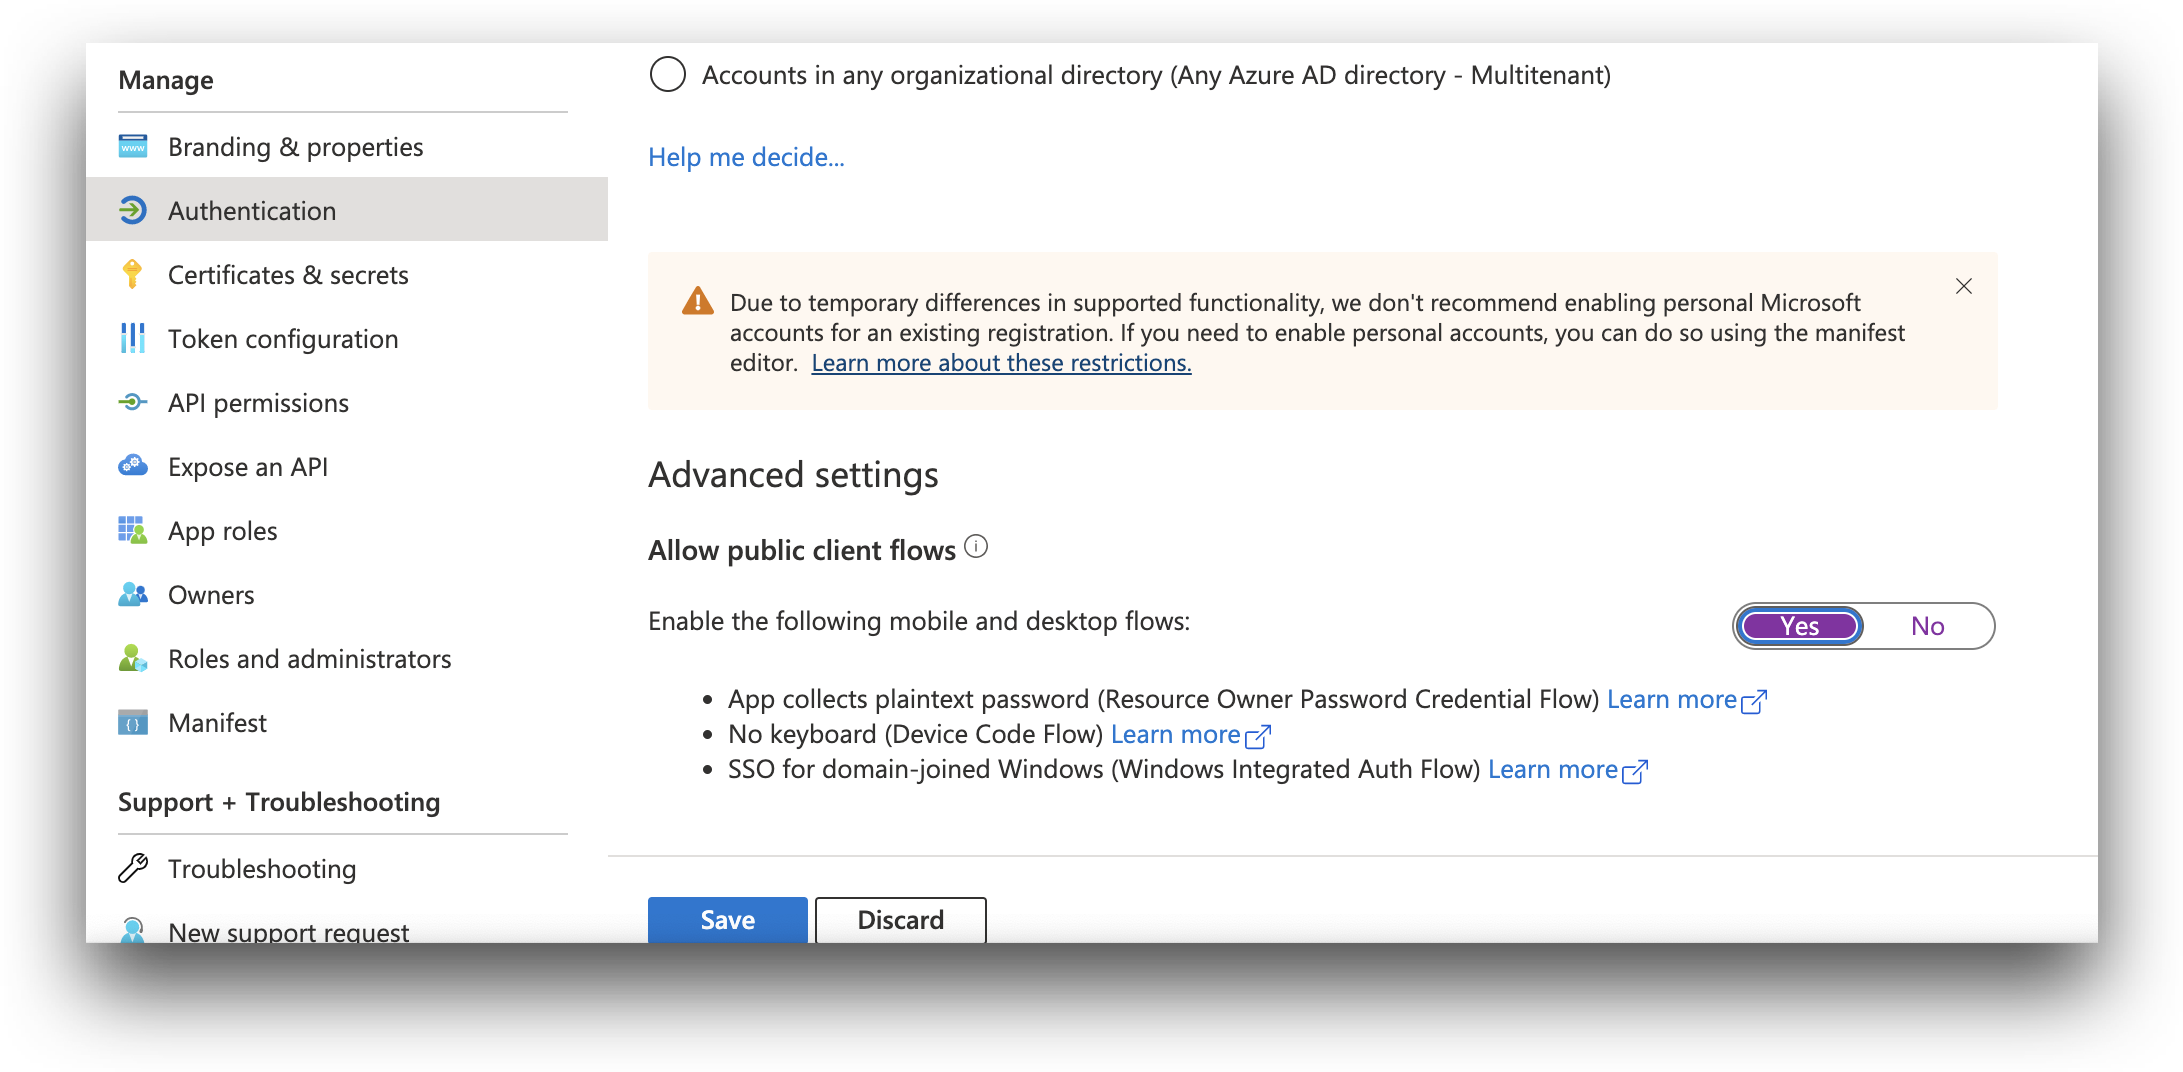
The Allow public client flows option must be set to Yes to use Microsoft Entra ID in AdminX.
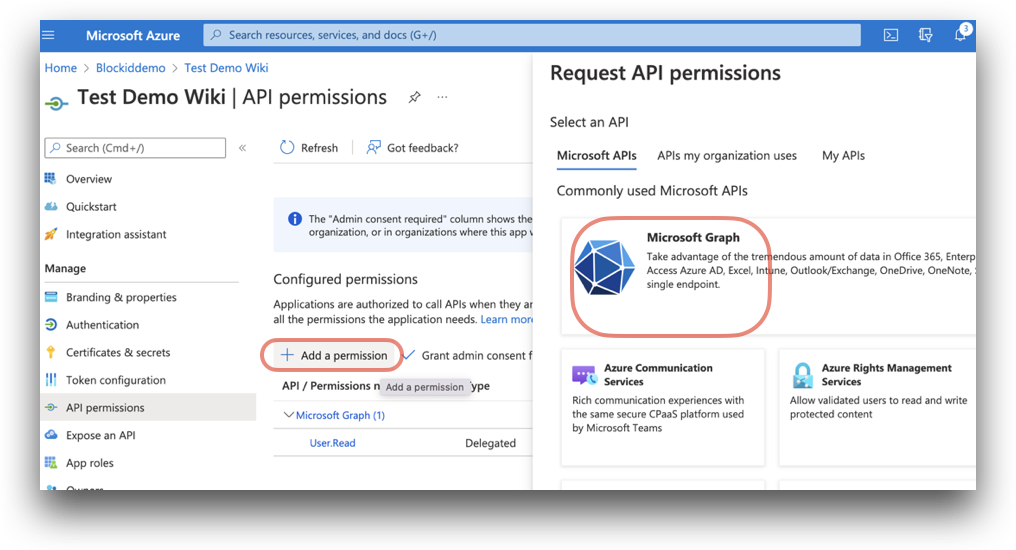
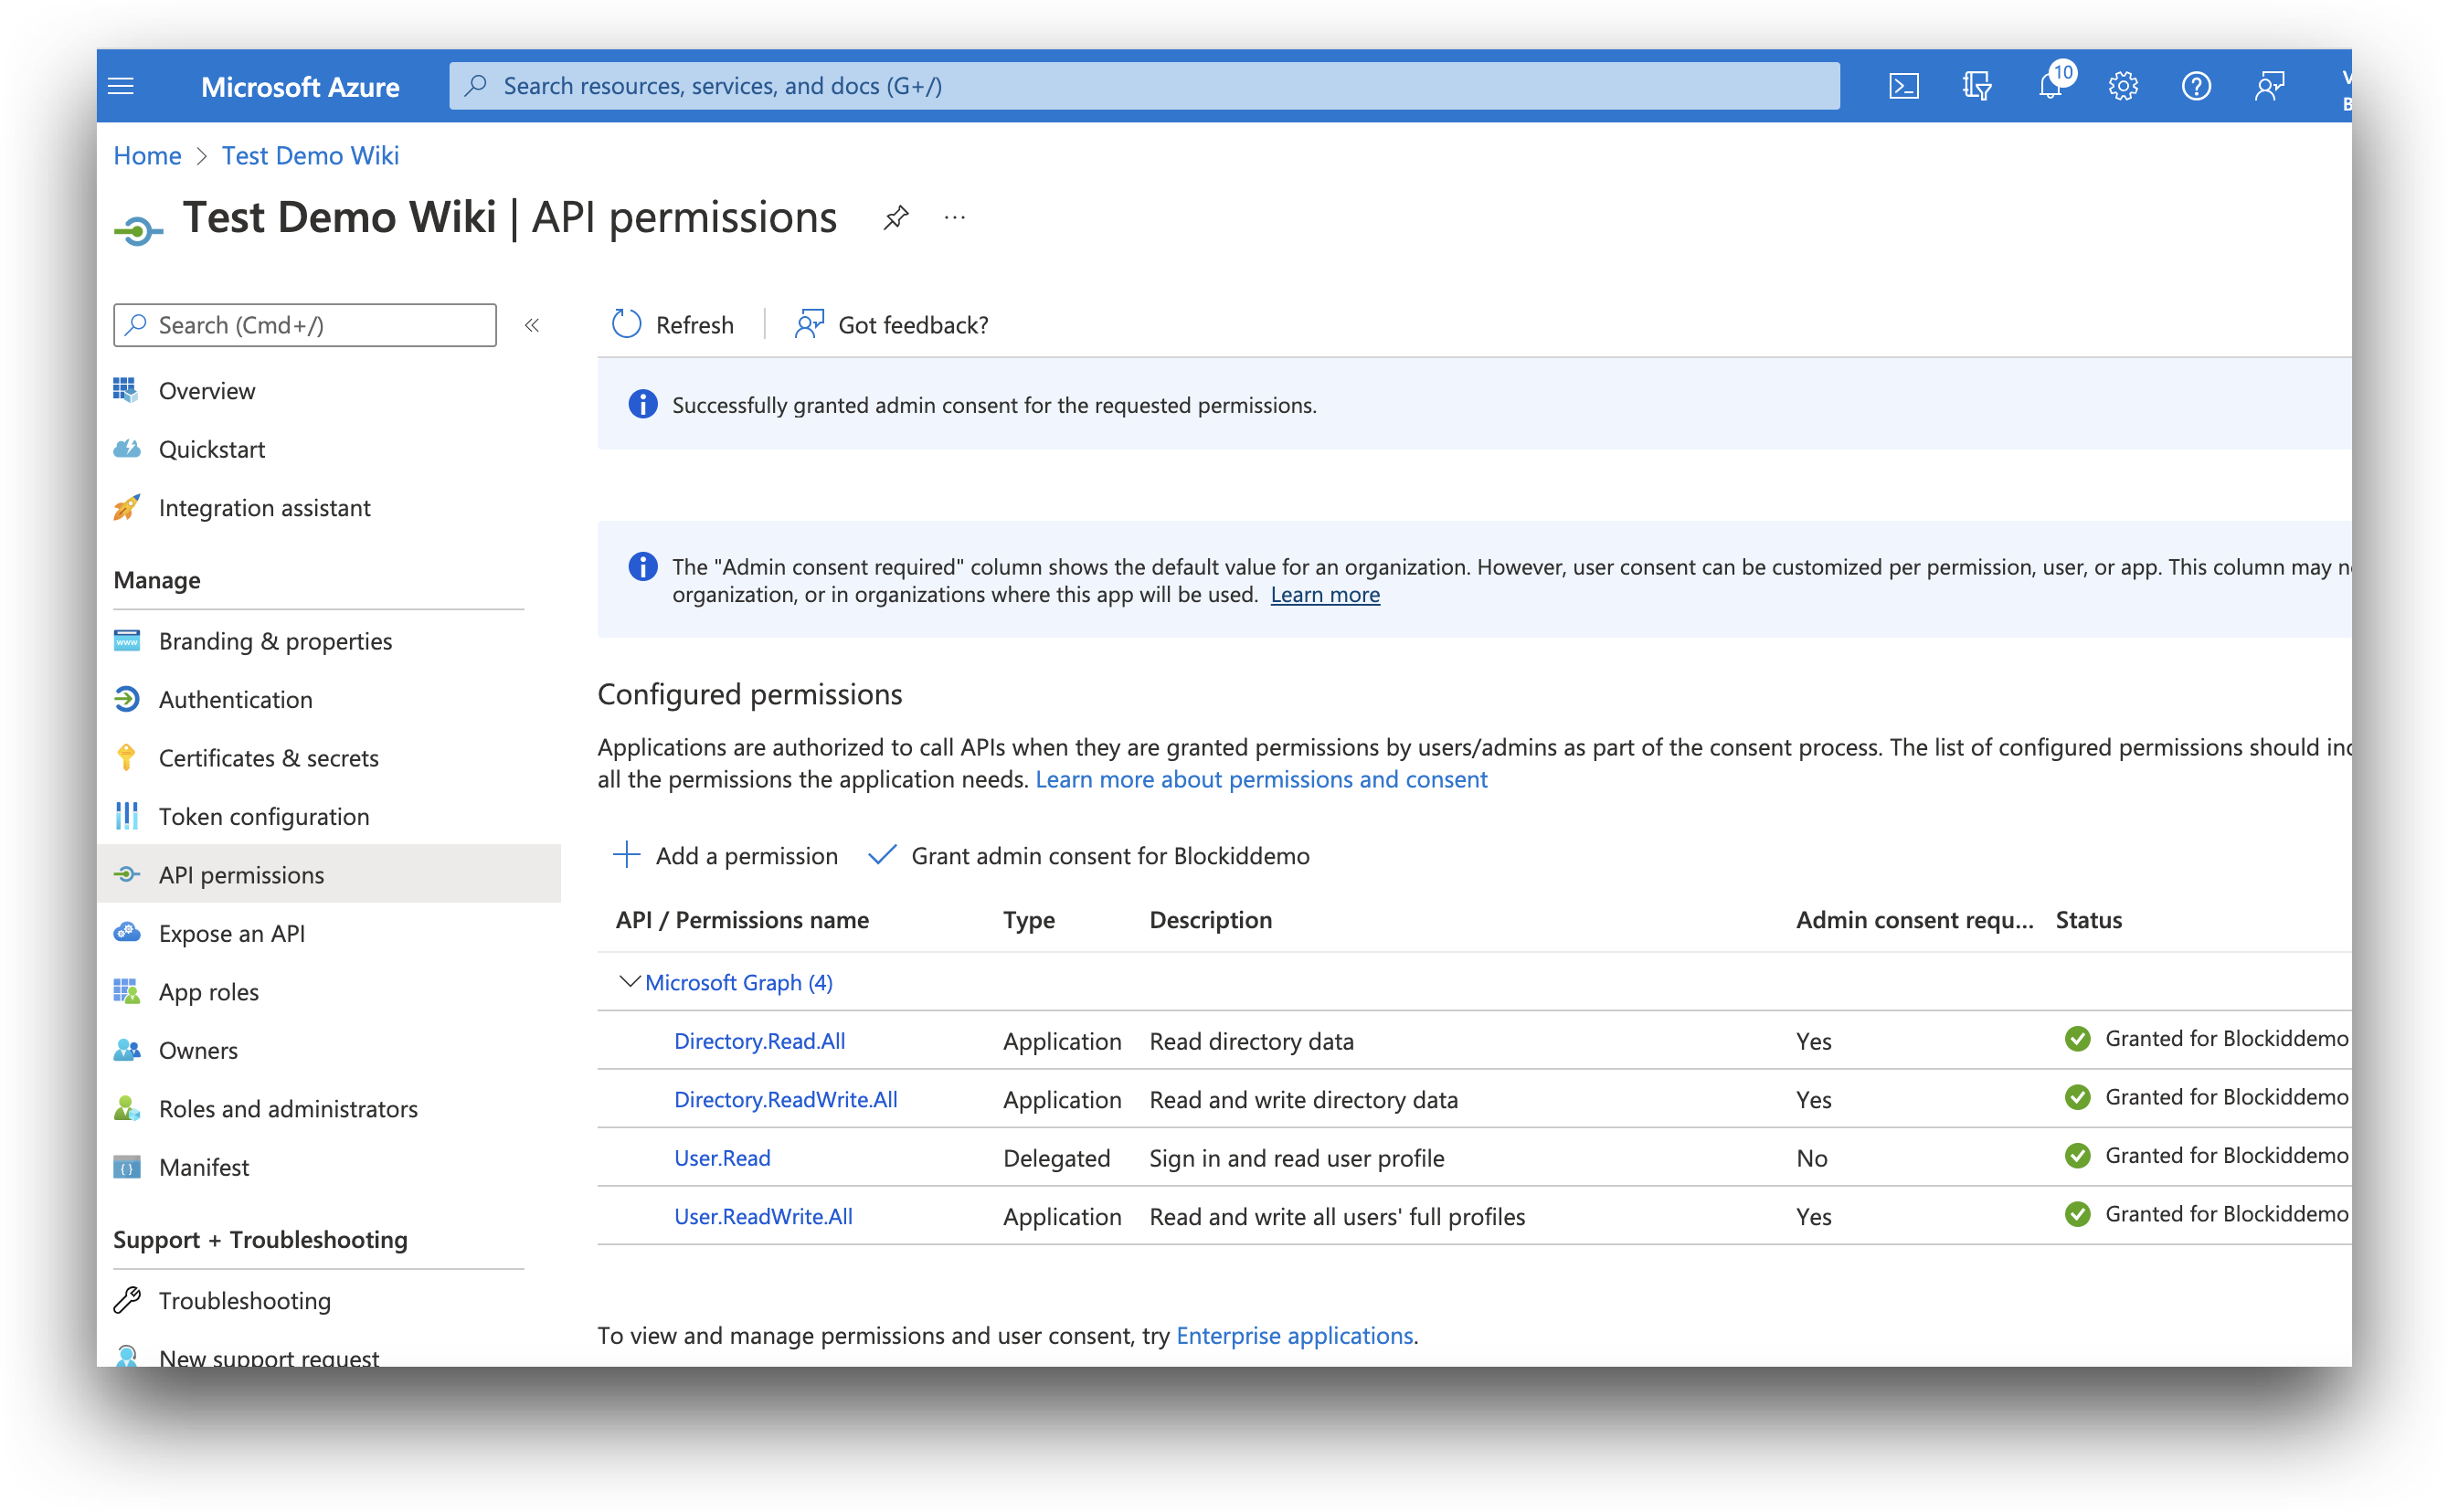
- Under the Manage drop-down menu, click API permissions.
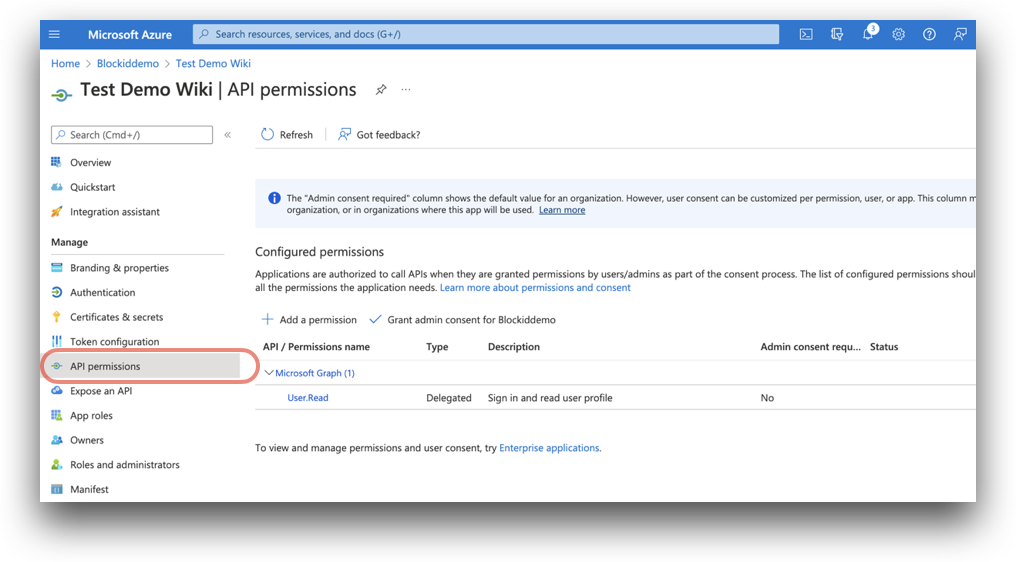
- On the API permissions page, click Add a permission. A window titled Request API permissions will pop up. Select Microsoft graph, the largest of the available icons.
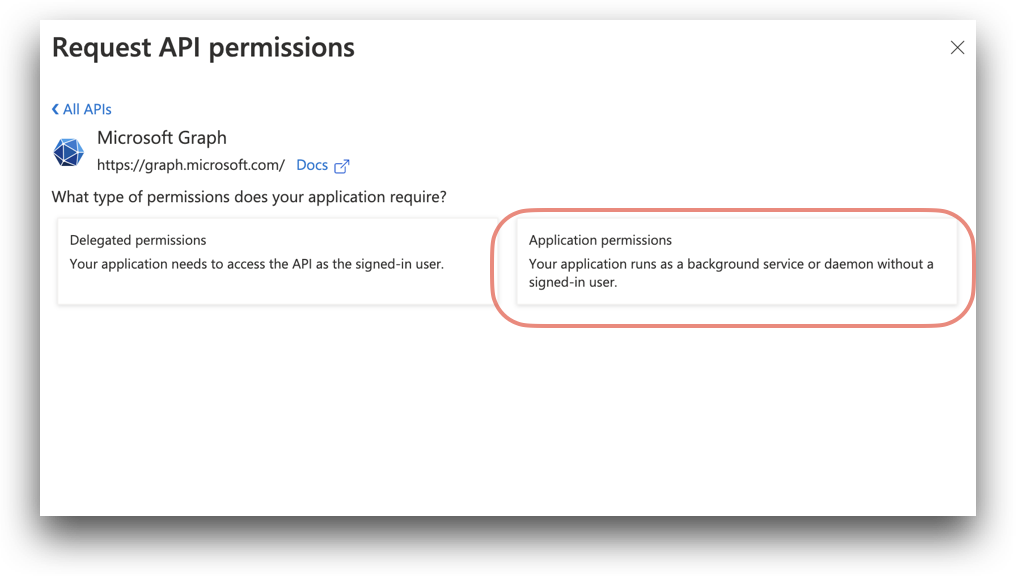
- Click Application permissions.
-
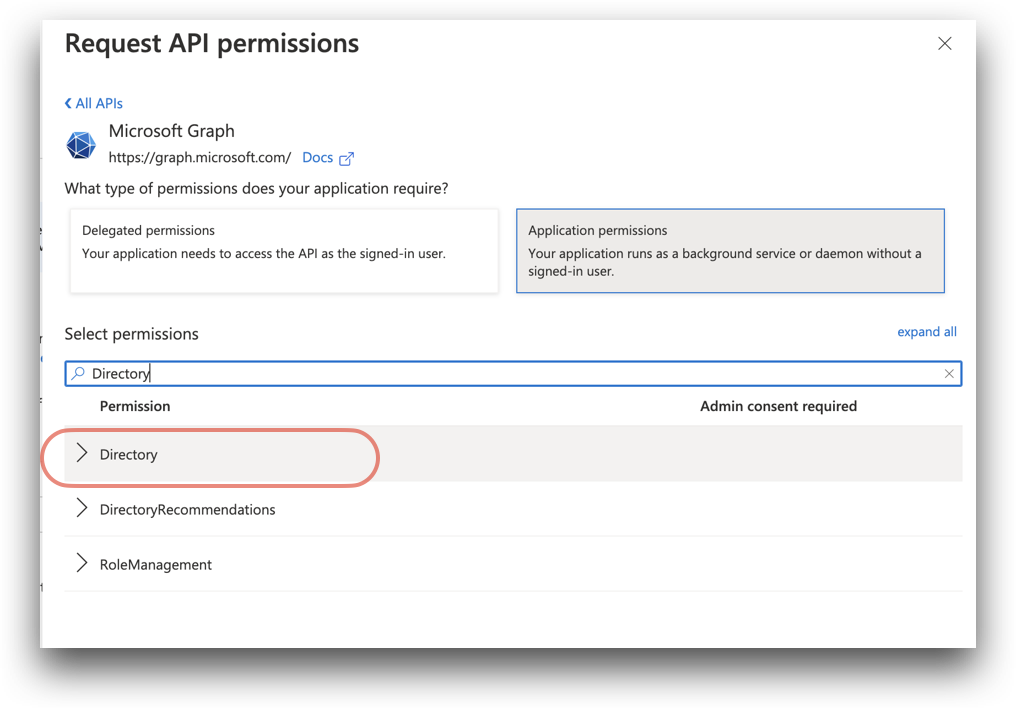
Under Select permissions, there is a search box. Search for the following permissions in the search box by entering the first word - such as
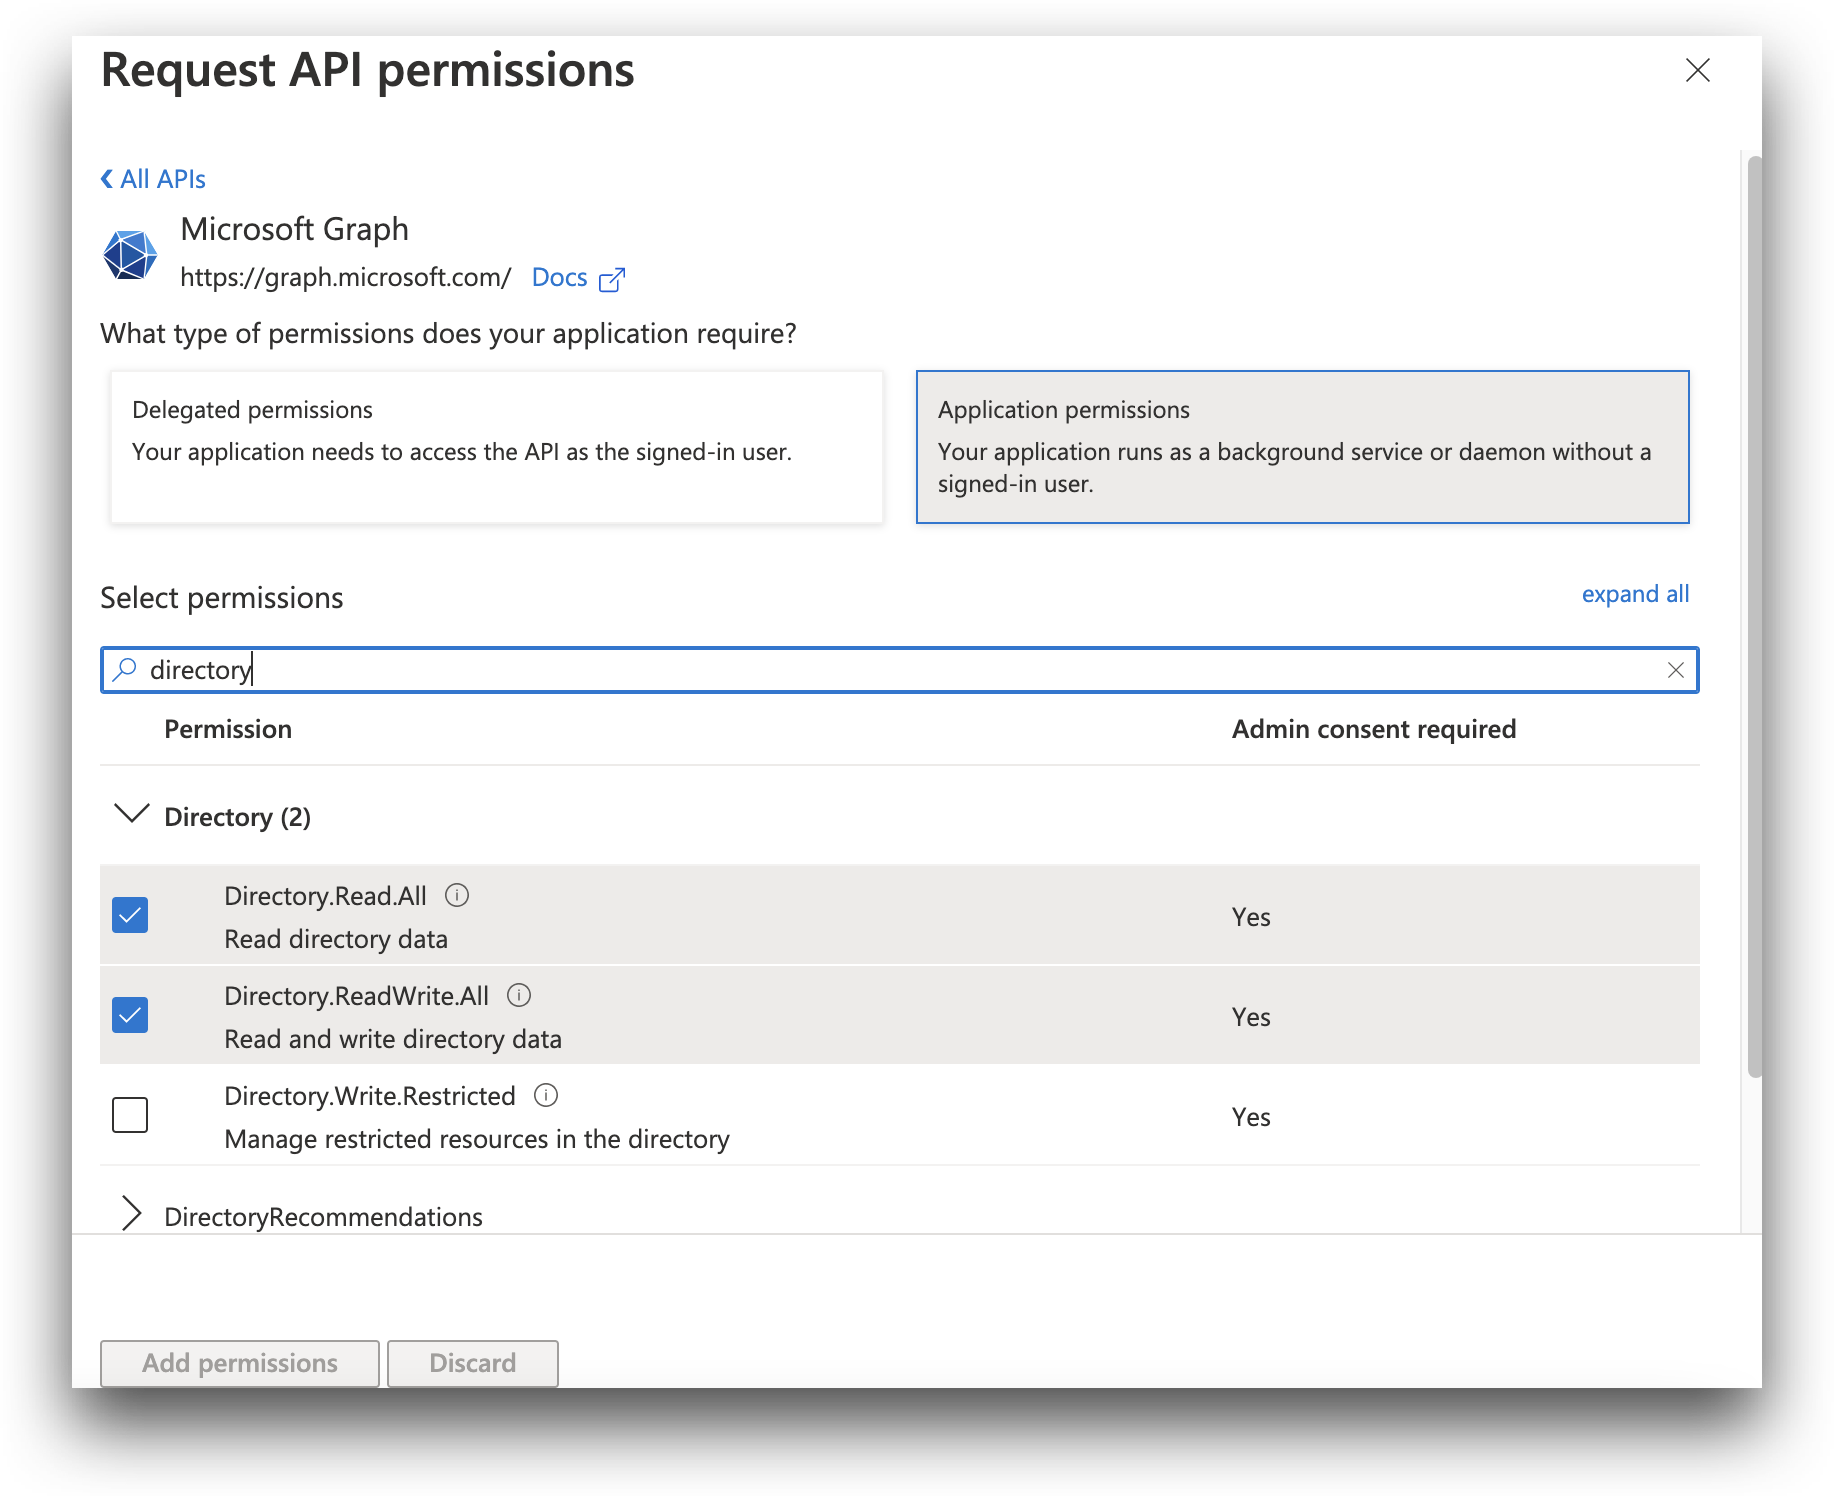
Directory- and by then expanding the Directory result to see the full list of permissions:If you wish to enable reading and writing to the user directory - being able to add or delete users - enable the following permissions:
Directory.Read.allDirectory.ReadWrite.allUser.ReadUser.ReadWrite.all
If you only wish to read from the user directory and to not be able to add new users, instead enable the following permissions:
Directory.Read.allUser.ReadUser.Read.all
-
After selecting all the required permissions, click Add permissions.
- The permission will need to be approved by an administrator before it can be used. To grant consent, click Grand admin consent for [your application].

- After approving consent, the status will be changed to Granted.
Configuring Microsoft Entra ID in AdminX
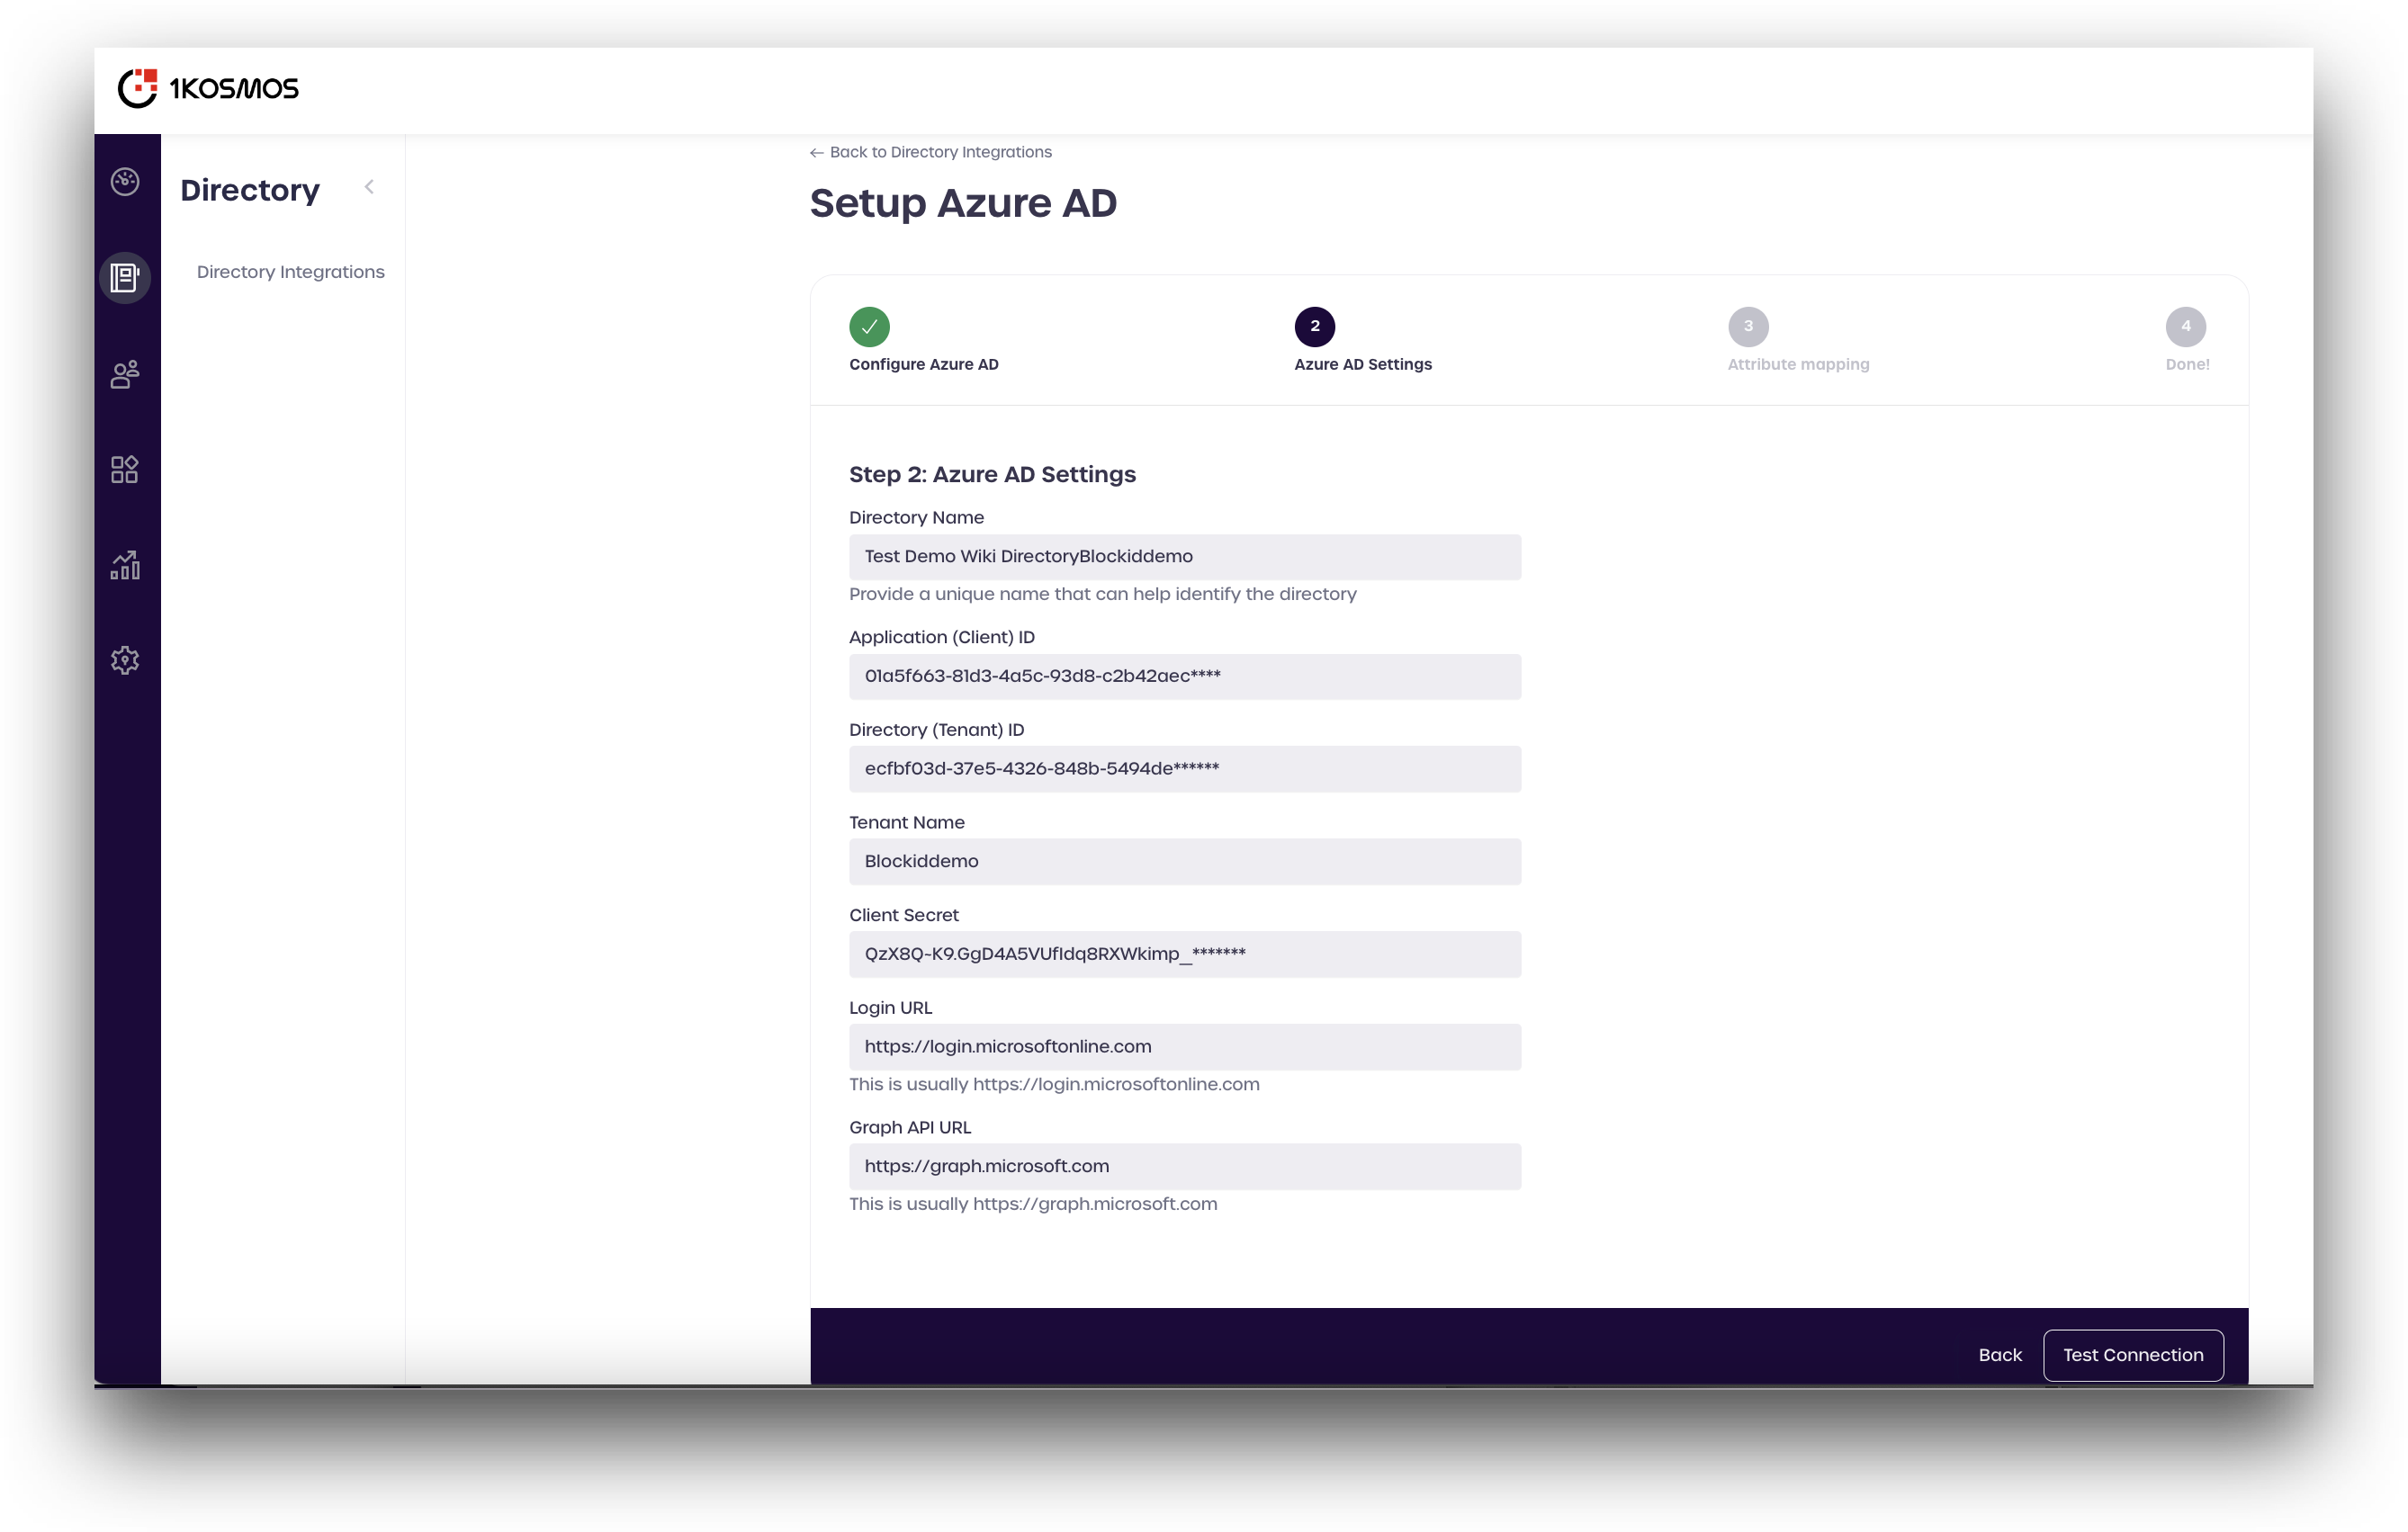
The following items are needed to configure Microsoft Entra ID in AdminX.
-
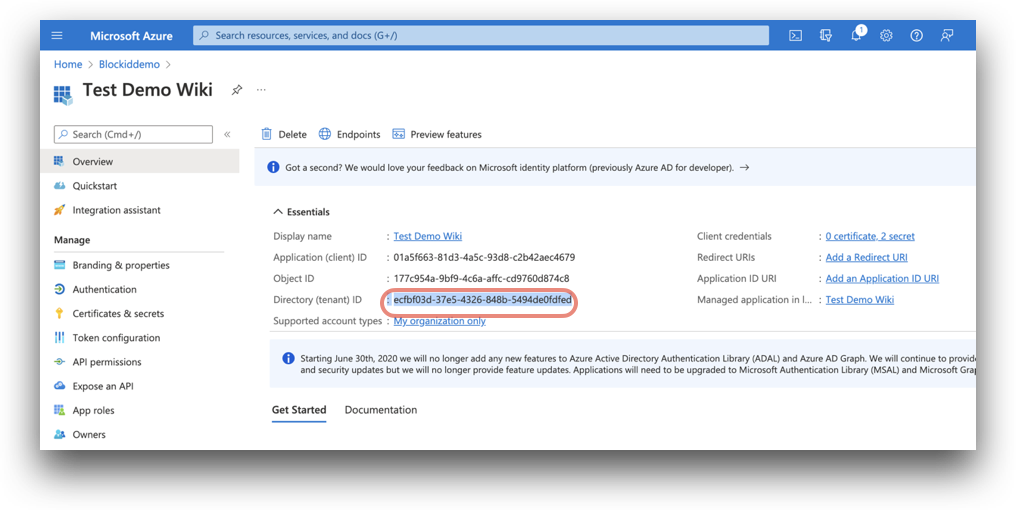
Application (client) ID: The
application (client) IDcan be found on the App registrations page.Azure Home -> Microsoft Entra ID -> App registrations
-
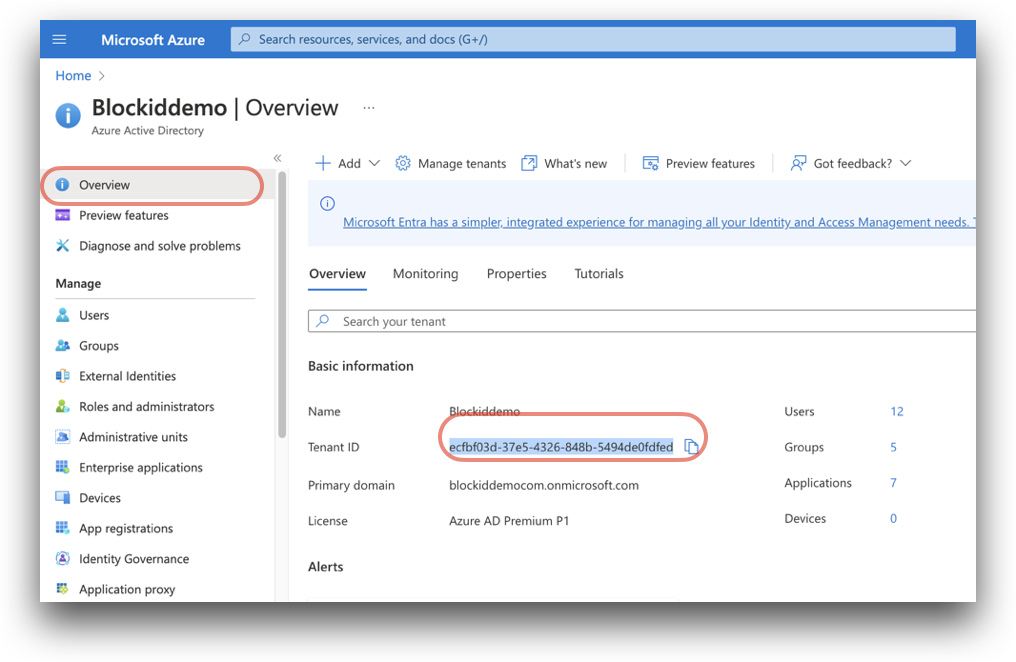
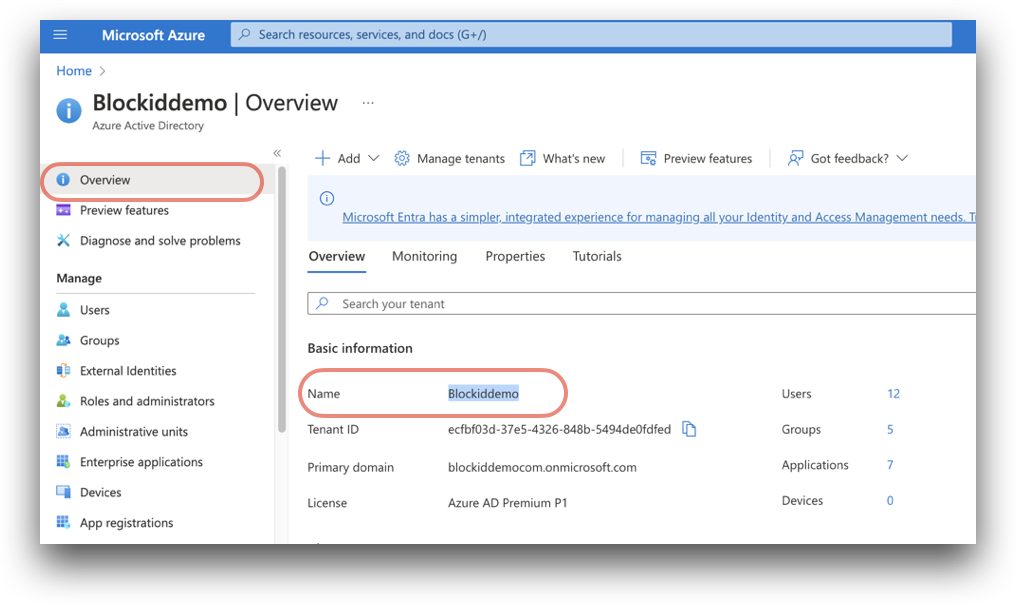
Tenant ID: Found on the Azure Active Directory Overview page.
Azure Home -> Microsoft Entra ID.
The tenant ID can also be found on [your application name] Overview, at
Azure Home -> Microsoft Entra ID -> App registrations -> [your application name]
-
(Tenant) Name: Your Azure tenant Name, Found on the Azure Active Directory Overview page.
Azure Home -> Microsoft Entra ID.
-
Client Secret: Secret for your app registration. Located on the application Certificates and secrets page.
Azure Home -> Microsoft Entra ID -> App registrations -> [your application name] -> Certificates and secrets
You can only view the certificate at the time it is created. If you lost your secret, you can create a new one by clicking New client secret
-
Login URL: Your login URL defaults to
https://login.microsoftonline.com -
Graph API URL: Your Graph API URL defaults to
https://graph.microsoft.com
Setting up Microsoft Entra ID in AdminX
After configuring all the necessary prerequisites, you can connect to Microsoft Entra ID using AdminX.
-
Log in to your tenant as a community administrator.
-
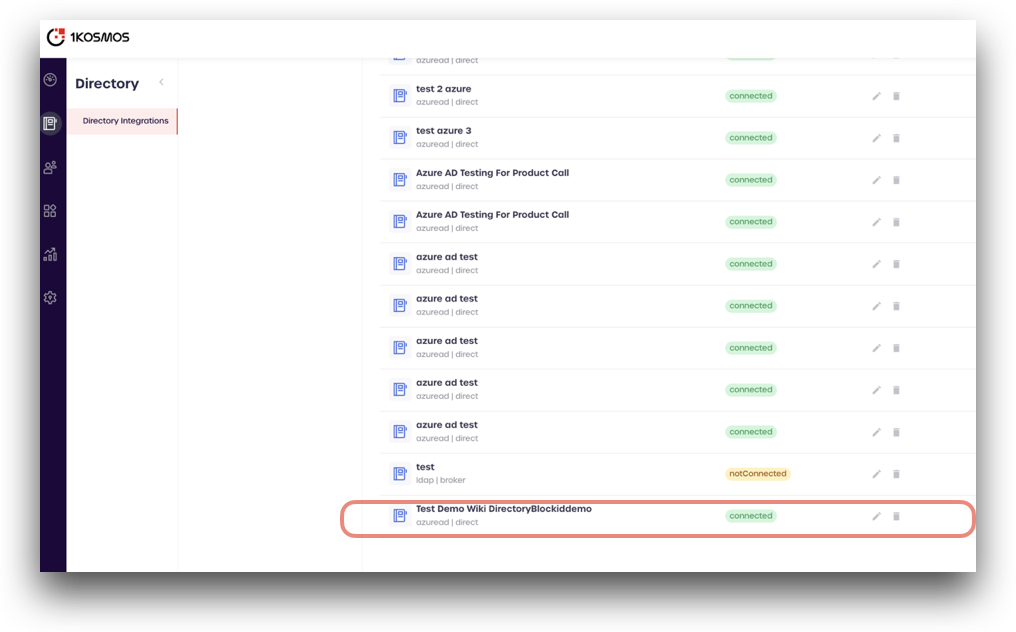
From the left-pane, navigate to Directory menu.
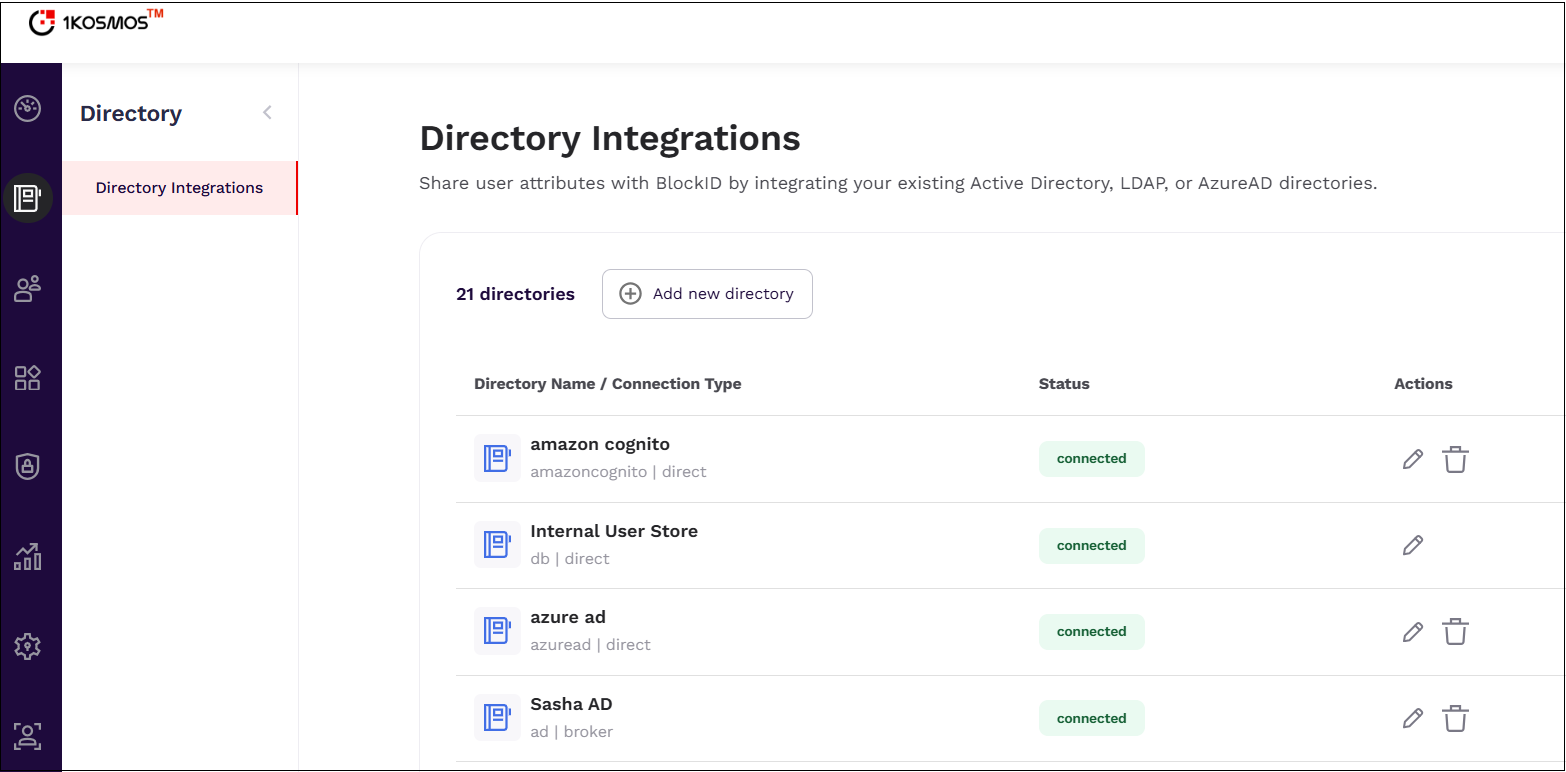
-
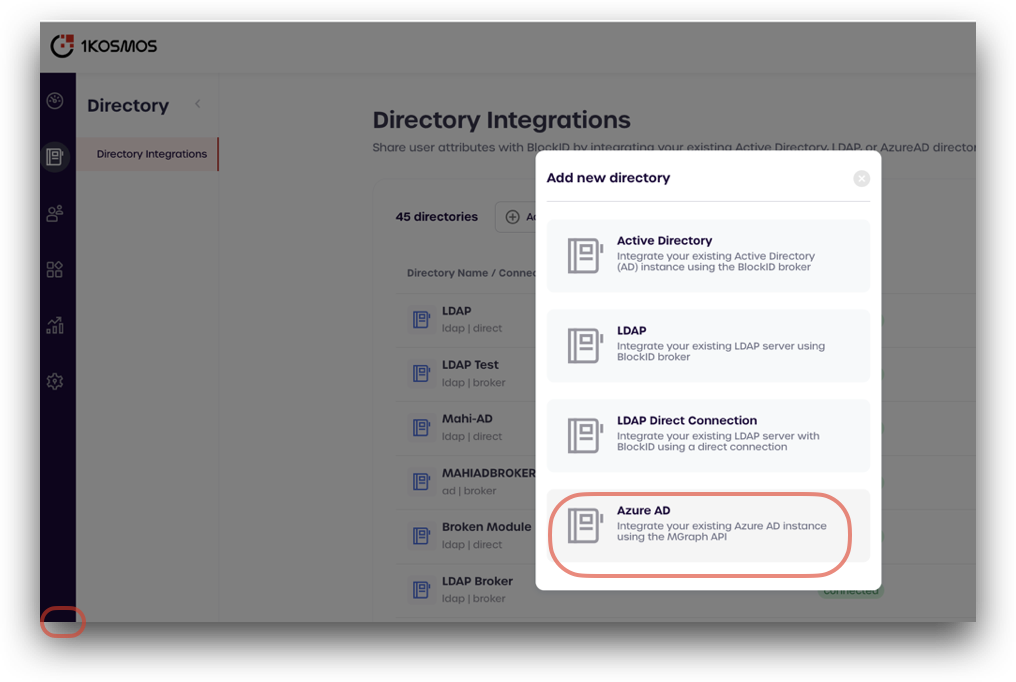
In the Directory Integrations page that is displayed, click Add new directory.
-
Select Azure AD.
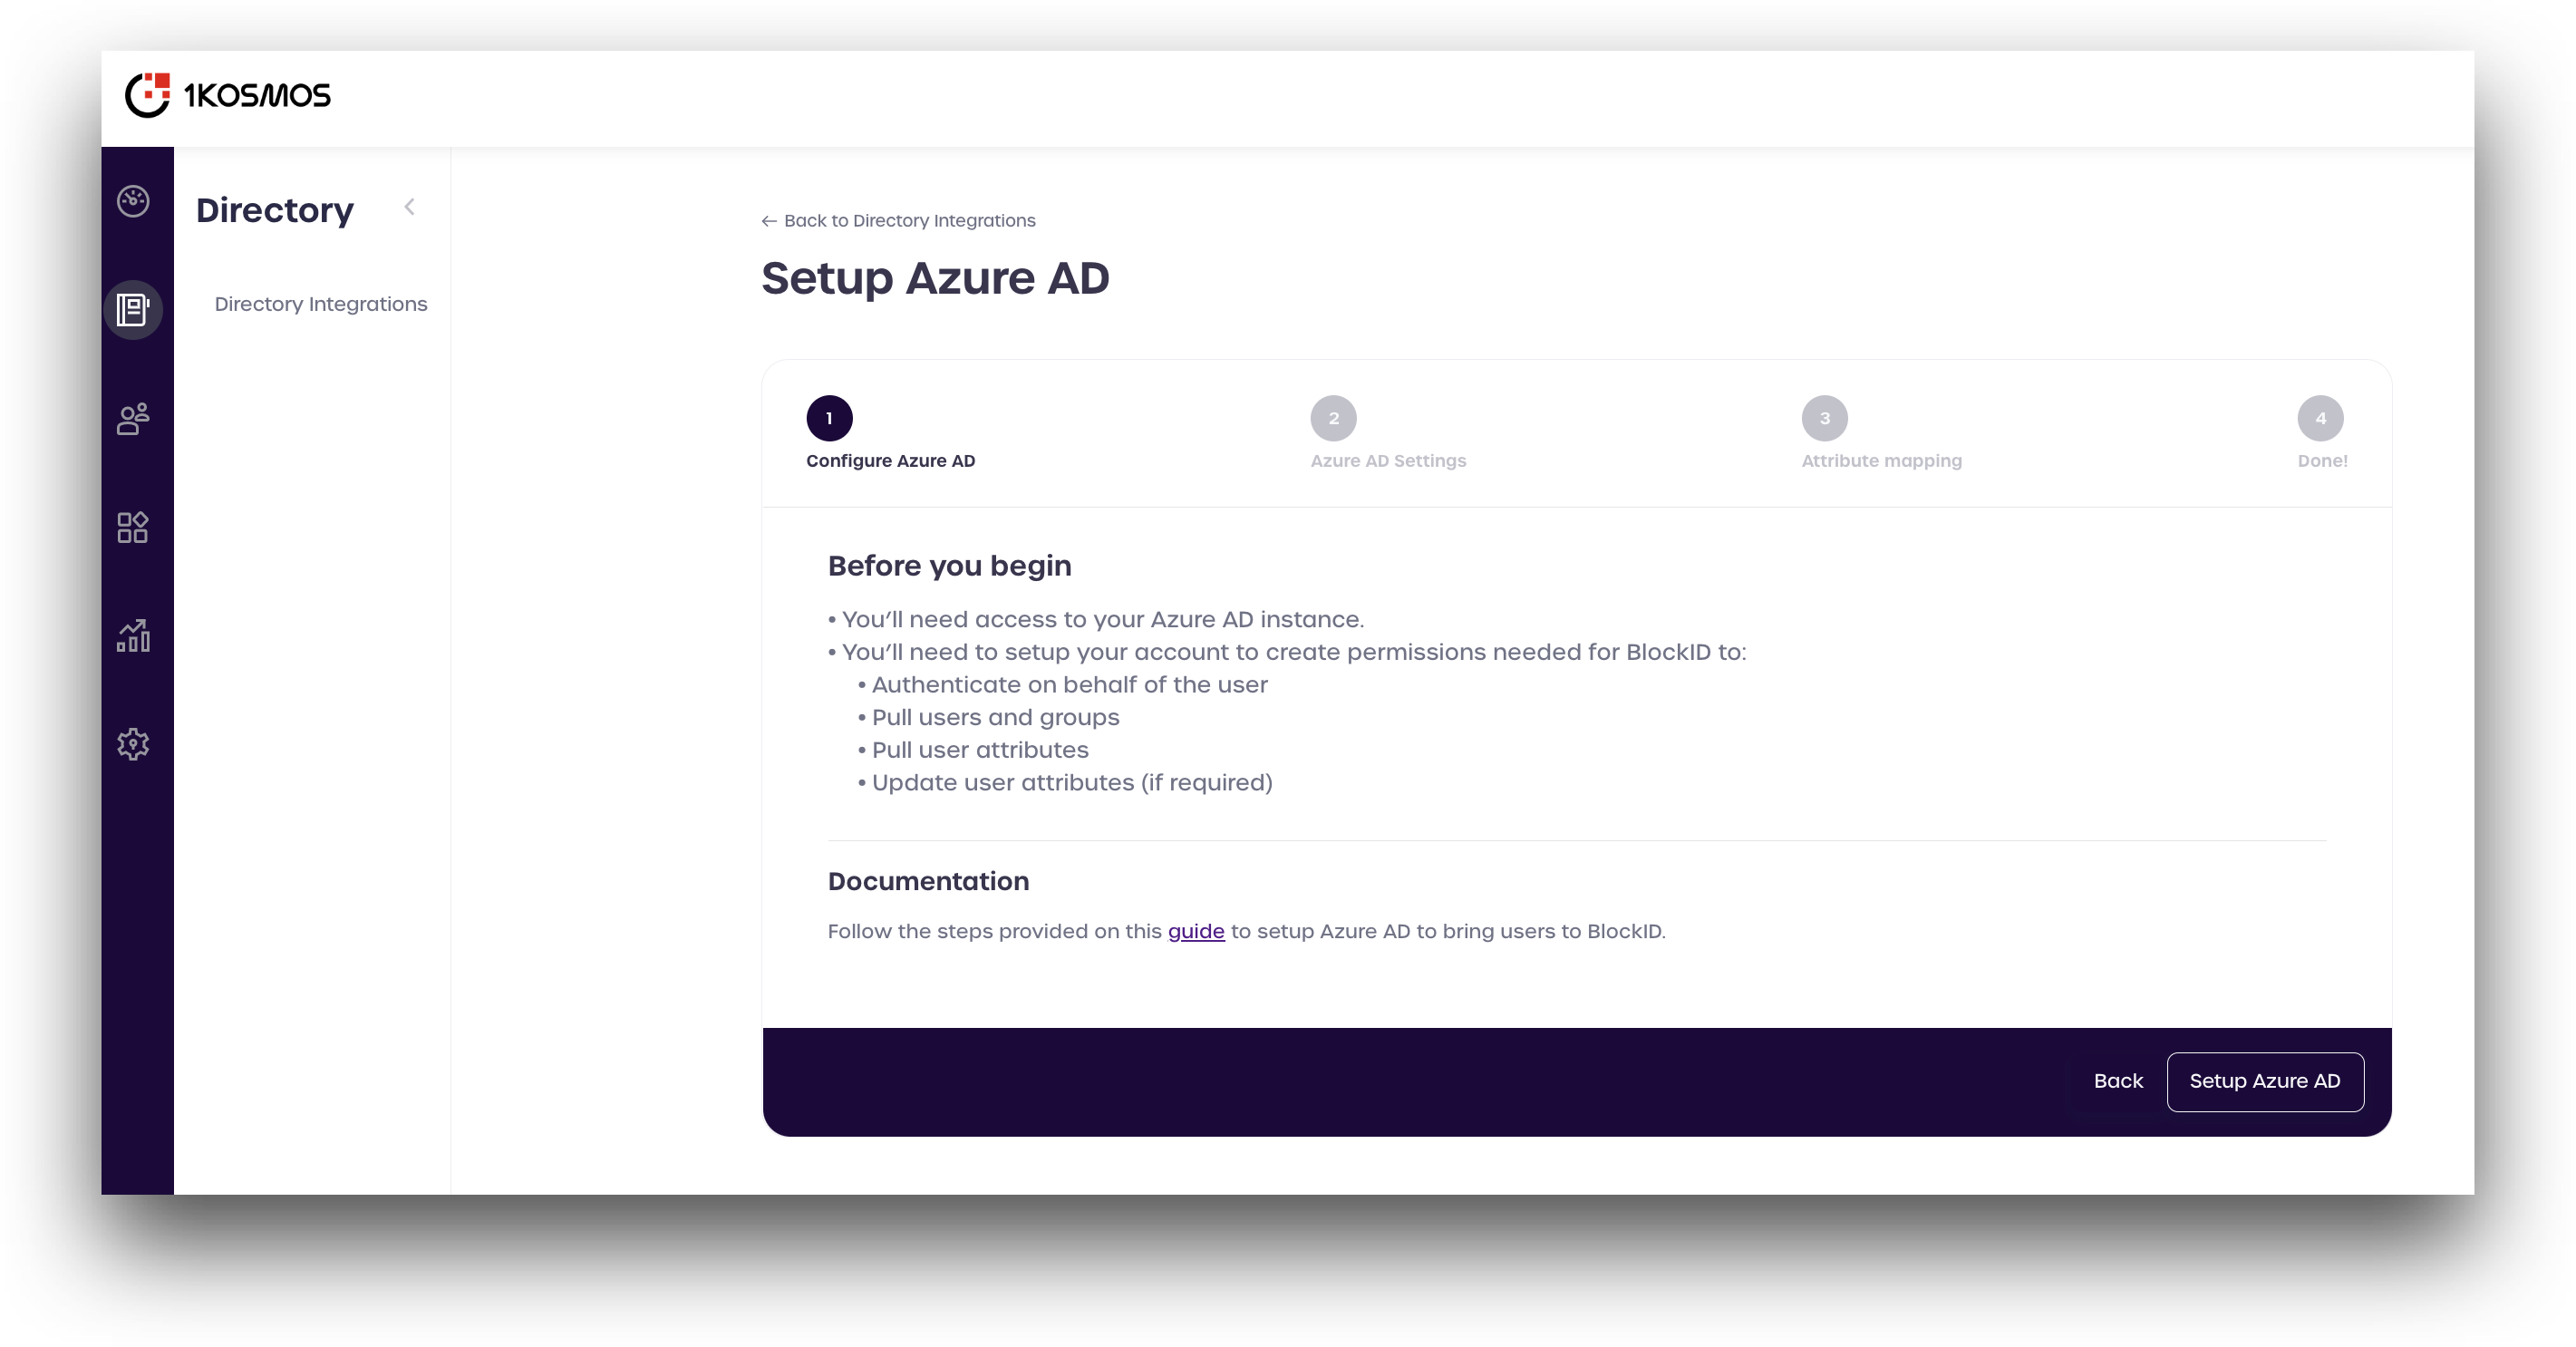
- Review the information displayed, and click Setup Azure AD
- Enter all the information you copied from Azure (See the picture for reference).
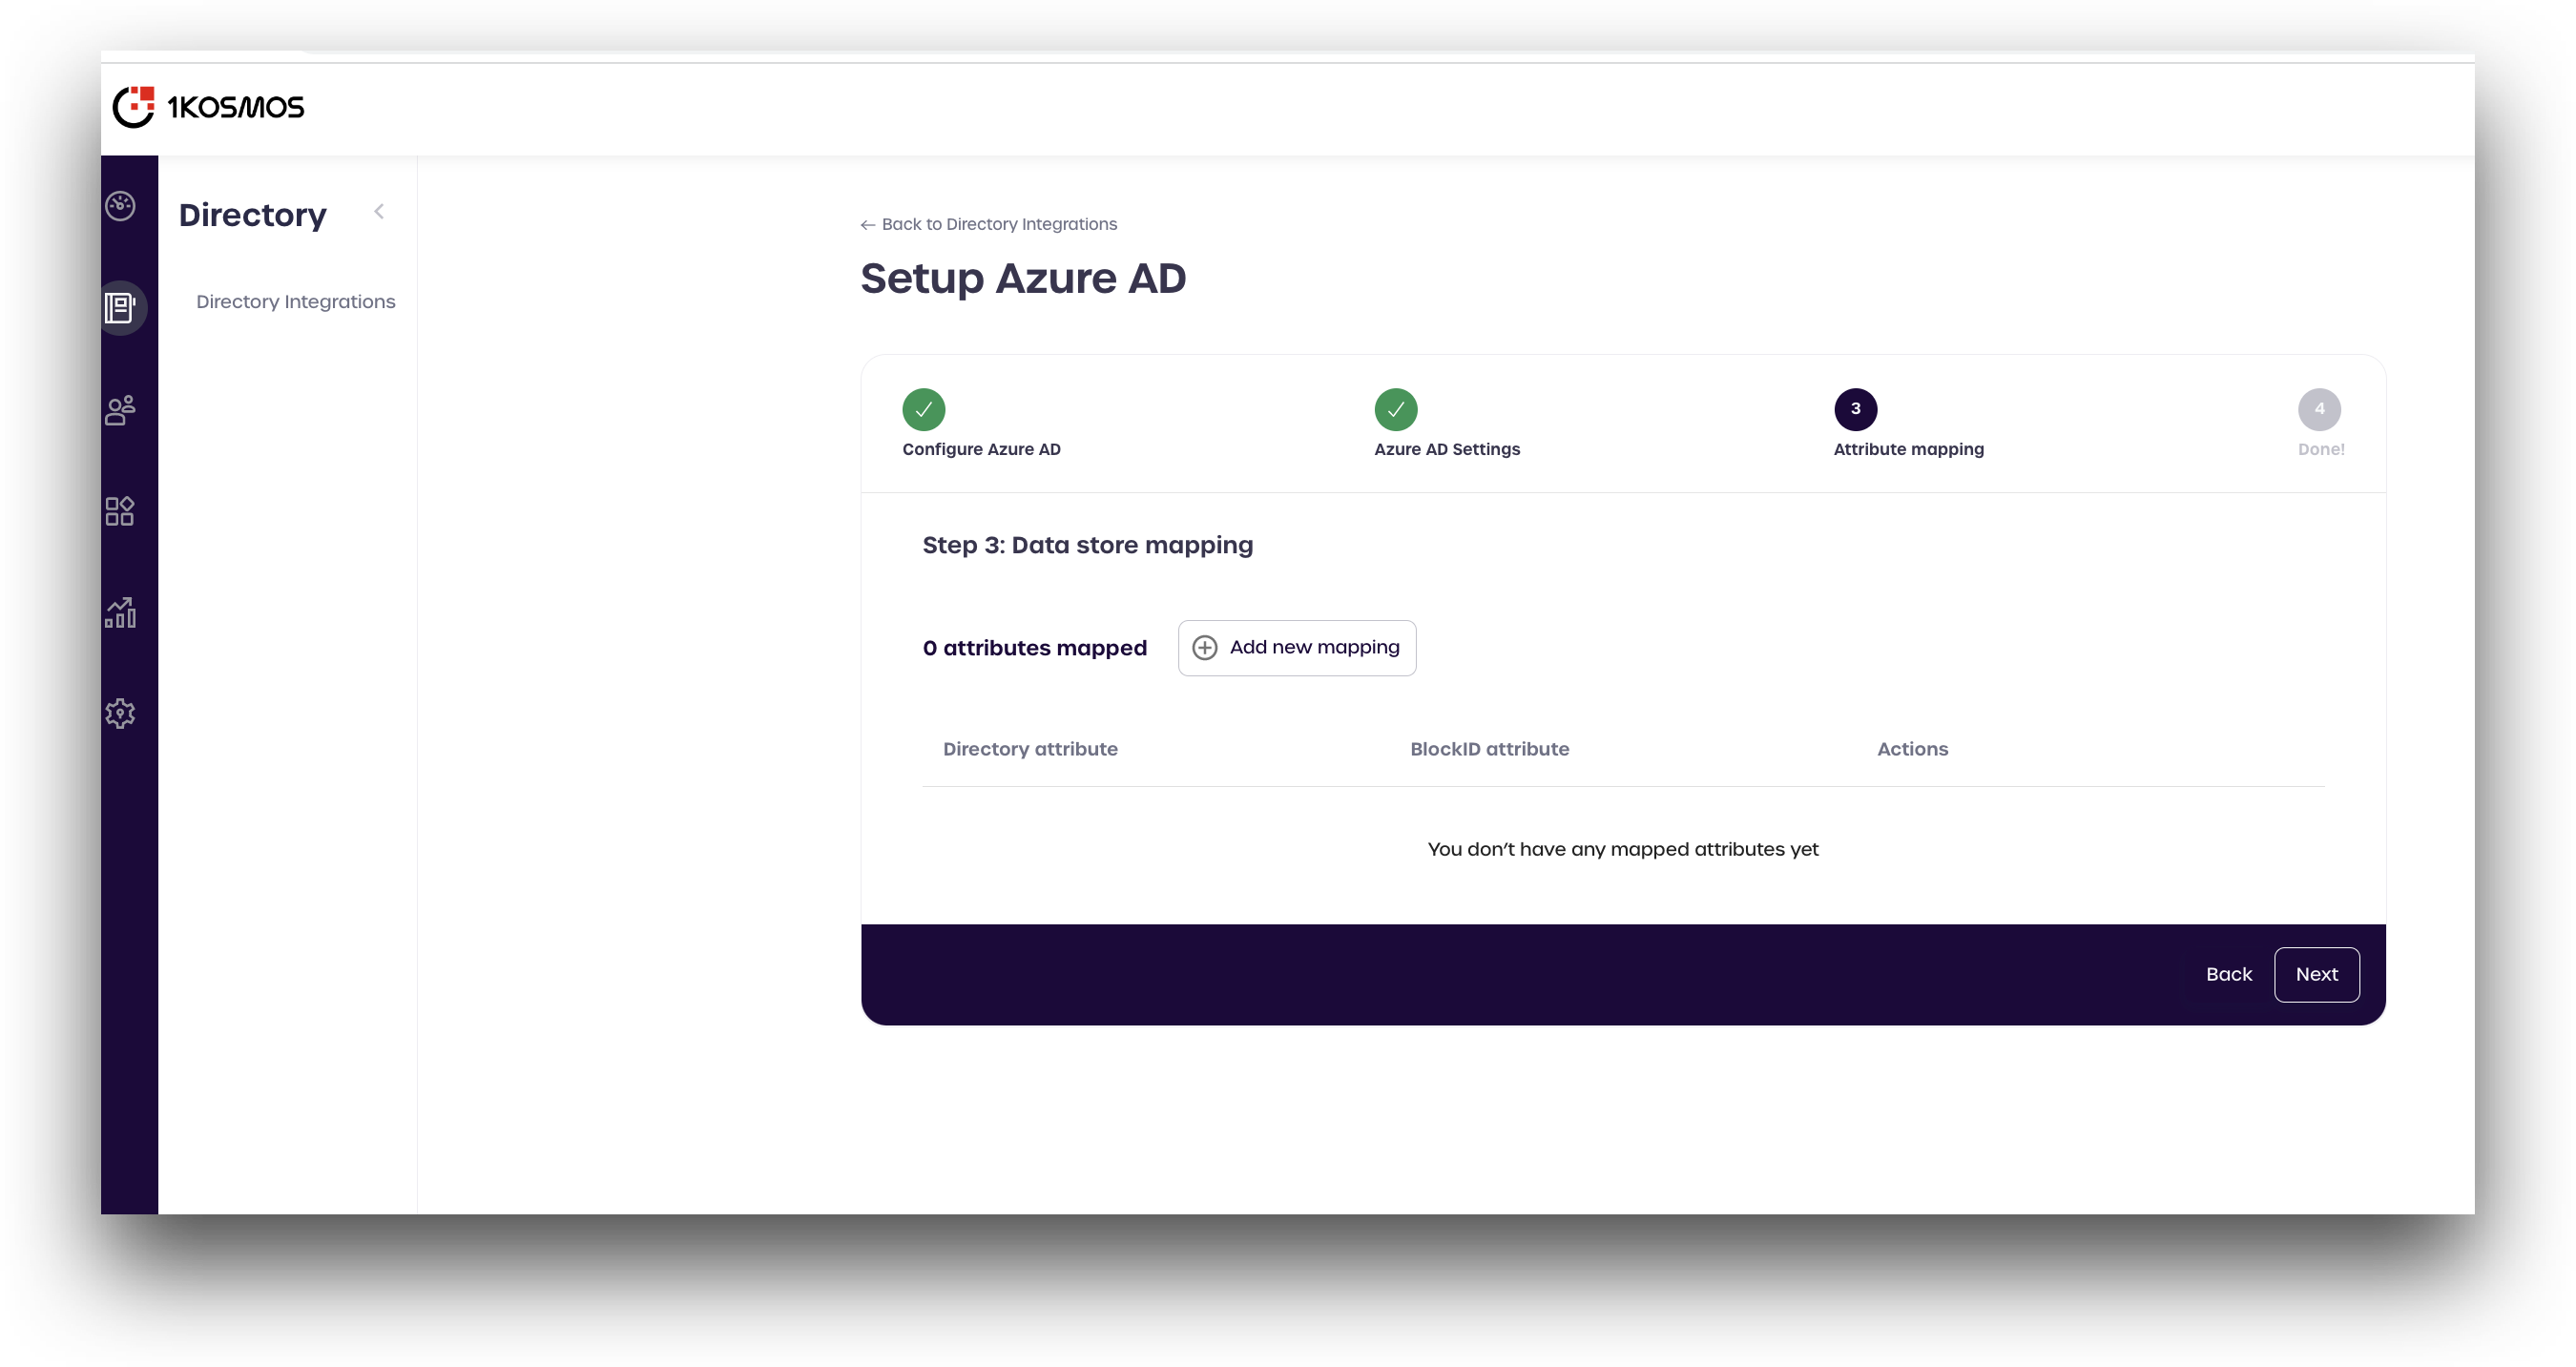
- Configure attributes mapping for the 1Kosmos data store used internally by AdminX. This mapping links the Azure directory attributes - such as name, number, etc. - to the attributes used by 1Kosmos.
The following attributes need to be mapped:
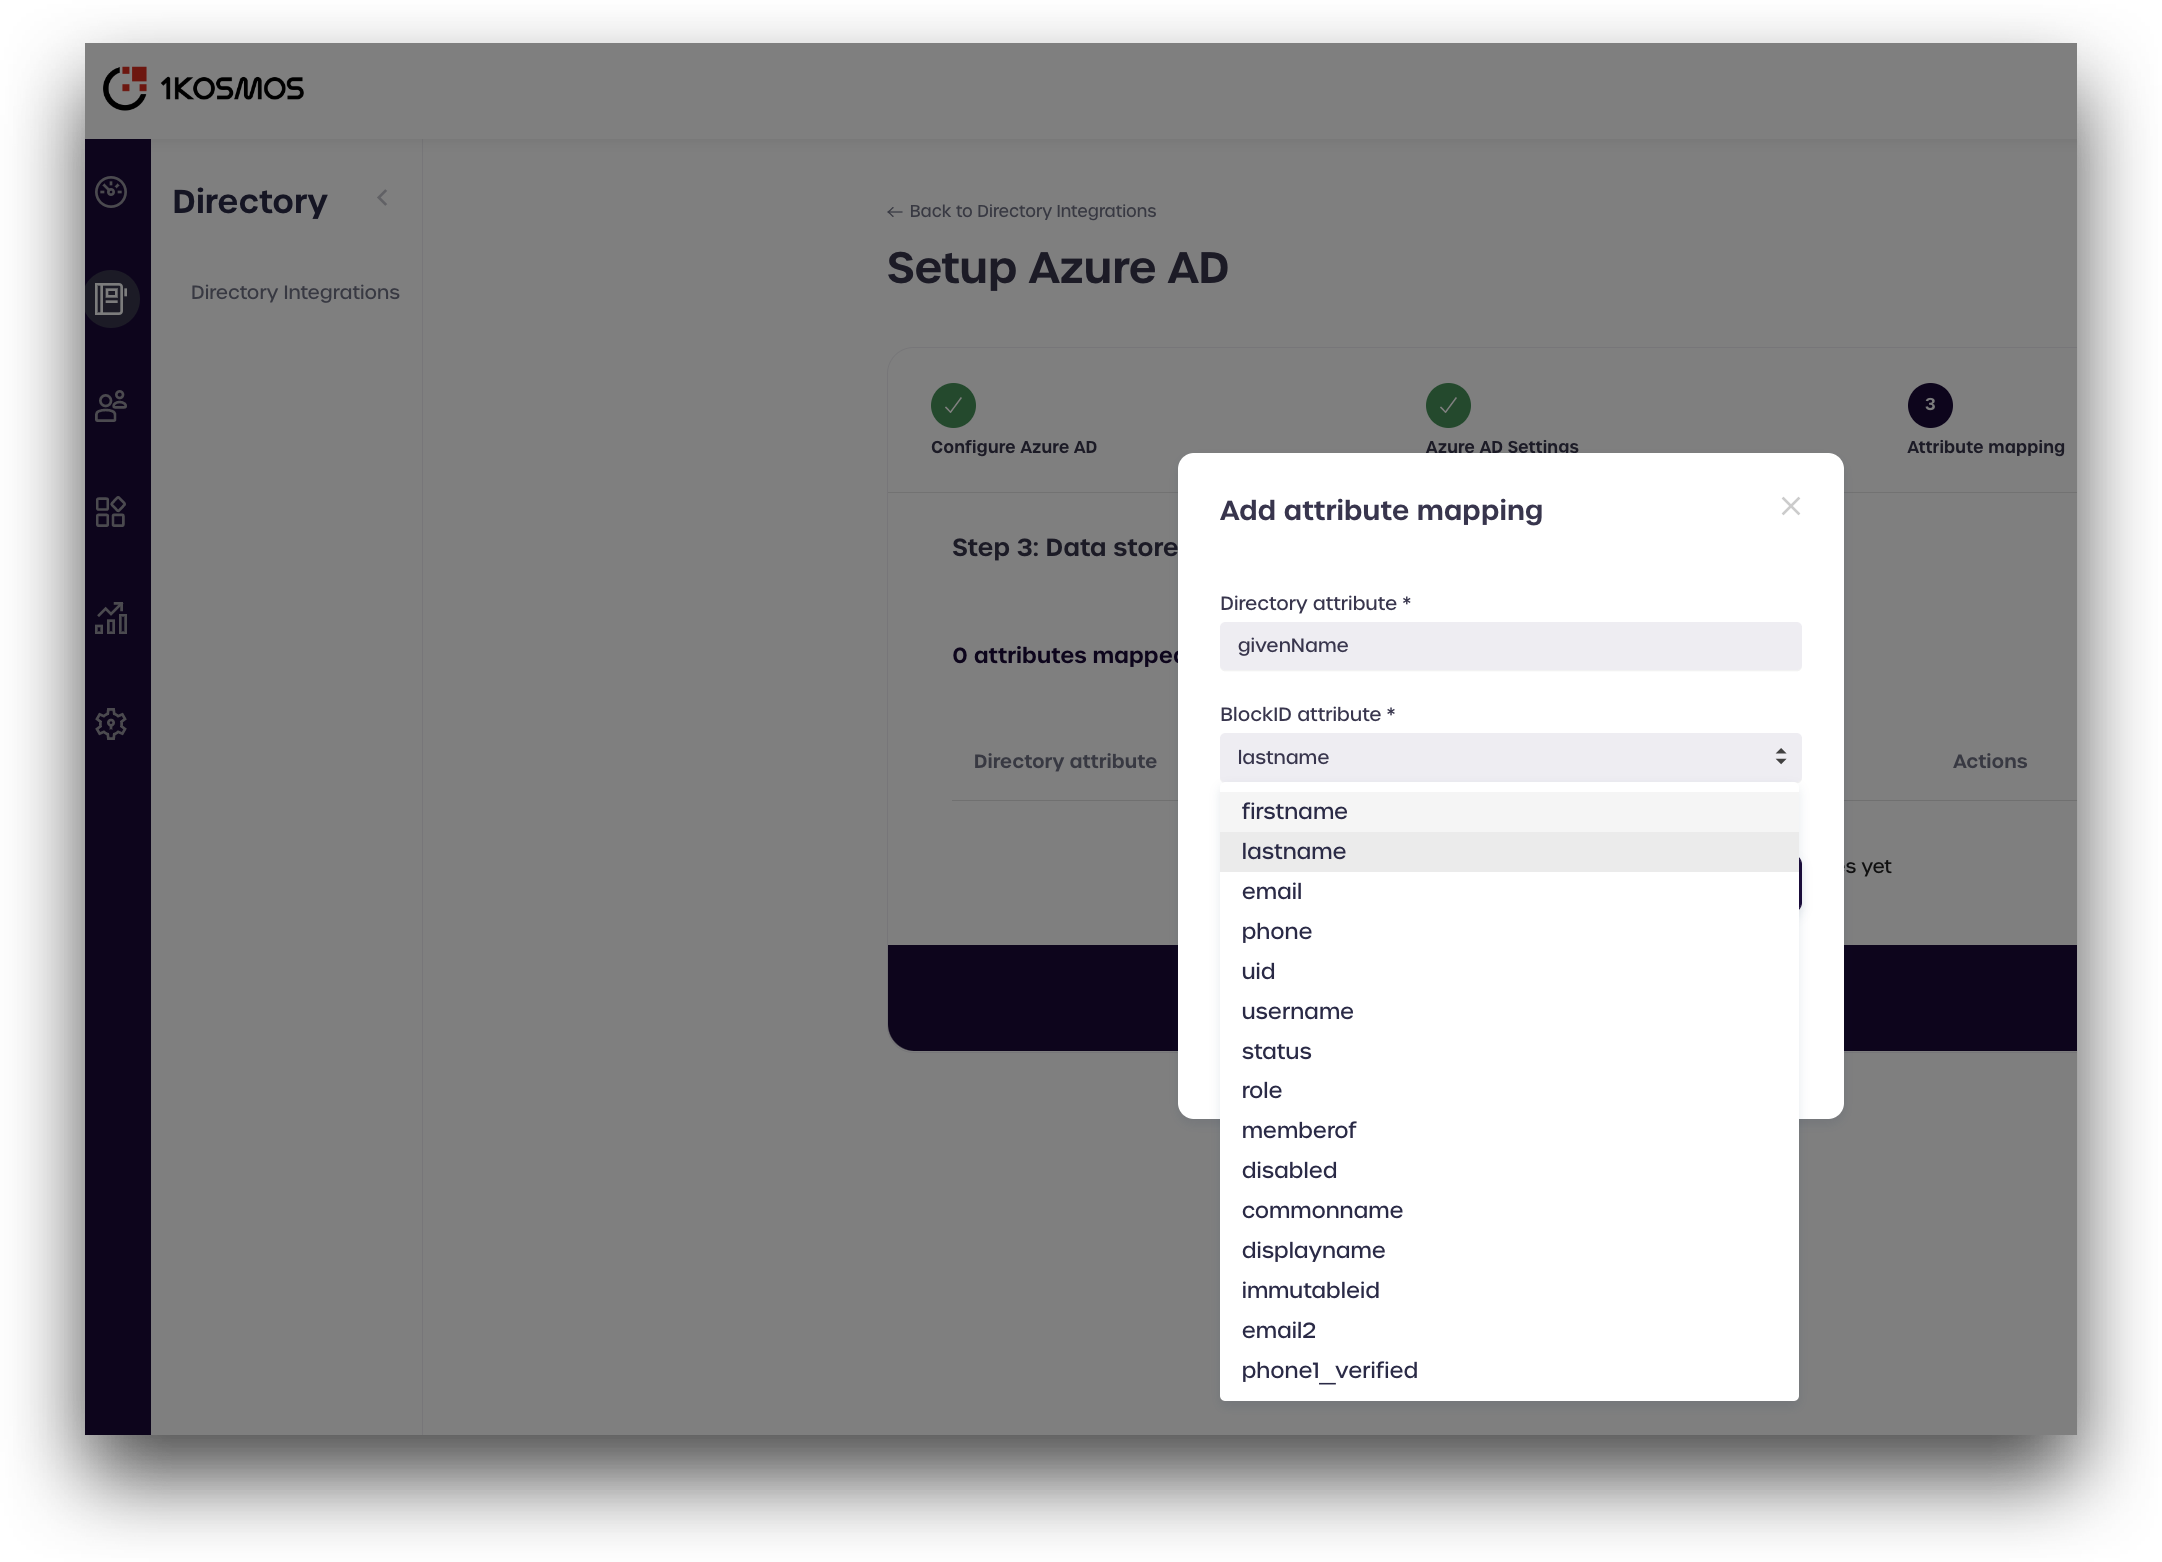
| Azure Directory Attribute | 1Kosmos Attribute Name |
|---|---|
| givenName | firstname |
| surname | lastname |
| userPrincipalName | |
| mobilePhone | phone |
| userPrincipalName | username |
-
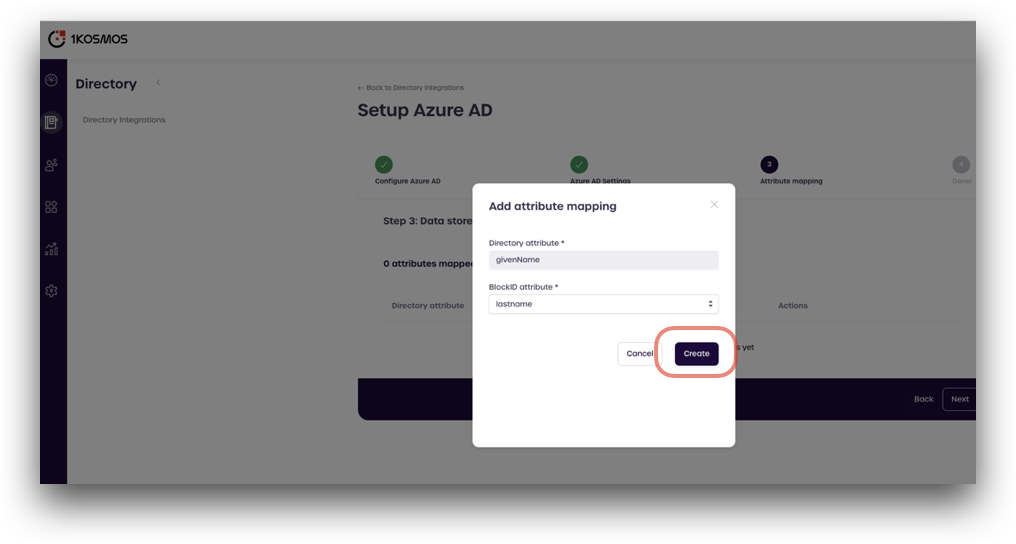
Click Add new mapping
-
Enter the Azure attribute in the top box labeled Directory attribute. Use the drop-down menu to select the corresponding 1Kosmos attribute from the table above, and click Create.
- Repeat this process until all the attributes from the table above are mapped, and click Next.
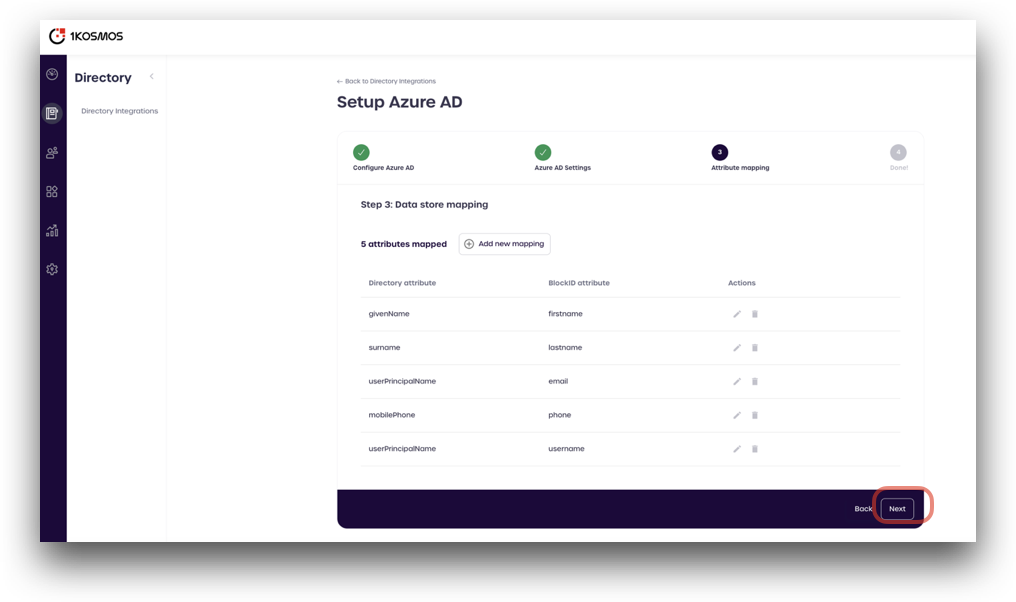
Once the attributes are mapped, you are done! You can click the View Users button to preview your Azure AD users.
- Click Complete to finish adding your Azure AD directory into Adminx.
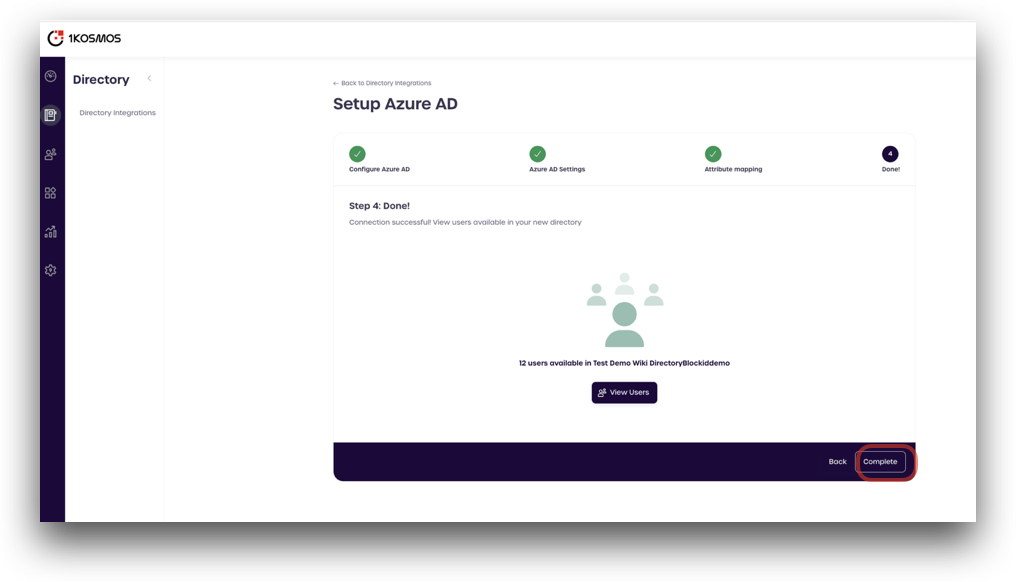
You can now view the added Azure AD directory to the Directory Integrations page in AdminX.