SAML Application Integrations
Overview
The Security Assertion Markup Language (SAML) integration screen allows you to add your identity provider (IdP)'s information and set its authorization and configuration details. This will enable a passwordless authentication solution for your organization's users (who have logged into the service provider's site). Thus, you can log in to your SP account by leveraging your biometrics. The biometric options include Touch ID / Face ID and LiveID.
For detailed information about SAML and to review the full protocol specification, see Security Assertion Markup Language (SAML) V2.0 Technical Overview
1Kosmos as Identity Provider
1Kosmos can integrate with SAML applications by acting as an Identity Provider (IdP) that provides single sign-on (SSO) to external Service Provider (SP) applications.
The service provider (SP) initiates the SAML sign-in flow with 1Kosmos when the user goes to sign-in, or when the user attempts to visit a protected resource:
- The SP generates a SAML Request, which triggers the authentication flow with 1Kosmos as the IdP.
- The user enters their log-in details.
- 1Kosmos generates a SAML Response containing the assertion of the authenticated user. In addition, a SAML Response may contain additional information, such as user profile information and group/role information, depending on what the Service Provider can support.
- The authenticated user is returned to the external Service Provider's application
For more information on setting your Identity Provider in AdminX, see Identity Provider (IdP) Configuration.
Managing Re-Authentication
1Kosmos now provides community administrators with the ability to force re-authentication for users when accessing SAML/OIDC Service Provider (SP) applications. This feature prompts users to re-enter any required credentials for the relevant authentication journey, regardless of whether they are already logged in with the same authentication factors.
Re-authentication can be enabled with the introduction of a new setting Force Re-authentication while adding SAML/OIDC applications. By default, this setting is disabled.
To re-authenticate a SAML application, follow these steps:
- Log in to your tenant as a community administrator.
- Navigate to Applications > Add Applications.
- Configure your SAML integration.
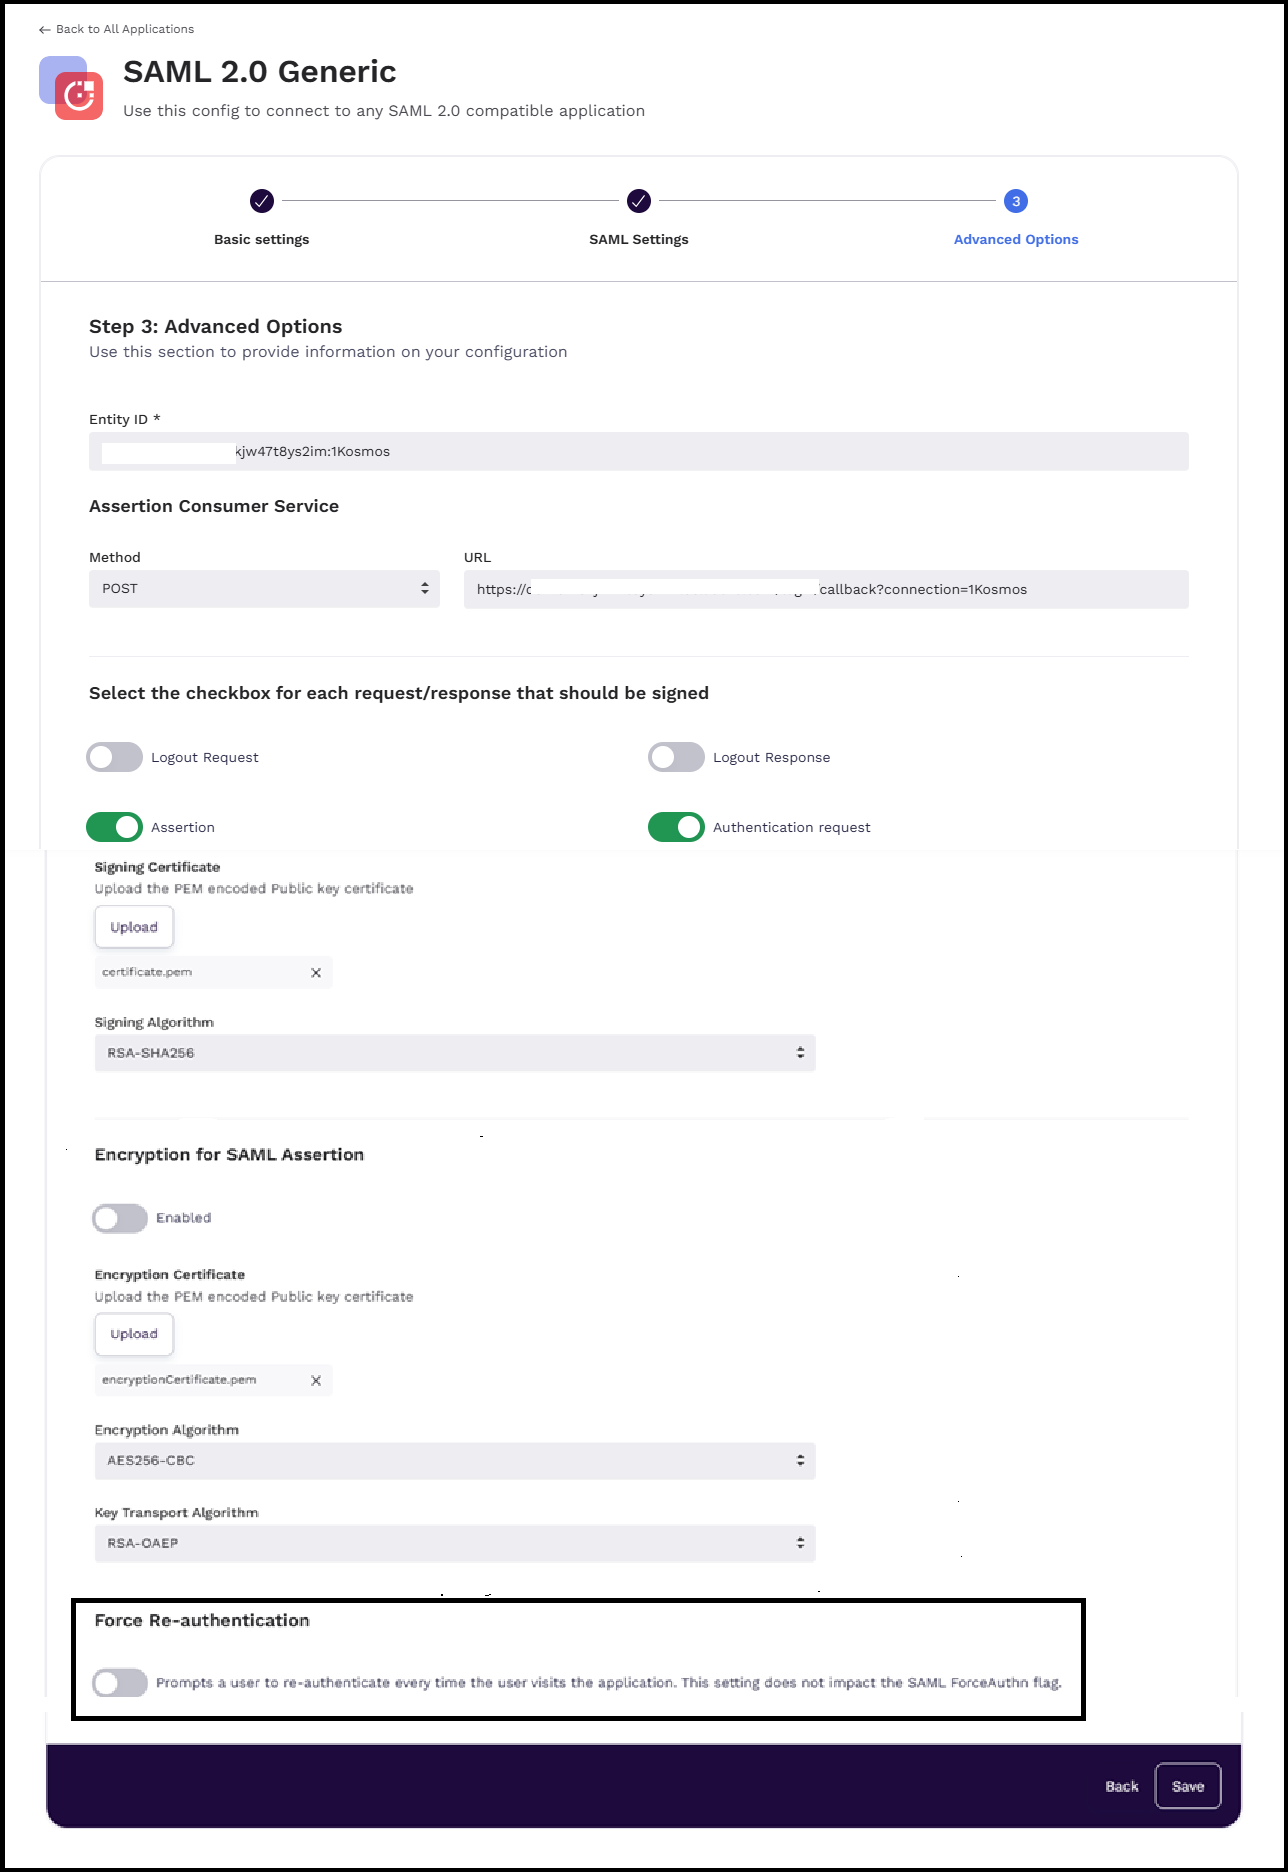
- Navigate to the Advanced Options tab of your SAML integration, enable the Force Re-authentication slider, and then click Save.
- Open the target application URL in a new tab. If you already have an active session in AdminX, you will be redirected to the 1Kosmos Authentication page with your username pre-filled.
- Select an authentication method. Once the authentication is successful, you will be logged in to the target application.
Event Logs
Following events are triggered during force re-authentication.
- E_SP_MODIFIED
- E_LOGIN_SUCCEEDED
- E_SP_REDIRECT_SUCCEEDED
SAML Integration in AdminX
Add a New SAML Application
The guide will follow the process for adding a generic SAML application.
For more information on the list of pre-built integrations, see SSO Integrations in AdminX.
To get started, follow these steps:
-
Log in to your tenant as a community administrator.
-
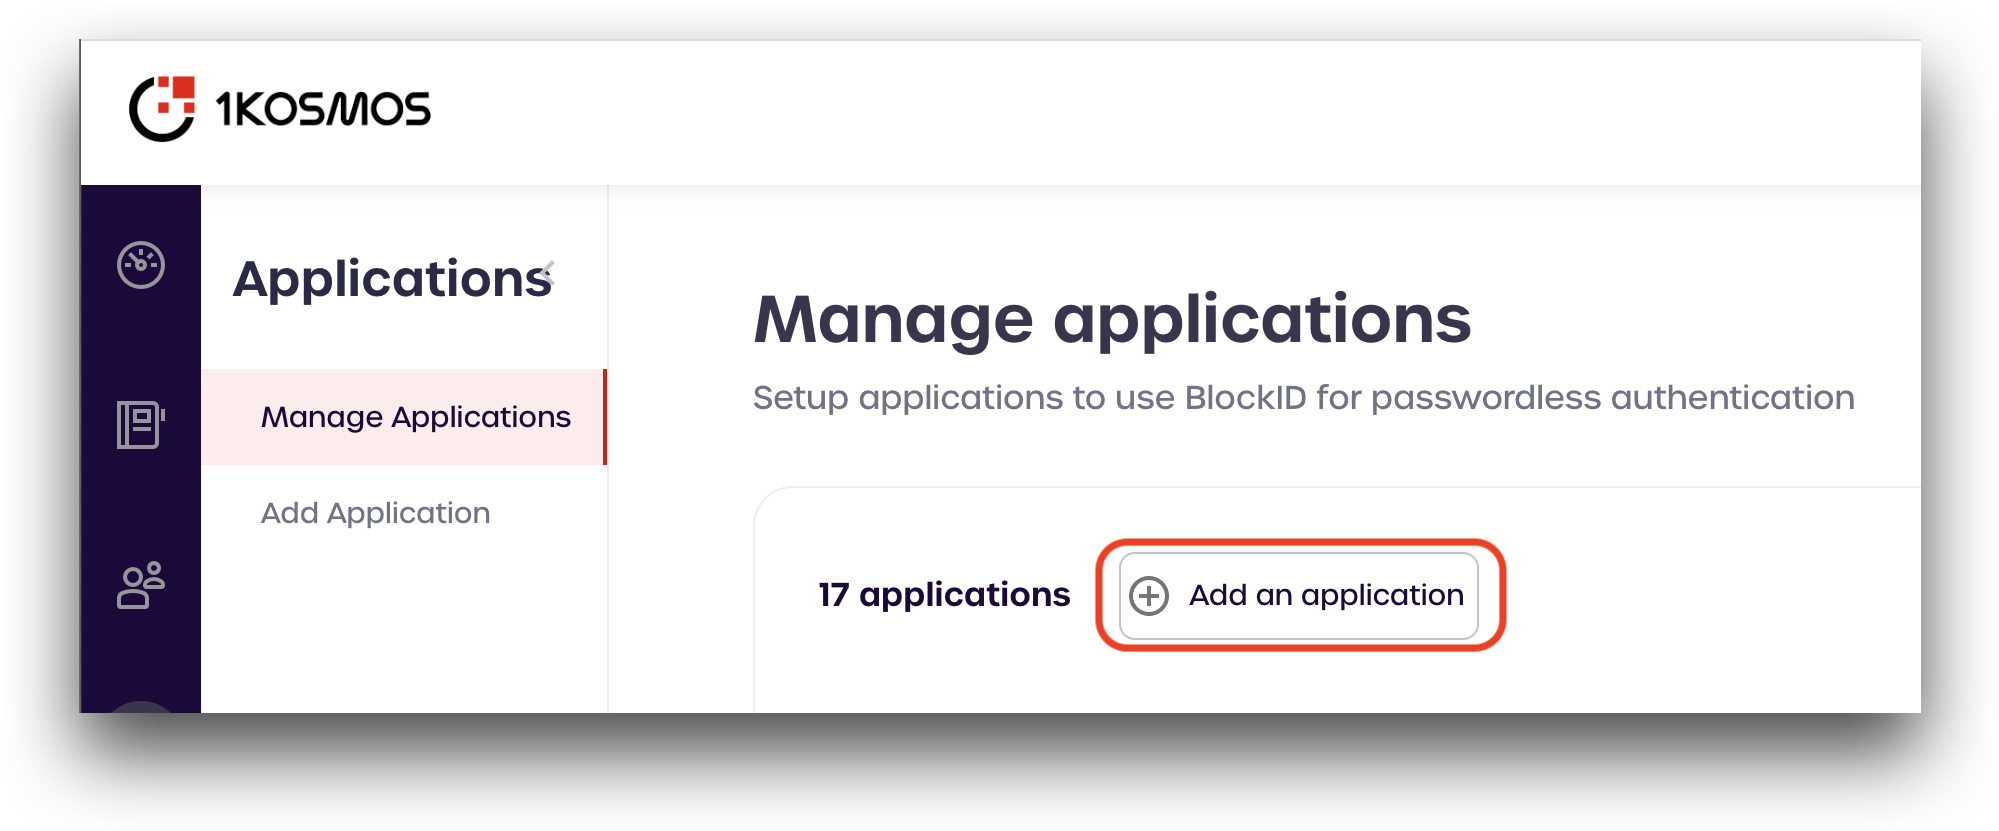
Navigate to the Applications page. Click Add Application.
-
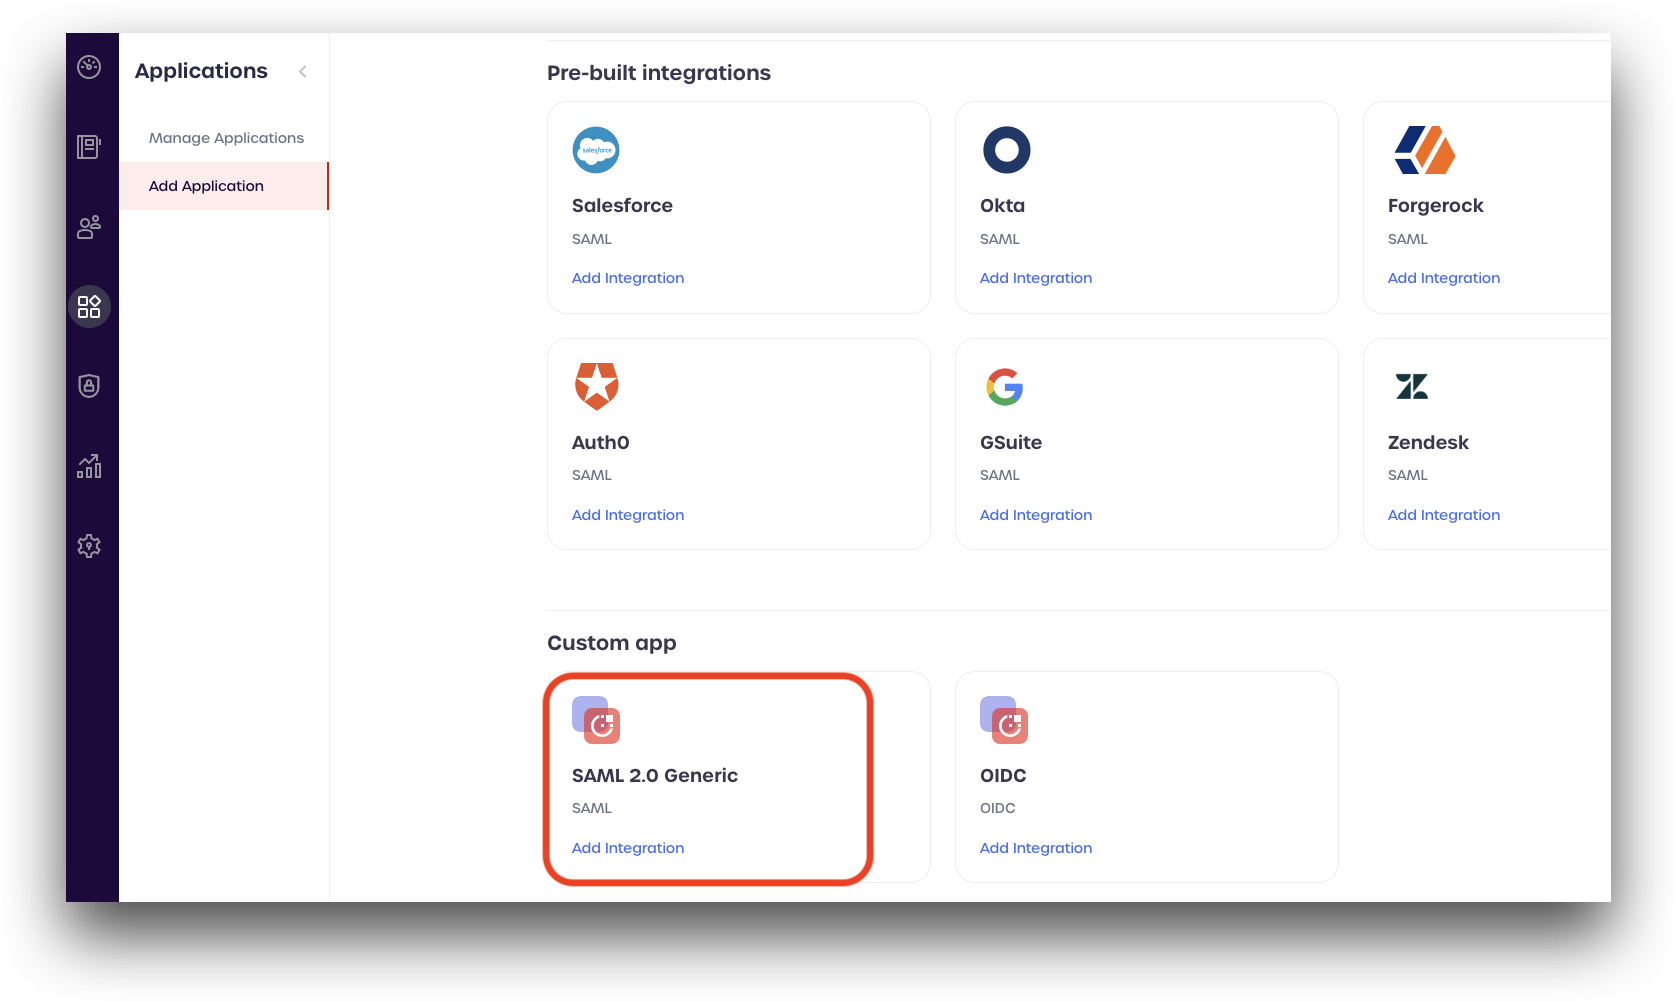
From the Add new applications page, scroll down to your service provider.
-
If your service provider is not listed, select SAML2.0 Generic (located in the Custom app section) and click Add Integration.
-
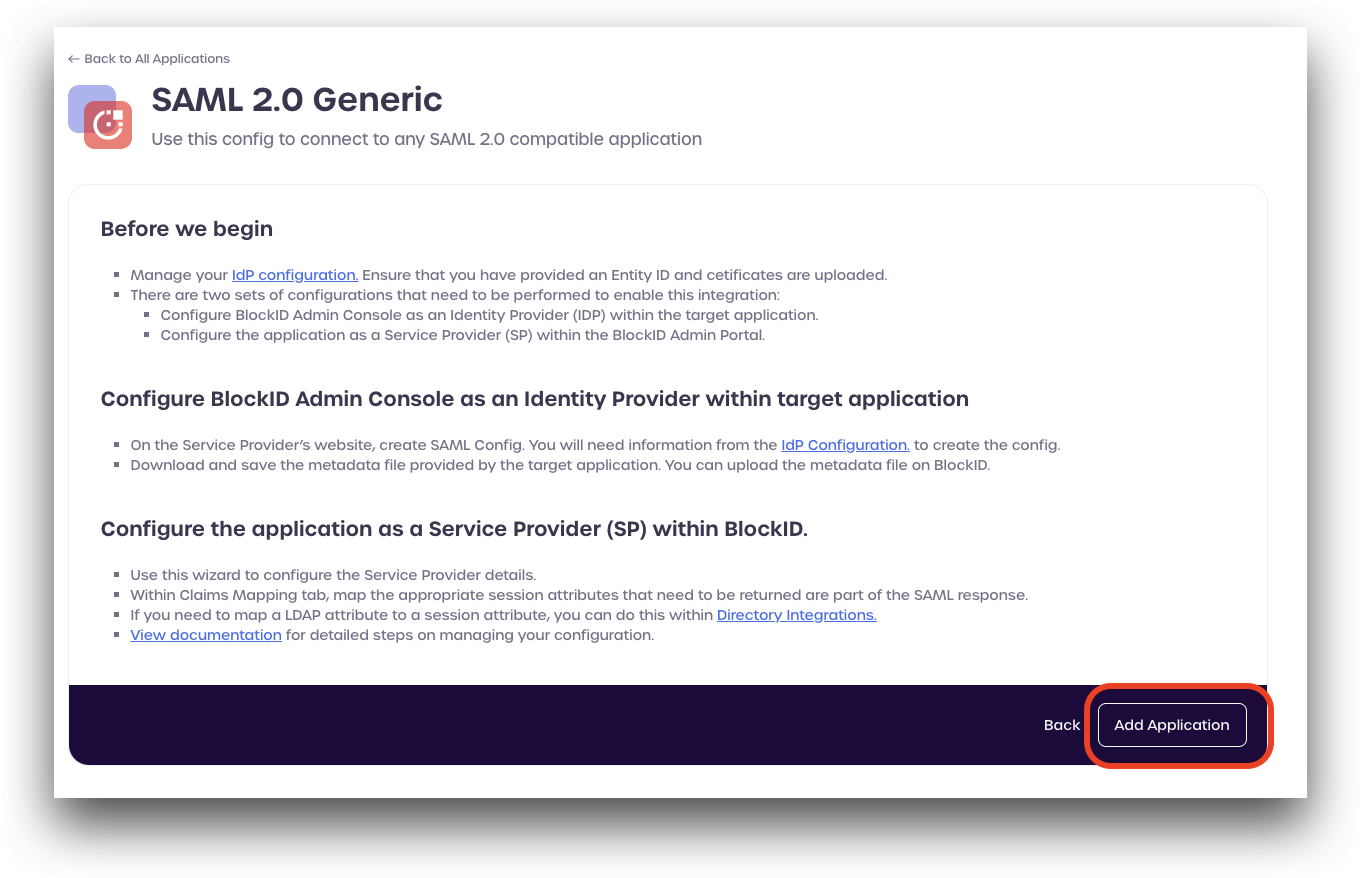
Review the information listed on the page. You will need to have completed the steps outlined in Identity Provider (IdP) Configuration before continuing with your SAML application integration.
-
Click Add Application to continue.
-
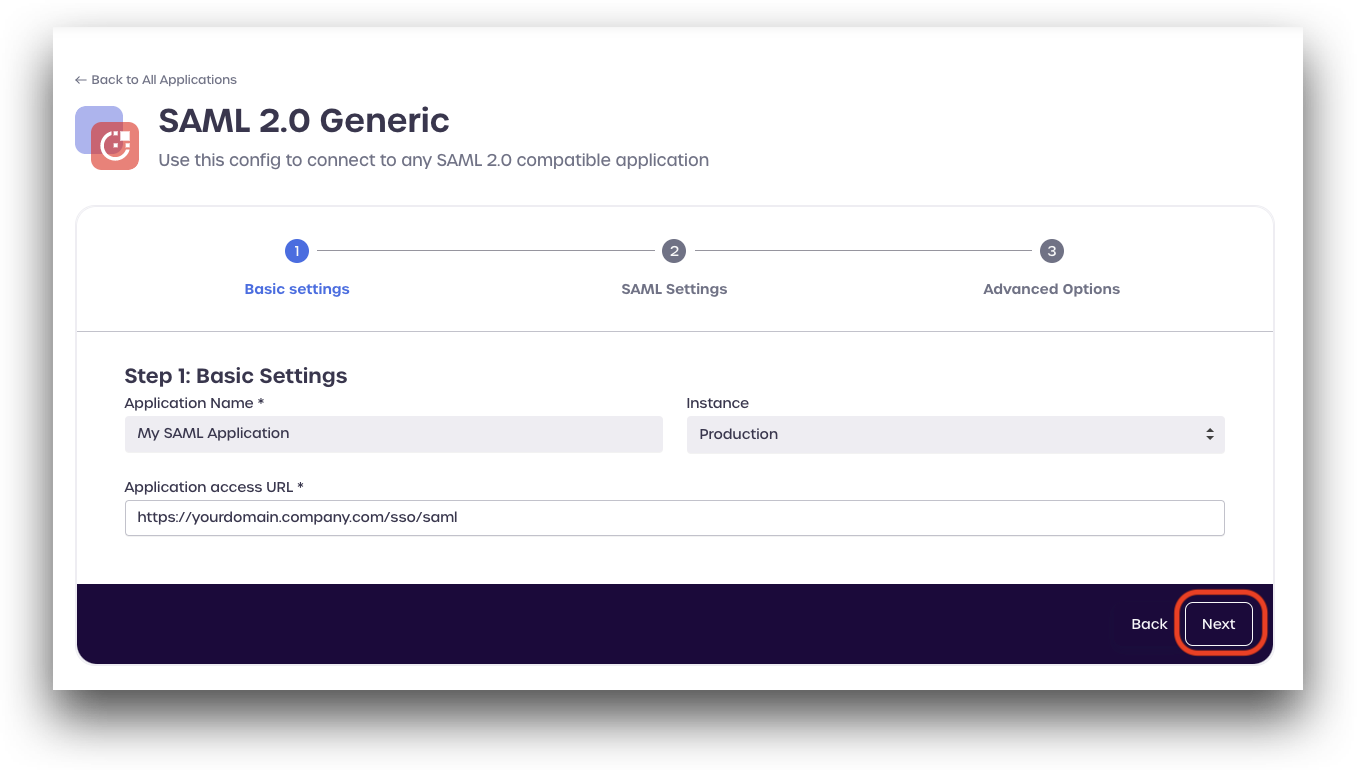
Enter an application name, and select an instance type.
-
Enter the Application access URL given by your Service Provider (SP). The URL should look something like:
https://mydomain.company.com/sso/saml -
Click Next to continue.
-
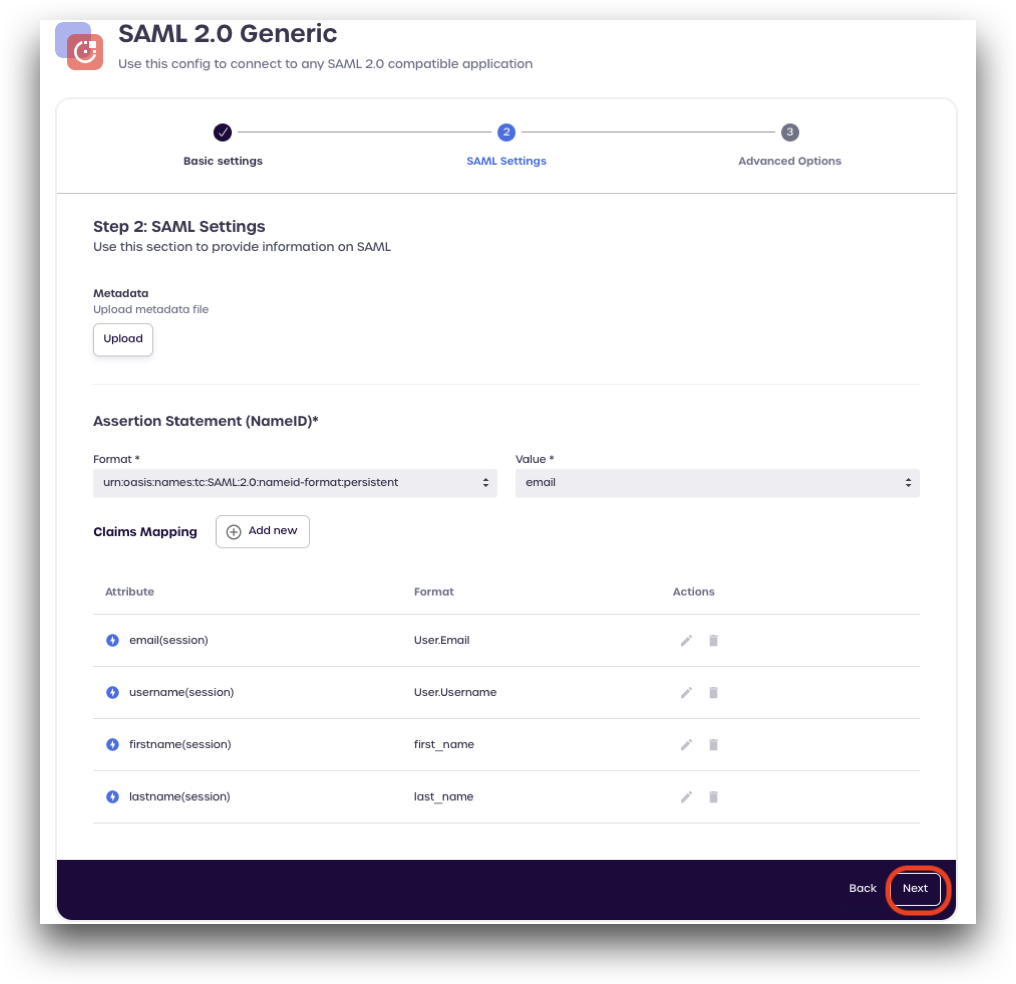
Under Step 2: SAML Settings, add the following attributes settings:
- Metadata: Upload a SAML metadata file if one is available from your service provider Assertion Statement (NameID):
- Format:
urn:oasis:names:tc:SAML:2.0:nameid-format:persistent - Value: enter an attribute, such as
email
-
In the Claims Mapping section, click Add new.
-
Add the following attributes and their formats as specified by your Service Provider. An example of claims mapping is provided below:
- Attribute:
emailFormat:User.Email - Attribute:
usernameFormat:User.Username - Attribute:
firstnameFormat:first_name - Attribute:
lastnameFormat:last_name
- Attribute:
-
Click Next to continue.
-
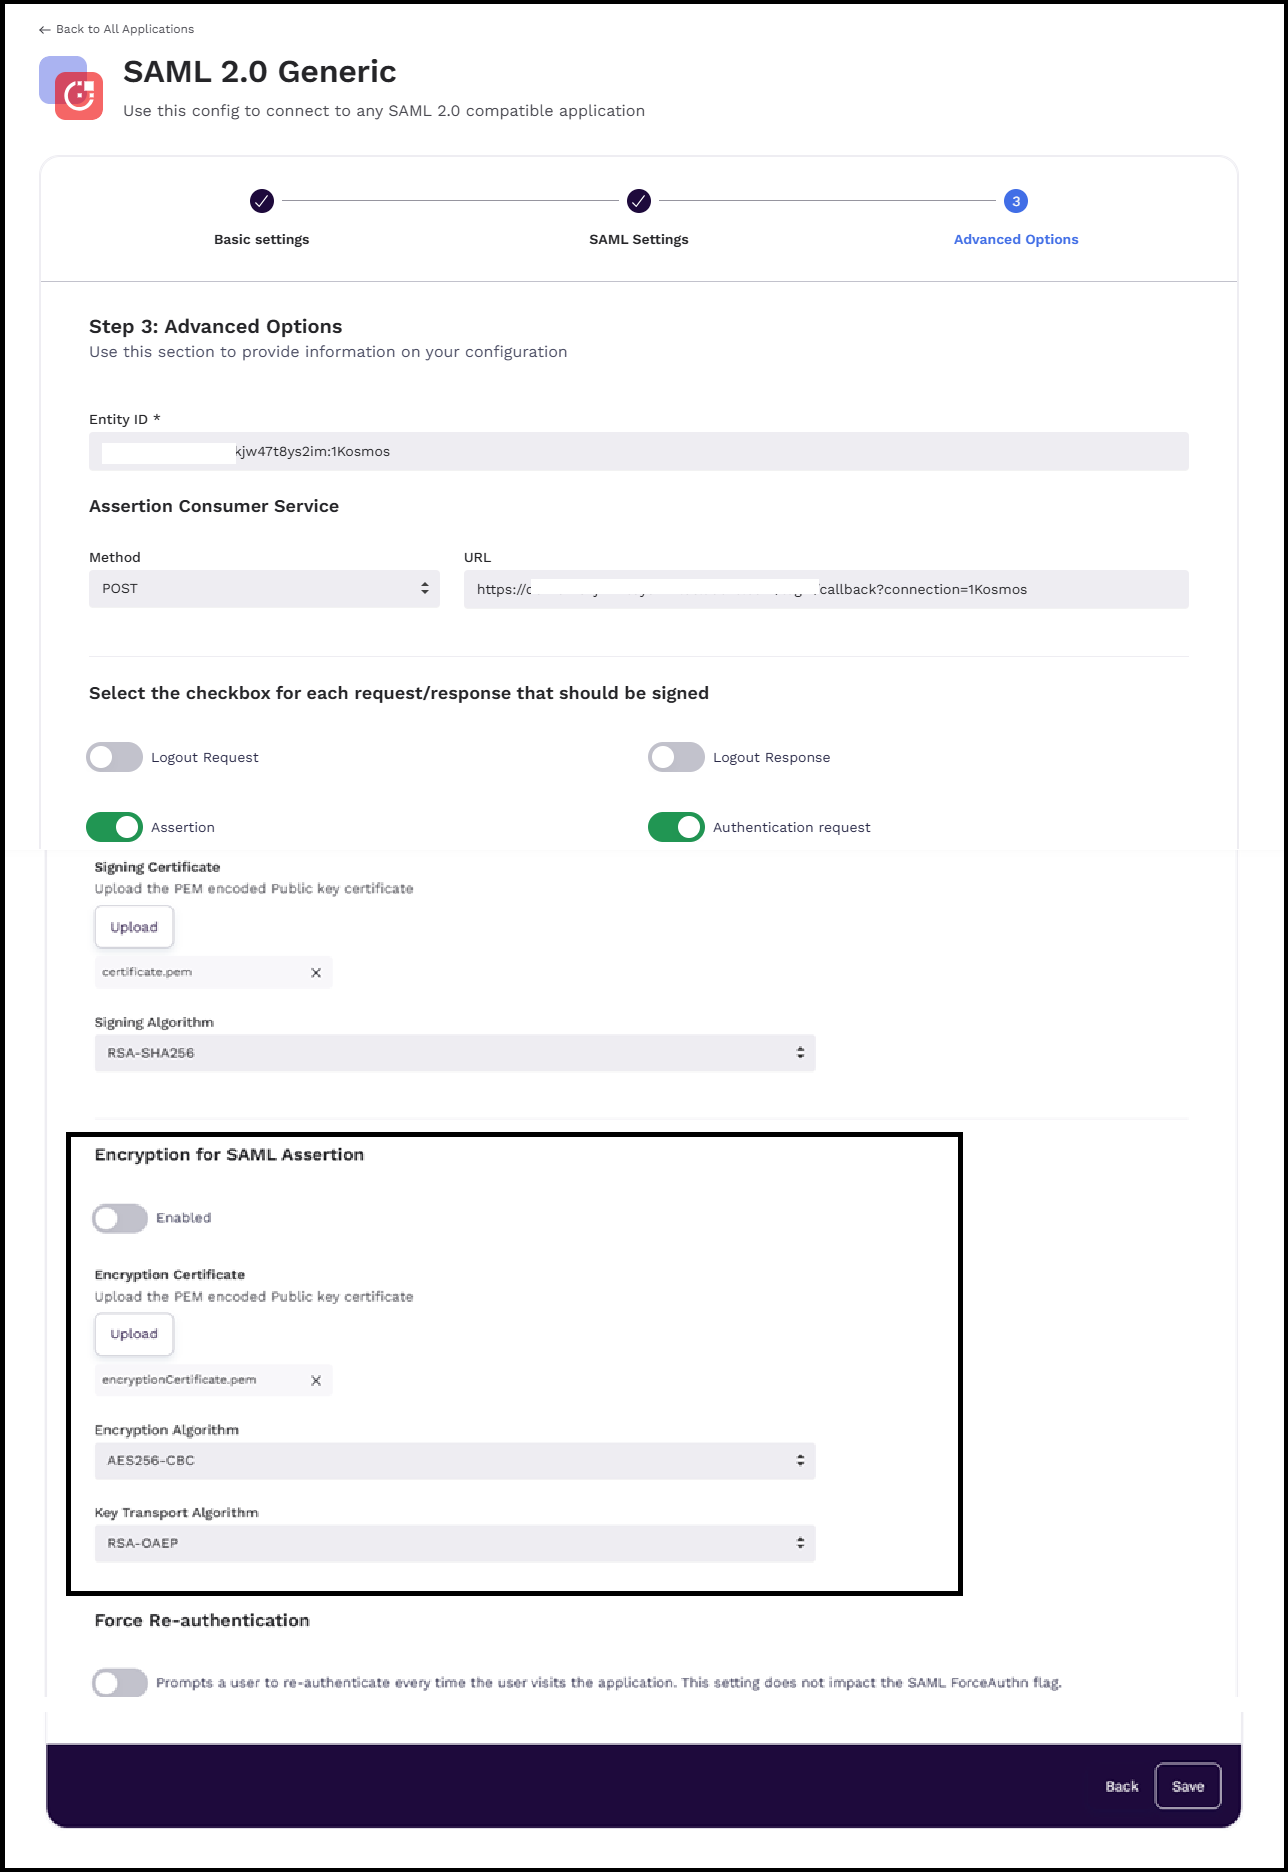
In the Advanced Options tab, enter and select the following details:
Entity ID: Enter the entity ID. For example,
https://mydomain.company.com -
In the Assertion Consumer Service section, perform the following steps:
- Method:
POST. - URL: Enter the SAML assertion consumer URL given by your SAML service provider. The URL should look something like
https://mydomain.company.com/sso/saml
- Method:
-
In the Select the checkbox for each request/response that should be signed section, perform any steps as specified by your service provider.
- Signing Certificate: Upload a public-key
.pemfile if one has been provided by your service provider.
- Signing Certificate: Upload a public-key
-
In the Encryption for SAML Assertion section, you can encrypt SAML assertions before they are transmitted to the service provider, ensuring secure data exchange. By default, the encyption of SAML assertion is disabled.
- The supported Encryption Algorithm: AES256-CBC
- The supported Key Transport Algorithm: RSA-OAEP
-
Enable the Force Re-authentication option to enable the re-authentication mechanism everytime the user visits the application.
-
Click Save to finish adding your SAML application.
Testing the Connection
-
In your browser, enter the target application domain URL. You will be redirected to your 1Kosmos Admin console's single sign-on page.
-
Login with 1Kosmos by scanning the QR code with the 1Kosmos Mobile Application or by entering your username, password, and OTP.
After authenticating, you will be logged into the target application, confirming the SAML integration has worked successfully.