Tenant Management
Overview
Adding a tenant allows administrators to create an independent instance of the BlockID Admin Console that can be operated in a shared environment for their clients. The DNS name will be different for each tenant, but the BlockID Admin Console will be the same except the list of available modules. These enabled modules will be shown as per the selection within the License Keys screen.
Add a New Tenant:
To add a new tenant, perform the following steps:
- Login to BlockID Admin Console.
- From the top right corner, click on the Tenants list (first list).
- From the list of added tenants, click Add New Tenant.

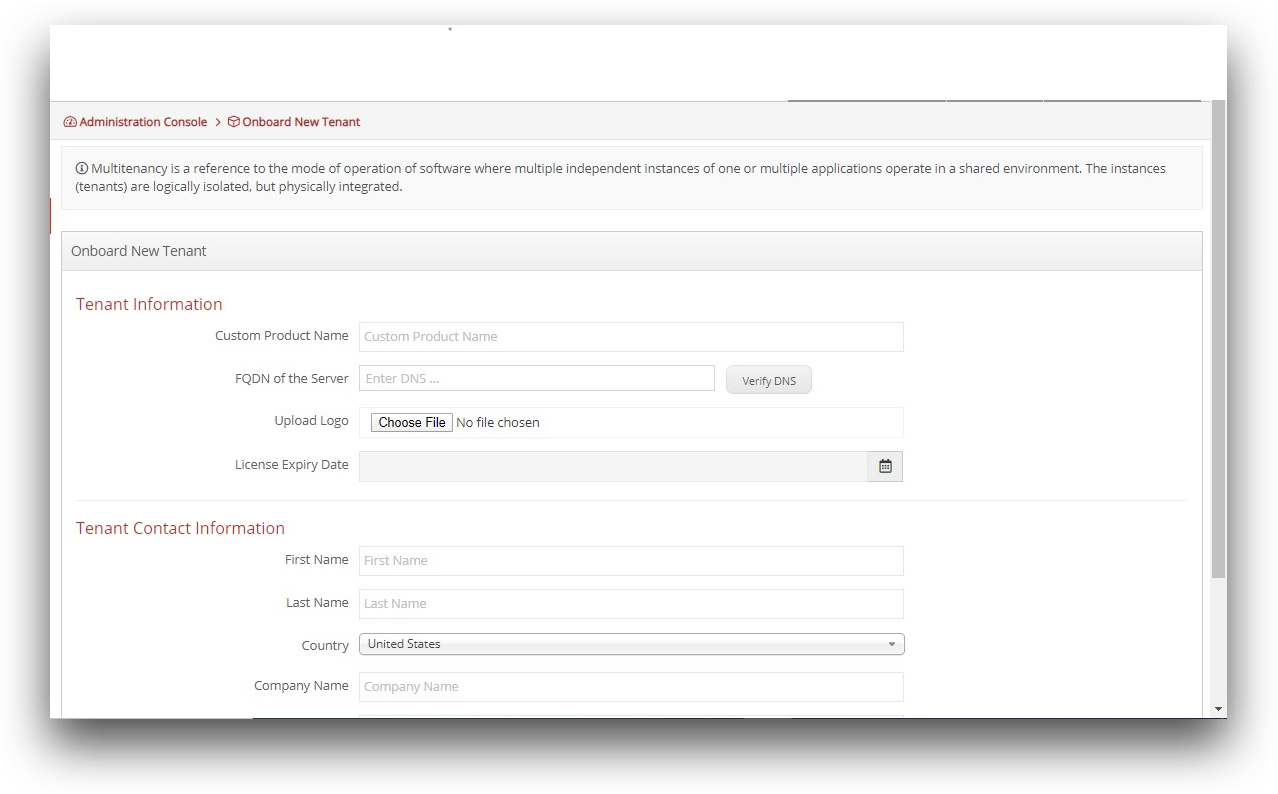
- In the Onboard New Tenant screen, enter the following details:
- In the Tenant Information section:
- Custom Product Name: Enter the appropriate for the tenant. For example,
BNYIDorJeffriesID. By default, it isBlockID. - FQDN of the Server: Enter the DNS URL for the client. It is a unique URL for each customer. The format we follow is “customername.1kosmos.net”.
- Click on the Verify DNS button, to check whether the DNS is deployed and propagated successfully.
- Upload Logo: Locate and select the appropriate image file for the client’s logo.
- License Expiry Date: Click on the Calendar menu and select the appropriate Expiry Date for the tenant.
- Custom Product Name: Enter the appropriate for the tenant. For example,
- In the Tenant Contact Information section:
- Enter the mandatory as well as other primary contact details of the customer.
- Click Add Tenant. The newly added tenant will be added to the tenant list.
- From the Tenants list, click on the desired tenant name. The instance of the BlockID Admin Console is displayed with the community as "Default" for the selected tenant.
- In the Tenant Information and Tenant Contact Information sections, perform the desired changes, and click Update Info, if required.
- In the Tenant Information section: