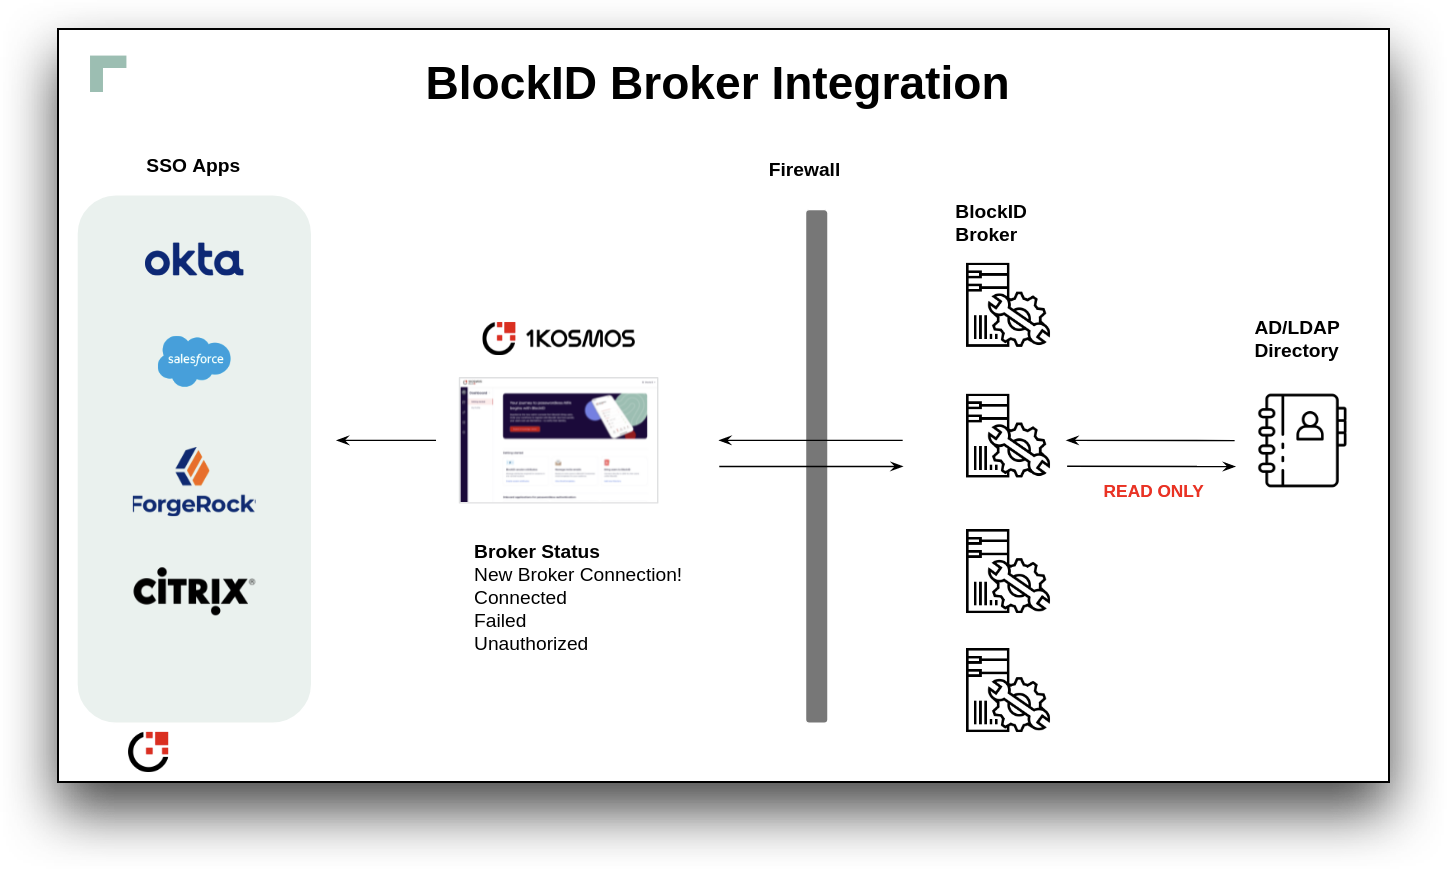
Connect to LDAP via Broker
The BlockID AdminX Broker allows a tenant or community administrator to connect and integrate an existing LDAP user directory to AdminX.
Getting Started
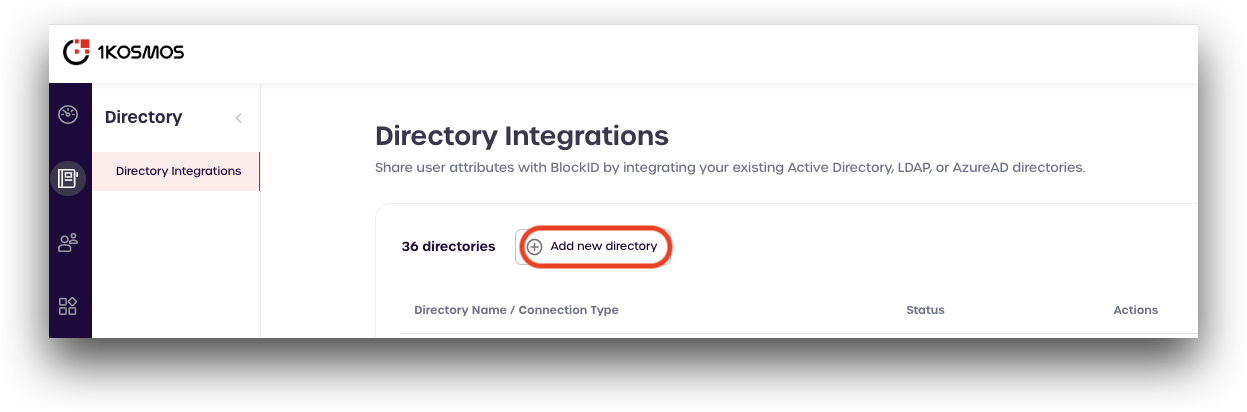
From the main menu, select Directory Integrations on the left-hand side of the page.
From the Directory Integrations page, click Add new directory.
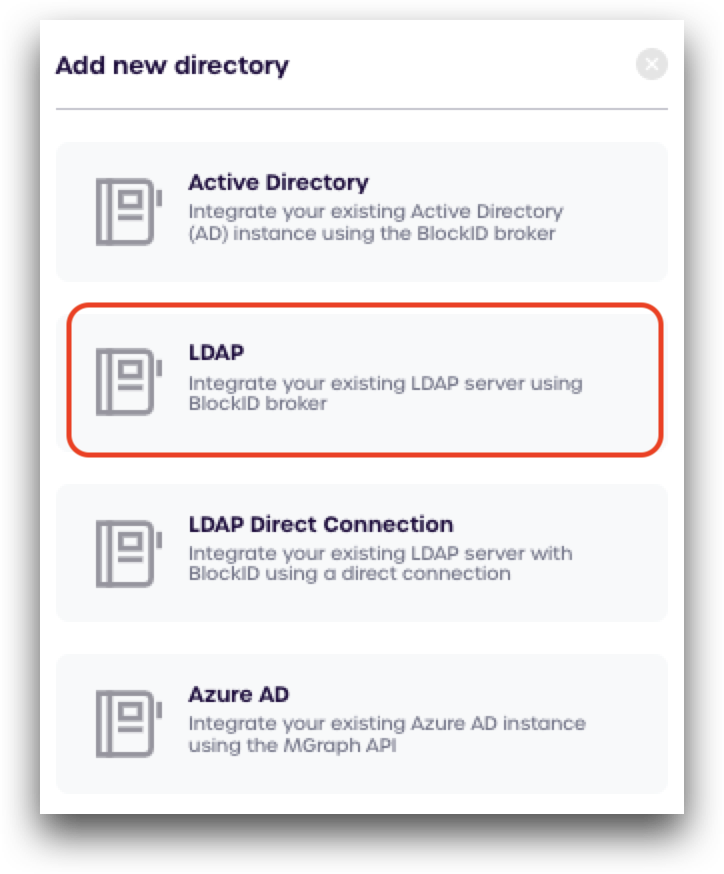
Select LDAP from the menu.
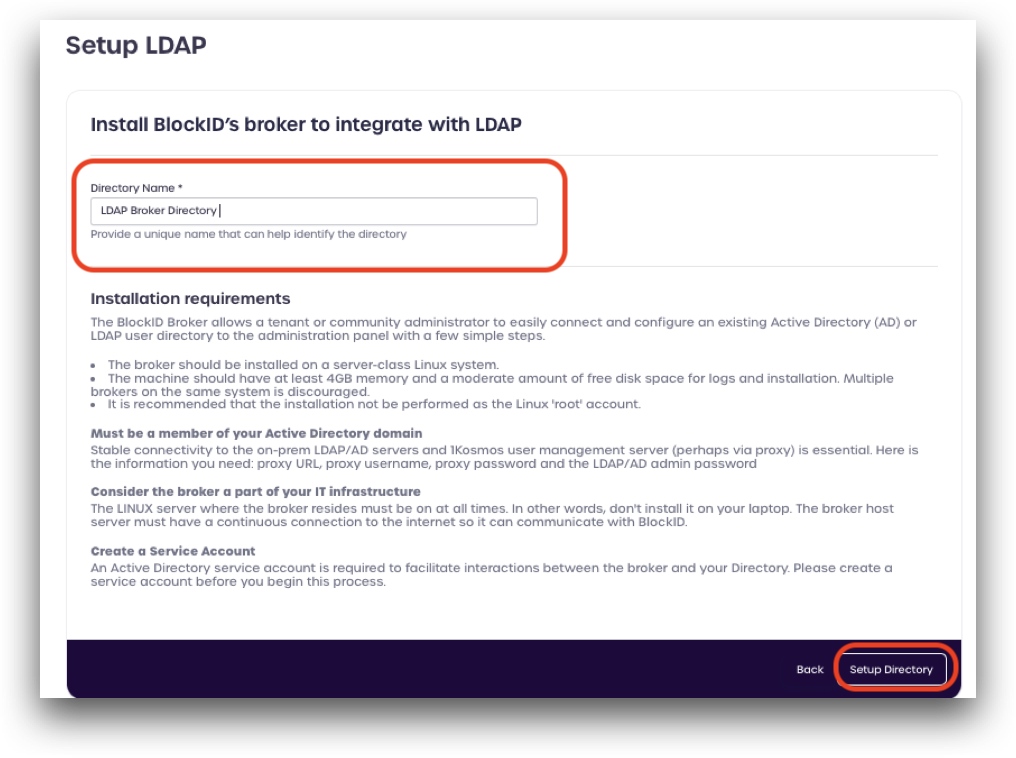
Enter a name to use for this connection, and click Setup Directory
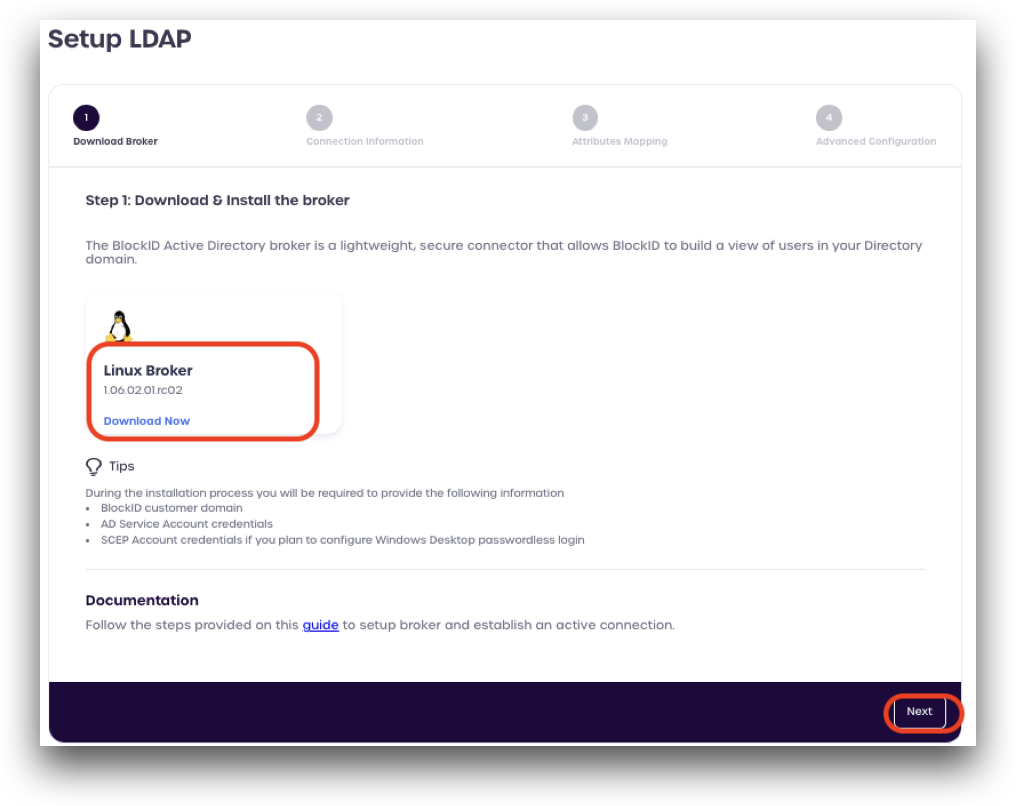
Step 1: Download & Install Linux Broker
Click the Download Now link to download the broker. The downloaded archive will need to be copied and installed on a Linux server that is part of your Active Directory domain.
Please see Configuring the Linux Broker for information on how to configure and start the broker on your Linux server.
After downloading the broker, click Next.
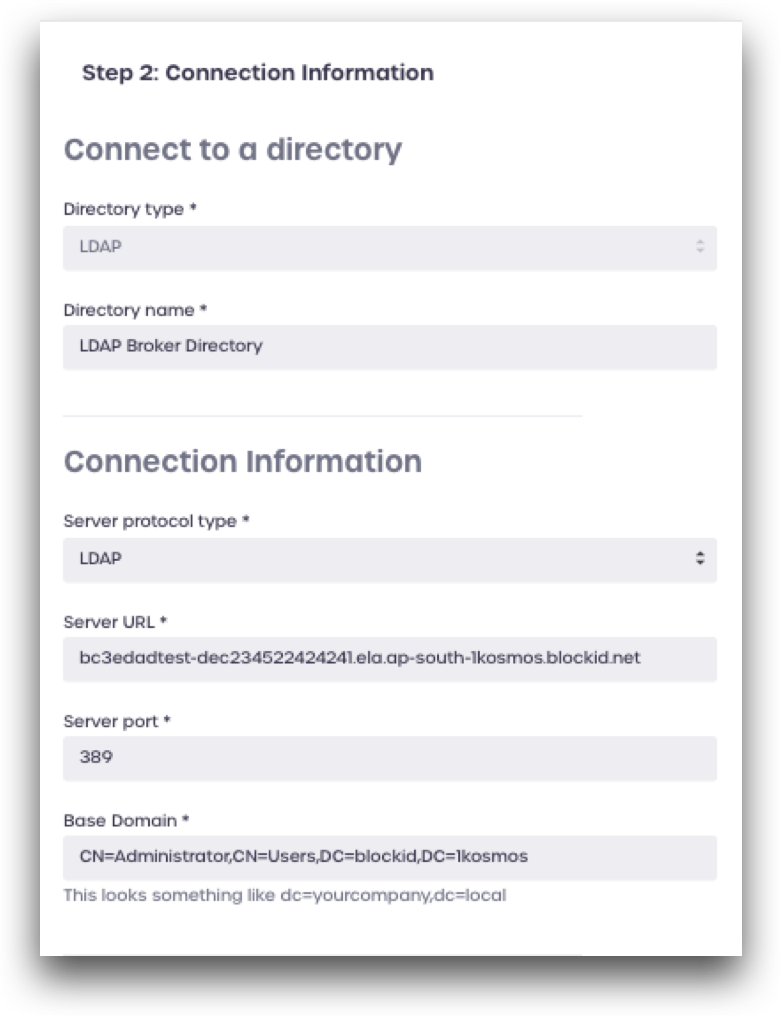
Step 2: Connection Information
Under Connection Information, enter the connection details for your Active Directory domain:
- Server protocol type: select LDAP, or LDAPS
- Server URL: LDAP server URL
- Server Port: LDAP server port
- Base Domain: LDAP base domain
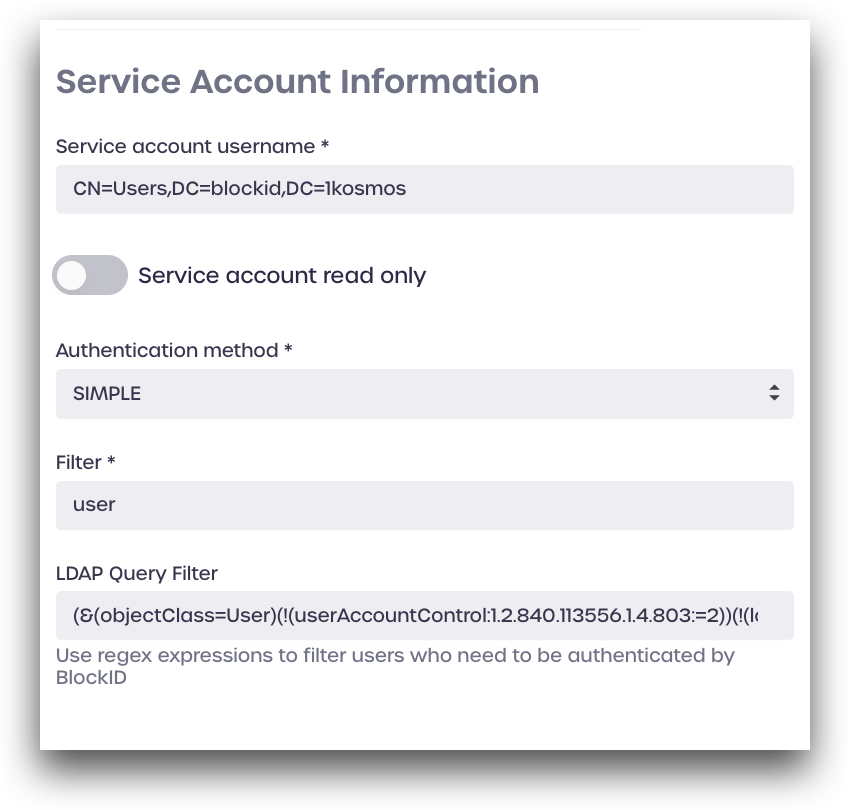
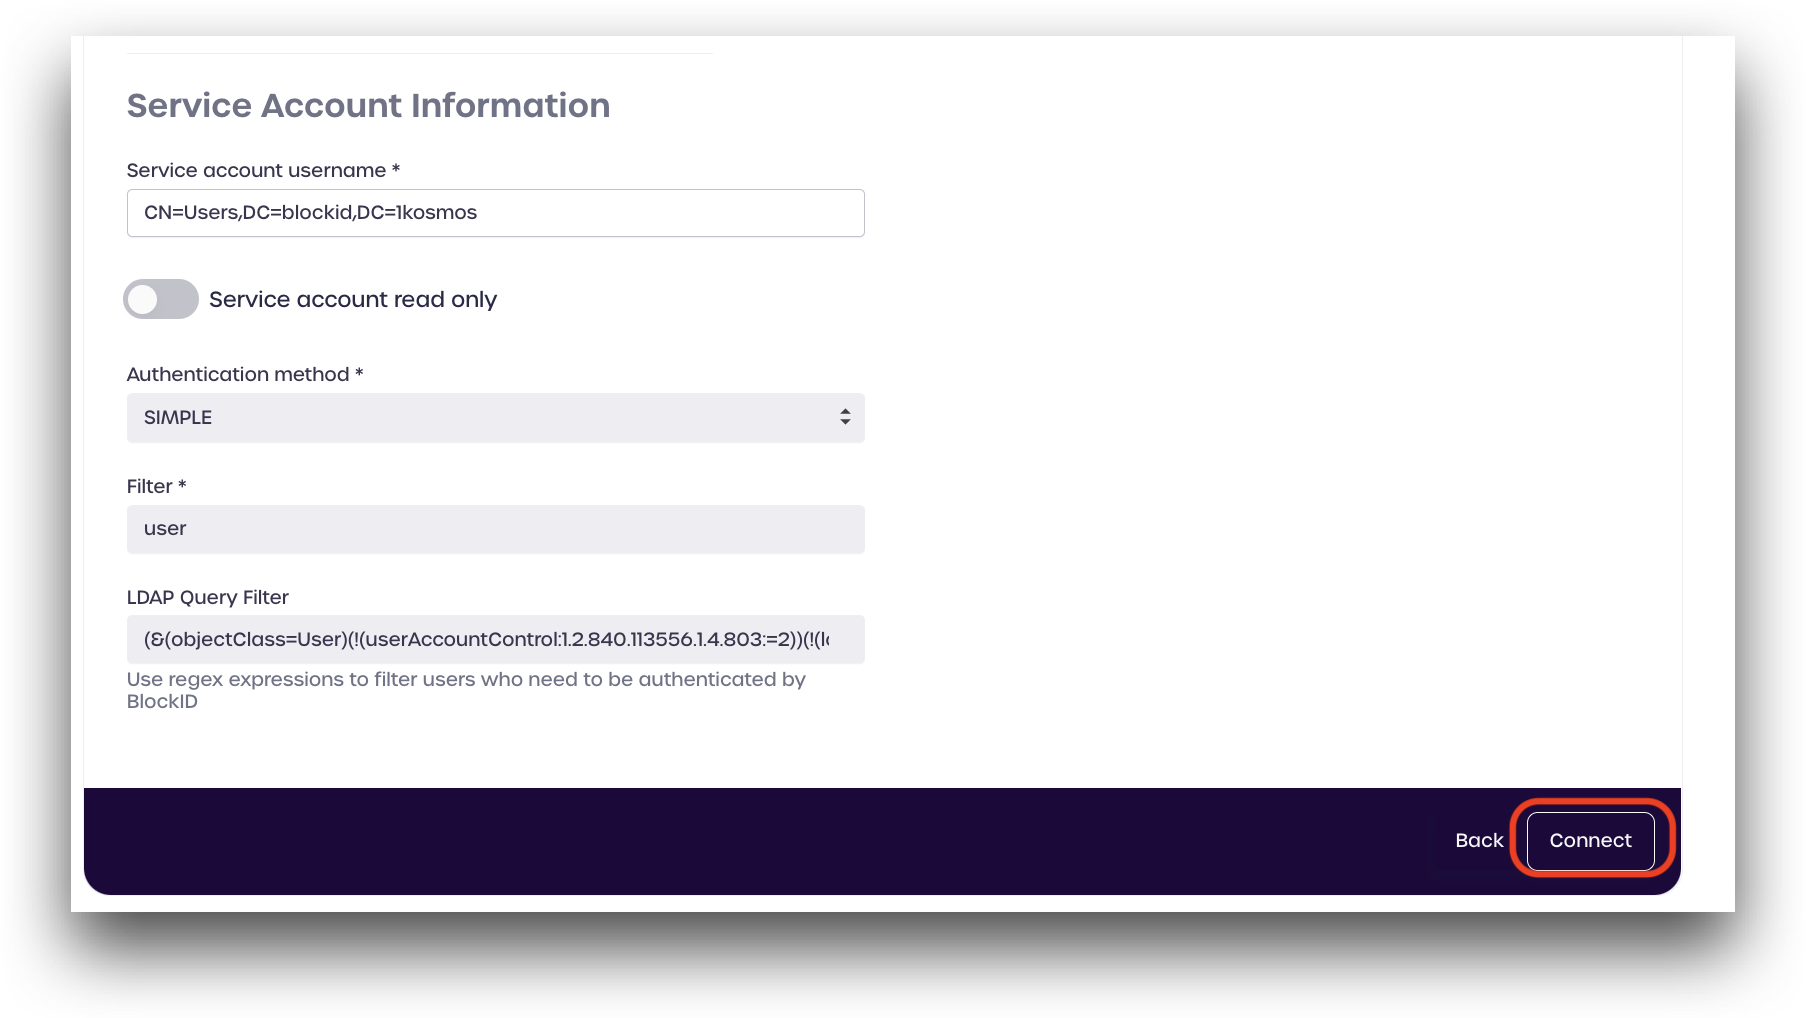
Under Service Account Information, enter the details for your LDAP service account:
- Service account username: LDAP service account
- Service account read-only: enable this if you only wish to read from this directory (cannot create new users)
- Authentication method: select SIMPLE
- Filter: Enter a directory term to filter for, such as
user - LDAP Query Filter (optional): Enter LDAP query to filter for (see below for more details)
Click Connect to save your settings and enable the directory.
LDAP Query Filter
LDAP query filters are regular expression used to filter only the desired directory parameters and discard any others.
Administrators can user LDAP directory queries to filter which users can authenticate to BlockID and log in. This is useful if you only wish to allow user accounts that are marked as active to log in to your tenant. This field is optional and can be left blank.
Example LDAP Query Filter:
(&(objectClass=User)(!(userAccountControl:1.2.840.113556.1.4.803:=2))(!(lockoutTime>=1)))
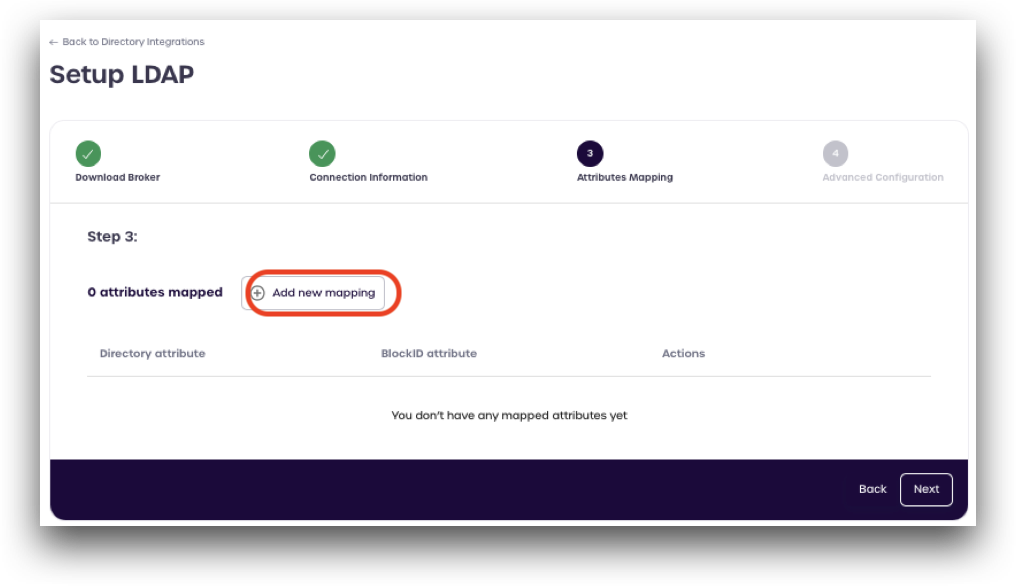
Step 3: Attributes Mapping
Next, we will set our attributes mapping for the broker to interact with the AD Directory.
Click Add new mapping.
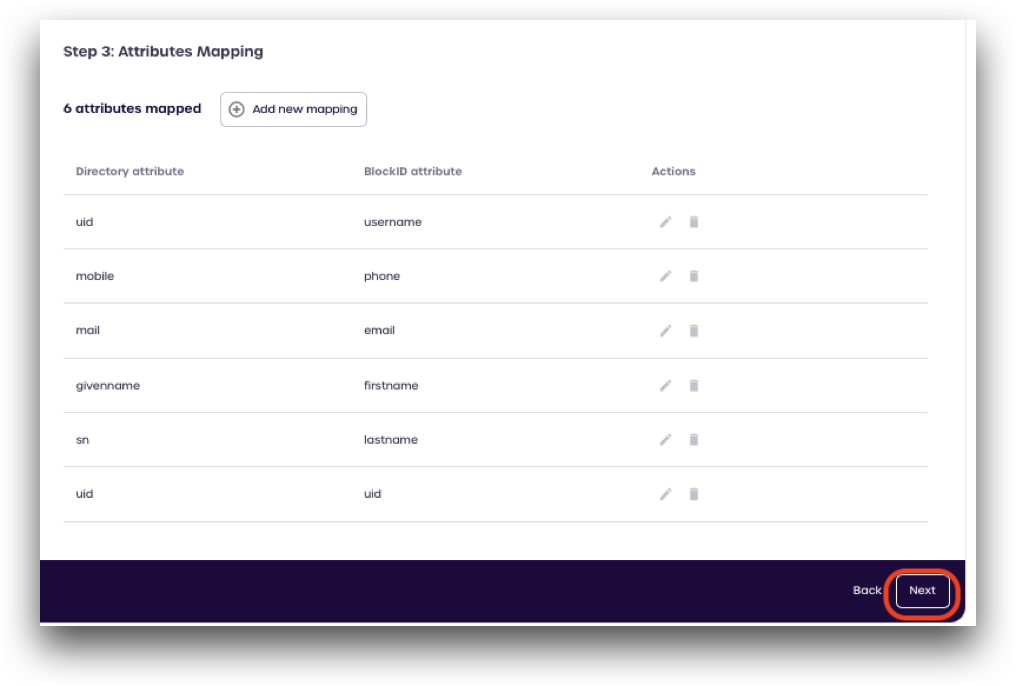
Add each Directory attribute and the corresponding BlockID attribute from the table below:
| Directory Attributes | BlockIDAttributes |
|---|---|
| uid | uid |
| uid | username |
| mobile | phone |
| givenname | firstname |
| sn | lastname |
Here is an example of how to add the uid attribute:
- Click Add attribute mapping
- Enter
uidin the Directory attribute box - Select
uidfrom the BlockID attribute drop-down menu - Click Create
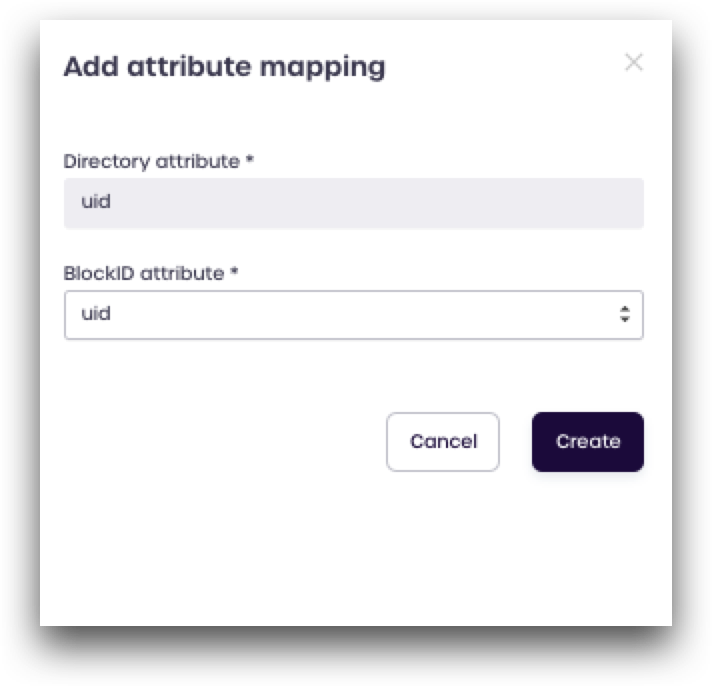
Repeat this process for all the attributes above.
When you have finished mapping all your attributes, click Next
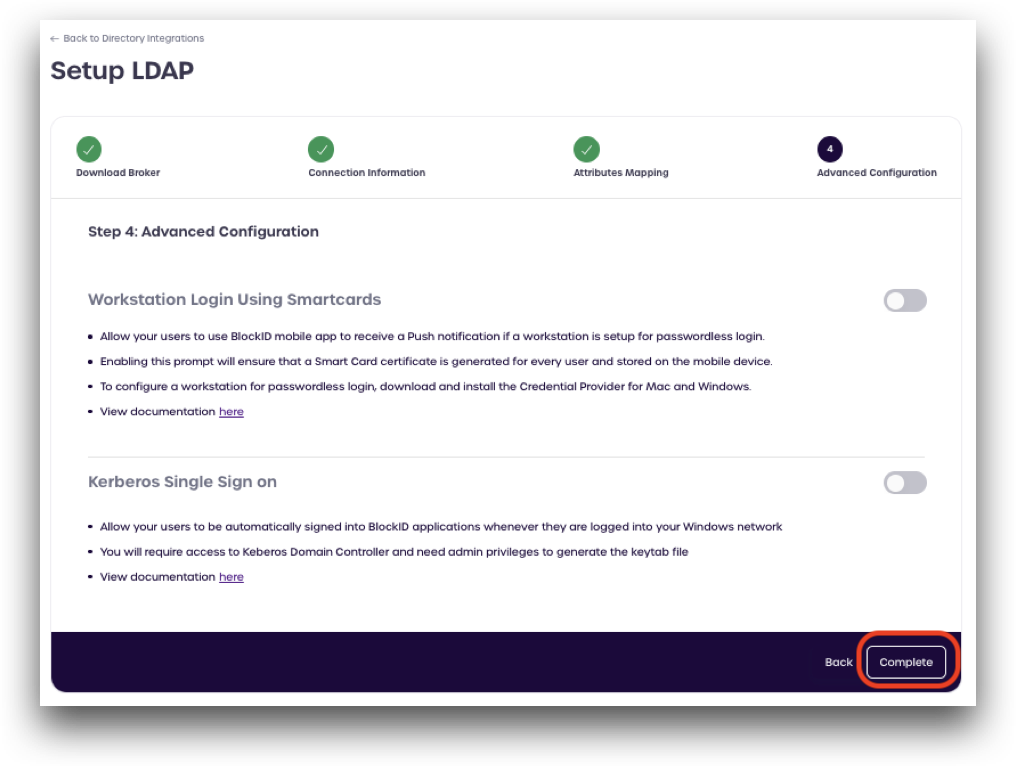
Click Complete at the bottom right of the screen to finish setting up your LDAP Broker user directory in AdminX.
Configuring the Linux Broker
Copy the broker you downloaded during Step 1 above to your Linux server running the broker. Unzip the broker.

Starting the Broker Service
The broker service must be kept running indefinitely for the connection between Active Directory and AdminX to remain valid
Open your command terminal and change to the directory where you unzipped the broker. Start the broker by executing the following command:
./startBroker.bsh
Follow the on-screen instructions to configure and start the broker service.
Enter E to edit the existing configuration, and proceed with the setup. An example is shown below:
Edit current license key 'd2a36a85-e81b-4956-b7c0-****** ' (Y/N/Q)?: n
Edit current community id '5f3d8d0cd866fa61****' (Y/N/Q)?: n
Edit current authmodule id '621e17cfd24493001****' (Y/N/Q)?: n
Edit current dns string 'blockid.1kosmos.net' (Y/N/Q)?: n
Change bind password (Y/N/Q)?: y
Enter new bind password: ********
Re-enter new bind password: ********
Enter new proxy url (Y/N/Q)?: n
Enter new proxy user (Y/N/Q)?: n
Change proxy password (Y/N/Q)?: n
Change scep agent password (Y/N/Q)?: y
Enter new scep agent password: ********
Re-enter new scep agent password: ********
(S)ave or (D)iscard edits (S/D)?: S
After saving your changes, the broker service will start.
Broker Logs
Logs will be viewable after starting the broker in the folder where you unzipped the broker in a new directory labeled logs.
Stopping the Broker Service
To stop the broker, execute the following command:
./stopBroker.bsh
If you ever need to troubleshoot a broker connection, checking the logs folder will provide the most information