Configuring Verification Flows
Community administrators or users with the idproofing.add-journey permission can create and manage verification journeys in the AdminX interface, under Verification > Verification Flows. Two journey types are supported:
- KYC with Selfie: Combines document verification with face liveness and selfie matching. Users are prompted to scan an identity document and then capture a selfie for comparison.
- Document Verification Only: Enables standalone document verification without any selfie or liveness check.
The journey creation includes 3 steps:
- Select workflow type - In the Workflow Type step, administrators can create two types of journeys — KYC with Selfie or Document Verification Only — and provide details such as the workflow name, type, last modified date, and creator.
- Select verification configuration – In this step, administrators can restrict allowed documents by country, region, and type, configure PII data retention policies, and enable first and last name matching for identity comparison.
- Manage face liveness and face matching threshold - In Step 3, administrators can configure Face Liveness (Soft, Regular, or Hardened) and set the Face Comparison Threshold (default: 50%) to control the sensitivity of biometric matching.
Accessing Verification Flows
To access the verification flows page, follow these steps:
- Log in to your tenant as a community administrator.
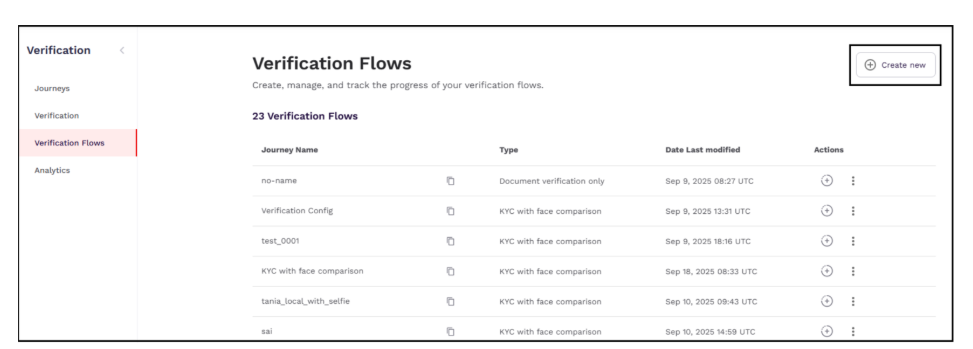
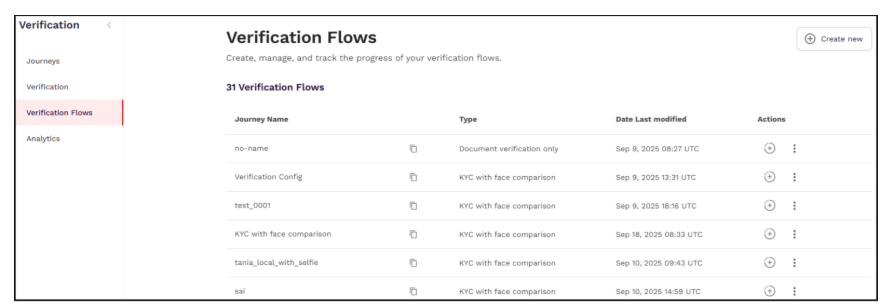
- Navigate to Verification > Verification Flows. The Verification Flows page is displayed.
Creating Verification Flows
Community administrators or users with the idproofing.add-journey permission can create and manage custom ID verification journeys.
To create a verification flow, follow these steps:
-
Log in to your tenant as a community administrator.
-
Navigate to Verification > Verification Flows.
-
In the Verification Flows page that is displayed, click Create new.
-
Select a journey type. The following options are available to select:
- KYC with face comparison – Use this option if you want to verify the user’s identity by matching a live selfie with their government-issued id.
- Document verification only – Using this option authenticates your identity by checking the validity and authenticity of a government-issued document.
-
After selecting an appropriate option, click Continue.
Managing Journeys
Community administrators can configure one of the following journeys for users to complete their identity verification.
- KYC with face comparison
- Document verification only
Configuring KYC with Face Comparison
In the KYC with Face Comparison journey, there are two main steps.
- The first step involves specifying the list of documents for verification.
- The second step involves configuring the face liveness settings.
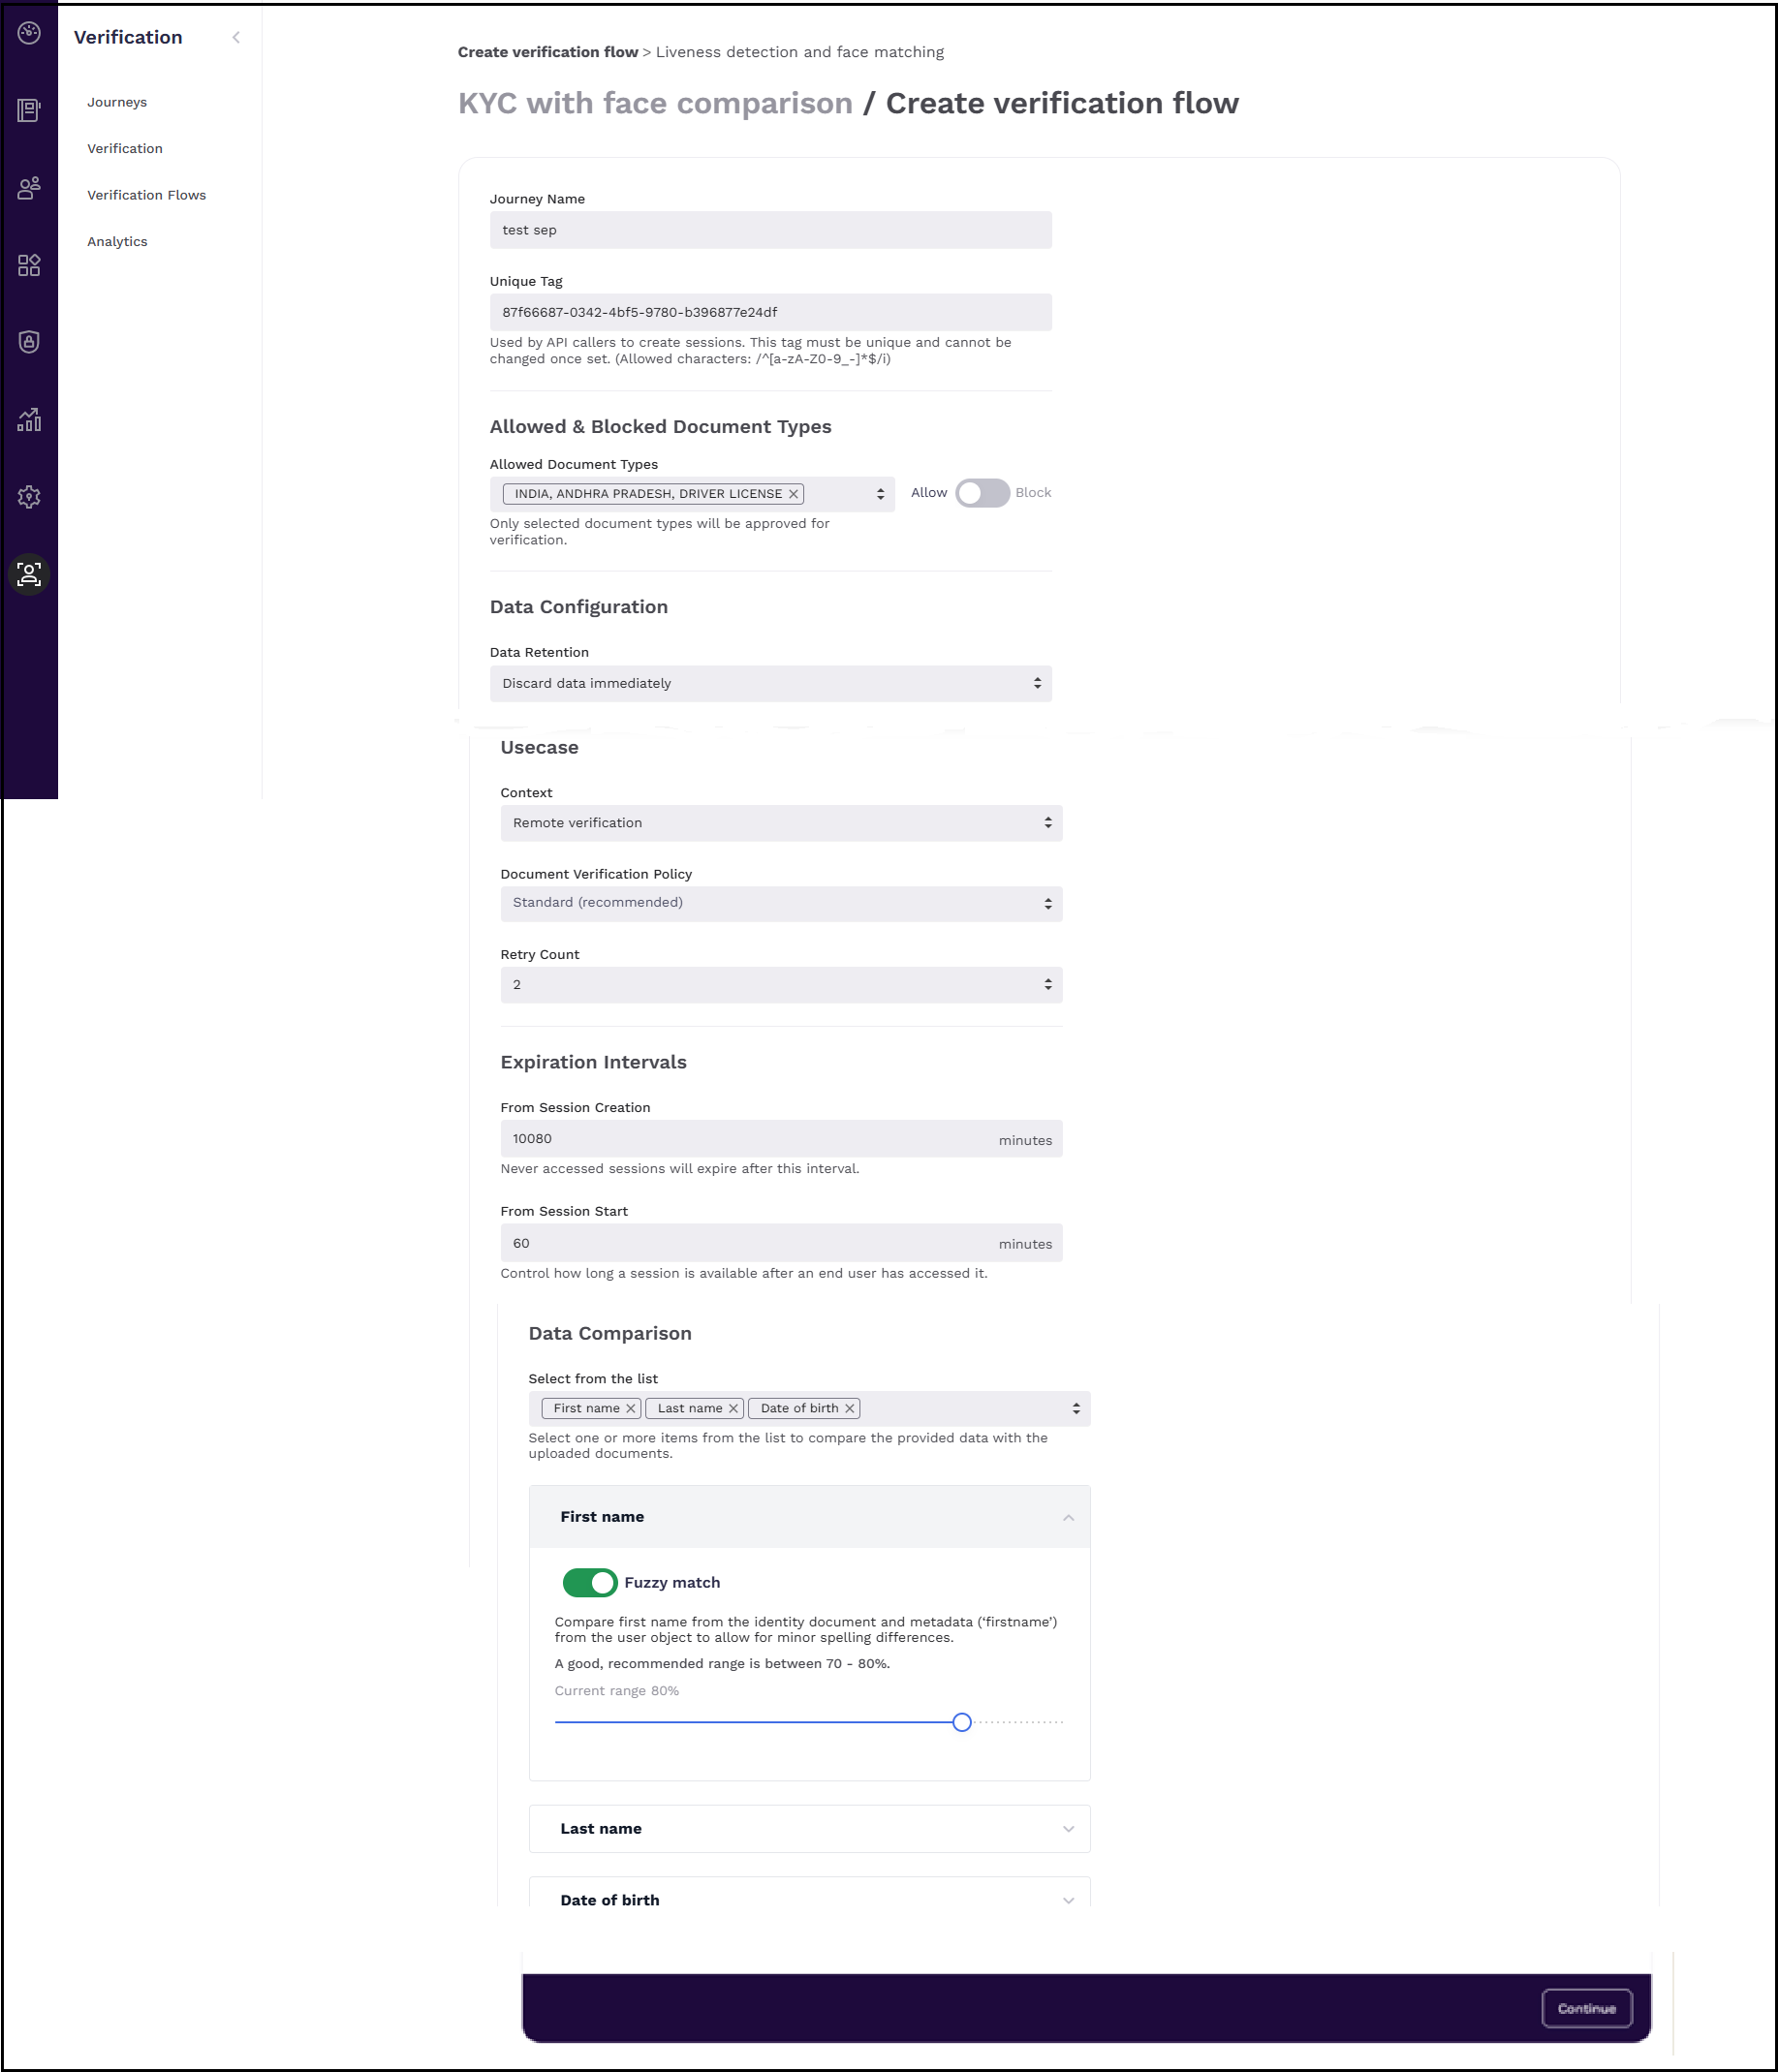
The following diagram illustrates the configuration options available for the KYC with Face Comparison journey.
Step1: Defining Documents for Verification
| Field | Description |
|---|---|
| Journey Name | Specify a name for the verification journey. |
| Unique Tag | Specify a unique tag that would be used by API callers to create sessions. This tag must be unique and cannot be changed once set. (Allowed characters: /^[a-zA-Z0-9_-]*$/i) |
| Allowed Document Types | Select which document types are permitted for verification based on country and region. Only the selected types will be accepted. By default, the Allow toggle is selected, and the Allowed Document Types dropdown is displayed. If you switch the toggle to Block, the Blocked Document Types dropdown appears instead. Click it to select the documents you want to restrict from being used for verification. - In the Allowed Document Types selection window, click the Allow all documents button to allow all supported documents for verification. - You can also specify the country and region to narrow down which documents are available for selection. 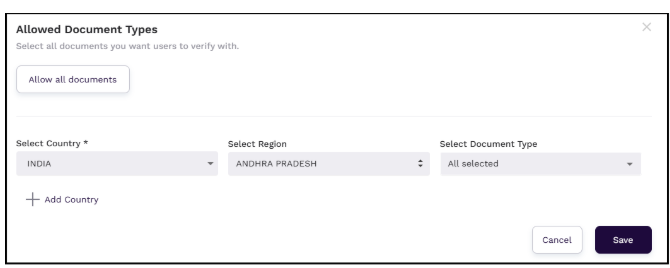 When selecting document types, the region determines whether the document format is national (used across the country) or regional (specific to a state or locality). - If you select Region: National, the document follows a country-wide format. Example - Country: India - Region: National - Document Type: Driver License - Displayed as: INDIA, DRIVER LICENSE Although NATIONAL is not shown in the label, this refers to a standardized national document format. - If you select a specific region, such as state: Example - Country: India - Region: Andhra Pradesh - Document Type: Driver License - Displayed as: INDIA, ANDHRA PRADESH, DRIVER LICENSE National and regional formats must be selected individually as needed — choosing one does not automatically include the other. |
| Allow/Block Toggle | Choose whether the selected documents are to be explicitly allowed or blocked. |
| Data Retention | Specifies how long user identity data will be retained. The following values are available to select: - Discard data immediately - Discard data after caller retrieves result - Discard data after specified time |
| Discard Data After (appears only if you select Discard data after specified time) | Specify the number of days or minutes after which the identity data will be discarded. |
| UseCase | |
| Context | Defines the verification use case, such as remote or in-person verification. |
| Document Verification Policy | Sets the policy for document analysis. Standard is recommended for most use cases. The following values are available to select: - Permissive - Standard (recommended) - Strict - Very Strict |
| Retry Count | Maximum number of retry attempts a user is allowed during the verification process. |
| Expiration Intervals | |
| From Session Creation | Sets how long a session remains valid if it has not been accessed. |
| From Session Start | Sets how long a session remains valid after it has been started by the user. |
| Data Comparison | |
| Select from the list | Choose which user data (e.g., First name, DOB) should be compared against document data. |
| Fuzzy Match (First Name) | Enables approximate matching for the first name. Useful for handling spelling variations. |
| Fuzzy Match (Last Name) | Enables approximate matching for the last name. |
| Fuzzy Match Slider | Adjusts the threshold for fuzzy matching (recommended range: 70–80%). |
| Date of Birth Comparison | Compares the entered date of birth with the extracted document data. Exact match only. |
| Continue | Proceeds to the next step in setting up the verification journey. |
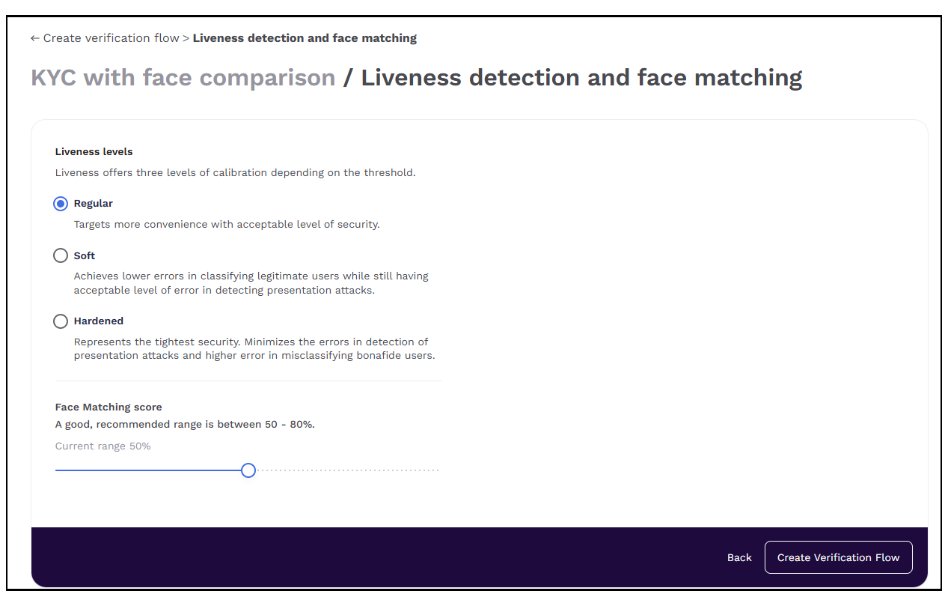
Step 2: Configuring Face Liveness Settings
| Field | Description |
|---|---|
| Liveness Levels | Determines the calibration level for liveness detection to balance convenience and security. The following options are available: - Regular - Default setting. Provides acceptable security with higher user convenience. - Soft - Reduces false rejections of genuine users while maintaining some error tolerance in detecting spoofing or presentation attacks. - Hardened - Highest security setting. Strongly reduces spoofing risks but increases chances of mistakenly rejecting legitimate users. |
| Face Matching score | Defines the threshold for similarity between a live face and the reference image. A good, recommended range is 50–80%. Adjustable using the slider. |
| Back(button) | Navigates back to the previous step in the verification flow setup. |
| Create Verification Flow (button) | Saves the configuration and proceeds with creating the verification flow. |
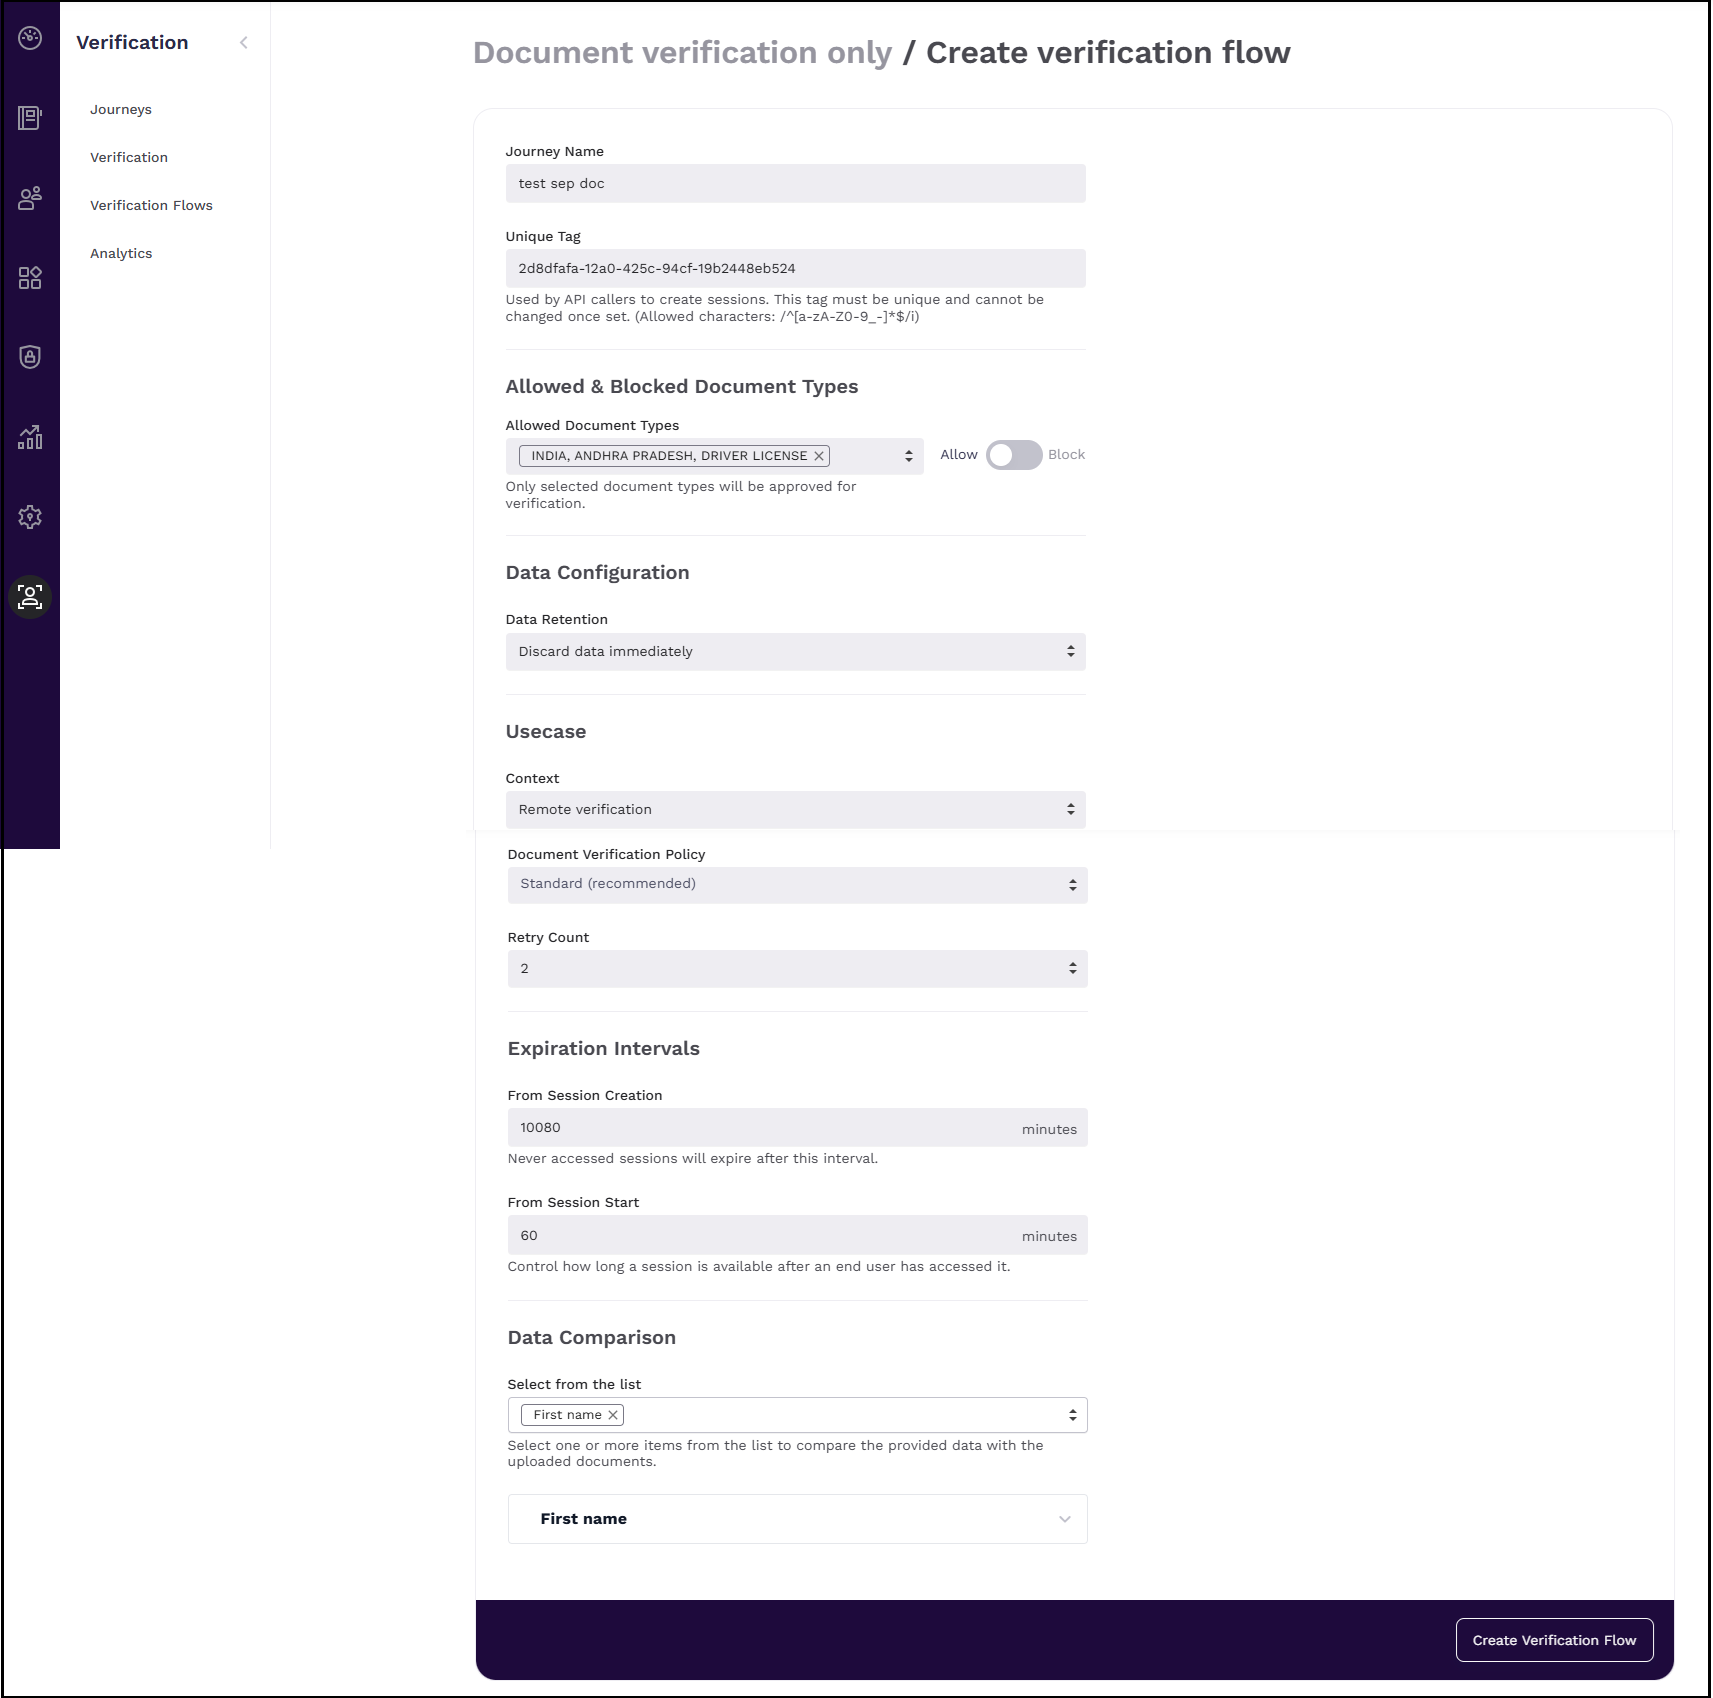
Document verification only
When community administrator configures the Document verification only journey for users, the UI authenticates their identity by checking the validity and authenticity of a government-issued document.
The following screenshot illustrates the configuration options available for the Document verification only journey:
| Field | Description |
|---|---|
| Journey Name | Specify a name for the verification journey. |
| Unique Tag | Specify a unique tag that would be used by API callers to create sessions. This tag must be unique and cannot be changed once set. (Allowed characters: /^[a-zA-Z0-9_-]*$/i) |
| Allowed & Blocked Document Types | |
| Allowed Document Types | Select which document types are permitted for verification based on country and region. Only the selected types will be accepted. By default, the Allow toggle is selected, and the Allowed Document Types dropdown is displayed. If you switch the toggle to Block, the Blocked Document Types dropdown appears instead. Click it to select the documents you want to restrict from being used for verification. - In the Allowed Document Types selection window, click the Allow all documents button to allow all supported documents for verification. - You can also specify the country and region to narrow down which documents are available for selection. When selecting document types, the region determines whether the document format is national (used across the country) or regional (specific to a state or locality). - If you select Region: National, the document follows a country-wide format. Example - Country: India - Region: National - Document Type: Driver License - Displayed as: INDIA, DRIVER LICENSE Although NATIONAL is not shown in the label, this refers to a standardized national document format. - If you select a specific region, such as state: Example - Country: India - Region: Andhra Pradesh - Document Type: Driver License - Displayed as: INDIA, ANDHRA PRADESH, DRIVER LICENSE National and regional formats must be selected individually as needed — choosing one does not automatically include the other. |
| Allow/Block Toggle | Choose whether the selected documents are to be explicitly allowed or blocked. |
| Data Configuration | |
| Data Retention | Specifies how long user identity data will be retained. The following values are available to select: - Discard data immediately - Discard data after caller retrieves result - Discard data after specified time |
| Discard Data After (appears only if you select the Discard data after specified time option) | Specify the number of days or minutes after which the identity data will be discarded. |
| UseCase | |
| Context | Defines the verification use case, such as remote or in-person verification. |
| Document Verification Policy | Sets the policy for document analysis. Standard is recommended for most use cases. The following values are available to select: - Permissive - Standard (recommended) - Strict - Very Strict |
| Retry Count | Maximum number of retry attempts a user is allowed during the verification process. |
| Expiration Intervals | |
| From Session Creation | Sets how long a session remains valid if it has not been accessed. |
| From Session Start | Sets how long a session remains valid after it has been started by the user. |
| Data Comparison | |
| Select from the list | Choose which user data (e.g., First name, DOB) should be compared against document data. |
| Fuzzy Match (First Name) | Enables approximate matching for the first name. Useful for handling spelling variations. |
| Fuzzy Match (Last Name) | Enables approximate matching for the last name. |
| Fuzzy Match Slider | Adjusts the threshold for fuzzy matching (recommended range: 70–80%). |
| Date of Birth Comparison | Compares the entered date of birth with the extracted document data. Exact match only. |
| Create Verification Flow | Creates a verification flow journey. |
Viewing Journeys
Community administrators or users with the idproofing.list-v2-journey permission can use the Verification > Verification Flows page to:
- View the list of created journeys
- See details such as creation date and journey type
- Edit or delete journeys
- Create a session from a journey
Editing Journeys
Community administrators or users with the idproofing.edit-journey permission can edit the created verification journey. To edit the journey, follow these steps:
- Log in to your tenant as a community administrator.
- Navigate to Verification > Verification Flows.
- In the Verification Flows page that is displayed, click the three dots under the Actions column in line with the journey name, and click Edit Journey.
- The Edit Verification flow page is displayed. Make the necessary changes and click save.
Deleting Journeys
Community administrators or users with the idproofing.delete-journey permission can delete the created verification journey. To delete the journey, follow these steps:
- Log in to your tenant as a community administrator.
- Navigate to Verification > Verification Flows.
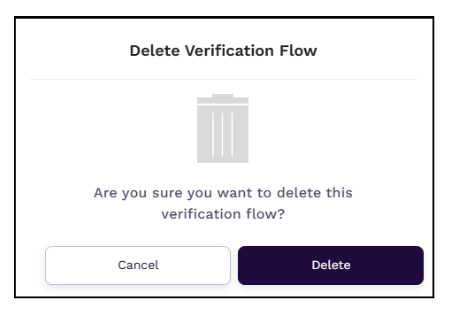
- In the Verification Flows page that is displayed, click the three dots under the Actions column in line with the journey name, and click Delete Journey.
- The Delete Verification Flow window appears, prompting the user to confirm deletion. Click Delete to proceed.
Generating Sessions
Community/helpdesk administrators or users with the idproofing.create-v2-session permission can create an ID verification session from the generated workflow.
To generate a session, follow these steps:
- Log in to your tenant as a community administrator.
- Navigate to Verifications > Verification Flows.
- Go to the workflow from which you want to create a session.
- Click the + icon in line with the workflow name. The Create Session window is displayed.
- Enter the first and last name of the user for whom the session has to be generated.
- Click Generate Session. For more information on the next flow of identity verification, see Verification Journey.
If the user uploads scanned documents that are not included in either the Allowed list or the Blocked list, the verification fails with the status "Verification Failed", and the reason displayed is "Document not allowed". In this case:
- The /result API returns the error code IDV0015 with the reason: "Document is not allowed".
- An E_IDV_DOCUMENTNOTALLOWED event is also triggered.