Saviynt 1Kosmos Identity Verification Integration
This topic provides information on how to integrate Saviynt with 1Kosmos Identity Verification system for verifying identity of employees/contractors to be onboarded into the Saviynt's Identity Cloud platform.
Before verifying users' identity, you must follow the steps mentioned below to configure the following settings in both 1Kosmos and Saviynt.
Step 1: Configuring Verification Journey in 1Kosmos
Step 2: Configuring Identity Proofing settings in Saviynt
Step 1: Configuring Verification Journey in 1Kosmos
Use the 1Kosmos' Verification Flows page on the AdminX interface to create and manage the verification journeys.
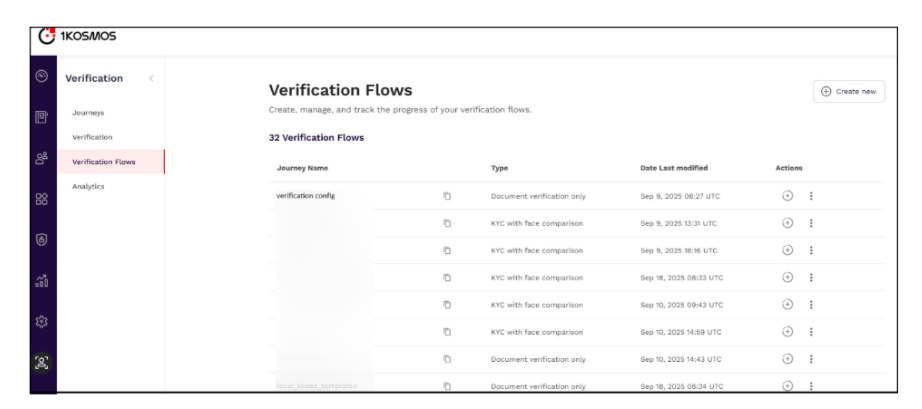
Two types of journeys are supported. Select a journey and create a verification flow for users.
- KYC with Selfie: Users are prompted to scan an identity document and then capture a selfie for comparison.
- Document Verification Only: Enables standalone document verification without any selfie or liveness check.
For more information, see Verification Flows.
Step 2: Configuring Identity Proofing settings in Saviynt
The following steps outline the process for configuring ID verification settings in Saviynt’s Enterprise Identity Cloud (EIC). These configurations ensure secure identity validation, compliance with company policies, and a smooth verification experience for users.
Enabling Identity Proofing
You must enable the Enable Identity Proofing setting under Global Configurations to view or configure third-party identity proofing providers from the ID Proofing page.
To enable the setting, follow these steps:
- Log in to Saviynt Identity Cloud.
- Navigate to Admin > Global Configuration. Alternatively, enter Global Configuration in the search box and select the required menu item. For more information, see Using the Unified Navigation.
- Select Identity Lifecycle from the drop-down list.
- Select the Enable Identity Proofing check box. The changes are saved.
Configuring Tenant Settings
Reach out to your 1Kosmos representative to obtain the following information to integrate with Saviynt Identity Cloud:
- License key
- Tenant DNS
- Community
- Document Verification ConfigurationID
To integrate 1Kosmos with Saviynt Identity Cloud, perform the following steps:
-
Log in to Saviynt Identity Cloud.
-
Navigate to Admin > Settings > Identity Proofing. Alternatively, enter Identity Proofing in the search box and select the required menu item. For more information, see Using the Unified Navigation. The Identity Proofing page is displayed.
-
In the 1Kosmos tile, click Set Up. The 1Kosmos page is displayed.
-
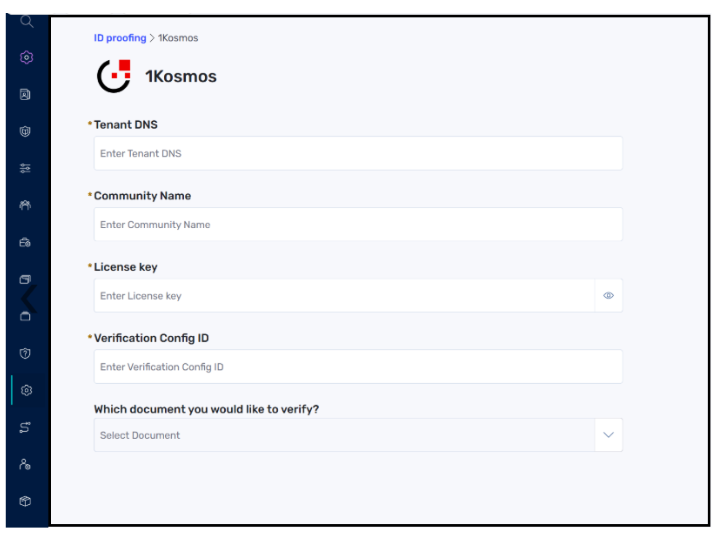
Enter the following details:
-
Tenant DNS: Specify the domain name associated with your tenant.
-
Community Name: Specify the tenant's community name.
-
License key: Specify the 1Kosmos license key.
-
Verification Config ID: Specify the tenant document verification configuration.
-
Which document you would like to verify?: Select the document to verify the users' identity in your organization. You can select one of the following options:
- Passport
- Driver’s License
- Any Document
-
-
Click Save. You are redirected to the Identity Proofing page.
-
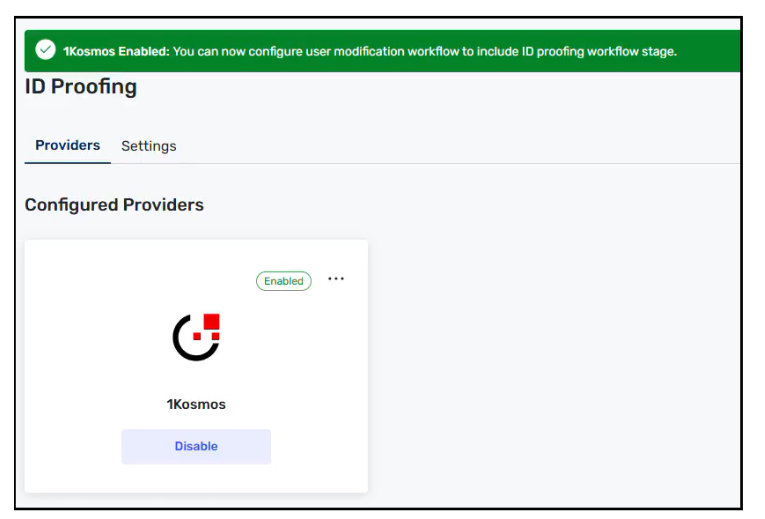
Click Enable in the 1Kosmos tile. A confirmation dialog box is displayed.
-
Click Apply. 1Kosmos is displayed in Enabled state, and the following banner appears:
The 1Kosmos Enabled: You can now configure user modification workflow to include ID proofing workflow stage banner appears.
Managing Workflows
Workflows in Saviynt is a sequence of processing tasks for a set of data to accomplish a business objective. You can create parallel and serial workflows based on your task requirements. Parallel workflows enable you to complete multiple tasks at the same time. A serial workflow involves a sequential process in which a new step is taken only after the previous step is completed.
Managing workflows involves creating and approving different workflow stages.
To create an ID proofing workflow, perform the following steps:
-
Navigate to Admin > Workflow > Workflow List.
-
Select Create New Workflow under Action.
-
Specify the Workflow Name and select the workflow type in Workflow Type fields in the Properties section respectively.
noteCurrently, the use of double quotes (“), Ampersand (&), and colon (:) in the Workflow Name is not supported. Also, ensure that the name of the workflow is unique and does not contain a blank space.
-
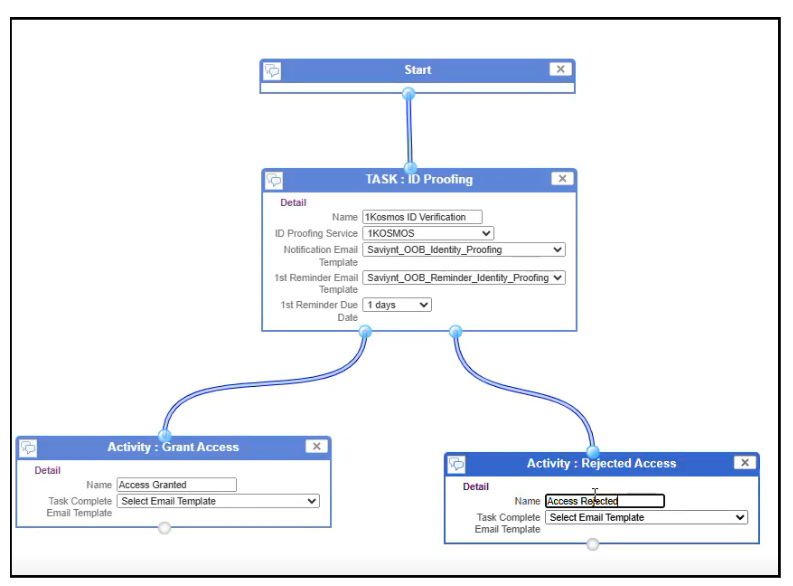
Drag the required component blocks from the Modules section (lower left pane) and drop to the right pane. Connect the blocks using wire connectors. For more information about ID proofing blocks, see Workflow Components.
-
Review the workflow and click Save.
-
Once the workflow is saved, click Send for Approval. The workflow is routed for the approval.
Approving Workflows
To approve the workflows, perform the following steps:
- Log in to Saviynt Identity Cloud as an approver.
- Go to Admin > Workflow > Workflow Approval.
- Execute a search operation to locate and select the required workflows. Based on the search criteria that you enter in the search or advanced search fields; the search results are displayed.
- Click Accept against the workflow that is displayed.
- Provide your comments and click Submit. The workflow is now approved.
Creating IDProofingVerificationJobStatus Trigger
Saviynt Identity Cloud uses jobs to manage various activities such as import, provisioning, and so on. Administrators can use the Job Control Panel to manage and execute jobs.
To create a new job trigger, perform the following steps:
- Log in to Saviynt Identity Cloud.
- Navigate to Admin > Job Control Panel. Alternatively, enter Job Control Panel in the search box and select the required menu item. For more information, see Using the Unified Navigation. The Job Control Panel page is displayed.
- Click Add New Job. The Create New Trigger window is displayed.
- Specify the following details in the Create New Trigger window:
-
Job Name: Specify the job trigger name. The following characters are permitted:
- Alphanumeric
- Underscore (_)
-
Job Type: Select the job type as IDProofingVerificationStatusJob.
-
- Specify the schedule based on which the job trigger must run.
- Click Save. After the job is saved, it is displayed in the list with an Action button under the Action column; Click Start to run the job.
Associating IDProofing Workflows
You can use the Global Configuration page to associate the approved workflows which will be used while onboarding users.
To associate the approved workflows, perform the following steps:
- Log in to Saviynt Identity Cloud.
- Navigate to Admin > Global Configuration. Alternatively, enter Global Configuration in the search box and select the required menu item. For more information, see Using the Unified Navigation.
- Select Identity Lifecycle from the drop-down list.
- Navigate to the User creation and modification workflow field and select the approved ID proofing workflow to send the user account modification request to the approver configured in the selected workflow. The configurations get saved.
Configuring SMTP Email Server Settings
The Email Server Settings page helps you configure the email server settings for receiving and sending emails. For more information, see Configuring SMTP Mail.
After configuring the SMTP Email server settings, you must run the EmailHistoryJob from the Job Control Panel page to receive email notifications.
Creating Users
In Saviynt, a user represents a unique entity that helps to identify an employee, contractor, or an intern in an organization. For more information, see Creating New Users.
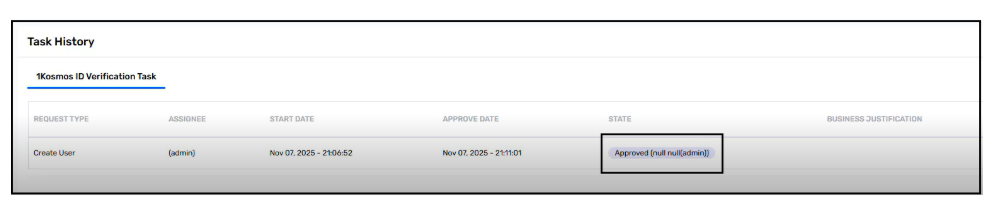
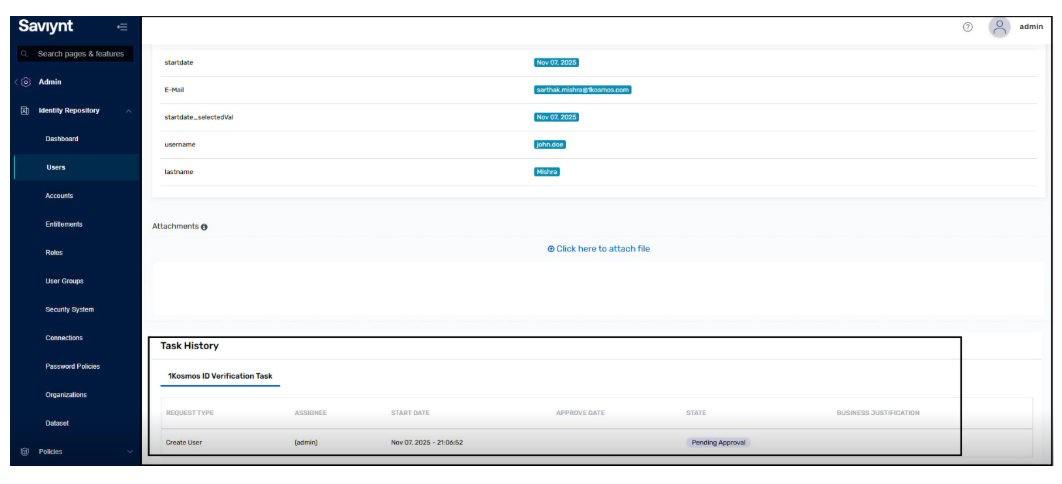
Upon creating a new user, a request has been submitted to the administrator for approval. The task for the same has been sent to the administrator and the status of the request remains Pending Approval until the ID verification process is successfully completed.
End-User Experience
The identity verification process is initiated by the end user through an email invitation. Users follow a simple set of steps to verify their identity and complete onboarding.
To complete the identity verification, the end user:
-
Receives an email prompting them to verify their identity for onboarding into the Saviynt Identity Cloud.
-
Opens the email and clicks Verify Your Identity.
-
Is redirected to the 1Kosmos Identity Verification page and selects Start ID Proofing.
-
Follows the on-screen instructions and completes identity verification using a valid ID document.
-
Upon successful verification, their onboarding is automatically approved.