Managing My profile
Overview
Users can use the My Profile tab under the Dashboard menu of the AdminX interface to seamlessly manage their devices and accounts. On the My Profile page, users can perform the following actions:
- View the Profile Information
- Manage the Identity Wallet
- Enroll Devices
- Track Invites
- View Login Activity
- View Generated Passcodes
Navigation
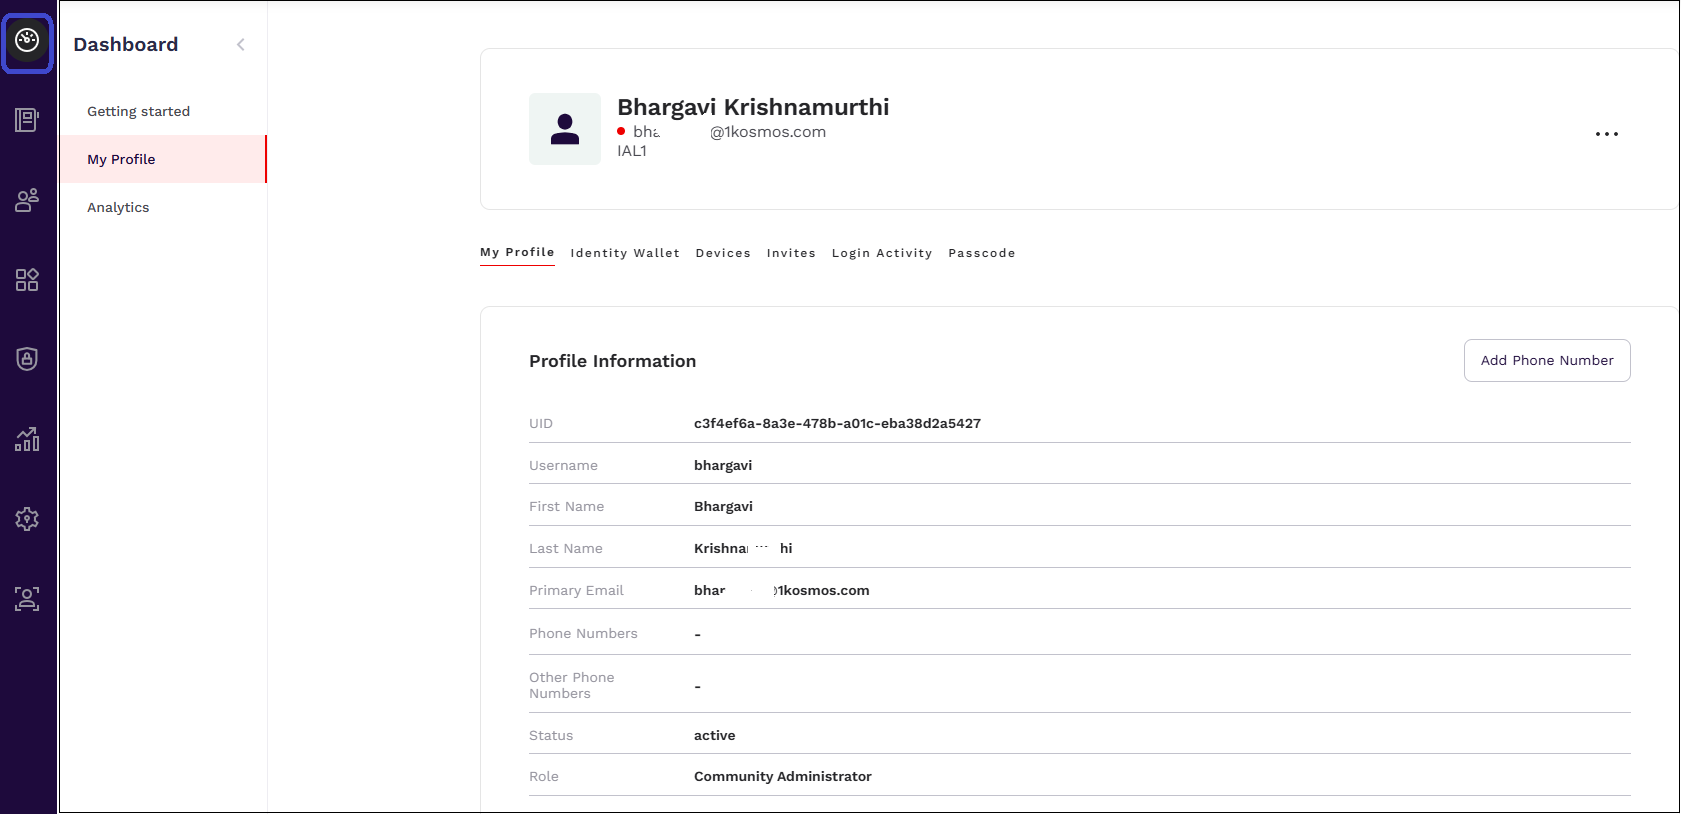
To navigate to the My Profile tab on the AdminX interface, follow these steps:
- Log in to a tenant.
- Navigate to Dashboard > My Profile. The My Profile page appears.
Viewing My Profile
End users can access the My Profile tab to view their profile details such as their first name, last name, email id, and so on. Additionally, 1Kosmos allows end-users to add or remove their phone numbers directly through the Adminx interface. This feature gives users the flexibility to update their phone numbers as needed and ensures they can receive passcodes on their new numbers.
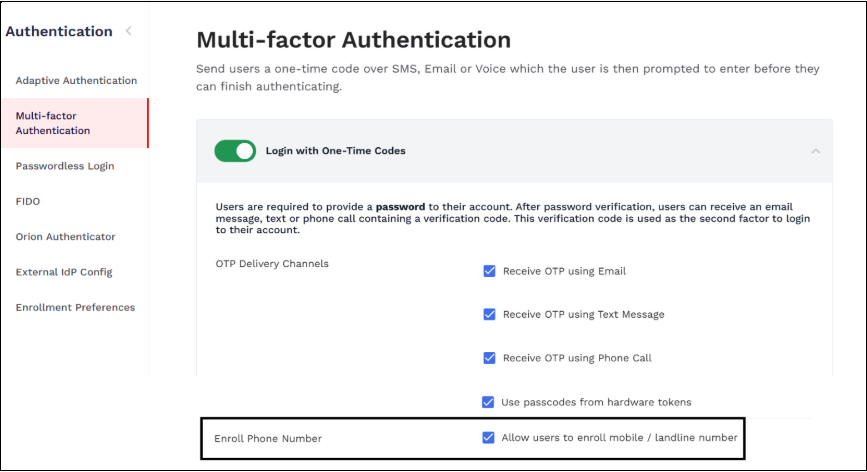
To enable end-users to link their mobile or landline numbers, community administrators must first enable the Allow users to enroll mobile / landline number setting under Authentication > Multi-factor Authentication > Enroll Phone Number.
To enroll their phone number, follow these steps:
-
In the My Profile tab, click Add Phone Number.
-
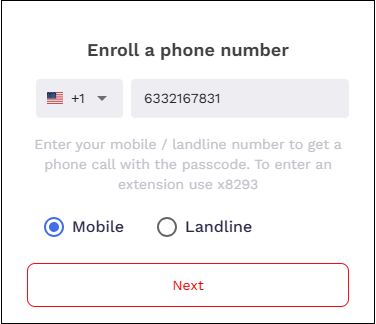
In the Enroll a phone number page that is displayed, select the country code and then enter the new phone number.
-
Select Mobile or Landline and click Next.
-
In the Enter your verification code page that is displayed, enter the OTP received in your recently enrolled device.
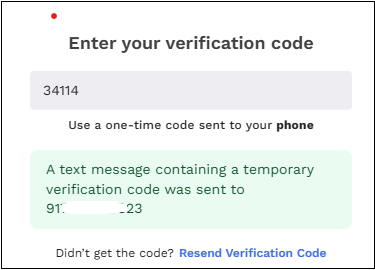
After the successful validation of the OTP, users are notified that their new phone number has been added to their profile. This new phone number is displayed on the Other Phone Numbers field.
To delete the associated phone number, follow these steps:
- Navigate to the Other Phone Numbers field in the Profile information section under the My Profile tab.
- Click the Delete icon beside the phone number. The Remove Phone Number window is displayed.
- Click Remove phone number.
Each time an end user links to a new mobile or landline number, a new E_USER_PROFILE_UPDATED event is triggered. This event shows the user's newly updated phone number along with the timestamp of when the update occurred. For more information, see Event Logs.
Managing the Identity Wallet
The Identity Wallet stores all the identity information you’ve provided to the portal. Users can upload new identity documents and view previously uploaded ones.
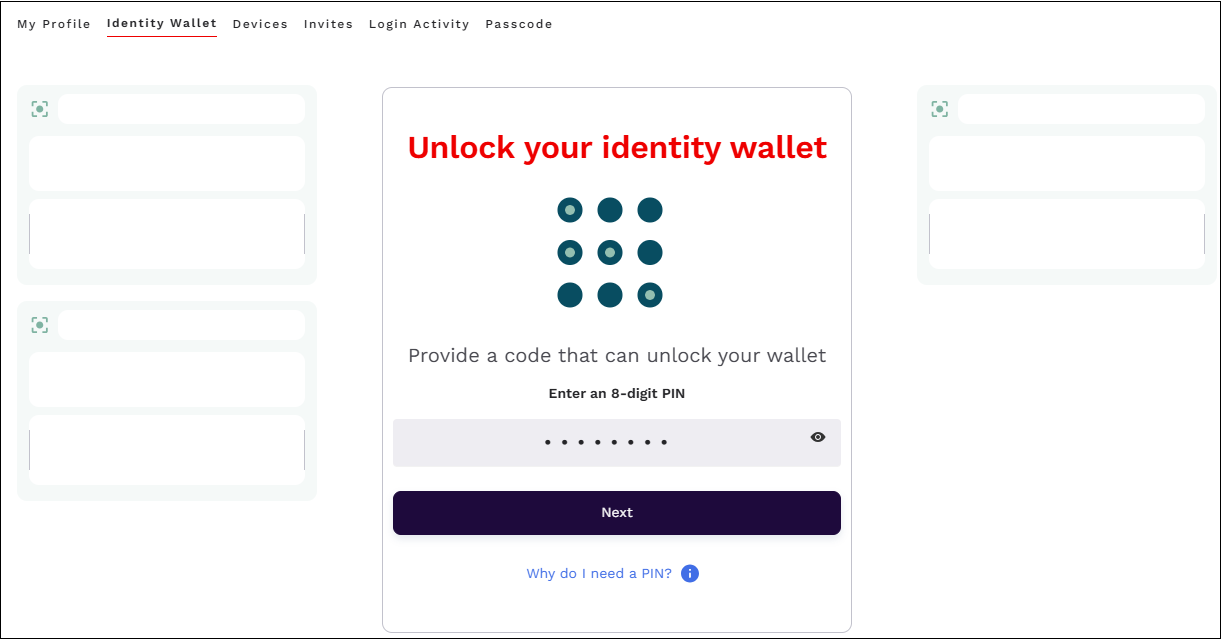
To access your previously uploaded documents, you must enter your 8-digit PIN to unlock the wallet. This PIN serves as an additional layer of security. You’ll need to enter the PIN each time you access sensitive information stored in your wallet.
In case, you have lost your 8-digit PIN, it is recommended to create a new account.
To unlock your wallet, follow these steps:
-
In the Identity Wallet tab, enter your 8-digit PIN in the Enter an 8-digit PIN field and click Next.
-
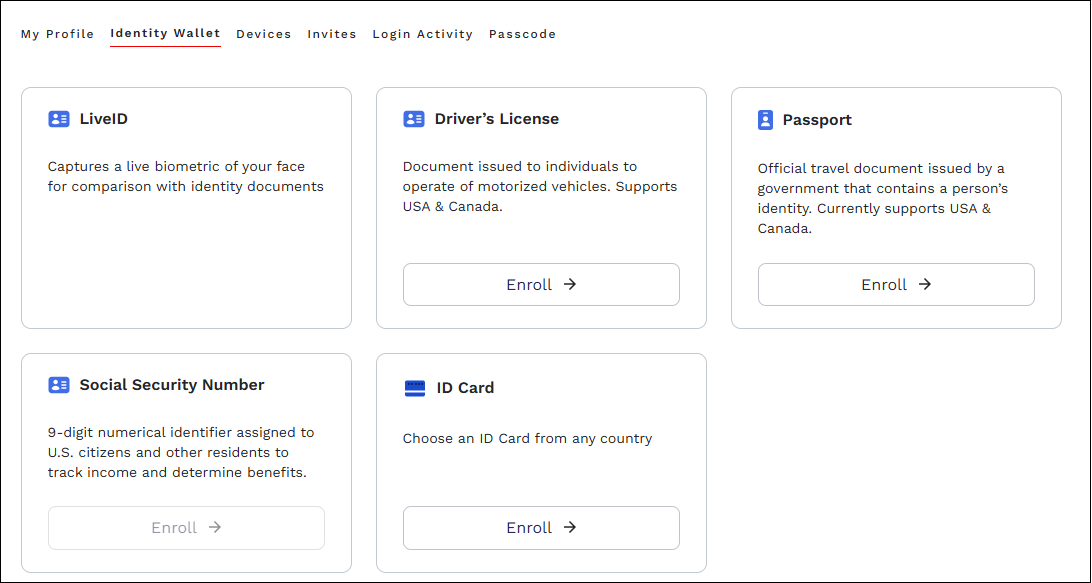
View the different identity documents that appear.
-
To enroll a specific identity document, click Enroll available in the corresponding card.
-
In the Receive a link on your smartphone page, enter the phone number in which you will receive a link to upload your identity document and then click Continue.

-
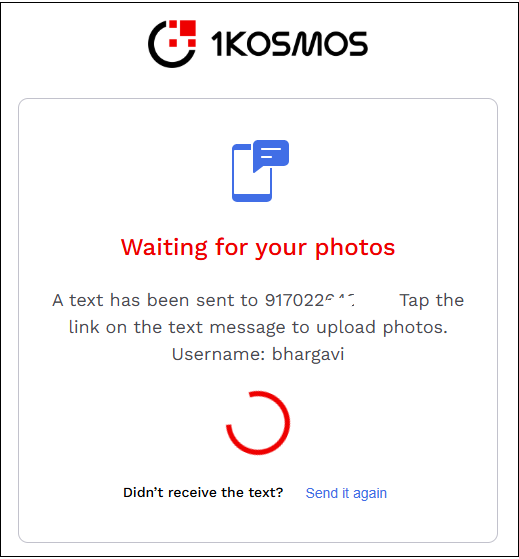
The UI displays a message that a link has been shared to upload the document. You would have received a link as an SMS in your mobile.
-
Navigate to the message in your mobile and tap the link. You will be redirected to a mobile browser.
-
Select your language and click Continue.
-
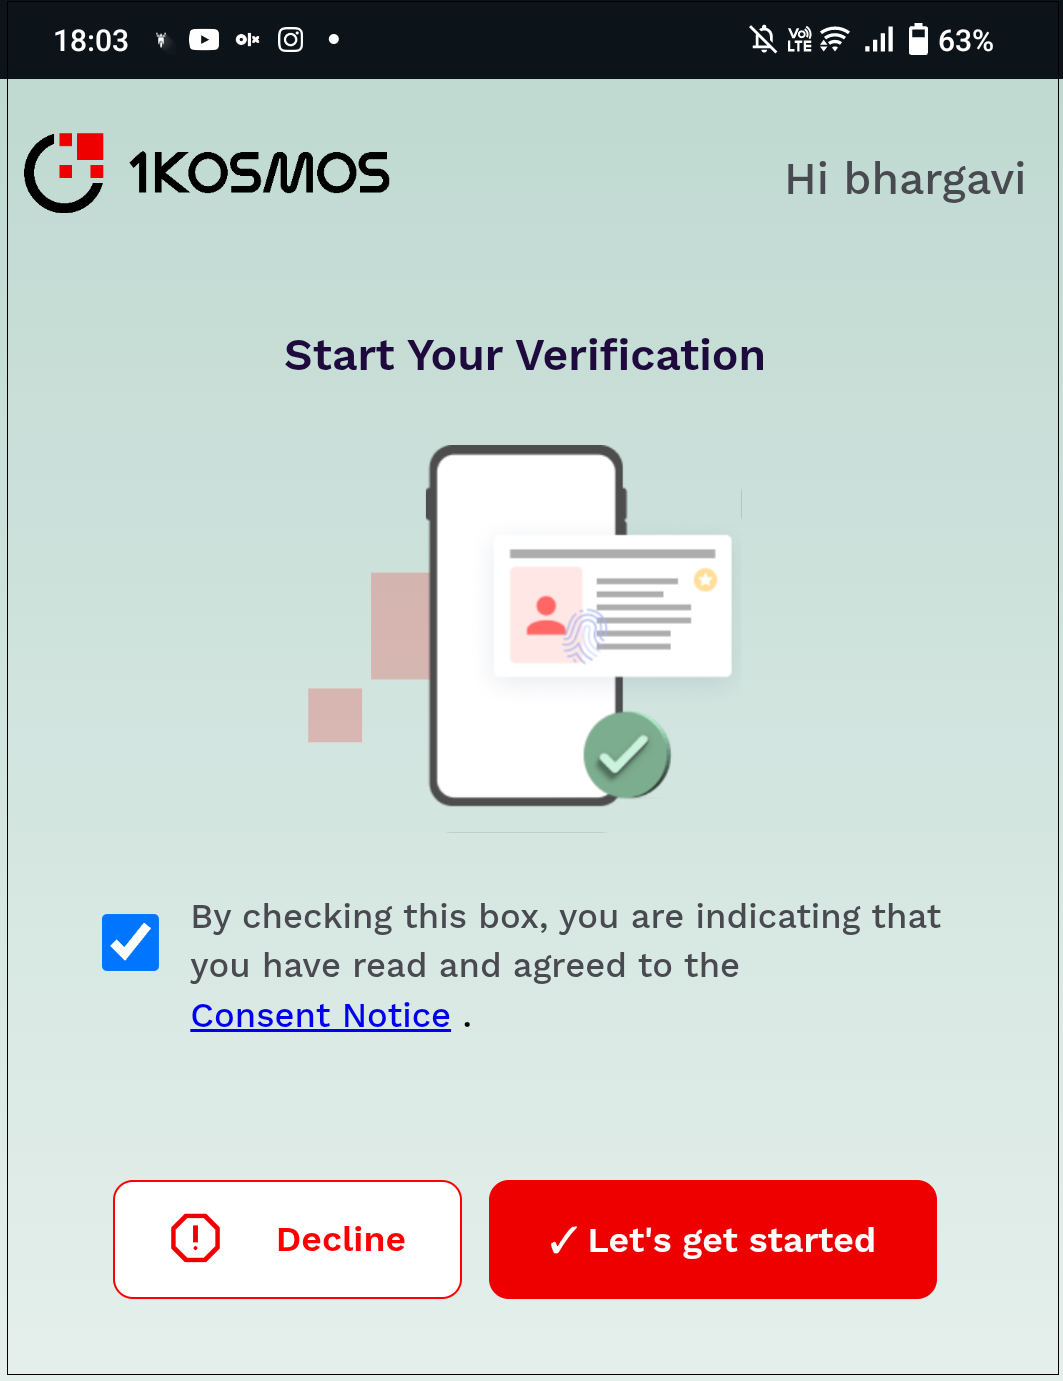
Tap the check box to give your consent and then tap Let's get started.
-
Scan the front and backside of the document.
-
Once the document scanning is complete, capture your facial image for the liveID verification.
-
After all the verification checks are completed, the document will be added to your identity wallet.
-
Navigate to the UI to see that the enrollment is successful.
Enrolling Devices
The Devices tab allows you to view the devices that have been enrolled.
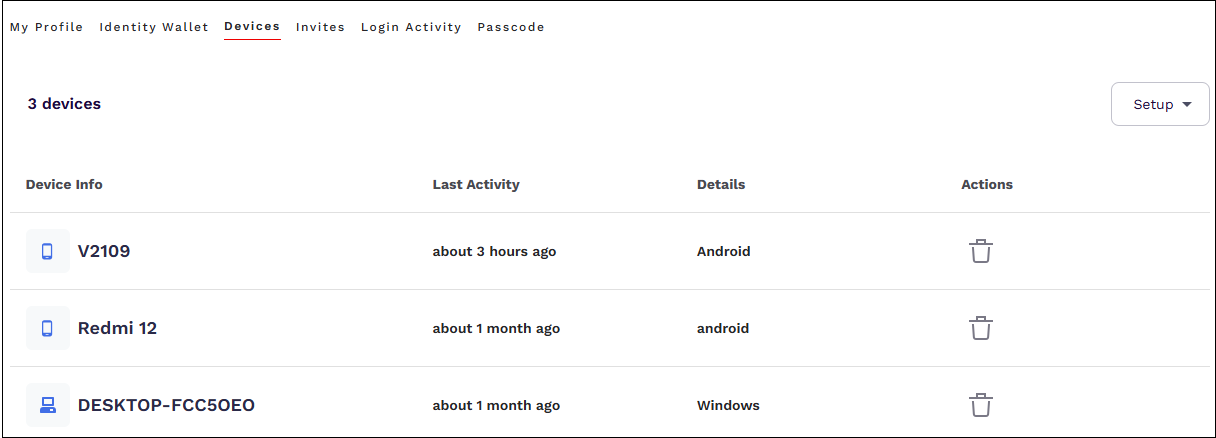
Additionally, users can perform the following actions:
- Enrolling devices such as Platform authenticator, Smartphone, Security Key, and Orion Authenticator.
- Removing Enrolled Devices
Removing Enrolled Devices
End users can use the Devices tab to remove their own devices that have been enrolled. To remove an enrolled device, follow these steps:
-
Navigate to the Devices tab.
-
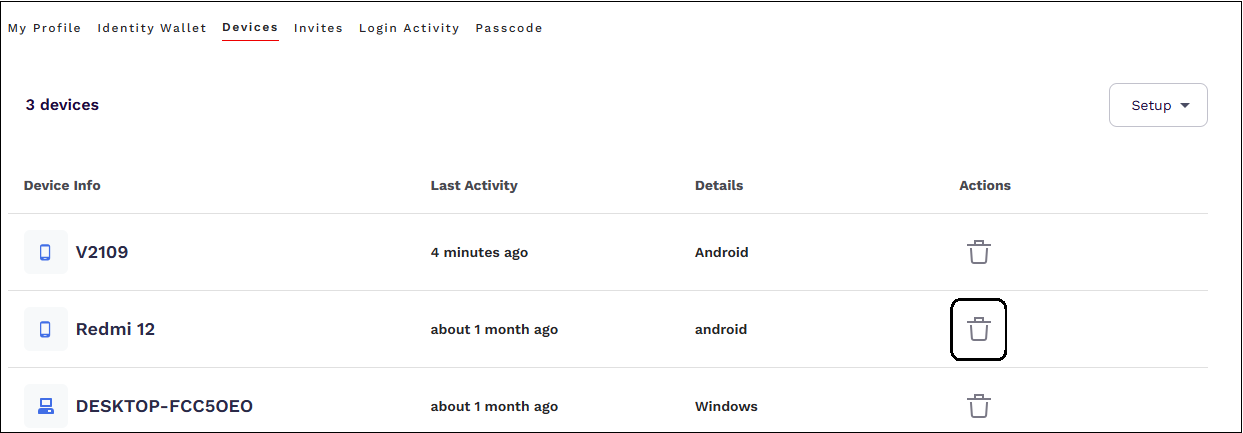
Select a device that has to be removed and click the Delete icon under the Actions column.
-
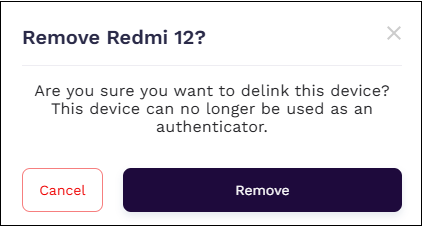
Users will be prompted with a confirmation message asking if they wish to remove the device.
-
Click Remove.
Tracking Invites
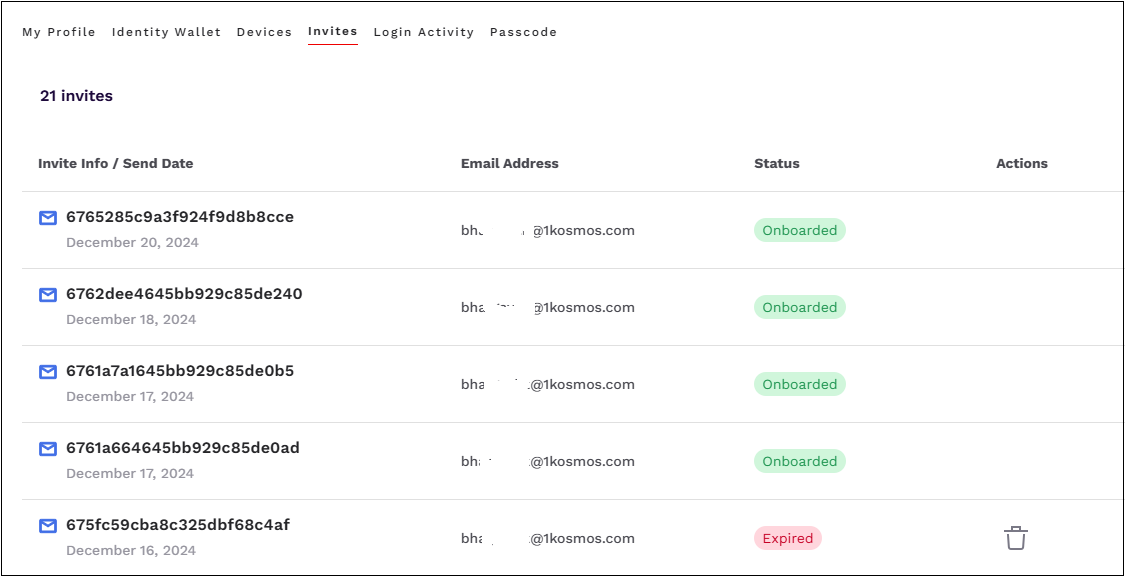
End users can use the Invites tab to track the number of invites they have received, along with the date of receipt. This tab also shows the email address to which the invite was sent and the status of whether the user has been onboarded. If an invite has expired, users can delete it by clicking the Delete icon next to the Expired status.
Viewing Login Activity
This tab allows end users to view their login activity details, including the authentication method used, the date and time of login, and the IP address from which they logged in.
Viewing Generated Passcodes
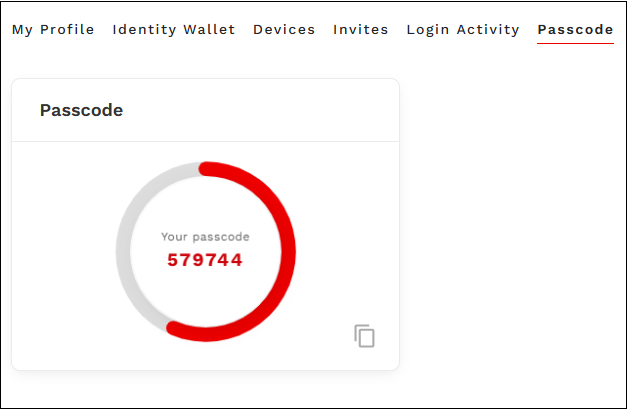
Starting with Release v1.10.09, the users profile page displays the Passcode tab, which can be used during authentication. The OTP displayed in this tab is used where users cannot carry the mobile device or install the BlockID app and would require access to a passcode to authenticate to 1Kosmos' applications. The passcode displayed on this page is identical to the Account OTP displayed on the mobile device.
