SCEP Configuration for Active Directory Authentication Broker
Overview
BlockID users wishing to enable Workstation Login will need to enable SCEP Configuration in the AdminX panel. Once enabled and configured, users will be able to log in to their Windows workstations using BlockID passwordless authentication.
Prerequisites
The following prerequisites need to be met before Workstation Login can be enabled:
- Your Windows workstations are connected using Active Directory
- Your AD Administrator has completed NDES Configuration for BlockID
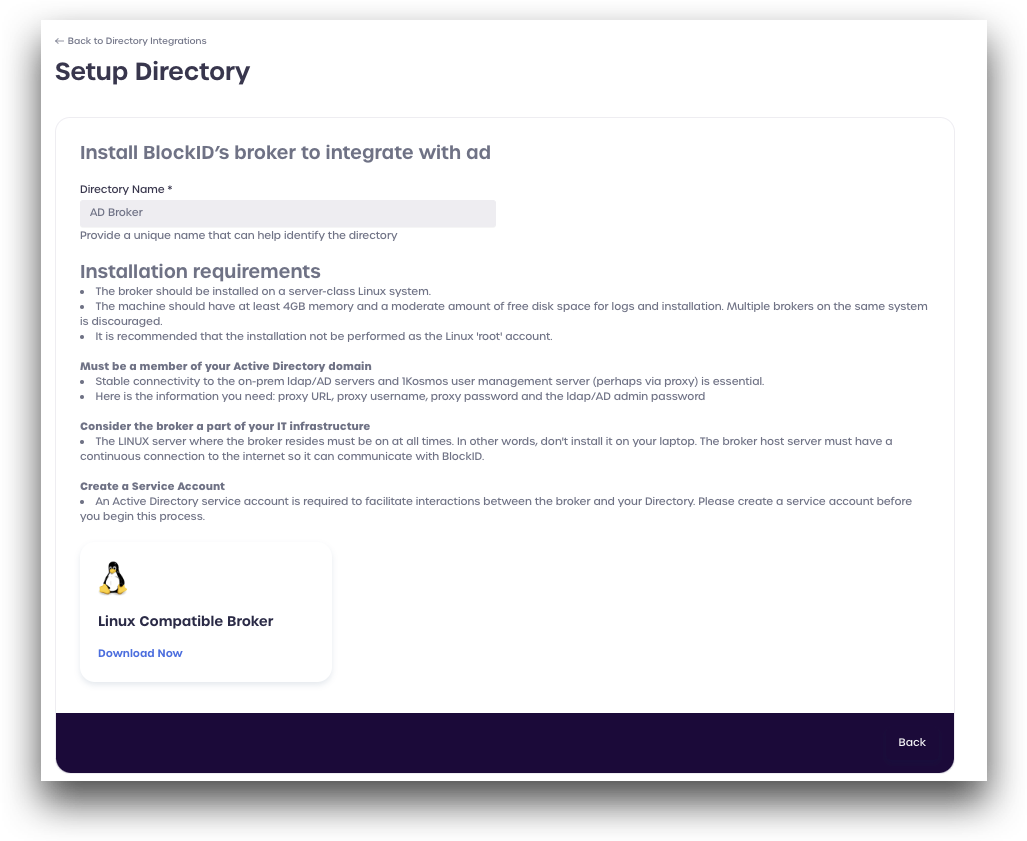
- In AdminX, a new or existing directory integration using the AdminX broker for AD
Step 1: Enable SCEP Configuration
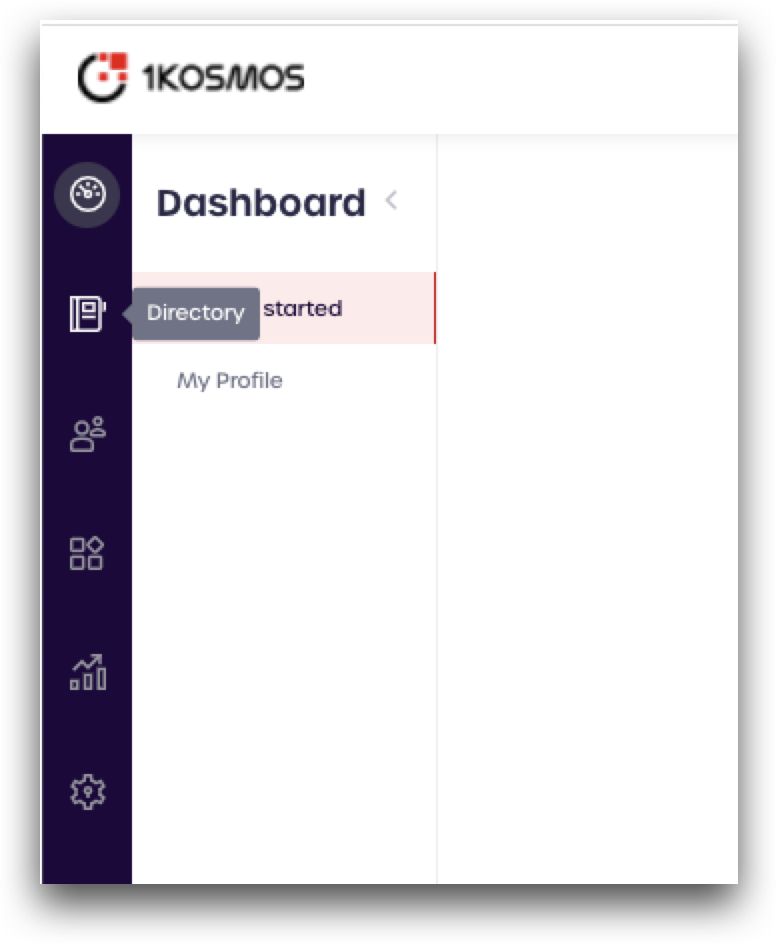
Navigate to your AdminX control panel and log in as a Tenant or Community Administrator to get started. Once logged in, click on the Directory button on the left-hand menu to access the Directory Integrations page.
From Directory Integrations, we can either add a new directory or edit an existing directory that has been connected as an AD Broker.
If you are not sure what type of connection your existing directory is using, locate your directory in the list, and it will have the connection type under the name.
For this article, we are going to edit an existing directory. To add a new AD Broker direcory integration, please see Connect to AD via Broker.
To edit an existing directory, first select the directory name from the displayed list and click the pencil icon on the right to edit its settings.

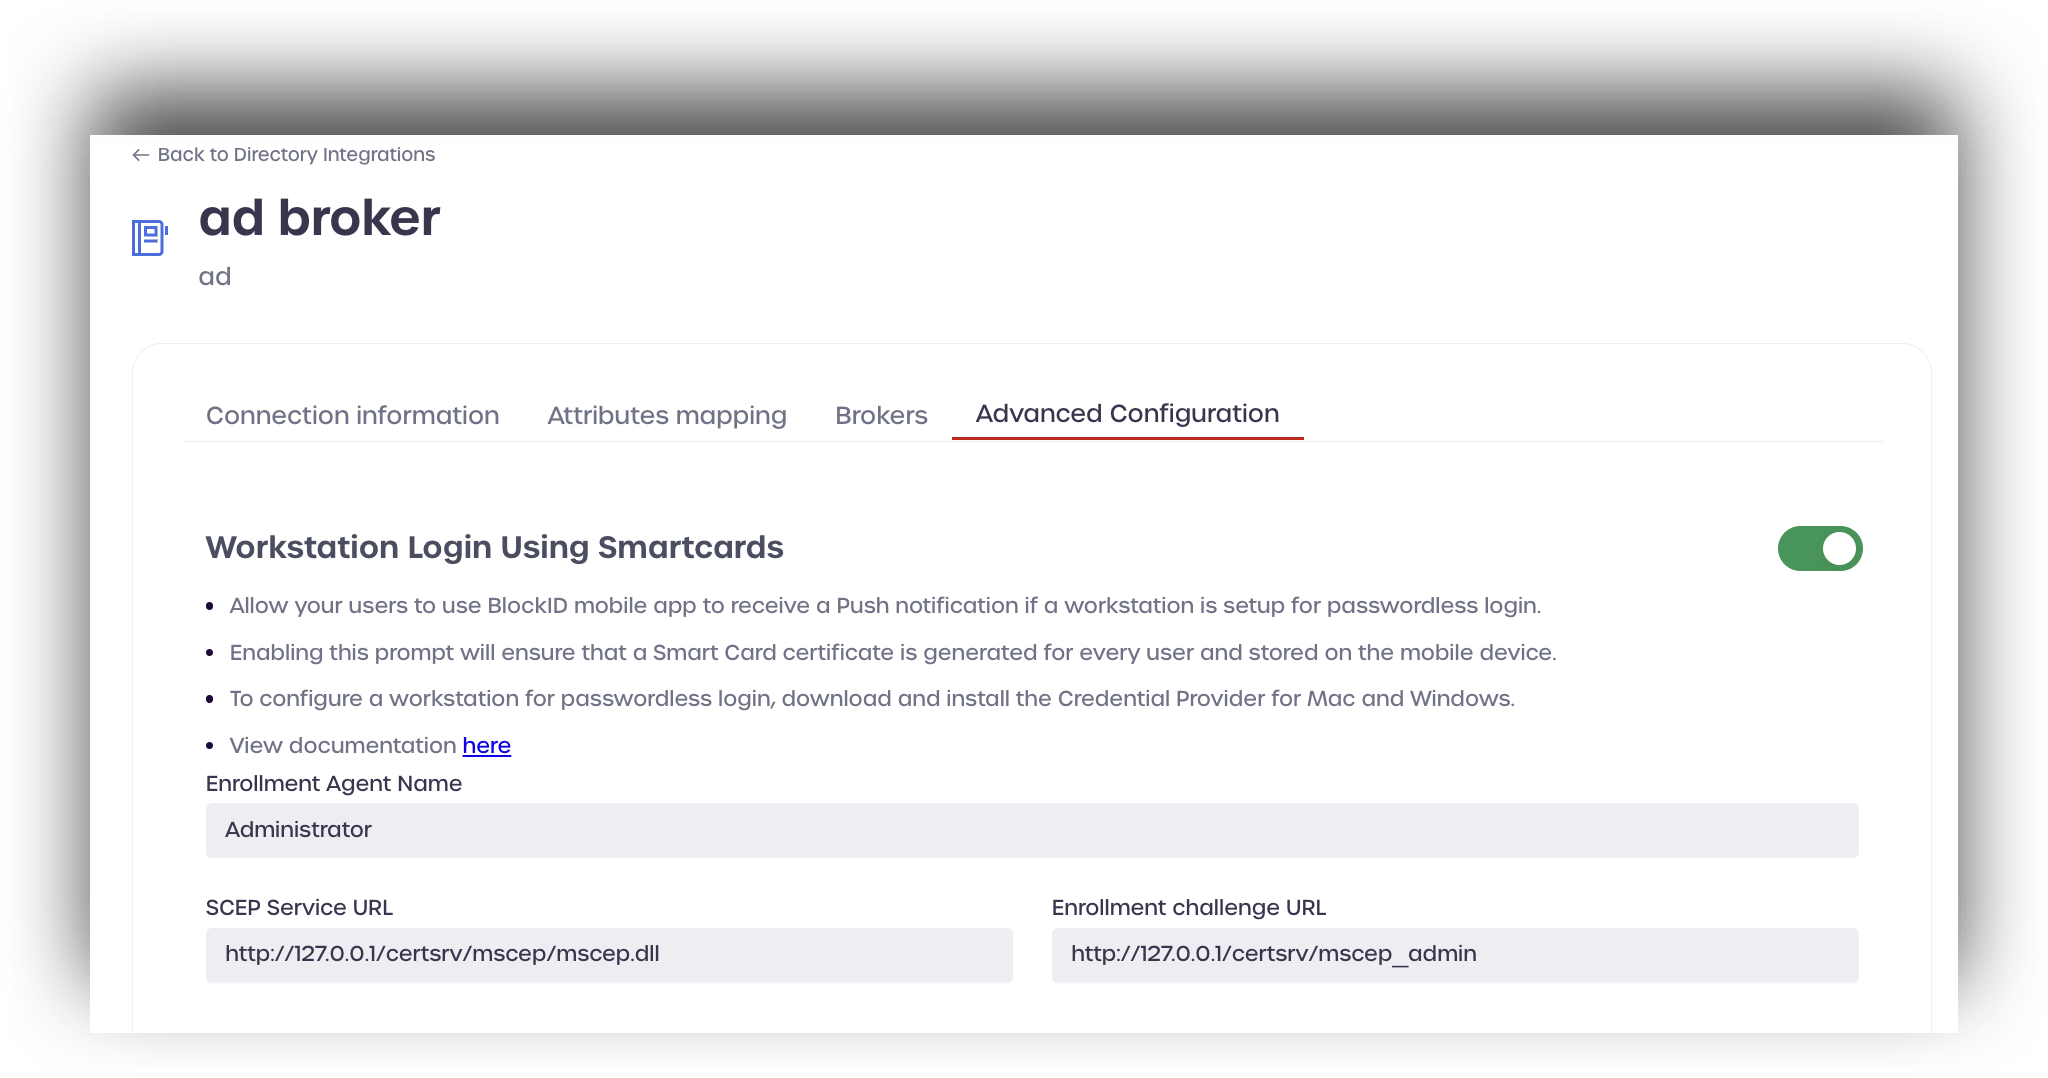
From the broker settings, select the Workstation Login tab.
Toggle the Workstation Login Using Smartcards switch to enable the feature.
Enter the following configuration details:
- Enrollment Agent name: enter a name to use for the enrollment
- SCEP Service URL: your SCEP service URL, usually
https://<IP-of-NDES-server>/CertSrv/mscep/mscep.dll - Enrollment Challenge URL: Your challenge URL, usually
https://<IP-of-NDES-server>/CertSrv/mscep_admin
Once these details have been entered, click Save.
Because this is the first time you are enabling SCEP Configuration for this broker, you will need to download the broker again and transfer it to your Linux machine.
Click the Brokers tab and then click Add new broker.
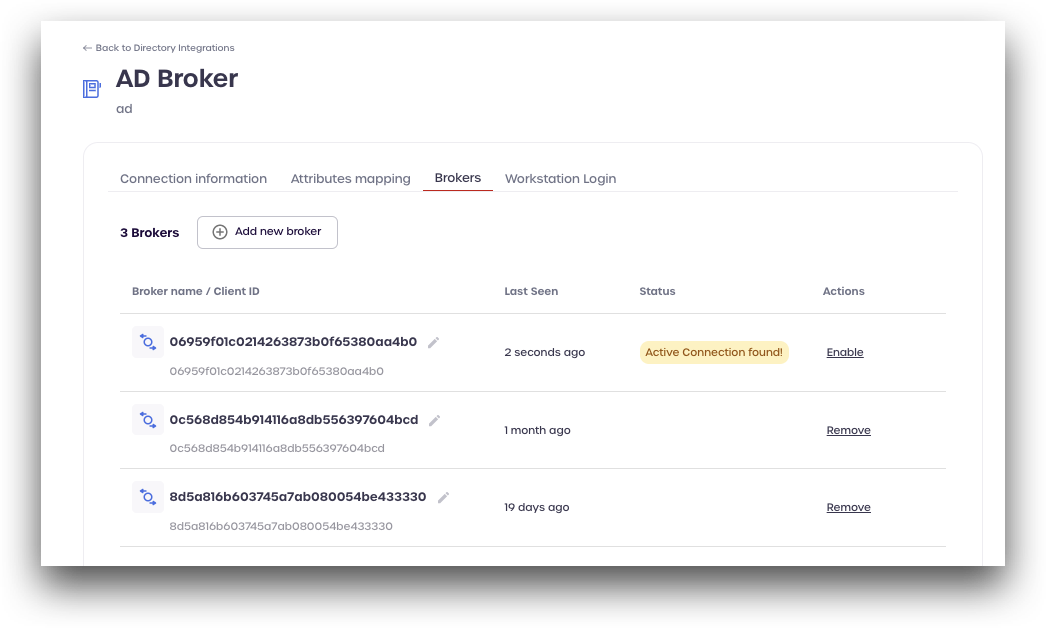
Click Download Now to download the broker in a zip archive. This zip file will need to be transferred to your Linux machine, and then unzipped.
Step 2: Set SCEP Agent Password for the AD Broker on Linux
Copy the broker to the Linux server that will be running the broker. Unzip the broker:

Next, start the broker by executing the following command:
./startBroker.bsh
You will need to run this step again, even if you have already configured a broker previously
After executing the broker, follow the on-screen instructions to configure and start the broker service.
Enter E to edit the existing configuration, and proceed with the configuration. An example is shown below (SCEP agent details in bold):
Edit current license key 'd2a36a85-e81b-4956-b7c0-****** ' (Y/N/Q)?: n
Edit current community id '5f3d8d0cd866fa61****' (Y/N/Q)?: n
Edit current authmodule id '621e17cfd24493001****' (Y/N/Q)?: n
Edit current dns string 'blockid-trial.1kosmos.net' (Y/N/Q)?: n
Change bind password (Y/N/Q)?: n
Enter new proxy url (Y/N/Q)?: n
Enter new proxy user (Y/N/Q)?: n
Change proxy password (Y/N/Q)?: n
Change scep agent password (Y/N/Q)?: y
Enter new scep agent password: ********
Re-enter new scep agent password: ********
(S)ave or (D)iscard edits (S/D)?: S
Step 3: Verify Connection
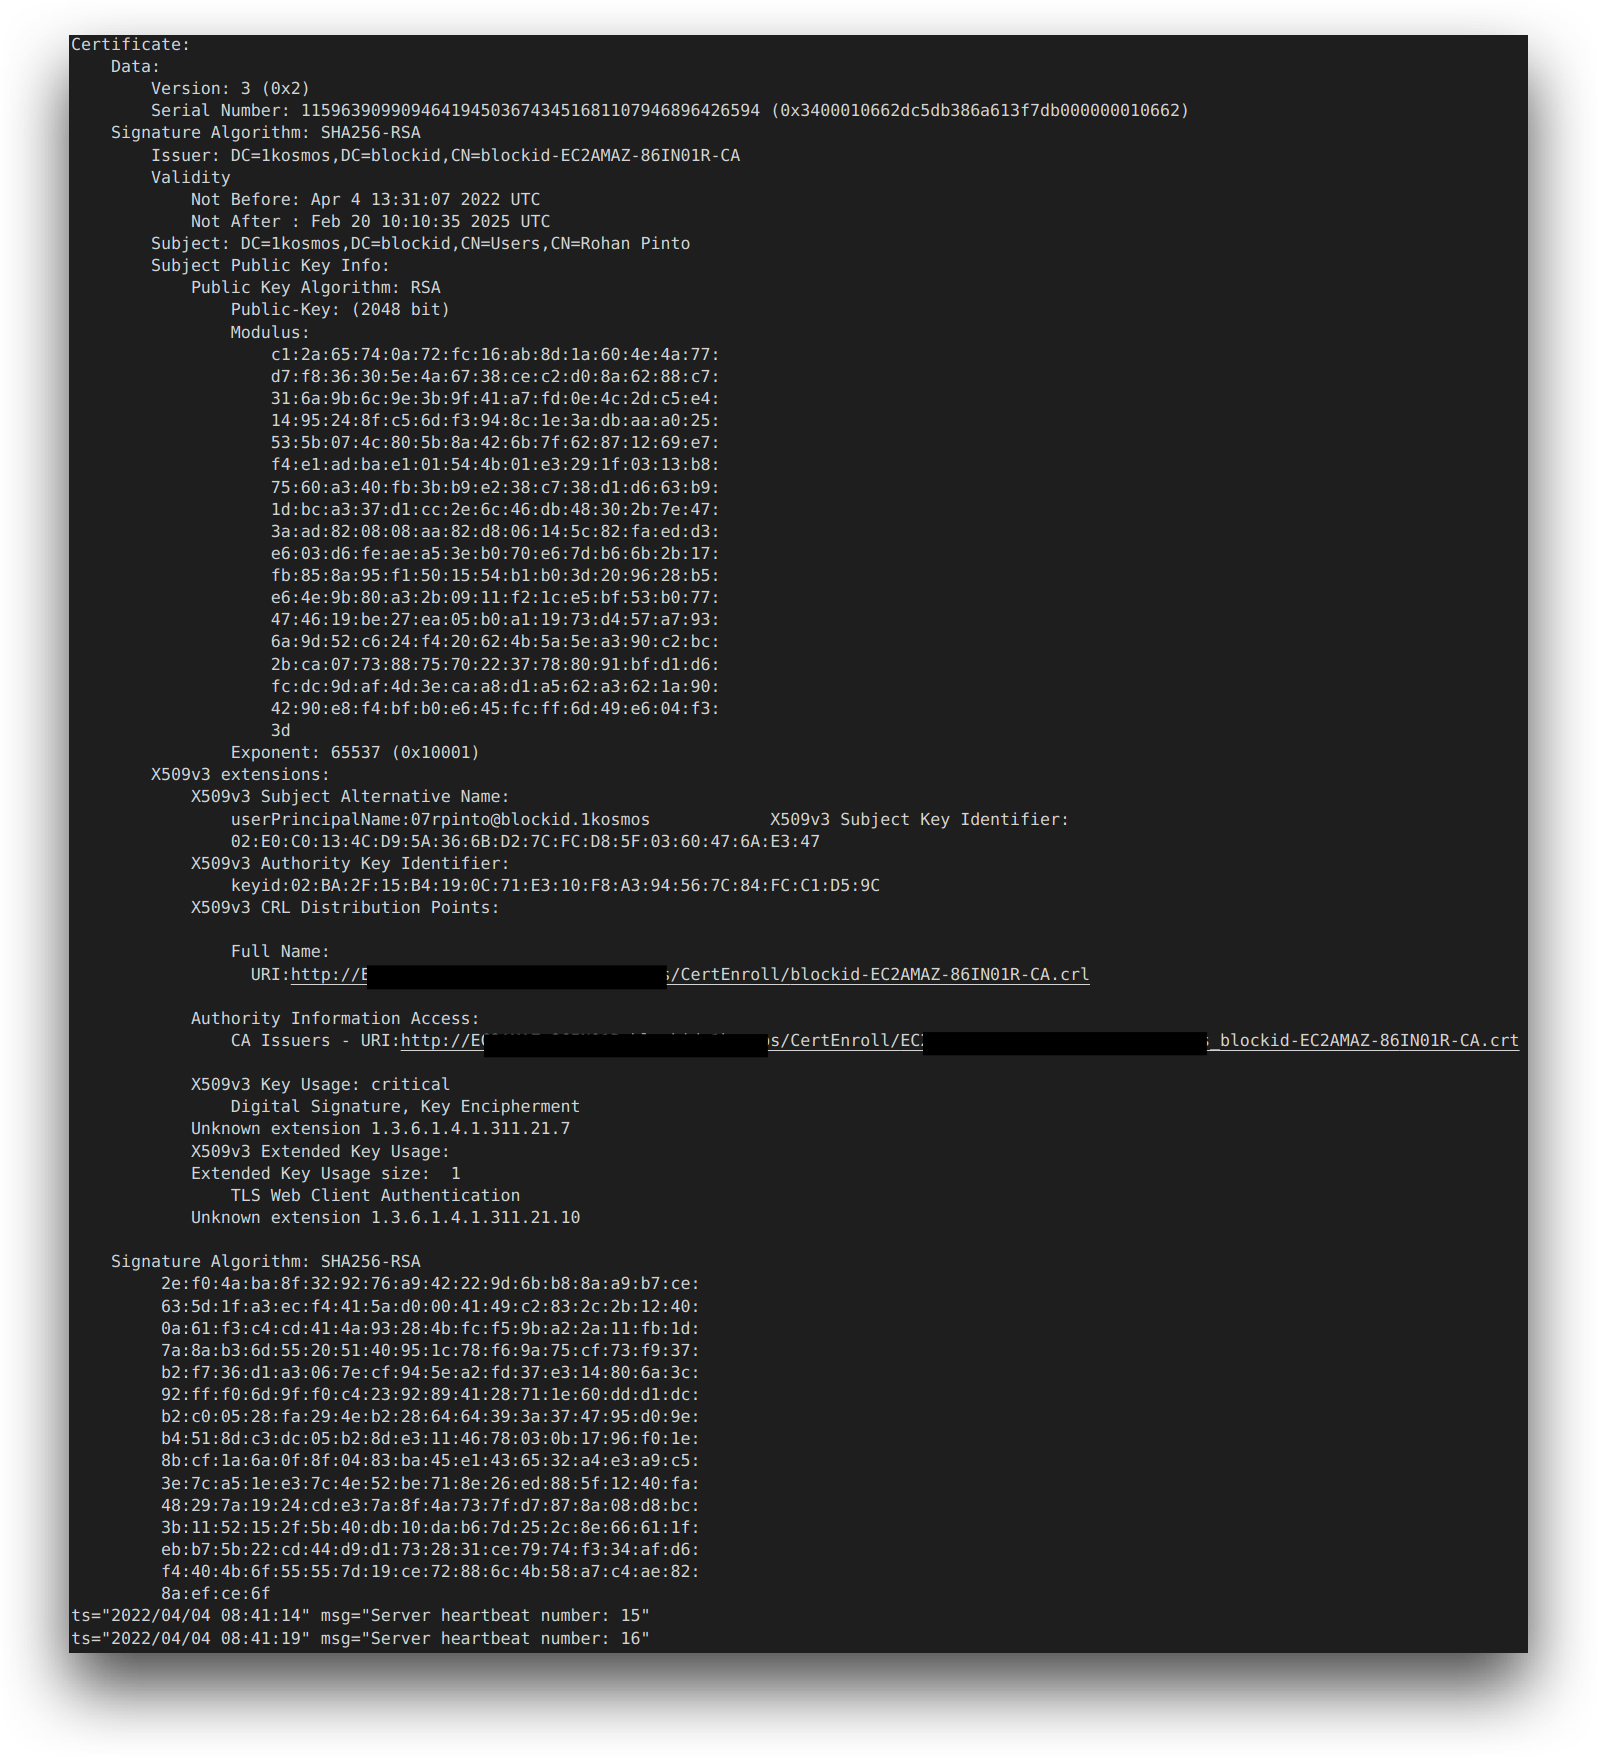
You can verify the if the SCEP agent is working by checking the broker logs on Linux server. Valid connections will display a CA certificate. Broker logs are created automatically upon running the broker, and are stored in <broker directory>/logs: