Kerberos Single Sign-On
This topic provides information on how to set up Kerberos.
Overview
Kerberos is a network authentication protocol that uses secret-key cryptography to verify the identity of users or hosts, providing strong authentication for client/server applications.
An Active Directory is a database that manages user accounts and passwords within an organization. 1Kosmos uses Kerberos in conjunction with the Active Directory to authenticate users, maintaining organization's security. Their single sign-on (SSO) capability enables users to be automatically logged into BlockID applications when they are authenticated on their Active Directory network. To use Kerberos SSO with BlockID on the AdminX portal, users must have admin access to their Kerberos Domain Controller to generate a keytab file.
Prerequisites for Kerberos SSO
-
Integrate your Active Directory domain with your BlockID tenant.
-
AD Broker user directory.
noteThe broker v1.08.08 is compatible with Kerberos authentication.
-
Create an AD service account and configure the service principal name.
-
Generate the Kerberos keytab file.
-
Configuring the Client browser to perform seamless authentication.
Steps to Complete in Active Directory
The following steps require administrator privileges on the Active Directory member server or domain controller.
Before enabling Kerberos SSO in AdminX, users must generate a keytab file on an Active Directory member server or Domain Controller. Additionally, users must remember the following:
- A separate keytab file must be generated for each tenant.
- The keytab file should be safeguarded like a password.
- The service principal of the keytab must correspond to the tenant it will be used with.
- The realm portion of the service principal must be in uppercase (BLOCKID.1KOSMOS, not blockid.1kosmos).
Creating Service Account and Configuring SPN
Create a service account in Active Directory on a member server or domain controller, requiring administrative access.
To create a service account, follow these steps:
- To open the Active Directory Users and Computers (ADUC) Microsoft Management Console (MMC) console on the Active Directory server, click Start > Run, and enter
dsa. msc, and press Enter. - Right-click the folder where you want to create the new account and select New > User.
- Complete the following fields:
- First name - Enter the user's first name
- Initial - Optional. Enter an initial for the user's middle name
- Last Name - Enter the user's last name
- Full name - Optional. Enter the user's full name
- User logon name - Enter a username
- Click Next.
- Complete the Password and Confirm Password fields and clear the User must change password at the next logon check box.
To prevent service interruptions, it is recommended that you select the Password never expires option. For security, you should also update the service account password regularly.
- Click Next and click Finish.
- Right-click the user created in step 6, select Properties, select the Account tab, and then select the This account supports Kerberos AES 128-bit encryption or This account supports Kerberos AES 256-bit encryption checkboxes in the Account Options area.
- Click Apply.
- Create a group policy to enable AES encryption on the AD server. See Windows Configurations for Kerberos Supported Encryption Type
To configure SPN for the service account, follow these steps:
-
Open a command prompt.
-
Run the following command to configure an SPN for the service account:
Command Syntax:
setspn -S HTTP/<BlockID tenant domain>@<REALM> <ServiceAccountName>Sample command:
setspn -S HTTP/blockid.1kosmos.com@BLOCKID.1KOSMOS spnadmin
Service Principal (SPN) Format
The format for the service principal (SPN) is as follows:
HTTP/<1kosmos tenant domain>@<REALM>
- Make sure the
setspncommand has the correct BlockID tenant domain and REALM - If your tenant domain is
blockid.1kosmos.net, and your AD REALM isBLOCKID.1KOSMOS, your service principal (SPN) isHTTP/blockid.1kosmos.net@BLOCKID.1KOSMOS
Your REALM is your Active Directory domain in UPPER-CASE, minus the TLD (.com, .net, etc.)
Determining your Kerberos REALM
To obtain the Kerberos Realm and DNS Names in Active Directory, follow these steps:
- Open Programs- > Administrative Tools- > Active Directory Management.
- Choose Active Directory Domains and Trusts.
- The Active Directory domain names will be listed. If you need to remove a service principal (SPN), use the following command:
Command format
setspn -d service/name hostname
Example command
setspn -d HTTP/blockid.1kosmos.net@BLOCKID.1KOSMOS blockid.1kosmos.net
Generating Keytab File
Follow the steps below to generate a keytab file, which must then be uploaded to the configuration settings page for their AD Broker user directory in AdminX.
After running the setspn command, generate the Kerberos keytab file.
Open a command prompt and run the following command to generate the keytab file:
Command format
ktpass -out <fn>.keytab -mapuser <ad user from above> +rndPass -mapOp set +DumpSalt -crypto AES256-SHA1 -ptype KRB5_NT_PRINCIPAL -princ <service principal name>
Example command
ktpass -out myfile.keytab -mapuser spnadmin@BLOCKID.1KOSMOS +rndPass -mapOp set +DumpSalt -crypto AES256-SHA1 -ptype KRB5_NT_PRINCIPAL -princ HTTP/blockid.1kosmos.net@BLOCKID.1KOSMOS
Explanation of the command options:
-out <filename.keytab>: keytab file name-mapuser <AD user>: AD user created during step 3 above+rndPass: generate a random password-mapOp set: set command+DumpSalt: show the salt algorithm-crypto AES256-SHA1: use AES 256 SHA1-ptype KRB5_NT_PRINCIPAL: kerberos principal type-princ <service principa>: set service principal created during step 10 above
After successfully running the command, copy the generated keytab file to a secure location. You will need to upload this keytab file to the AdminX portal.
-
The AD user and -crypto settings must align with what was configured in Step 7 of the 'Creating Service Account and Configuring Service Principal Name' section.
-
Your service principal (SPN) must match your BlockID tenant and correspond to the settings defined in the setspn command in the same section.
Enabling Kerberos SSO in AdminX
Enabling Kerberos SSO in a New AD Broker User Directory
For instructions on creating a new AD Broker user directory with Kerberos enabled, see AdminX Broker. You can enable the Kerberos configuration by enabling the Kerberos Single Sign On option under the Advanced Configuration tab. For more information, see the Advanced Configuration section in the Connect to AD via Broker topic.
Enabling Kerberos SSO in Existing AD Broker User Directories
BlockID users can enable Kerberos in the Adminx portal if their Active Directory user store is connected through the AD Broker.
To enable Kerberos, follow these steps:
-
Log in to your AdminX portal as a tenant or a community administrator.
-
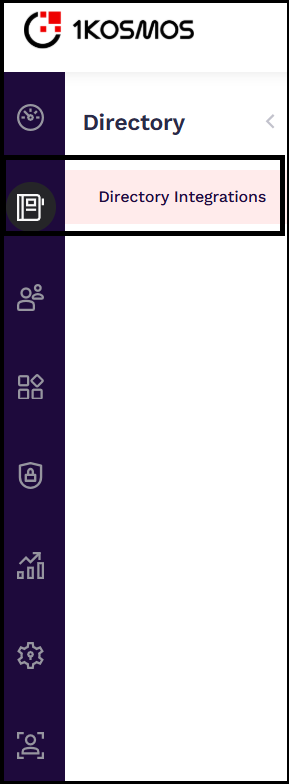
Navigate to the Directory tab and click Directory Integrations.
-
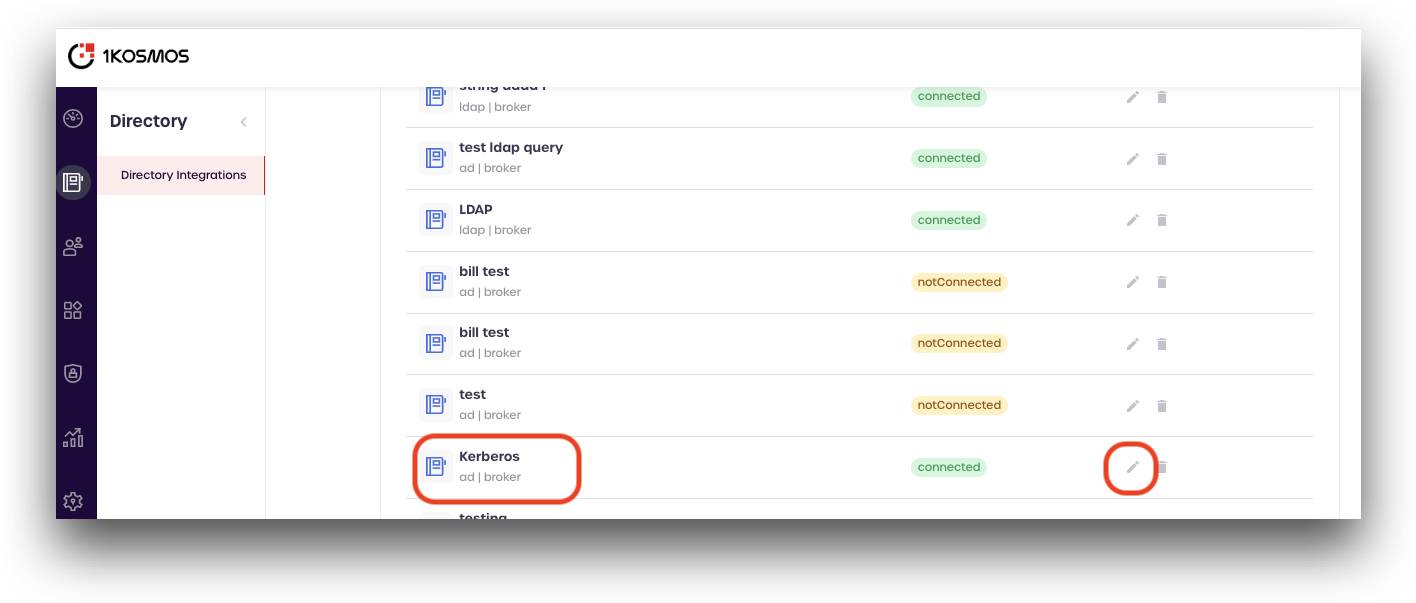
Scroll down to your AD Broker user directory, and click the pencil icon to edit its configuration.
-
Click the Advanced Configuration tab to access the advanced configuration details.
-
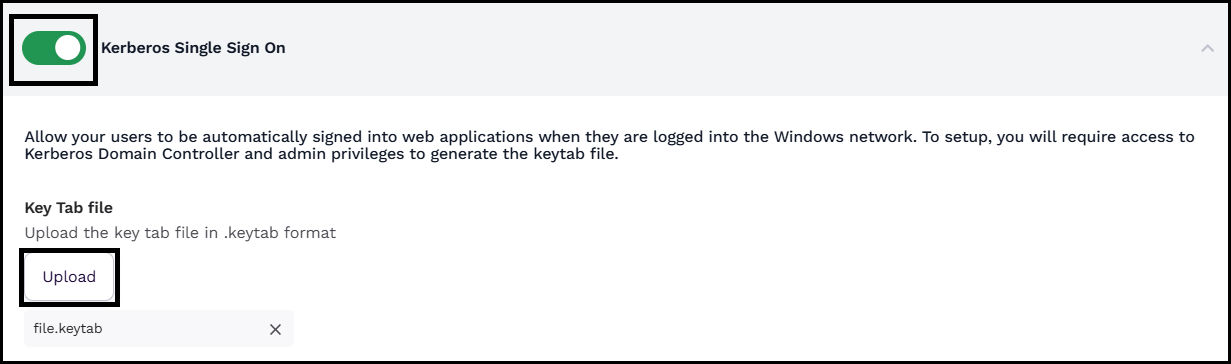
Scroll down the page and enable the Kerberos Single Sign On option; Under the Key Tab file section, click Upload to upload your Kerberos keytab file.
-
Click Save Changes.
Configuring Browsers
To enable Kerberos authentication for your tenant, you must configure specific settings in each browser.
You need to know how to display and set options in a browser (such as Firefox). You must have a browser installed that supports Kerberos authentication.
To configure your Firefox browser, follow these steps:
- In your desktop, log in to the windows active directory domain.
- In the address field of the Firefox browser, type
about:config. - In the Filter, type
network.n. - Double click on
network.negotiate-auth.trusted-uris. This preference lists the sites that are permitted to engage in Kerberos Authentication with the browser. Enter a comma-delimited list of trusted domains (1kosmos) or URLs.
You must set the value for network.negotiate-auth.trusted-uris.
If you are using the advanced Kerberos feature of Credential Delegation, then double click on network.negotiate-auth.delegation-uris. This preference lists the sites for which the browser may delegate user authorization to the server. Enter a comma-delimited list of trusted domains or URLs.
- Click OK. The configuration appears as updated.
- Restart your Firefox browser to activate this configuration.
To configure your Microsoft Edge or Google Chrome browser, follow these steps:
- From the Control panel, open Internet Options.
- In the Internet Properties window that is displayed, click the Trusted sites zone.
- In the Trusted sites section, Click Sites.
- In the Trusted sites window, enter the website address under the Add the website to the zone drop-down menu, and click Add.
- Click Apply, and then click OK.
Configuring Adaptive Authentication Journey for Kerberos
You can use one of the following authentication methods to configure an adaptive authentication journey for Kerberos.
- Kerberos - This option allows users to log in using an active Kerberos token.
- Kerberos + Push - This option requires users to authenticate with the Kerberos token first, followed by push authentication.
- Kerberos + Any OTP - This option lets users authenticate with the Kerberos token first and then complete the process using an OTP generated by 1Kosmos applications.
To configure an adaptive authentication journey for Kerberos, follow these steps:
-
Log in to your AdminX tenant.
-
Navigate to Authentication > Adaptive Authentication.
-
Click Add new adaptive auth journey.
-
In the Create Adaptive Auth Journey page, specify the following details:
a. Enter the journey name.
b. Specify the conditions such as users for whom this authentication journey is applicable.
c. In the Authentication drop-down menu, select the appropriate Kerberos authentication methods. The following screenshot illustrates the same:
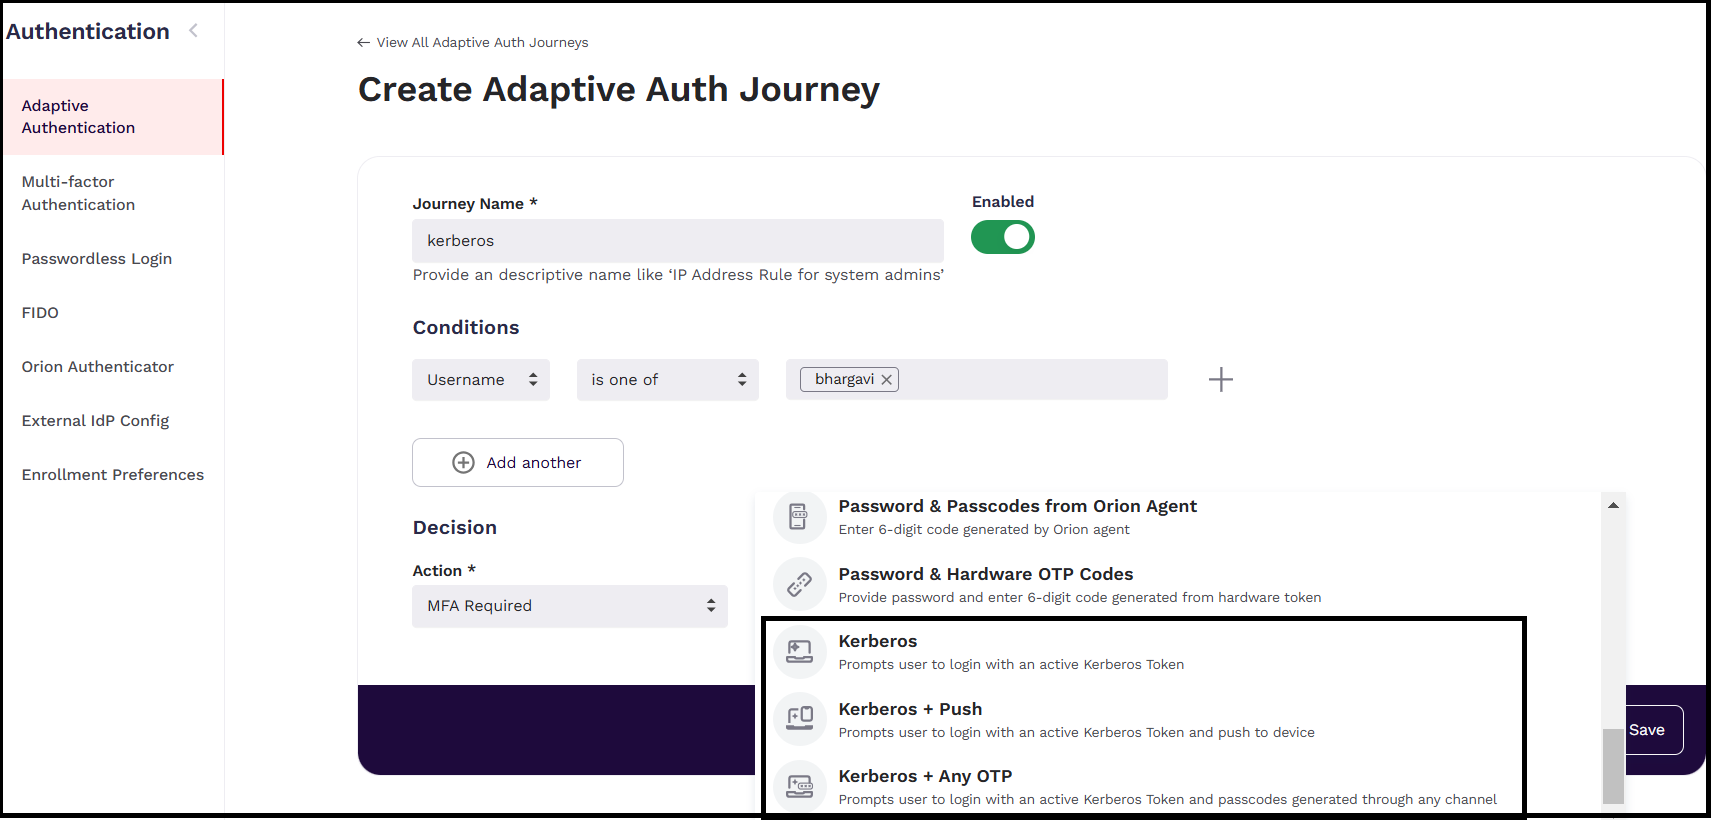
d. Click Save.
The created authentication journey is displayed on the Adaptive Authentication Journeys list page.
Logging into a Tenant
Once all the necessary settings are configured, open the browser set up for Kerberos and enter the tenant URL. Depending on the configured authentication flow, you will be logged into the tenant automatically.
The table below outlines the UI behavior for various Kerberos authentication methods.
| If the Authentication Method is set to | Then... | UI |
|---|---|---|
| Kerberos | The user will be logged into the tenant directly. | 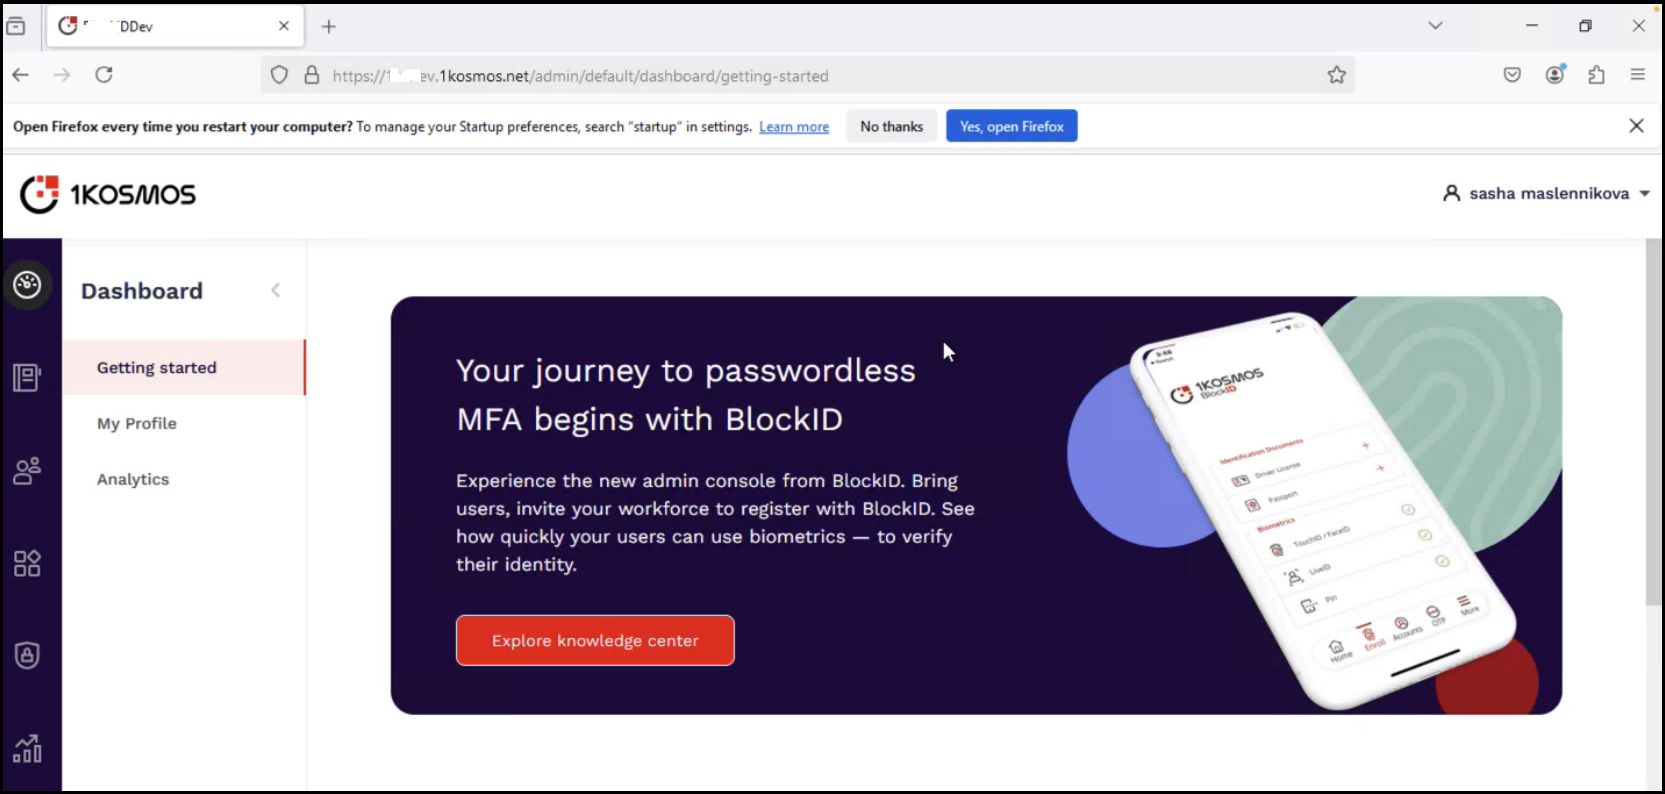 |
| Kerberos + Push | The user will be prompted with additional MFA options, including a Push Notification. After receiving and approving the notification, the user will be granted access to the tenant. | 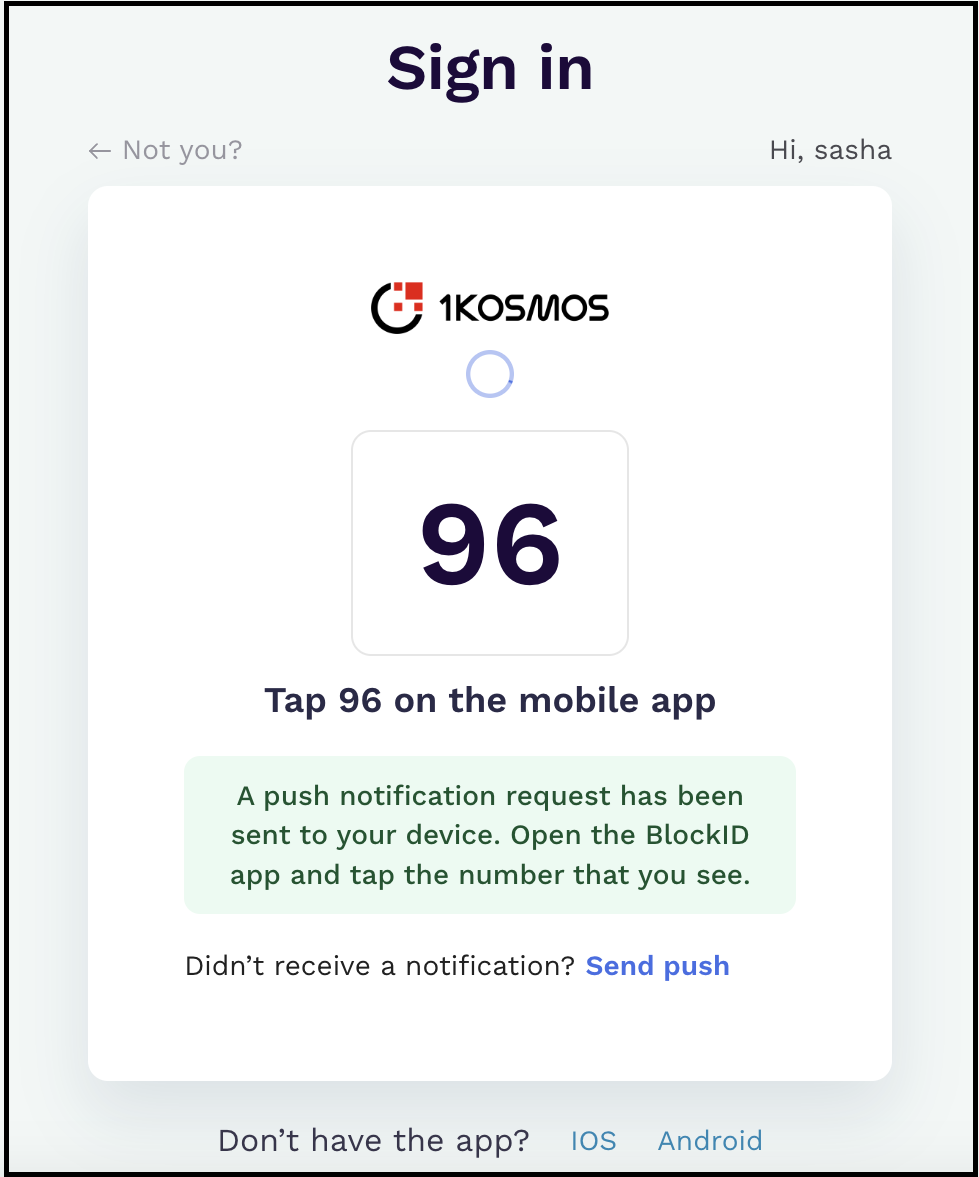 |
| Kerberos + Any OTP | The user will be prompted with additional MFA options. They can select an appropriate authentication method to enter a valid OTP received from the authenticated 1kosmos applications. | 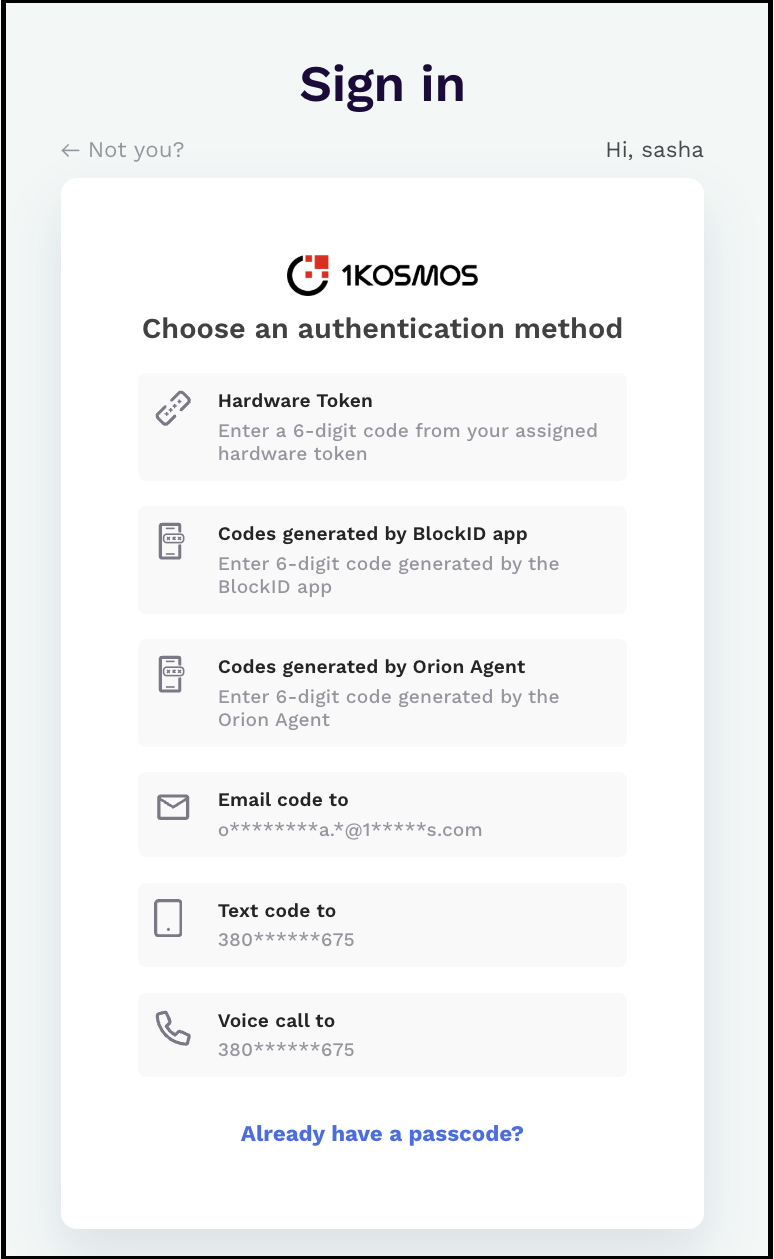 |
Viewing Events
The following events are recorded when users authenticate successfully through Kerberos:
- When users log into a tenant using Kerberos authentication, an E_LOGIN_SUCCEEDED event is recorded with the authentication method marked as Kerberos.
- If the adaptive authentication journey for Kerberos is modified, an E_ADAPTIVE_AUTH_MODIFIED event is triggered.