Setting Up Microsoft Verified ID Integration
This topic outlines the end-to-end process for setting up and testing a Verified ID issuance and verification flow using Microsoft Entra Verified ID. It includes:
- Steps to configure the verification journey
- Deploy a sample VerifiedID application
- Test credential issuance
- Provision Verified Credentials (VCs) into the Microsoft Authenticator app
Issuance Flow Overview
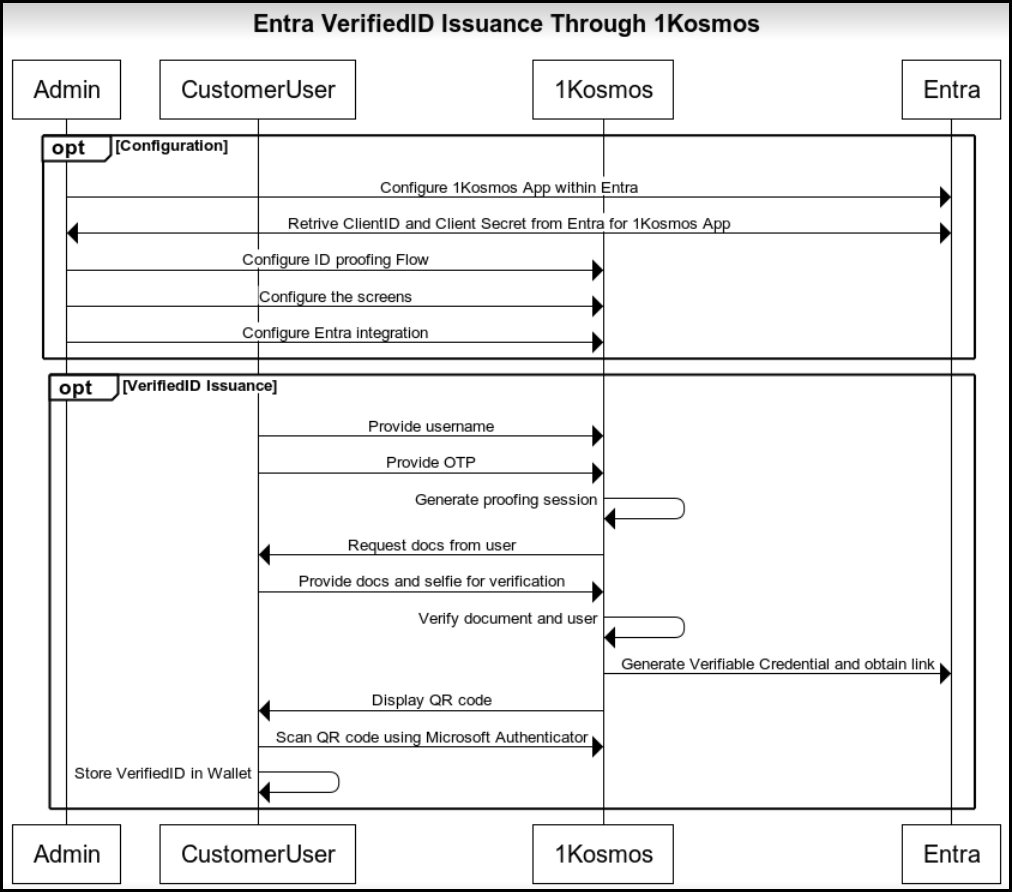
The Issuance Flow of Verified ID is categorized into two phases — the Configuration phase and the Issuance phase.
- The Configuration phase involves administrative setup activities such as configuring the 1Kosmos app within Entra, retrieving the Client ID and Client Secret, and configuring the ID proofing flow.
- The Verified ID Issuance phase involves the end user performing the identity verification process by submitting their identity documents and selfie for verification, and scanning the QR code to provision the generated Verifiable Credential (VC) into the Microsoft Authenticator app.
The following diagram illustrates the workflow process of the Verified ID Issuance Flow.
Configuration phase
To set up the Verified ID issuance process, the administrator performs the following configuration steps in Entra and 1Kosmos.
- Configure the 1Kosmos app in the Entra portal.
- Retrieve the Client ID and Client Secret from Entra for the 1Kosmos application.
- Define the ID proofing flow within the 1Kosmos platform.
- Use the 1Kosmos' Verification Flows page in the AdminX interface to create and manage verification journeys.
- Complete the Entra integration setup to enable secure communication between Entra and 1Kosmos.
Verified ID Issuance phase
To complete the Verified ID issuance, the user performs the following steps to verify identity and receive the Verifiable Credential.
- Enter your username to initiate the proofing process.
- Enter the one-time password (OTP) sent for authentication.
- In the generated proofing session, submit the required identity documents.
- Provide a selfie for verification.
- After successful verification, 1Kosmos generates a Verifiable Credential (VC) and retrieves the credential link from Entra.
- Scan the displayed QR code using the Microsoft Authenticator to receive the Verifiable Credential. The Verified ID is securely stored in the user’s digital wallet.
Step 1: Configuring Verification journey
Use the 1Kosmos' Verification Flows page on the AdminX interface to create and manage the verification journeys.
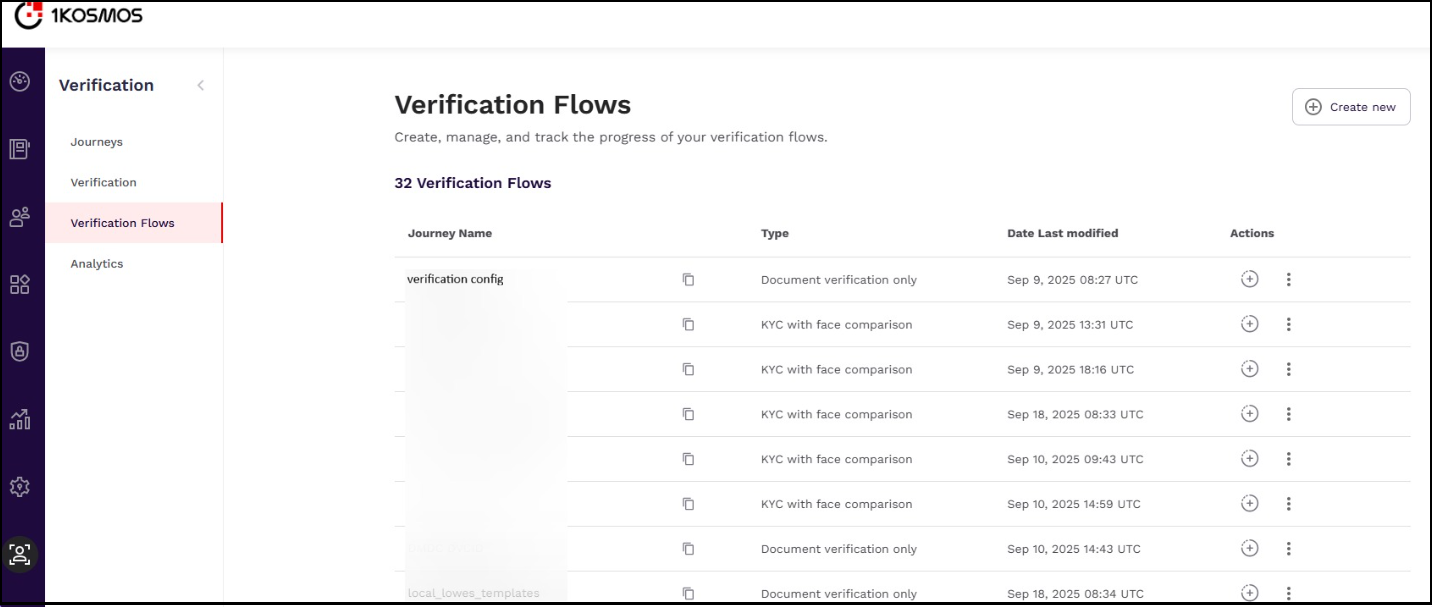
Two types of journey are supported. Select a journey and create a verification flow for users.
- KYC with Selfie: Users are prompted to scan an identity document and then capture a selfie for comparison.
- Document Verification Only: Enables standalone document verification without any selfie or liveness check.
For more information, see Verification Journey.
Step 2: Configuring Sample VerifiedID Application Settings
This section provides the necessary steps to deploy the sample VerifiedID application and configure it with the required permissions.
- Reach out to your 1Kosmos representative to deploy the sample VerifiedID application.
- Follow the Microsoft documentation to set up an application with the appropriate permissions.
- Provide the Client ID and Client Secret to 1Kosmos to configure the sample app.
- Once configured, you will be able to test the generation of Entra VerifiedID.
Step 3: Testing Generated Entra VerifiedID
Prerequisites
Ensure users exist in the 1Kosmos' user directory with the following fields:
- First Name
- Last Name
- Phone Number
- Date of Birth - optional
To test, follow these steps:
-
Navigate to the Sample App.
-
Enter your email address.
-
Choose the type of document and the device you will use for verification.

-
You will receive a link to continue the process.
-
Follow the instructions under the Verifying Identity section to complete document verification.
-
After successful verification, you will be presented with an option to generate a VerifiedID.
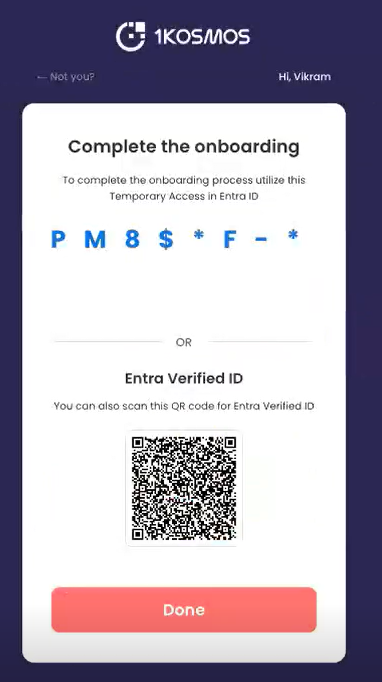
Step 4: Provisioning VCs into Your Microsoft Authenticator App
To provision VCs, follow these steps:
-
Scan the QR code using the Microsoft Authenticator app.
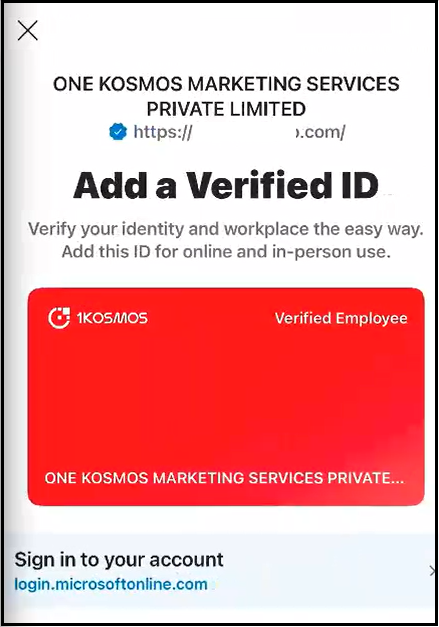
-
Once the scan is successful, the verified ID will be added to your wallet.
-
You can now request your end user to share their Verified Credential with you by sending a Presentation Request through Microsoft Entra.