Setting Up 1Kosmos as a Service Provider with Okta as the Identity Provider
Overview
Security Assertion Markup Language (SAML) is an XML-based protocol. When a user signs in to an app using SAML, the Identity Provider (IdP) sends an SAML assertion to their browser that is passed to the SP. When users request access to an external app registered with Okta, they're redirected to Okta.
This topic outlines the steps to configure Okta as an External Identity Provider (IDP) for 1Kosmos Service Provider (SP) using SAML for authentication. The integration allows users to authenticate through Okta and access applications and services provided by 1Kosmos.
Creating 1Kosmos as Service Provider on Okta Interface
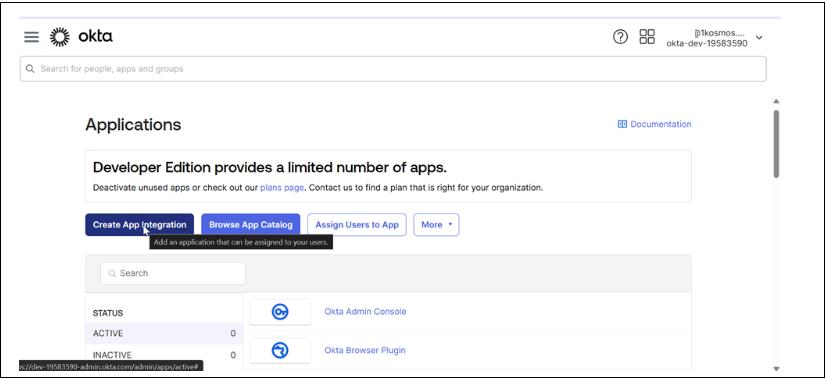
To create an application in the Okta Admin Console, follow these steps:
-
Navigate to the Applications section in the Okta Admin Console and click Create App Integration.
-
In the Create a new app integration page that is displayed, click SAML 2.0 and then click Next.
-
Specify the following details in the Application Integration Wizard.
Field Description App name Enter the application name. For example, you can enter 1Kosmos-okta. App logo (optional) Upload a logo to use for your integration in the Okta org. The logo must be in PNG, JPG, or GIF format, and be smaller than 1 MB.
For better results, use a PNG image with a transparent background and a landscape orientation. Use a minimum resolution of 420 x 120 pixels to prevent upscaling.App Visibility Select this option if you want to hide your integration from end users. Single sign-on URL Specify a URL for submitting the SAML assertion using a POST operation. By default, the Use this for Recipient URL and Destination URL check box is selected. This setting uses the same URL for both the recipient and destination URLs. Audience URI (SP Entity ID) Enter the entity ID of your service provider. Default RelayState Enter the URL of the resource to redirect users to after they successfully authenticate with the SP via SAML. Name ID format Specify the format in which the username has to be sent in the SAML response. Application username Enter the default value to be used for a user's app username. Update application username on Specify the scenario by when the app username has to be updated. By default, the Create and update scenario is used by all Application username types. -
Click the Preview the SAML Assertion button to view the XML generated from the SAML settings that you provided.
-
Click Next.
-
Click Finish.
-
After you create your SAML app integration, the SAML Signing Certificates section appears on the Sign On tab. You must configure your app integration to verify signed SAML assertions for SSO.
Viewing Metadata Details
To view the metadata details, follow these steps:
- From the Metadata details section, copy the Metadata URL.
- Obtain the IDP information by managing your certificates.
- Under SAML Setup, click View SAML setup instructions. The instructions may require that you copy some values from the Metadata details section.
- Download the SAML assertion file in the XML format.
Assigning App Integration to a User
To configure 1Kosmos as a service provider, follow these steps:
- In the Admin Console, go to Applications > Applications.
- Enter the name of the app integration in the Search field.
- Click the app integration name to open the settings page.
- Click the Assignments tab.
- Click Assign and select Assign to People.
- In the Assign app name to People dialog, click Assign in the row that contains the user to assign to the app integration.
- Confirm that the data is correct in the Assign app name to People dialog.
- Click Save and Go Back. The Assign button changes to Assigned and is disabled to indicate that the app integration is assigned to the user.
- Click Done. This assigns the app integration to the user as an Individual assignment, which is shown in the Type column of the assignments table.
Configuring Okta as the IdP on the 1Kosmos Interface
To configure Okta as the Idp on 1Kosmos, follow these steps:
-
Log in to the 1Kosmos tenant as a community administrator.
-
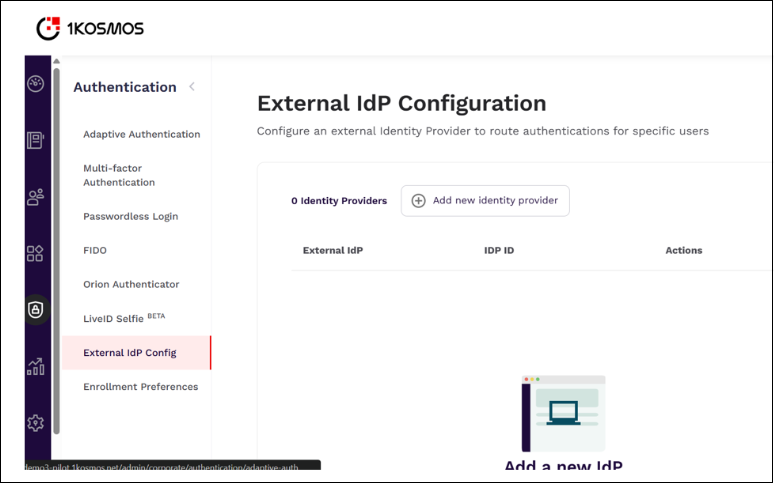
Navigate to Authentication > External IdP Config.
-
In the External IdP Configuration that is displayed, click Add new identity provider.
-
In the Core Configuration tab, perform the following: a. Specify the IDP Name as Okta. b. Click Manually Enter and then enter the ID of the IDP Entity (Okta). d. In the SSO Binding Type field, select the method as POST. e. Enter the appropriate URLs in the SSO and SLO URL fields. f. Upload the IDP and Request Signing Certificates. g. Click Save.
-
In the Routing Policies tab, perform the following:
a. Specify the condition for whom the policy must be applied and enable the policy.
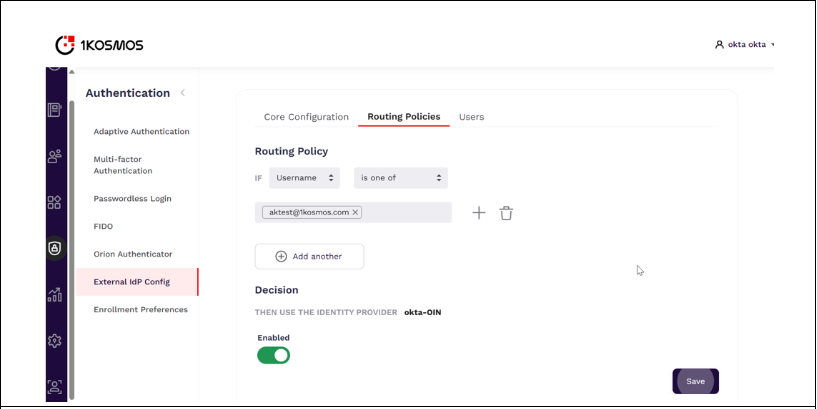
b. Click Save.
Testing the Application Integration
To test the integration, follow these steps:
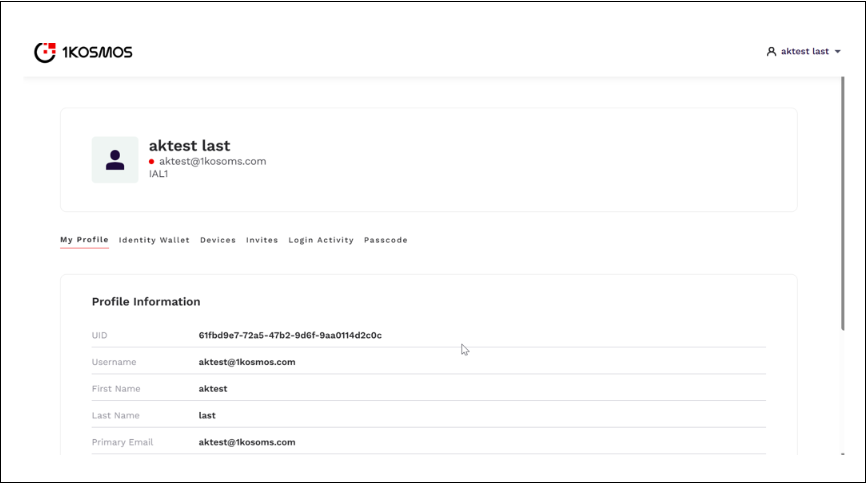
-
In your browser, open the application URL. You will be redirected to your 1Kosmos Sign in page.
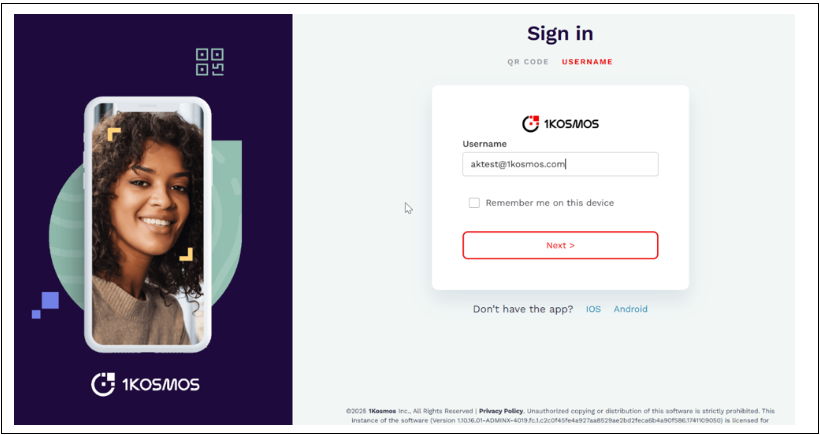
-
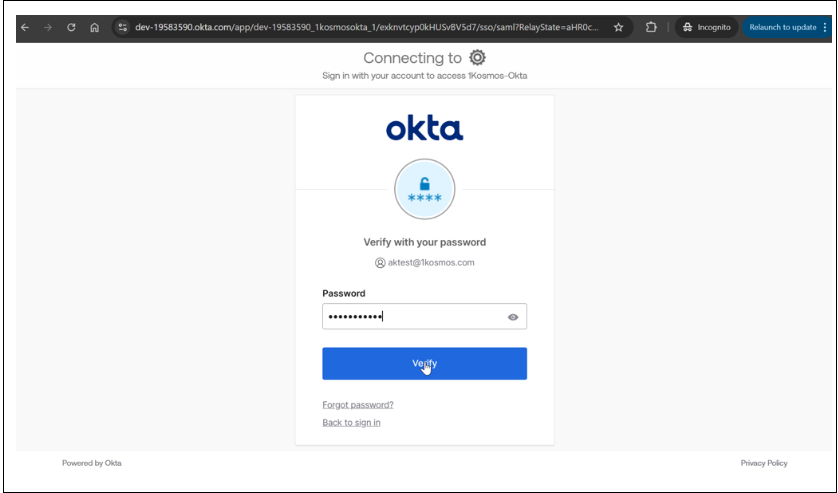
Login with username who has access to the application followed by the password.
-
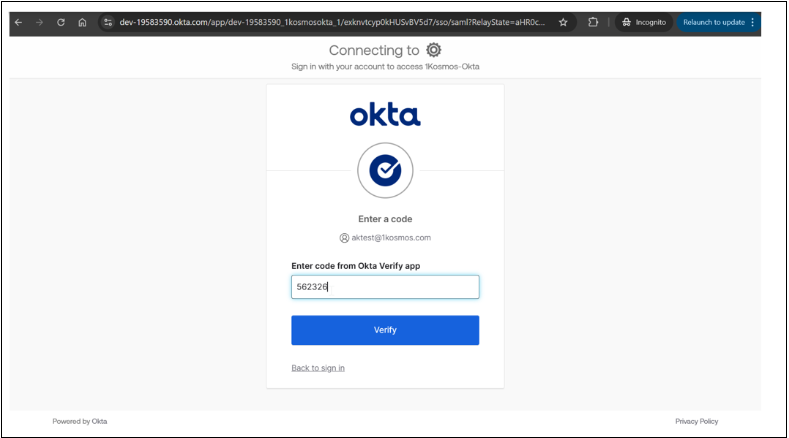
Enter the code received in your Okta Verify app and click Verify.
-
After authenticating, you will be logged into the target application, confirming the SAML integration has worked successfully.