Branding Customization
Overview
In 1Kosmos, you have the flexibility to customize the user interface according to your organization’s preferences. This includes customizing the login page, QR code, and the background of the sign in page.
Understanding Login Page Customization
The following table lists the login page features that you can customize:
| Feature | Reference |
|---|---|
| Login Page | Customizing Login Page |
| QR Code | Customizing QR Code |
| Image Layout | Customizing Image Layout |
| Sign In background | Modifying Background Colors on Sign In Page |
| Help button on Login Page | Displaying Help Button on Login Page |
Customizing Login Page
You can customize your login page by providing the user either a QR code or a Username experience when the user lands on the login page. Additionally, you can provide the disclaimer specific to your organization and add your own community logo. To customize the login page, follow these steps:
-
Log in to your tenant.
-
Navigate to Settings > Branding.
-
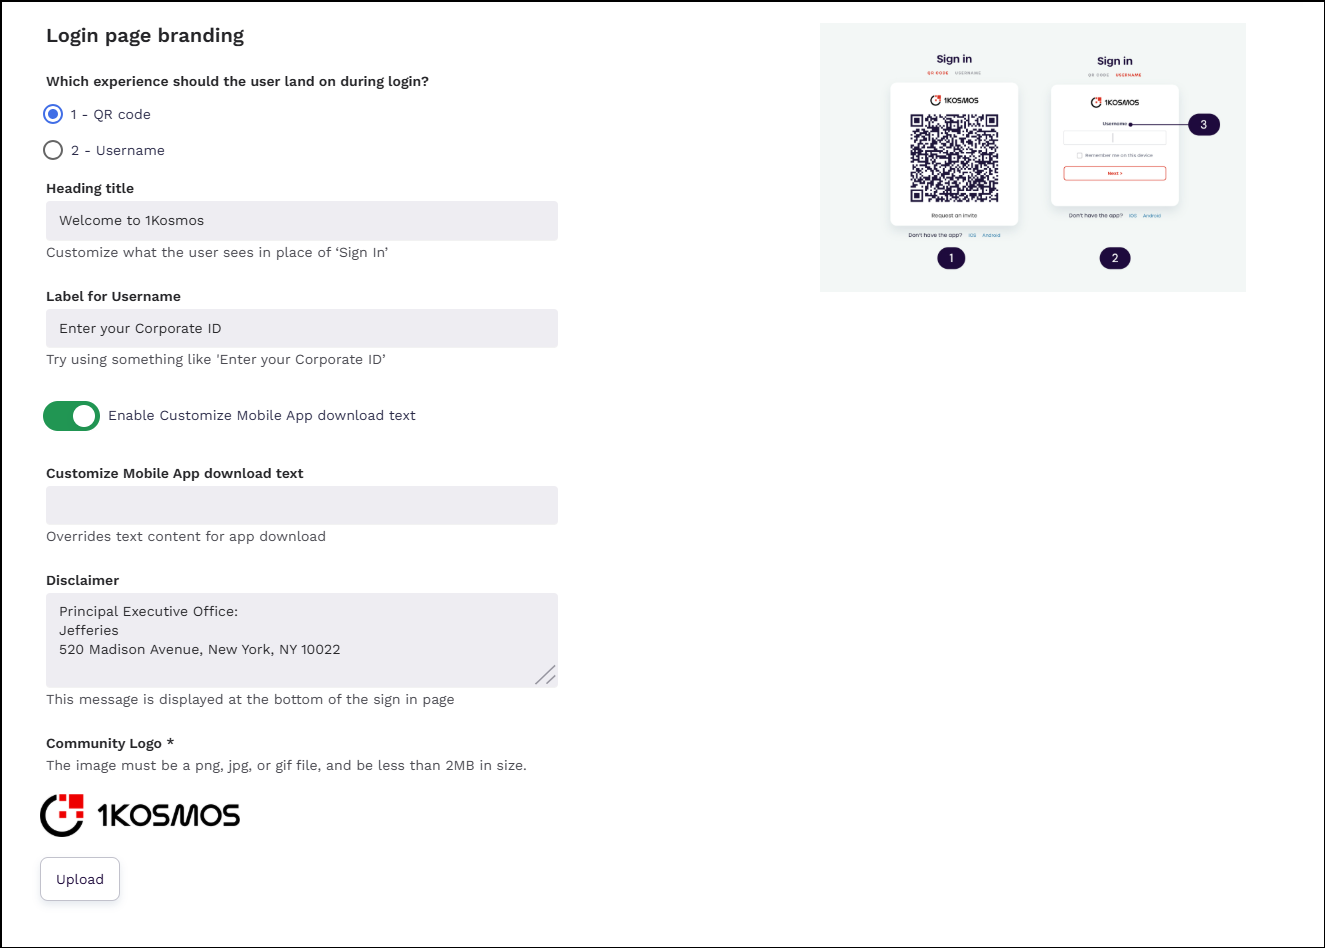
In the Login page branding section, perform the following:
a. Select 1 - QR code or 2 - Username option.
note- If you choose 1 - QR code, the login page will display a QR code instead of a username. This enables users to quickly scan the QR code in their 1Kosmos mobile app and log in without needing a password. This is the default setting.
- If you choose 2 - Username, users will see a username input box on their login page. They will enter their username and then select an additional authentication method, either a password and one-time passcode (OTP), or a push notification to their device.
b. Use your own label in place of Sign In. For example, you can specify a label like Welcome to 1Kosmos.
c. Use your own label instead of a username. For example, you can specify a label like Enter your corporate ID.
d. Turn the Enable Customize Mobile App download text toggle ON to use your own custom text for the mobile app download message. When enabled, a text field will appear for you to enter your custom message.
In the Customize Mobile App download text field, enter the message you want users to see when prompted to download the mobile app. This replaces the default download text.
e. In the Disclaimer box, add your own disclaimer. This disclaimer is displayed at the bottom of the sign in page.
f. In the Community Logo section, click Upload and add your own logo.
noteThe logo should be in PNG, JPG, or GIF format and must not exceed 2MB in size.
g. Click Save.
Customizing Central Logo in QR Code
You can use the QR code customization section to customize the central logo in the QR code. You can upload a png or jpg file of size less than 10KB. The recommended size is 35px x 35px.
To customize the central logo in the QR code, follow these steps:
-
Log in to a tenant as a community administrator.
-
Navigate to Settings > Branding.
-
In the Branding page that is displayed, navigate to the QR code customization section.
-
In the Corner Square Color field, select the square color for its corner.
noteBy default, the color of the corner square is #1B0B39.
-
In the Dots Color field, select the appropriate dots color.
noteBy default, the color of dots is #1B0B39.
-
Click Upload to browse an image for upload.
-
Click Save.

Customizing Image Layout
You can customize the background image display on your sign-in page to match your branding.
To customize the banckground image, follow these steps:
-
Log in to a tenant as a community administrator.
-
Navigate to Settings > Branding.
-
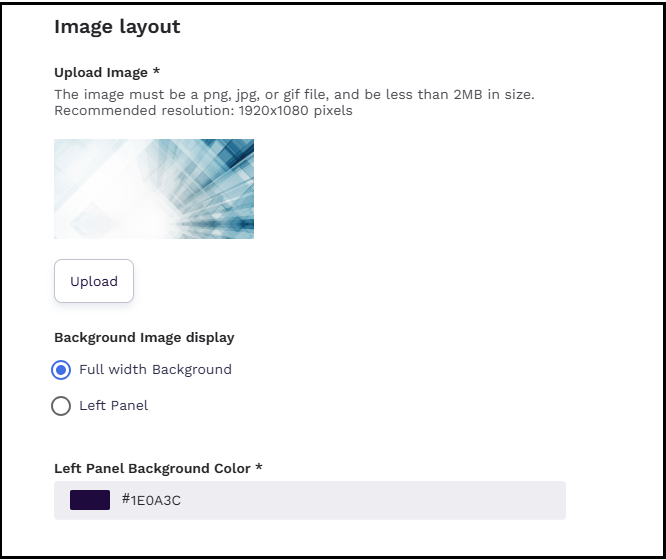
In the Branding page that is displayed, navigate to the Image Layout section.
-
Use the Upload Image section to add an image for the sign-in page.
- Supported formats: JPG, PNG, or GIF
- Recommended resolution: 1920x1080 pixels
- Max file size : 2MB.
-
Choose how the background image should be displayed on the sign-in page. You can select one of the following options:
- Full width Background – Select this option to display the image across the entire page.
- Left Panel – Select this option to display the image only on the left panel of the sign-in page.
-
In the Left Panel Background Color box, select an appropriate background color.
-
Click Save.
Modifying Background Colors on Sign In Page
You can use the Sign In background section to modify the background colors of the Sign In page.
To modify the colors, follow these steps:
-
Log in to a tenant as a community administrator.
-
Navigate to Settings > Branding.
-
In the Branding page that is displayed, navigate to the Left Panel section.
-
Modify the colors of the corresponding UI components on the Sign In page. The following UI components are available:
- Background Color
- Title Text Color
- Primay Button Color
- Tabs Text Color
- Links Color
- Footer Color
-
Click Save.

Enabling the Help Button on the Login Page
You can display a Help button on the footer of the login page by enabling the Help Button on Login Page slider under Settings > Branding. Users who have trouble signing in can click the help button to view customizable helpdesk information, including support numbers and email addresses.
To enable this feature, toggle the Help Button on Login Page switch.

Customizing Help Button Components
After enabling the toggle, Administrators can customize their help button style and displayed information.
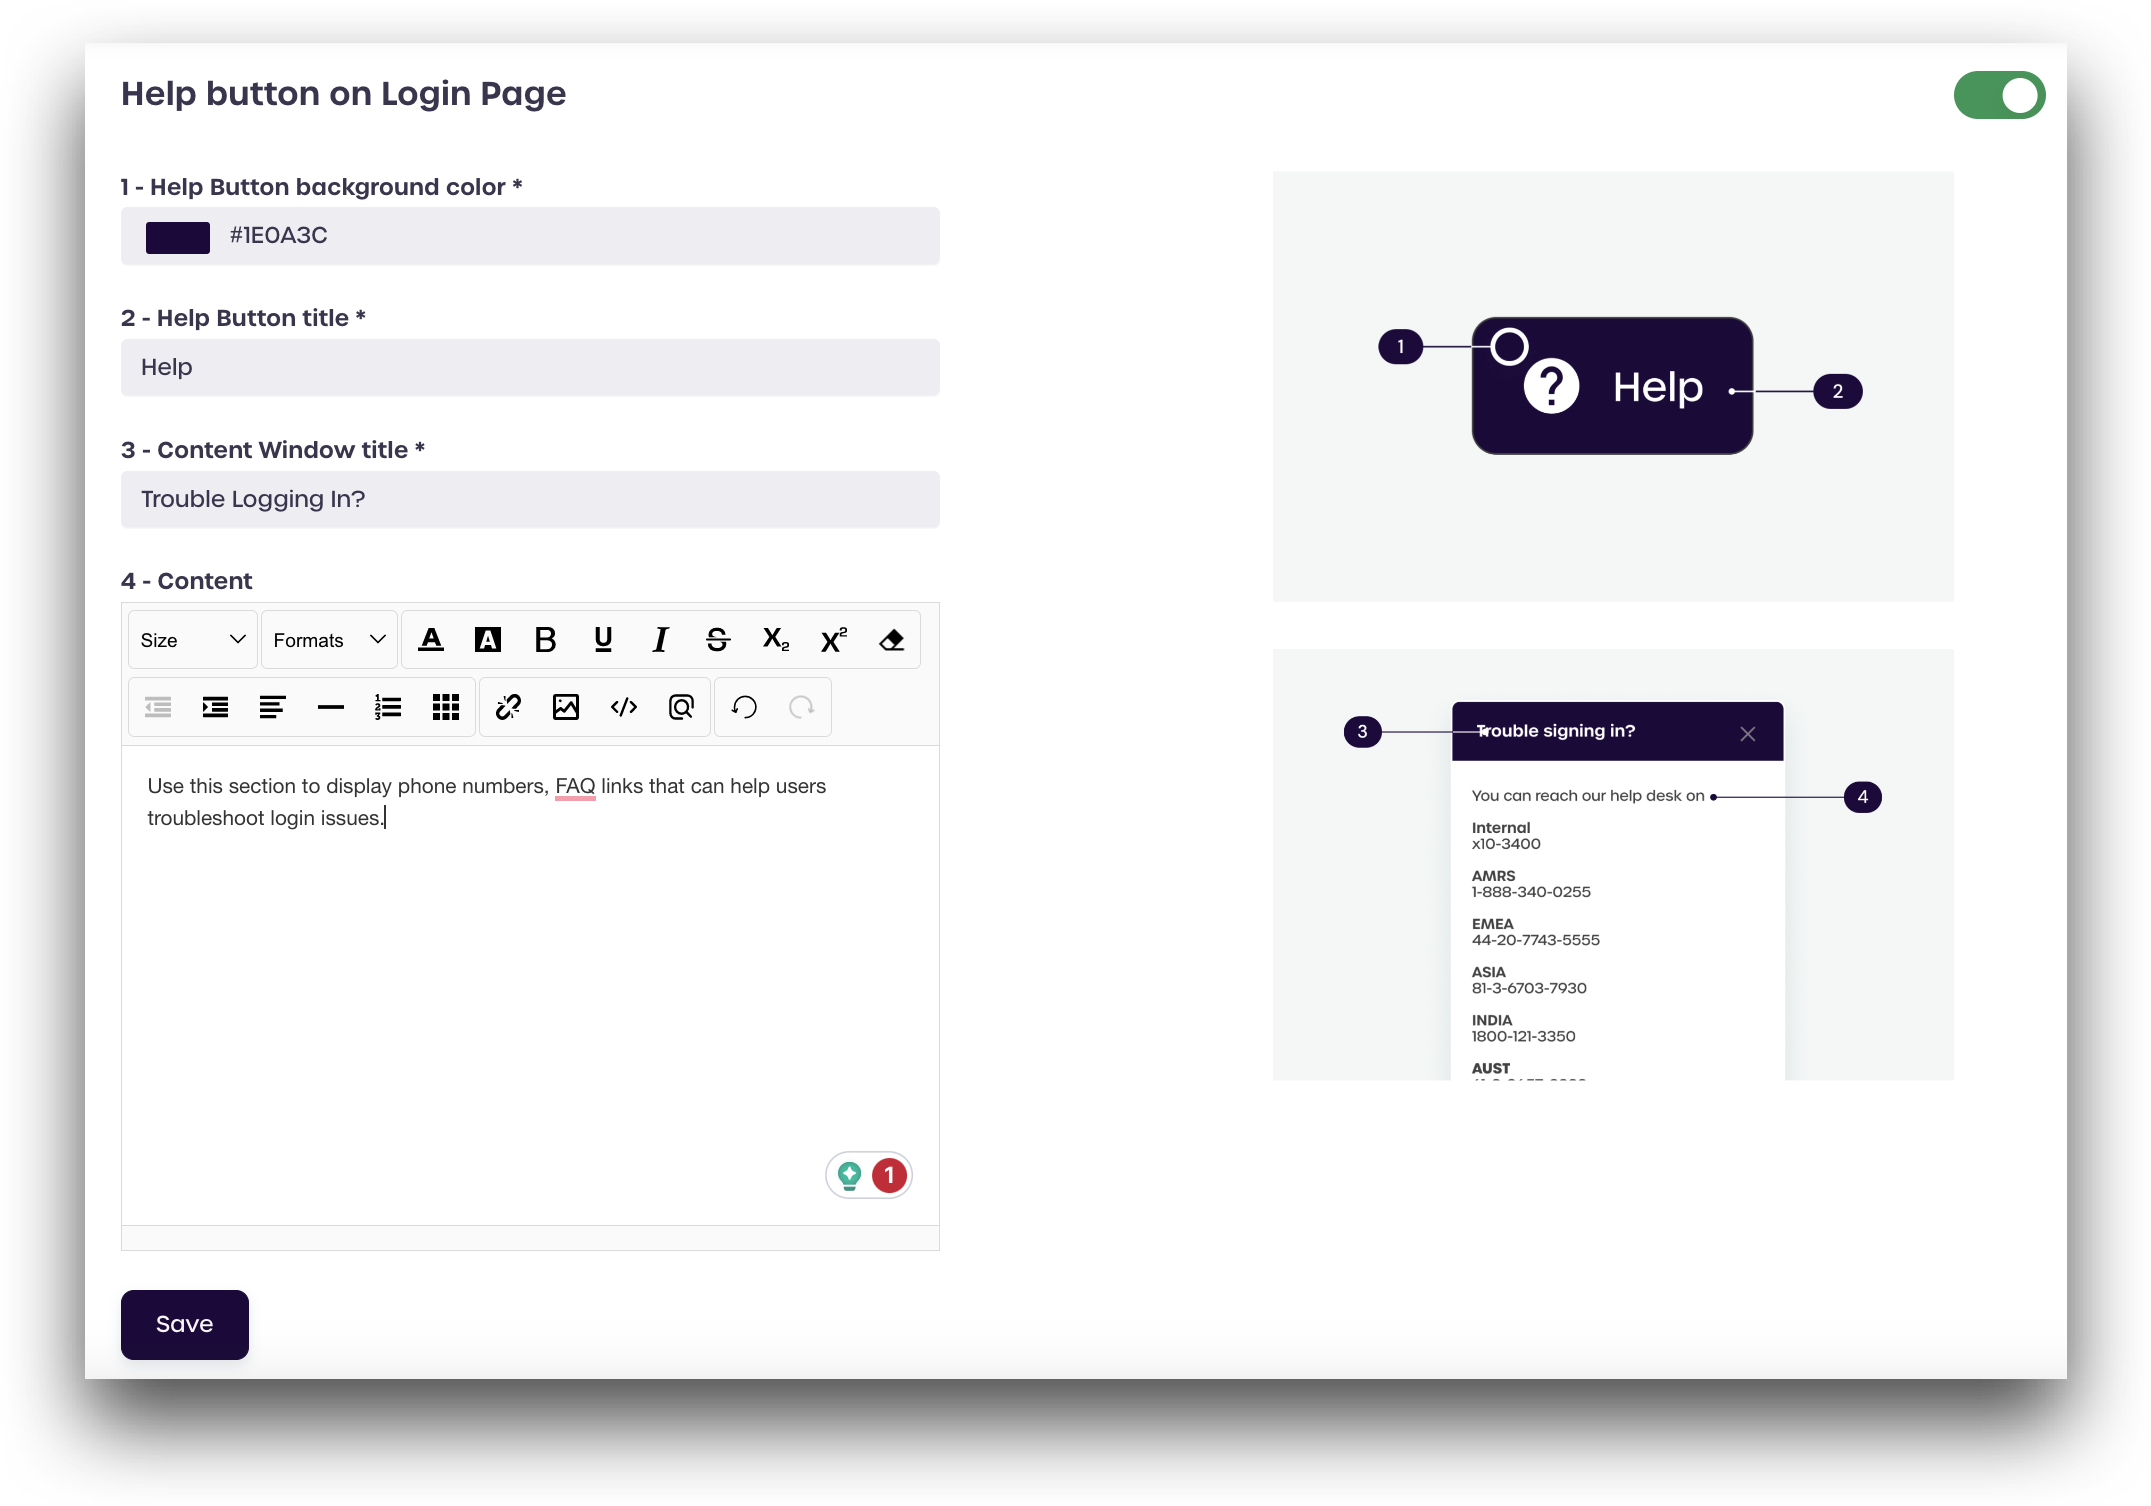
Administrators can customize the Help Button background color*, Help Button title, Content Window title, and Content as desired. The tip on the right side of the screen demonstrates the items that are customizable.
After making your desired changes, click Save. You can test your changes by logging out and navigating to your tenant login page. Click the new Help button, located at the bottom-right of the page, to display your Help Button content.
