Gateway Settings
Overview
Configure your outgoing email, voice, and SMS gateways by adding your provider information to the Gateway Settings page. Your calls, messages, and emailss will be sent using the account information specified.
Adding Gateway
Add an email gateway to send emails through your email provider. You will need to provide your account details and outgoing mail server information.
To add a new gateway, follow these steps:
-
Log in to your tenant as a community administrator.
-
Navigate to Settings > Gateway Settings.

-
Click Add new gateway
-
Under Gateway Info enter a name and select
Emailfor the channel type. -
In the Email Provider Settings section, enter the outgoing email server details and account information:
-
Provider : Select the appropriate service provider
-
Protocol: Select the outgoing email protocol to use
-
Outgoing Mail Server Hostname: Enter your outgoing mail server hostname
-
From email address: Enter the email sender address. Your users will receive emails from this address
-
Outgoing Mail Server Port: Enter your outgoing mail server port
-
Authentication: Select an authentication option
-
Username: Your outgoing email account username
-
Password: Your outgoing email account password

-
-
Click Create.
Your new email gateway will now be visible on the Gateway Settings page.
Adding SMS Gateway
Add an SMS gateway to send text messages through your SMS provider. You will need to provide your account details and SMS gateway information.
Twilio, Infobip and Karix are currently supported
-
Log in to your tenant as a community administrator.
-
Navigate to Settings > Gateway Settings.

-
Click Add new gateway
-
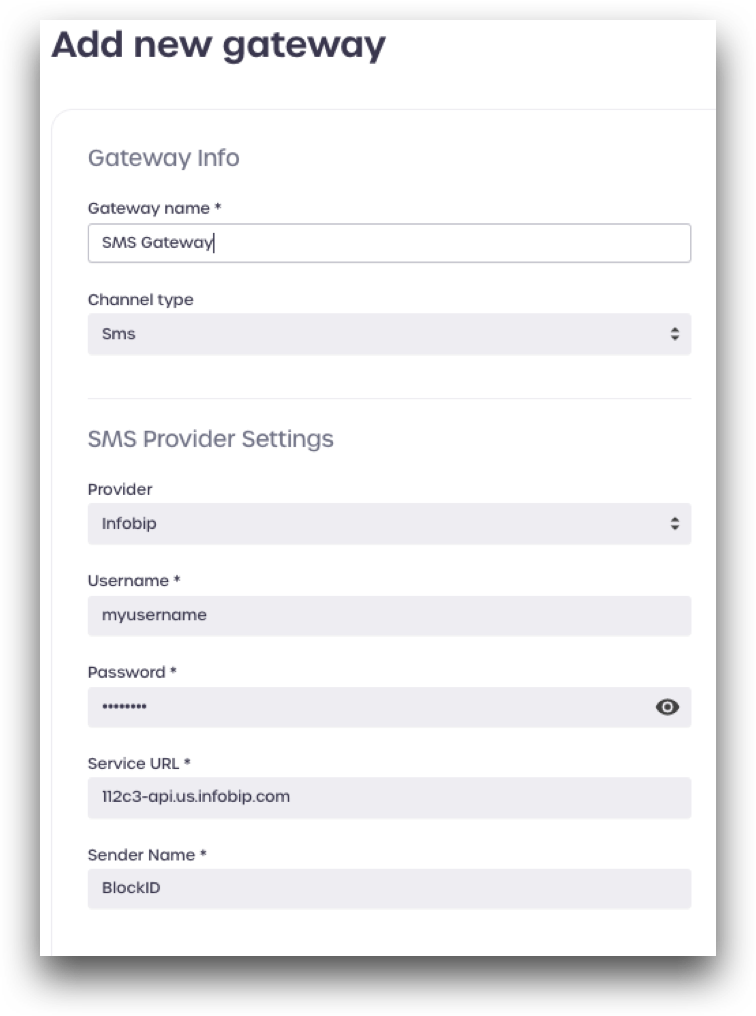
Under Gateway Info enter a name and select
SMSfor the channel type. -
Under SMS Provider Settings, select your SMS provider and enter the account information and service details:
-
Provider: Select your SMS provider from the drop-down menu
-
Username: Your SMS provider username
-
Password: Your SMS provider password
-
Service URL: Your SMS provider service URL
-
Sender Name: The name or number you wish to show as the SMS sender

-
The Sender Name field accepts alphanumeric values. Administrators can enter a name or a number to use as the SMS message sender. Using your company name as the message sender can help to ensure your messages are perceived as genuine by your users
-
Click Create.
Your new SMS gateway will now be visible on the Gateway Settings page.
Adding SMS & Voice Gateway
Add a gateway to send text messages and dial voice phone calls through your SMS & Voice provider. You will need to provide your account details and gateway information.
Twilio is currently supported
-
Log in to a tenant as a community administrator.
-
Navigate to Settings > Gateway Settings.

-
Click Add new gateway.
-
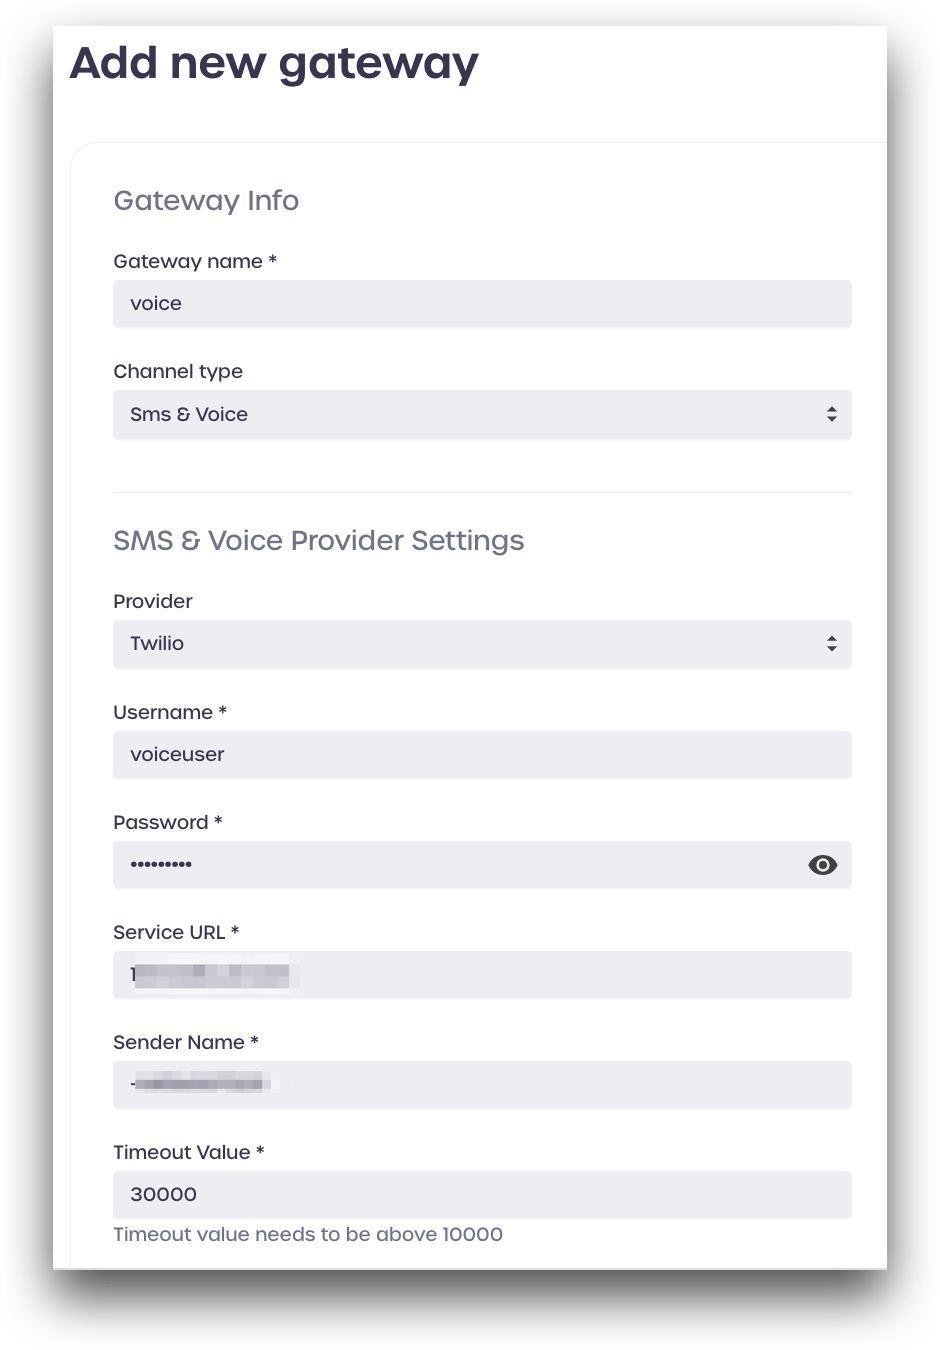
Under Gateway Info enter a name and select
SMS & Voicefor the channel type. -
Under SMS & Voice Provider Settings enter your account information and service details:
- Provider: Select your SMS & provider from the drop-down menu
- Username: Your SMS provider username
- Password: Your SMS provider passwod
- Service URL: Your SMS provider service URL
- Sender Name: The name or number you wish to show as the sender or caller
- Timeout Value: Enter a timeout value (10000 or higher). After this value has been reached the request fails.

The Sender Name field accepts alphanumeric values. Administrators can enter a name or a number to use as the SMS and voice sender and caller. Using your company name as the message sender or caller can help to ensure your messages are perceived as genuine by your users
-
Click Create.
Your new SMS & Voice gateway will now be visible on the Gateway Settings page.
Deleting a Gateway
-
Log in to a tenant as a community administrator.
-
Navigate to Settings > Gateway Settings.
-
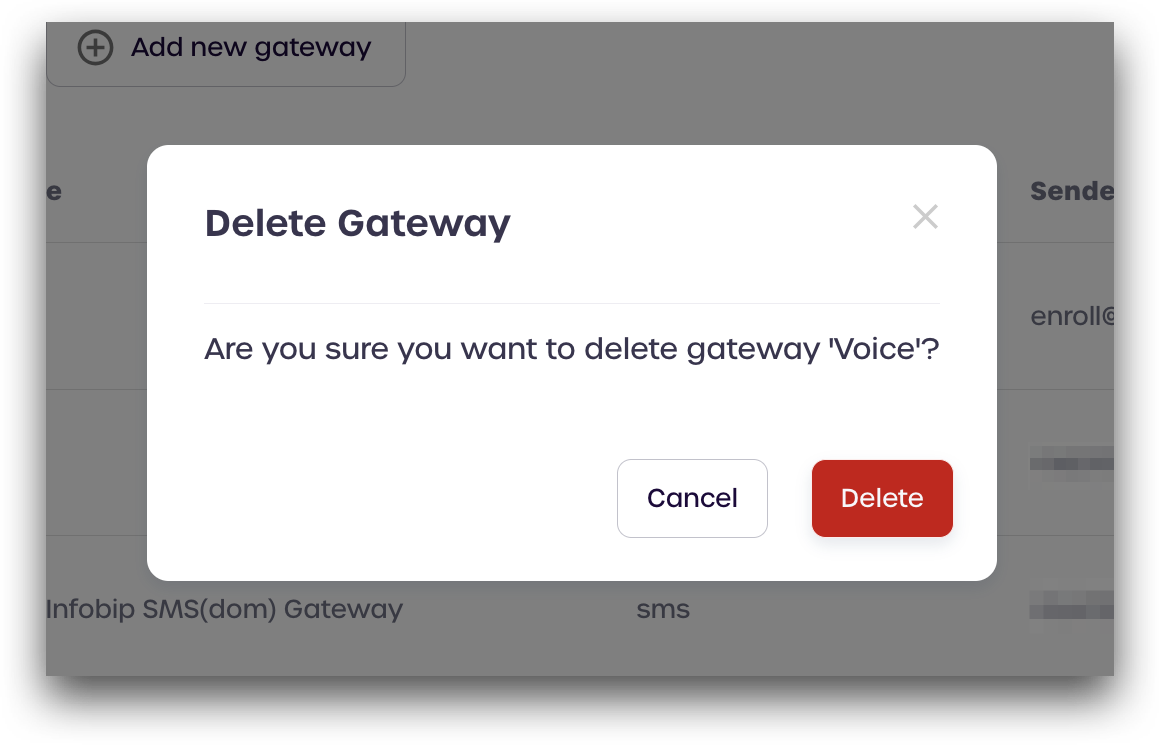
Find the gateway you wish to delete and click the trash icon to the right of the Gateway Name, under Actions

-
Click Delete when prompted to remove the gateway
