Integration with ARCON
Overview
This document describes the procedure to configure the BlockID Admin Console as a passwordless authentication solution for your organization's ARCON application users. This integration will allow your users to log in to the ARCON account leveraging their biometrics. The biometric options include Touch ID / Face ID and LiveID.
Before you Begin
You will need the following resources and privileges to complete this integration:
- Admin access to the following:
- BlockID Tenant: If your organization is not registered for the BlockID tenant, visit the Sign Up page to set up a free BlockID tenant for your organization. The 1Kosmos representative will create a tenant URL, community, tenant tag, and a license key for your respective organization within the BlockID platform.
- ARCON application that supports SAML integration running on a Windows server.
- Install on your mobile device:
- BlockID mobile application (Compatible with iOS and Android devices). Visit BlockID for Android or BlockID for iOS to download the application.
Assumptions
- With the above prerequisites, you should now successfully be registered and be able to log in to:
- BlockID Admin Console application. Ensure the email address used to log in to this application is the same as the one used to log in to the ARCON account.
- Installed and registered the BlockID mobile application.
- Launch the BlockID mobile application and follow the on-screen instructions to register your app with the BlockID platform to enroll your biometrics. Visit the Enroll Biometrics (Touch ID / Face ID and LiveID) section of the BlockID Mobile Application User Guide for step by step understanding of the biometrics enrollment process within the BlockID mobile application.
There are two sets of configurations that need to be performed to enable this integration:
- Configure your BlockID Tenant as an Identity Provider (IDP) within the ARCON application.
- Configure the ARCON application as a Service Provider (SP) within your BlockID Tenant.
List of Topics:
- Configure your BlockID Tenant as an Identity Provider (IDP) within the ARCON application
- Configure the BlockID tenant metadata
- Configure the ARCON application as a Service Provider (SP) within your BlockID Tenant
- Test the SAML Single Sign-On Connection
Configure your BlockID Tenant as an Identity Provider (IDP) within the ARCON application
The following steps will be performed by your ARCON administrator. Get your tenant's XML metadata file and SSL certificate from your 1Kosmos representative to configure 1Kosmos as an IDP within your company's ARCON application account.
- Log in to the Windows server where the ARCON application is installed.
- Navigate to
<Drive>:\<folder_location>\ARCOS SOLUTIONS\ARCOSClientManagerOnline\SAML, and open the SamlIdpEntities.json file in the Notepad editor. - In the SamlIdpEntities.json file, enter the following details:
- IdpEntityId: Enter your IDP URL. To get the IDP URL of your tenant's BlockID Admin Console, open the XML metadata file provided by your 1Kosmos representative, search for the entityID field, copy, and paste it in this field.
- EntityId: Enter your ARCON application URL. For Example,
https://0.0.0.0/(It is the IP address of the Windows server where the ARCON application is installed.). - EntityName: Enter the appropriate name for your IDP.
- IsActive:
true. - SingleSignOnServiceBinding: Enter your IDP URL. To get the IDP URL of your tenant's BlockID Admin Console, search for the SingleSignOnService tag from the XML metadata file provided by your 1Kosmos representative, copy the Binding value, and paste it in this field.
- CertificateName: Enter the name of your IDP SSL certificate for your tenant's BlockID Admin Console provided by your 1Kosmos representative. Navigate to
<Drive>:\<folder_location>\ARCOS SOLUTIONS\ARCOSClientManagerOnline\SAMLand copy the name of the saved SSL certificate name. For example,1kosmos_SelfSignedCert.cer. - SingleSignonIdProviderUrl: Enter your IDP sign-on URL. To get the IDP Single Sign-On URL of your tenant's BlockID Admin Console, search for the Single SignOn Service field from the XML metadata file provided by your 1Kosmos representative, copy, and paste it in this field.
- usemetadata:
true. - metadatafilename: Enter the name of your IDP metadata file for your tenant's BlockID Admin Console provided by your 1Kosmos representative. Navigate to
<Drive>:\<folder_location>\ARCOS SOLUTIONS\ARCOSClientManagerOnline\SAMLand copy the name of the saved XML metadata file name. For example,1kosmos-metadata.xml. - httpPostEndPoint: Enter your IDP sign-on URL. To get the IDP Single Sign-On URL of your tenant's BlockID Admin Console, search for the Single SignOn Service field from the XML metadata file provided by your 1Kosmos representative, copy, and paste it in this field.
- httpRedirectEndPoint: Enter your IDP sign-on URL. To get the IDP Single Sign-On URL of your tenant's BlockID Admin Console, search for the Single SignOn Service field from the XML metadata file provided by your 1Kosmos representative, copy, and paste it in this field.
- Save and close the file.
Configure the BlockID tenant metadata
- Open the web browser and enter your organization’s BlockID tenant’s metadata URL in the following format:
https://<customer_name>.1kosmos.net/default/metadataThe XML metadata information file is displayed. - From the XML metadata information file, copy and save the values of the following keys to use while performing the ARCON application SAML integration configuration:
- entityID: The example of its value is:
https:// <customer_name>.1kosmos.net/default/idp1 - SingleSignOnService URL:
https://<customer_name>.1kosmos.net/default/SingleSignOnService - SingleLogoutService URL:
https://<customer_name>.1kosmos.net/default/SingleSignOnService - X509Certificate:
- Copy the certificate details and save them in the following format:
-----BEGIN CERTIFICATE-----
Certificate details
-----END CERTIFICATE----- - Save the certificate with
.certextension.
- Copy the certificate details and save them in the following format:
- entityID: The example of its value is:
Configure ARCON application as a Service Provider (SP) within your BlockID Tenant
Set IDP Assertion Claim details
Perform the below-mentioned steps:
- Login to BlockID Admin Console, navigate to Administration Console > Federation > SAMLv2. The SAMLv2 screen is displayed.
- In the IDP Assertion Claims Mapping tab, link the appropriate LDAP and Session attribute values to the Claims for each Label.
- Map the
nameIdentifiertoemail. - Click Save.
- Map the
These mapped fields will be available in the SAMLv2 > Service Providers > SP Assertion Claims Mapping tab for the imported service provider.
Add ARCON application as a Service Provider
- In the SAMLv2 screen, click Service Providers.
- In the Service Providers List screen, from the One-Click Rapid Service Provider Onboarding section, click on the ARCON option.
- In the Onboard ARCON as a SAMLv2 Service Provider window, enter details for the following fields:Note:
In case, if your client does not share their ARCON's XML metadata file to 1Kosmos, get the Entity ID and Login URL (SAML Assertion Consumer Service URL) details of their ARCON application.
- Application Label: Enter the appropriate name for your organization’s ARCON application as a service provider.
- Entity ID: Enter the unique entityId URL specified in your single-sign on settings in the ARCON application.
- Login URL: Enter the login URL specified in your single-sign on settings in the ARCON application.
- Click Onboard ARCON.
- Click on the newly added ARCON as a service provider link.
- In the Edit screen:
- In the SP Core Configuration tab: check the following details are selected:
- Select the checkbox for each request/response that should be signed: ensure that the Assertion and Authentication Request options are selected.
- NameID Value:
nameidentifier.
- In the SP Assertion Claims Mapping tab: Select the checkbox for the following options:
- nameIdentifier
- In the SP Service URL End Points tab:
- Select
POST. - Ensure ARCON login URL is added.
- Select
- Click Confirm and Save.
- In the SP Core Configuration tab: check the following details are selected:
Test the SAML Single Sign-On Connection
- In your browser, enter your organization’s ARCON URL.
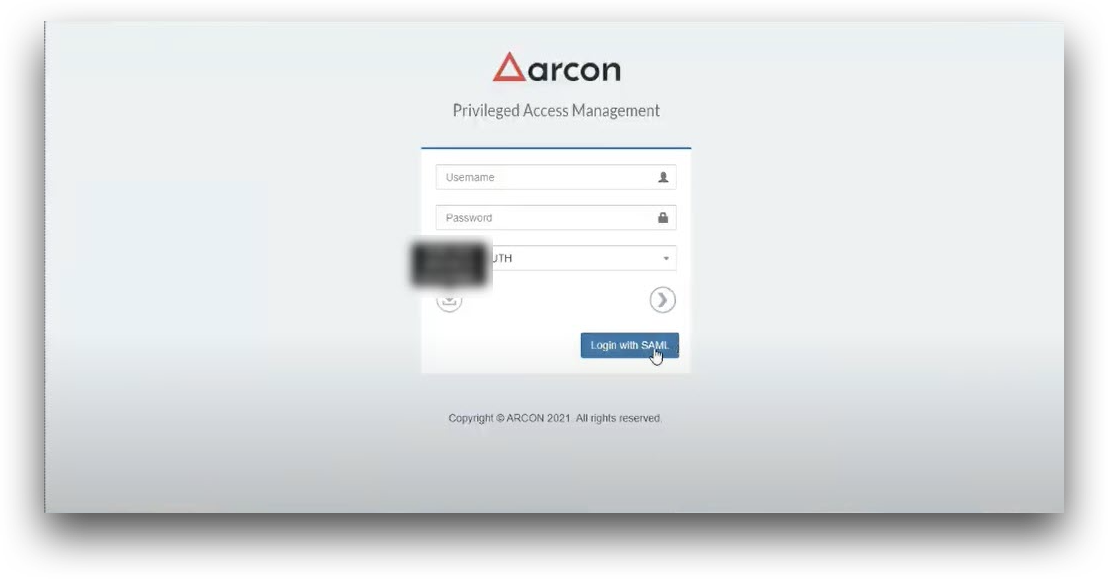
- Click Login with SAML. You will be redirected to the BlockID Admin console’s login screen is displayed with the barcode to be scanned from your BlockID mobile app.
- On the BlockID mobile application’s Home screen, click ‘Scan QR’.
- Scan the QR code. The confirmation pop-up window is displayed asking to
Allow BlockID to access this device’s location?. - In the confirmation pop-up window, select
Allow only while using the app. The Authentication screen is displayed with thePlease authenticate using <Biometric_option> from 1kosmosmessage. - Click Authenticate and perform the appropriate authentication method. The pop-up window is displayed with
Thank you! You have successfully authenticated to Log Inmessage upon successful authentication. - You will be logged in to your ARCON account.