Verification Journey in AdminX
Overview
The Verification Journey feature allows you to create a verification session for users, enabling them to verify their documents. This topic aims to help you efficiently create and manage verification sessions in AdminX.
Creating a Verification Session
Community/Helpdesk administrators can use the AdminX interface to create a verification session. To create a verification session, follow these steps:
-
Log in to your tenant as a community/helpdesk administrator.
-
Navigate to Verification > Journeys.
-
In the Verification Journeys page that is displayed, click Create Session in line with a journey against which you want to create a session.
-
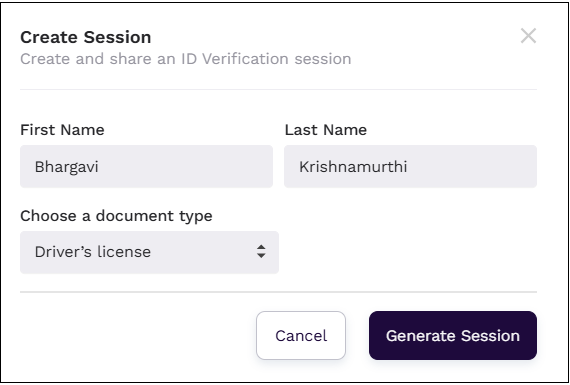
In the Create Session window that is displayed, enter the users details for whom the session has to created. The details include: first name, last name, and the document for which the session has to be created. You can create a session for the following types of documents:
- Driver's license
- Passport
- Other ID Cards
-
Click Generate Session.
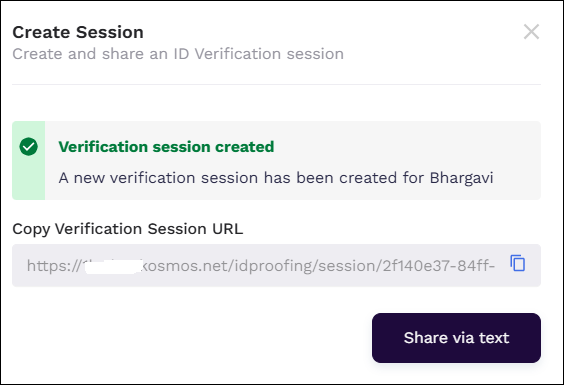
Sharing the Verification Session
After generating the session, the administrators have the following options to share the session URL with the end user:
- Copy the session URL and share it with the user directly.
- Click the Share via text button to share the session link through SMS.
To share the session URL through SMS, follow these steps:
-
Click Share via text.
-
In the Share via text window that is displayed, enter the user's phone number.
-
To configure the SMS template, click the Manage template for SMS link. For more information on templates, see Messaging Templates.
To configure an SMS provider, click the Configure an SMS Provider link. For more information, see Gateway Settings.
-
Click Send. The session URL is generated.

-
Click Share via text to send the session URL as an SMS.
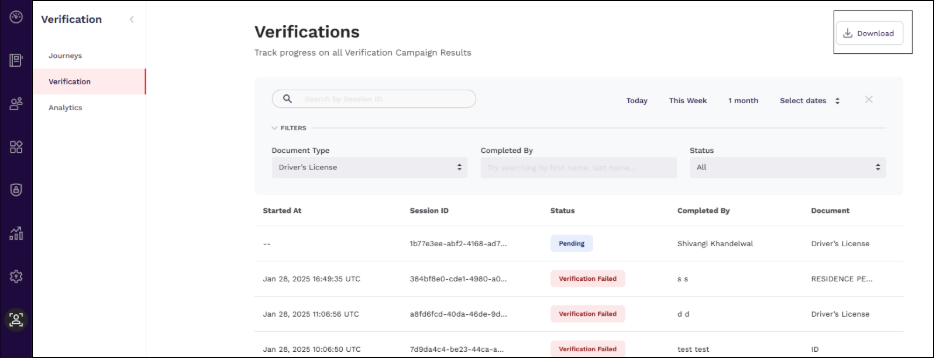
Managing Verification Sessions
Once the session is created, it will appear on the Verifications page. This page shows all sessions created by administrators, along with the status of each verification session. Additionally, you can filter the sessions by journey name, UID, document type, and other criteria.
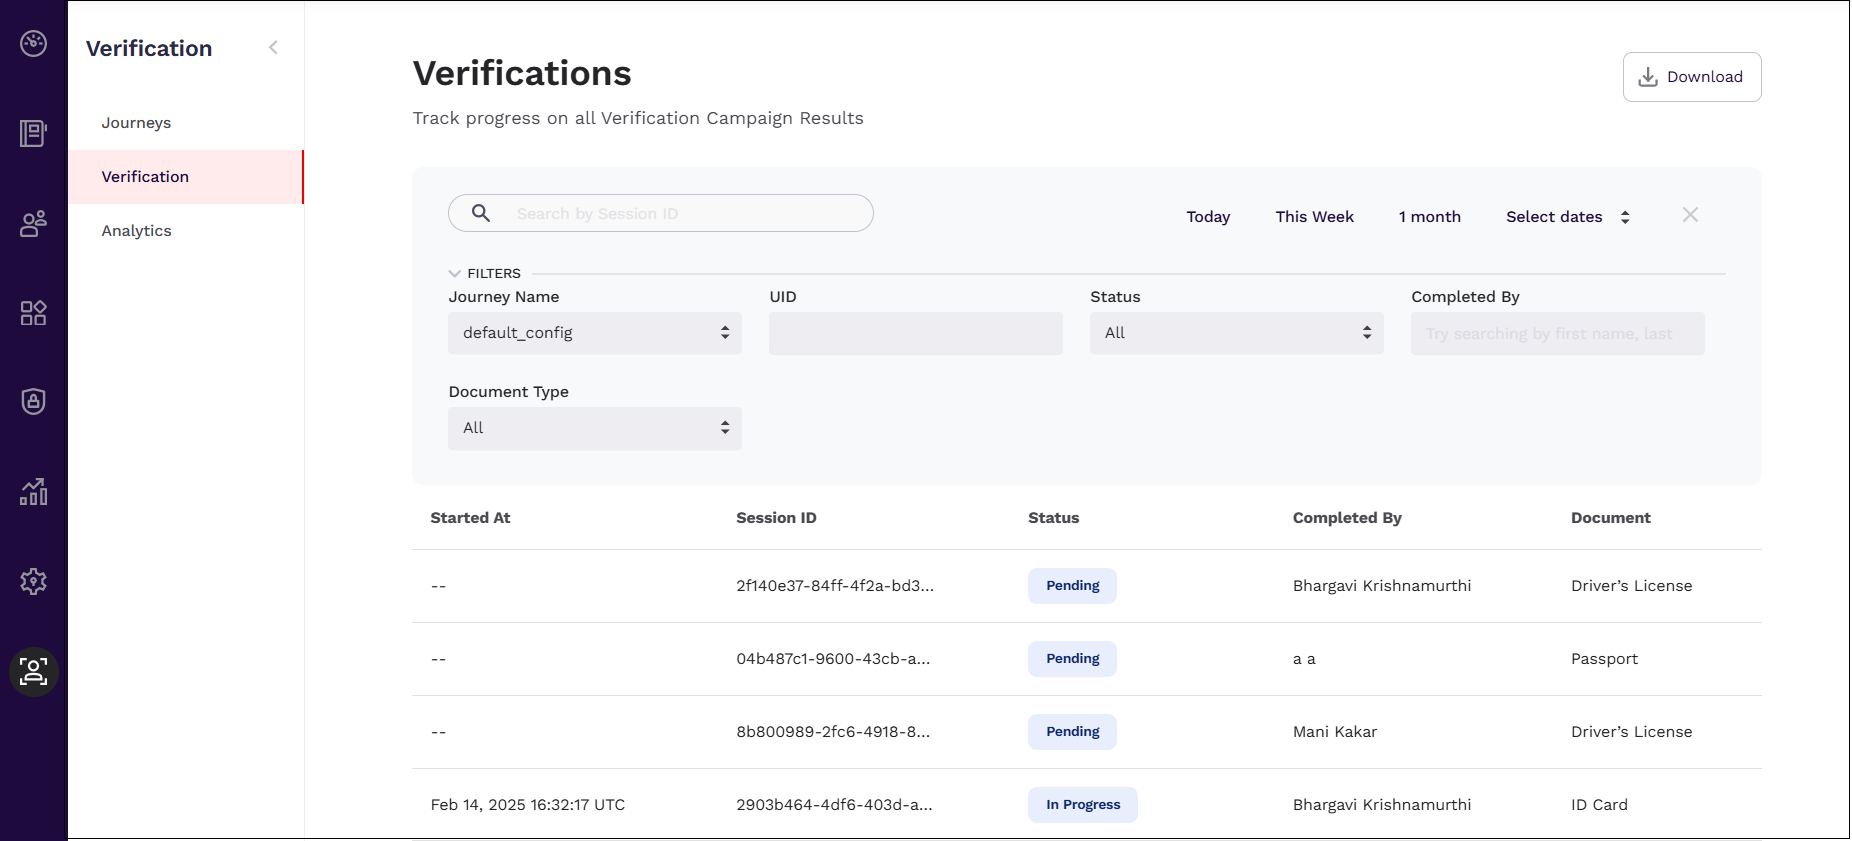
The following table outlines the filters of the Verifications page.
| Filter | Description |
|---|---|
| Journey Name | Select the journey name and display the session details based on it. |
| UID | Enter the UID and display the sesssion details based on it. |
| Status | Filter the session based on the status. The following values are available to select: - All - Select this to display all the sessions irrespective of the status. - Verification Pass: Select this to display the session that has passed the verification. - Verification Failed: User has completed the verification, but the document verification has failed. - Verification Not Performed: This status is displayed when the verification process has been partially completed. - In-Progress: This status is displayed when the user clicks the consent check box and hit “Let’s get started”. - Pending: This status is displayed when the user has not started their verification journey even though the session has been created. - Declined: User has clicked the Decline button on the Welcome screen. - Expired: This status is displayed when the verification session has expired. - Abandoned: This status is displayed when the user has started the session but has left the session incomplete. - Completed: This status is displayed when the user has submitted the document and has given the selfie (if session is configured for selfie). |
| Completed By | Enter the user that has completed the session. |
| Document Type | Filter the session based on the document type. The following values are available to select: - All - Driver's License - Passport |
Viewing Session Results
You can view the results of a session by clicking on any session listed in the Verification page.

The View Results page displays the following details including:
- Session Details: Summary of the session, such as
Created on,time taken, etc. - Summary: Summary of the session, including
Document scannedandverification results. - Confidence Score: The confidence score provides a summary of the scores achieved for various attributes, including:
Document Liveness Front: Checks for whether the presented document is screen replays, printed copies, or portrait submission.- Screen Replay Attack: Checks if an attacker replays a recorded image or video of a document.
- Printed Copy Attack: Checks if an attacker presents a photocopy of the authentic document.
- Portrait Submission Attack: Checks whether an attacker presents an authentic ID, except that the identifying photo has been replaced.
Selfie to Headshot Comparison: Compares the user's profile picture in the document with their selfie.Document Liveness Back: Checks for whether the presented document is screen replays, printed copies, or portrait submission.Fraud Detection: Performs the following checks:- Data Format Checks: 1Kosmos ensures adherence to the highest standards with meticulous format checks, aligning every detail within official guidelines.
- Data Logic Checks: Our system's deep understanding of document intricacies strengthens security with precise data logic checks.
- Information Consistency: Sophisticated cross-matching technology guarantees consistency across all formats to protect against advanced fraud.
Selfie Liveness Check: Detects presentation and injection attack. Checks for screen replays, printed copies, and portrait substitutions,
You can view the following additional details only if you are a community administrator else cannot access the following details.
- Data Extracted: Summary of the details extracted from the document.
- Images: Images captured during the verification process, such as document and selfie.
The retention period for storing images depends on the pii_retention_policy setting. When set to 0, 1Kosmos will not store the data. Define the retention policy to specify the number of days to retain the data.
- Session Details: Detailed information on attributes scanned from the document, such as
address details,barcode data,date of expiry, etc. - Session Events: Step-by-step information on the progress of the verification session. The status and the description.
- Initialization: The session has been initialised.
- Welcome: The session has been started by the user.
- Document Instruction: The user followed the instructions for capturing images of their identification document.
- Document Capture: The user is capturing images of their identification document.
- Document Preview: The user is previewing their identification document before submission.
- Selfie Instruction: The user is following the instructions for taking a selfie.
- Selfie Capture: The system successfully captured the user's selfie for verification.
- Selfie Preview: The user is currently previewing their selfie before submission.
- Document Submission: The user submitted their identification document for verification.
- Validate Document: The system validated the submitted identification document.
By following these steps, you can effectively manage the verification process and ensure accurate and secure document verification for your users.
Downloading Verification Reports
The community administrator or users with the following permissions can download the report from the AdminX interface under Verification > Verification page.
- idproofing.reports.verification-sessions-download
- idproofing.session-management
Download reports by filtering records based on document type, verification status, and the user who completed the verification process. If the report exceeds 2 million records, users will be prompted to refine their search.
To download the report, follow these steps:
- Log in to a tenant as a community administrator.
- Navigate to Verification > Verification menu.
- In the Verifications page that is displayed, filter the records according to your requirement and click Download.
The UI alerts the user that the report will be emailed.